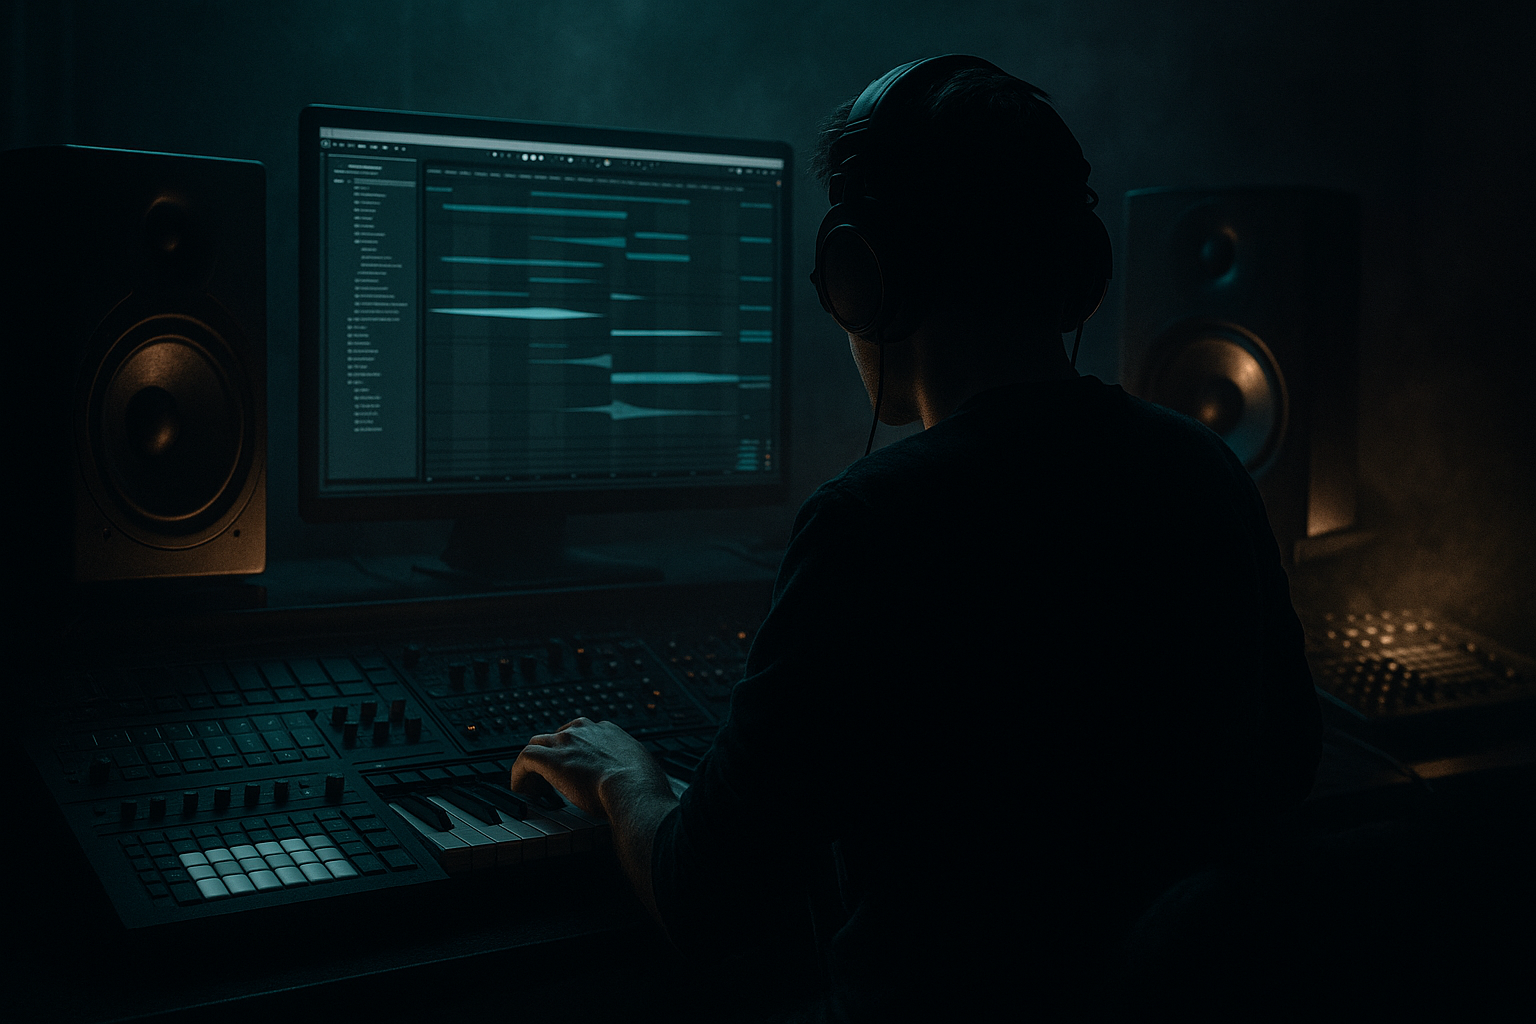
DNB COLLEGE

Drum & Bass Ableton Live 12 Tutorials

LESSON DETAIL

Bassline Theory Ableton Live 12 swing tutorial using groove pool tricks for jungle oldskool DnB vibes (Intermediate)

An AI-generated intermediate Ableton lesson focused on Bassline Theory Ableton Live 12 swing tutorial using groove pool tricks for jungle oldskool DnB vibes in the DJ Tools area of drum and bass production.

Back to lessons
Bassline Theory Ableton Live 12 swing tutorial using groove pool tricks for jungle oldskool DnB vibes (Intermediate) cover image

Narrated lesson audio

The voice track includes the tutorial plus extra teacher commentary.

Open audio file

Main tutorial

Bassline Theory + Swing in Ableton Live 12

Groove Pool tricks for jungle / oldskool DnB vibes 🥁⚡️

---

1. Lesson overview

This lesson is about making basslines “sit” like proper jungle/oldskool DnB by combining:

  • Bassline theory (what notes to play, how long, where to leave space)
  • Swing that actually feels authentic (not just random shuffle)
  • Ableton Live 12 Groove Pool workflow (timing + velocity + base control)
  • DJ-tool mindset (versions you can mix: straights, swung, dub, intro/outro)
  • We’ll focus on rolling 170–174 BPM with that slightly drunk-but-tight push/pull that makes breaks and bass glue together. 🎛️

    ---

    2. What you will build

    You’ll build a classic 2-bar jungle/DnB bassline in A minor (easy to transpose later), plus:

  • A sub + mid bass chain (clean sub, gritty mid)
  • A Groove Pool swing system you can apply consistently across bass, drums, and chops
  • Two DJ-ready variations:
  • 1. Straight (for mix compatibility)

    2. Swung/rolling (for vibe)

    ---

    3. Step-by-step walkthrough

    Step 0 — Set the session like a DnB producer

    1. Set tempo: 172 BPM

    2. Time signature: 4/4

    3. Turn on Warp for any break samples you use (later)

    4. Create groups:

    - DRUMS

    - BASS

    - MUSIC/FX

    ---

    Step 1 — Bassline theory for jungle roll (the “why”)

    Oldskool/jungle basslines usually follow a few rules:

  • Sub hits land around the kick + key syncopations (not constant)
  • Short notes + gaps = groove (space is rhythm)
  • Use root + fifth + flat seventh a lot (minor feel, weight)
  • Bass often “answers” the break, not fights it
  • In A minor, your go-to notes:

  • Root: A
  • Fifth: E
  • Flat 7: G
  • Optional tension: Bb (for darker vibes), or C (minor third)
  • ---

    Step 2 — Create the bass instrument (stock devices, clean + controllable)

    Create a MIDI track: BASS SUB

    Instrument chain (SUB):

    1. Operator

    - Algorithm: A only

    - Wave: Sine

    - Envelope:

    - Attack: 0–5 ms

    - Decay: 250–500 ms

    - Sustain: -inf or very low (if you want plucks)

    - Release: 60–120 ms

    2. Saturator

    - Drive: 1.5–3 dB

    - Soft Clip: On

    3. EQ Eight

    - Low cut: Off (don’t cut your sub)

    - Optional tiny dip at 200–300 Hz if it gets boxy later

    4. Utility

    - Bass Mono: On

    - Width: 0% (for sub track)

    Now duplicate that track: BASS MID

    Instrument chain (MID):

    1. Wavetable (or Operator if you prefer)

    - Choose a gritty table: Basic Shapes → start with saw-ish or square-ish

    - Unison: 2–4 voices, Amount low

    2. Auto Filter

    - LP24, Drive: 3–6

    - Envelope Amount: small, for bite

    3. Amp (yes, stock!)

    - Type: Clean or Blues

    - Gain low, just texture

    4. Saturator

    - Drive: 3–7 dB

    - Soft Clip On

    5. EQ Eight

    - High-pass around 120–180 Hz (make room for sub)

    6. Utility

    - Width: 20–60% (keep it controlled)

    Route both to a BASS GROUP, then on the group:

  • Glue Compressor
  • - Attack: 10 ms

    - Release: Auto

    - Ratio: 2:1

    - GR: aim 1–2 dB

  • Limiter (safety, not loudness)
  • ---

    Step 3 — Write a 2-bar bassline that grooves before swing

    Create a 2-bar MIDI clip on both bass tracks (same MIDI).

    Grid: start with 1/16, then we’ll groove it.

    Try this pattern (A minor, 2 bars). Keep notes short initially:

    Bar 1

  • 1.1: A1 (1/8)
  • 1.2.3: E1 (1/16)
  • 1.3: G1 (1/8)
  • 1.4.3: A1 (1/16)
  • Bar 2

  • 2.1: A1 (1/8)
  • 2.2.3: G1 (1/16)
  • 2.3: E1 (1/8)
  • 2.4.2: A1 (1/16)
  • Theory note: This is root-heavy (A) with movement (E/G) and syncopation. The “late 16ths” are where swing will shine.

    Velocity idea (important for groove):

  • Main A hits: 90–110
  • Ghost/connector 16ths: 55–80
  • ---

    Step 4 — Add a reference break so you swing in context

    You can’t dial jungle swing in silence.

    1. Create an audio track: BREAK

    2. Drop in a classic-style break (or any chopped amen-style loop).

    3. Warp Mode:

    - Beats

    - Preserve: 1/16

    - Transients: default

    4. If it’s too tight, add a little random:

    - In clip view, reduce Transient Loop or try Texture mode for a rougher vibe (use sparingly)

    Now you’ve got a groove target.

    ---

    Step 5 — Groove Pool fundamentals (the “secret sauce”)

    Open Groove Pool (left panel). Ableton includes grooves like MPC, Swing, etc.

    #### Choose a good starting groove

    Good starting points:

  • MPC 16 Swing 57–63
  • Swing 16-… variations
  • Or extract groove from your break (best for authenticity)
  • Best move for jungle:

    Right-click the break clip → “Extract Groove”

    Now you have that break’s micro-timing available as a groove.

    ---

    Step 6 — Apply groove to bass (but control it like a pro)

    Drag your chosen groove onto the bass MIDI clip.

    Now click the groove in the Groove Pool and set:

  • Timing: 30–60%
  • (Start at 40%)

  • Velocity: 10–25%
  • (Start at 15%)

  • Random: 0–8%
  • (Start at 3%)

  • Base: try 1/16 first
  • If it feels too lumpy, try 1/8

    🎯 Goal: the bass should lean into the break, not flam against it.

    #### Make it “roll” instead of “wobble”

    If the bass feels like it’s tripping:

  • Reduce Timing slightly
  • Reduce Random to 0–2%
  • Keep Base at 1/16 so the groove affects the right notes
  • ---

    Step 7 — The killer trick: swing only the non-sub movement

    Sub needs to be stable. Mid can dance.

    Method A (simple):

    Keep one MIDI clip, but split notes by pitch:

    1. Duplicate the MIDI clip so you have:

    - SUB clip (only A1 notes, maybe the strongest hits)

    - MID clip (E/G connectors, movement)

    2. On SUB clip:

    - Groove Timing: 10–25% (sub stays firm)

    3. On MID clip:

    - Groove Timing: 45–70% (mid swings harder)

    This is a classic DnB “tight low end, lively top” approach. 💣

    ---

    Step 8 — Commit groove when you’re happy (DJ tool consistency)

    Once it feels right:

  • Select the bass clip(s)
  • Hit Commit in Groove Pool
  • Why commit?

  • Your groove becomes actual MIDI timing, so exports and resampling behave consistently.
  • Great for DJ tools: you can render multiple versions (straight vs swung).
  • DJ tool workflow idea:

  • Scene 1: Straight bass
  • Scene 2: Swung bass
  • Scene 3: Swung + extra ghost notes
  • Export each as a loop for performance/mashing.

    ---

    Step 9 — Arrangement ideas (oldskool-friendly)

    Make it feel like a real jungle tune quickly:

    16-bar block suggestion:

  • Bars 1–8: Break + sub only (mid filtered low)
  • Bars 9–16: Full bass (sub+mid), add a stab or pad
  • Automation (stock devices):

  • Auto Filter on BASS MID:
  • - Open cutoff gradually into the drop

  • Saturator Drive automation:
  • - Slight drive increase every 8 bars (tiny, like 0.5–1 dB)

    ---

    4. Common mistakes

    1. Swinging the sub too much

    - Result: low-end feels late and messy.

    - Fix: keep sub straighter; swing mids.

    2. Groove on everything

    - If kick, snare, bass, hats all get heavy groove from different sources, it turns to soup.

    - Fix: choose one master groove (often from the break).

    3. Too much “Timing”

    - At 80–100% timing, you can lose punch.

    - Fix: start 35–50%, then increase only if the break demands it.

    4. No velocity shaping

    - Swing without dynamic accents feels robotic.

    - Fix: let Groove Pool add a little velocity, and hand-tune key notes.

    5. Bass notes too long

    - In jungle, long notes can blur the groove.

    - Fix: shorten notes; let release provide tail.

    ---

    5. Pro tips for darker/heavier DnB 🖤

  • Add the “evil” note tastefully:
  • In A minor, sprinkle Bb as a very short passing note (1/16) before A for menace.

  • Sidechain without killing the roll:
  • Use Compressor on BASS GROUP, sidechain from kick:

    - Ratio 2:1

    - Attack 3–10 ms

    - Release 50–120 ms

    - GR 1–3 dB

    Keep it subtle so the groove stays intact.

  • Make mids audible on small speakers:
  • On BASS MID, use Saturator + slight EQ bump around 700 Hz–1.5 kHz (careful).

  • Parallel distortion for weight (stock-only):
  • - Create a return track: “BASS CRUSH”

    - Put OverdriveSaturatorEQ Eight (HP @ 200 Hz)

    Send only the MID bass into it.

  • Groove extraction from your break = signature feel:
  • Two producers can use the same notes; the one who grooves to their break will sound more “real.”

    ---

    6. Mini practice exercise 🎯

    1. Build two 2-bar bass loops using the same notes:

    - Loop A: No groove

    - Loop B: Groove extracted from your break, Timing 45%, Velocity 15%, Random 3%

    2. Make SUB straight and MID swung (split clips).

    3. Commit groove, then render both loops.

    4. A/B test:

    - Which one feels like it “locks” with the break at low volume?

    - Which one survives when you low-cut the break at 200 Hz (bass has to carry the groove)?

    Bonus: transpose the whole bassline to F minor and see if the groove still feels right.

    ---

    7. Recap

  • Jungle/DnB bass groove is timing + dynamics + space—not just notes.
  • Extract groove from the break for authentic oldskool swing.
  • Use Groove Pool like a weapon:
  • - Timing ~35–60%

    - Velocity ~10–25%

    - Random ~0–5%

    - Base usually 1/16

  • Keep sub stable, swing mids harder for roll and character.
  • Commit groove for DJ-tool consistency and easy exporting.

If you want, tell me what break you’re using (Amen edit? Think? Hot Pants?) and your key, and I’ll suggest a matching 2–4 bar bass pattern + exact groove settings for that specific vibe.

Ask GPT about this lesson

Chat with the lesson tutor, get follow-up help, or use quick actions.

Bigup 👽 Ask me anything about this lesson and I’ll answer in context.

Narration script

Show spoken script
Title: Bassline Theory in Ableton Live 12: Swing Tutorial with Groove Pool Tricks for Jungle and Oldskool DnB Vibes (Intermediate)

Alright, let’s get into a really practical, really usable piece of jungle and oldskool drum and bass craft: how to make a bassline sit correctly with a break at 170-plus BPM, using Ableton Live 12’s Groove Pool in a controlled way.

Because here’s the truth: you can have the right notes, the right sounds, even the right break… and it still won’t feel like jungle unless the bass and the drums are sharing the same pocket. That slightly drunk-but-tight push and pull. That “rolling” feeling where the break feels like it’s pulling the bass forward, and the bass feels like it’s answering the break.

By the end of this lesson you’ll have a two-bar bassline in A minor, a clean sub plus a gritty mid layer, and a groove workflow you can reuse like a DJ tool: straight version for compatibility, swung version for vibe, and a couple of variations you can bounce out and actually mix.

Let’s set it up like a DnB producer.

Set your tempo to 172 BPM. Time signature 4/4. If you’re working with any breaks, make sure Warp is on. And make three groups so you can think clearly: DRUMS, BASS, and MUSIC or FX. That sounds basic, but it keeps you in “versioning” mode, like you’re building tools, not just a loop.

Now, before we touch swing, let’s talk bassline theory for this style. Oldskool jungle basslines aren’t usually constant eight-notes or a wall of sound. They land in key places, they leave gaps, and they often work like call and response with the kick and snare. Not the entire break. Kick and snare.

So a quick coaching habit I want you to build: at some point, solo just kick, snare, and bass for two minutes. Ask yourself two questions.
One: are my biggest sub hits happening away from the snare transient, so the backbeat still punches?
Two: do I have at least one intentional gap right before or right after the snare, so the snare feels loud and uncluttered?

That little bit of space is rhythm. In jungle, silence is part of the groove.

In A minor, your power notes are simple: A as the root, E as the fifth, and G as the flat seven. If you want darker tension, you can sprinkle Bb as a passing note, super short. And if you want a bit more classic minor movement, C works too.

Now let’s build the bass sound with stock devices, clean and controllable.

Create a MIDI track called BASS SUB. On it, load Operator. Keep it simple: Algorithm A only, sine wave. For the envelope, go fast attack, basically zero to five milliseconds. Decay around 250 to 500 milliseconds. Sustain either all the way down if you want plucky notes, or low enough that it doesn’t drone. Release around 60 to 120 milliseconds so it breathes but doesn’t smear.

Then add a Saturator. Drive about 1.5 to 3 dB, Soft Clip on. This helps the sub read without you turning it up too loud.

Add EQ Eight. Don’t low cut your sub. If later it feels boxy, you can dip a tiny bit around 200 to 300 Hz, but don’t pre-emptively carve the life out of it.

Then Utility: turn Bass Mono on, and set Width to zero percent. That sub is a foundation, not a stereo experience.

Now duplicate that track and rename it BASS MID. This is where character and swing can show off.

On MID, load Wavetable or Operator. In Wavetable, start with something saw-ish or square-ish from Basic Shapes. Add a little Unison, like two to four voices, but keep the amount low. You’re going for thickness, not a trance supersaw.

Add Auto Filter. Low-pass 24 dB mode, add some Drive, maybe three to six. Use a small envelope amount so the transient gets a little bite. That matters because a brighter transient will make the groove feel more obvious, even if your timing changes are subtle.

Add Amp, yes the stock one. Clean or Blues, with low gain. You’re just adding texture.

Then Saturator again. This time you can drive it harder, like three to seven dB, Soft Clip on.

Then EQ Eight: high-pass the mid layer somewhere around 120 to 180 Hz. The point is simple: the sub owns the subs, the mid stays out of the way down there.

Utility on the MID: set Width somewhere like 20 to 60 percent. Keep it controlled.

Now route both tracks into a BASS group. On that group, put Glue Compressor, gentle settings: attack about 10 milliseconds, release on Auto, ratio 2 to 1, and aim for maybe one to two dB of gain reduction. Then a Limiter just as safety. Not loudness. Safety.

Cool. Sound is ready. Now we write the bassline.

Create a two-bar MIDI clip, and for now set your grid to sixteenth notes. We’re going to make it groove before we apply swing. This is important. Groove doesn’t fix a bad rhythm; groove enhances a good rhythm.

Use this two-bar pattern in A minor, and keep the notes short to start.

Bar 1:
On 1.1, place A1 for an eighth note.
On 1.2.3, place E1 as a sixteenth.
On 1.3, place G1 for an eighth.
On 1.4.3, place A1 as a sixteenth.

Bar 2:
On 2.1, A1 for an eighth.
On 2.2.3, G1 as a sixteenth.
On 2.3, E1 for an eighth.
On 2.4.2, A1 as a sixteenth.

What’s happening here is root-heavy stability with little late-sixteenth connectors. Those late sixteenths are exactly where swing is going to shine, because they give the groove something to pull around.

Now do a quick velocity shape, because in DnB, velocity is part of swing. Set your main A hits somewhere like 90 to 110. And your connector sixteenths more like 55 to 80. Anchor hits louder, lead-ins quieter. That’s how you stop it sounding like random timing drift later.

Next, we need context. You cannot dial jungle swing in silence. You need a reference break.

Create an audio track called BREAK. Drop in an amen-style loop, or any classic break you like. Set Warp mode to Beats, Preserve at 1/16. That usually gives you a solid, choppy feel that responds well to groove extraction. If your break feels too surgically tight, you can experiment a little, but do it carefully. You’re trying to keep transients meaningful.

Now we hit the secret sauce: Groove Pool.

Open the Groove Pool on the left. Yes, you can start with MPC 16 Swing around 57 to 63, and that’s a decent neutral swing. But if you want authentic jungle feel, do the best move: extract groove from the break you’re actually using.

So right-click the break clip and choose Extract Groove. Now you’ve captured that break’s micro-timing and dynamics as a reusable groove template.

This is one of the biggest “identity” moves you can do. Two producers can use the same notes, but the one who grooves the bass to their break sounds like it belongs.

Now apply the groove to the bass MIDI clip. Drag the groove onto the clip.

Click the groove in the Groove Pool and set some starting values.
Timing: start around 40 percent. Typical working zone is 30 to 60.
Velocity: start around 15 percent. Typical zone 10 to 25.
Random: start around 3 percent. Keep it low, usually zero to five, maybe up to eight if you want grit.
And Base: start at 1/16.

Base is a big deal, so listen up. Base is basically selecting which rhythmic divisions are allowed to be affected. If you use Base at 1/16, all those tiny connector notes can move. If it feels too lumpy, or like everything is wobbling, try Base at 1/8 so it mainly influences bigger offbeats and not every microscopic note.

Now press play with the break. Your goal is not “more swing.” Your goal is that the bass leans into the break without flamming against it.

If the bass suddenly feels like it’s tripping, do this in order.
First, lower Timing a bit.
Second, reduce Random to near zero.
Third, reconsider Base. Sometimes 1/8 instantly cleans it up.

Now we do the killer trick that makes this feel professional: swing only the movement, not the foundation.

Sub needs to be stable. Mid can dance.

Here’s a simple workflow. Duplicate the MIDI clip so you have a SUB clip and a MID clip, even if they’re playing on separate tracks. On the SUB clip, keep only your strongest anchor notes, usually your A1 hits, and maybe any hits that line up with the kick. On the MID clip, keep your E and G connector notes, the movement.

Now apply different groove amounts.
On SUB: Timing maybe 10 to 25 percent. Keep it firm.
On MID: Timing more like 45 to 70 percent if you want it really rolling.

This is the classic “tight low end, lively top” approach. And it’s why your mix still hits hard while your groove feels animated.

Quick coach test for the sub: swing can make the sub feel weaker because it stops reinforcing the kick consistently. Put a Spectrum on the BASS group. Loop two bars. Toggle the groove on and off. If you see the fundamental region, say around 40 to 60 Hz, dip noticeably when groove is on, your sub timing is too loose. Reduce Timing on the SUB clip, or shorten the sub note lengths a touch so the transient is cleaner.

Now, once you like the feel, we talk about committing groove.

In Ableton, committing means your groove becomes actual MIDI timing. That matters for consistency when you export, resample, or build DJ tools. It also means you’re not relying on a live groove engine later and wondering why your bounce sounds slightly different.

Select the clip, hit Commit in the Groove Pool.

But here’s another pro workflow: commit selectively and keep a control clip.
Keep one uncommitted clip as your edit master. That’s the one you can keep adjusting. Then duplicate it and commit the groove on the duplicate for export.

Now let’s turn this into something that feels like a real jungle arrangement, fast.

Think 16-bar blocks.
Bars 1 to 8: break plus sub anchors only. Keep the mid filtered down or muted so it’s like a tease.
Bars 9 to 16: bring in full bass, sub plus mid, and maybe a simple stab or pad.

Automation is your friend here. On the mid bass, automate Auto Filter cutoff opening into the drop. And you can do tiny Saturator drive increases every eight bars, like half a dB to one dB. Keep it subtle. Jungle is all about movement that you feel more than you hear.

Now, common mistakes to avoid while you’re here.

Don’t swing the sub too much. That’s the fastest way to make the low end feel late and messy.
Don’t put heavy groove on everything from different sources. If kick, snare, hats, bass, and chops all have different groove templates, it turns into soup. Pick one master groove, usually from the break.
Don’t crank Timing to 80 or 100 and expect it to be “more jungle.” Often you just lose punch.
Don’t skip velocity shaping. Groove without accents still sounds robotic.
And don’t leave bass notes too long. In jungle, long notes blur the pocket. Shorten notes and let the release handle the tail.

Let’s add a couple darker, heavier options if you want that menacing edge.

In A minor, try the “evil” Bb as a super short passing note, usually right before an A. Like a quick sixteenth that leads into a main hit. Tasteful. Don’t overdo it or it turns into a different genre.

If you want sidechain, keep it subtle. Put a Compressor on the BASS group, sidechain from the kick, ratio 2 to 1, attack 3 to 10 milliseconds, release 50 to 120 milliseconds, and aim for one to three dB of reduction. The goal is space, not pumping. And if the bass is swung but your kick is straight, watch the release time so the compressor recovers before the swung notes land.

If you want mids to translate on small speakers, add a very gentle EQ bump around 700 Hz to 1.5 kHz on the mid layer, after saturation. Careful with harshness.

And if you want extra weight without ruining the sub, do parallel distortion. Create a return track called BASS CRUSH. Put Overdrive into Saturator into EQ Eight with a high-pass at 200 Hz. Send only the MID bass to it. That way the grit lives above the sub region and your low end stays disciplined.

Now, a mini practice exercise to lock this in.

Make two versions of the same two-bar bass loop.
Loop A: no groove.
Loop B: groove extracted from your break, Timing about 45 percent, Velocity about 15 percent, Random about 3 percent.

Split the clips so SUB is straighter and MID is more swung. Commit the groove on the export version. Then render both.

And do an A/B test in two specific ways.
First, listen at low volume. The one that still bounces quietly is usually the one with the better pocket.
Second, low-cut the break at 200 Hz so the bass has to carry the groove. If the bassline suddenly feels stiff without the break, you need better timing and velocity shape.

Bonus: transpose the whole thing to F minor and see if the groove still feels right. If it does, you’ve built a reusable DJ tool, not a one-off loop.

To wrap it up, here’s the mindset I want you to keep.

Jungle and DnB bass groove is timing plus dynamics plus space. Not just the notes.
Extract groove from your break for real oldskool feel.
Use Groove Pool like a weapon, but stay controlled: timing in that 35 to 60 zone, velocity 10 to 25, random low, base usually 1/16 but don’t be afraid of 1/8.
Keep the sub stable and let the mid swing harder.
Commit groove for consistency, but keep an uncommitted master for edits.

If you tell me what break you’re using and what key you’re writing in, I can suggest a matching two to four bar bass pattern and a tighter set of groove settings that fits that specific break’s pocket.

mickeybeam

Go to drumbasscd.com for +100 drum and bass YouTube channels all in one place - tune in!

Generating PDF preview…