DNB COLLEGE

AI Drum & Bass Ableton Tutorials

LESSON DETAIL

Break Lab edit: a dub siren framework shape from scratch in Ableton Live 12 (Intermediate)

An AI-generated intermediate Ableton lesson focused on Break Lab edit: a dub siren framework shape from scratch in Ableton Live 12 in the Edits area of drum and bass production.

Free plan: 0 of 1 lesson views left today. Premium unlocks unlimited access.

Break Lab edit: a dub siren framework shape from scratch in Ableton Live 12 (Intermediate) cover image

Narrated lesson audio

The voice track includes the tutorial plus extra teacher commentary.

Open audio file

Main tutorial

Lesson Overview

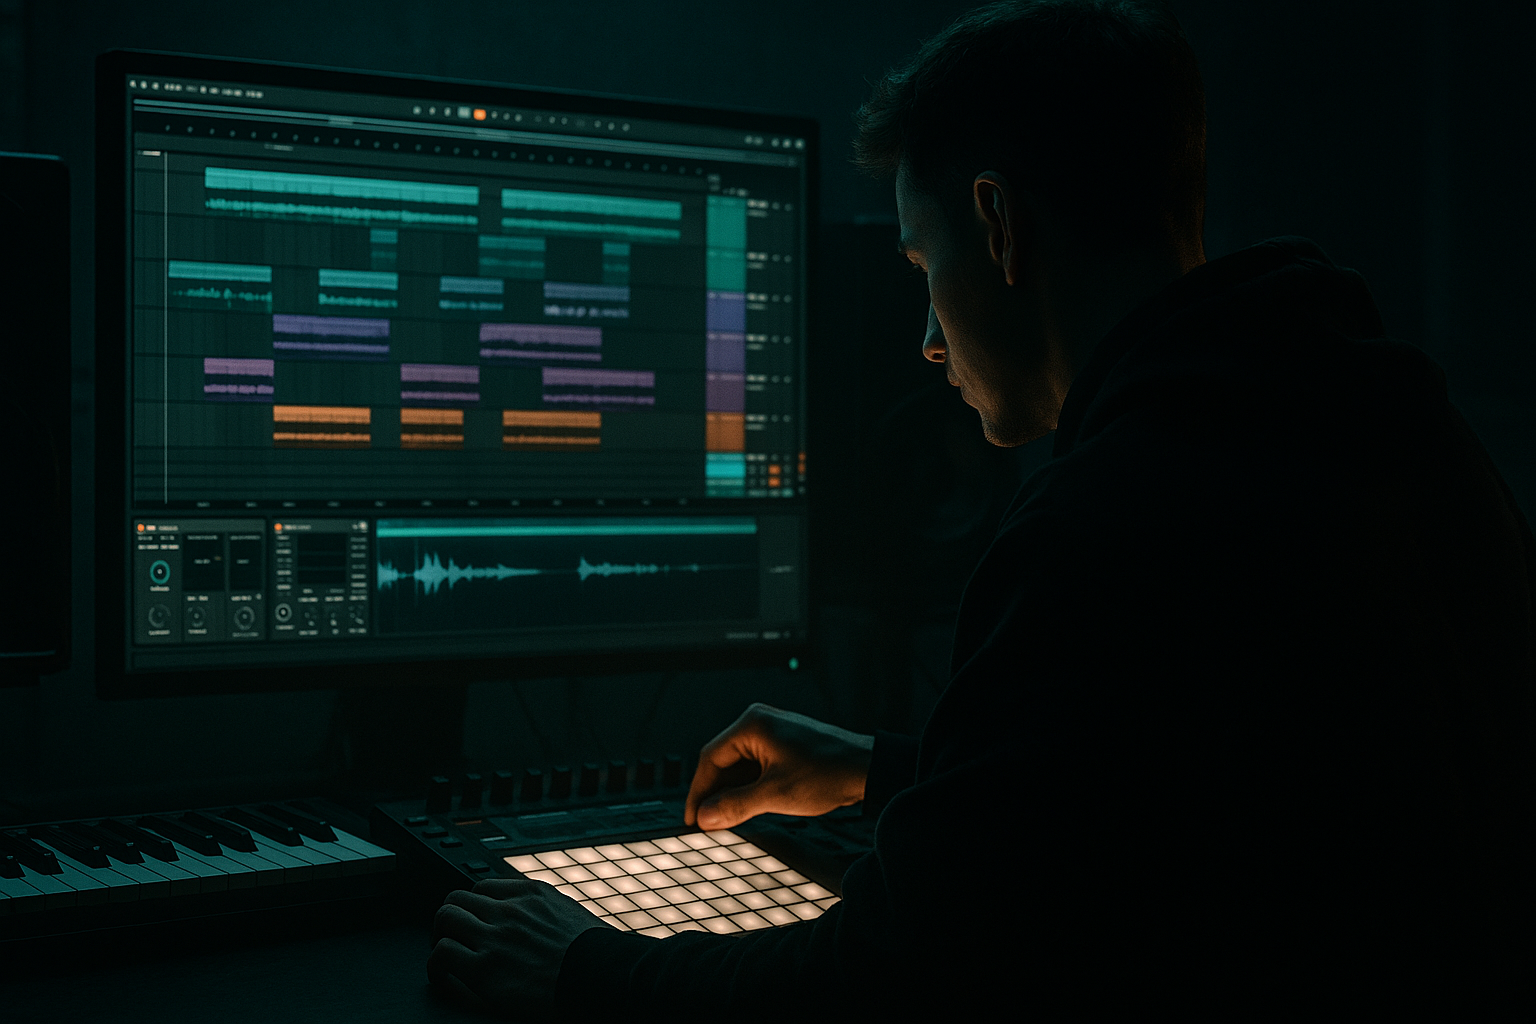
This lesson is about building a dub siren framework shape from scratch in Ableton Live 12 and using it like a real Break Lab edit tool inside a Drum & Bass arrangement.

In DnB, a dub siren is not just a “sound effect.” Used properly, it becomes a tension device, a call-and-response hook, and a way to glue together break edits, fills, and drop transitions. Think of it as a rude, mystical warning signal that can sit above jungle breaks, reinforce a dark rollers groove, or punch through a neuro-style drop without taking over the low end.

Why this matters in DnB: the best edits usually do more than “fill space.” They create forward motion. A siren framework gives you a reusable musical layer that can be reshaped across the intro, build, drop, and switch-up. Instead of dropping random effects, you build a controlled system with:

  • a stable tonal center
  • automation movement
  • filter and pitch modulation
  • resampled texture
  • room for breaks and bass to stay dominant
  • This lesson is especially useful if you want your edits to sound intentional and club-ready rather than pasted on. You’ll build something that can live in a DJ-friendly intro, explode into a double-time break switch, and still leave enough headroom for the sub and snare to hit hard. 🔥

    What You Will Build

    You’ll create a dub siren framework in Ableton Live 12 that works like a modular edit layer for DnB:

  • a two-oscillator siren voice with pitch movement and detune
  • a filter-driven shape that opens and closes over 1–4 bar phrases
  • modulation automation for siren wobble, vibrato, and urgency
  • a resampled audio version you can chop into an edit
  • a call-and-response version that can answer drums or bass stabs
  • a version that works in both:
  • - jungle / edit-heavy break sections

    - darker rollers / half-time tension moments

    - neuro-leaning transitions with controlled aggression

    By the end, you’ll have a siren element that can be used as:

  • an intro texture
  • a 1-bar fill before a drop
  • a breakdown signal
  • a build-layer under break edits
  • a repeatable motif across your track
  • Step-by-Step Walkthrough

    1. Set up a clean edit-ready return or MIDI track

    Create a new MIDI track and name it `Dub Siren FW`. Keep it separate from your drums and bass so you can edit it quickly later. If you already have a break session, place it near your break group so the workflow stays fast.

    Insert Wavetable as your main instrument. It’s a strong stock choice for this because it can do clean tonal shapes, unstable motion, and controlled aggression without needing external tools.

    Suggested starting point:

    - Osc 1: Saw

    - Osc 2: Square

    - Osc 2 level: lower than Osc 1, around -6 to -12 dB relative balance

    - Unison: 2 voices for a slightly wider siren, but don’t overdo it yet

    - Voicing: Mono or Legato if you want it to behave like a classic siren line

    Set up a MIDI clip with a single held note or a simple two-note phrase. For DnB, a siren often works best when it’s rhythmic but not busy. Try a note around the song’s key center, then test a second note a fifth above for tension.

    2. Shape the siren tone with a filter-first mindset

    Open the filter section in Wavetable and give the siren that unmistakable “warning signal” contour.

    Good starting settings:

    - Filter type: Low-pass 24

    - Cutoff: around 200 Hz to 1.2 kHz, depending on how bright you want the line

    - Resonance: 20% to 45%

    - Drive: gentle at first, then increase until the tone gets sharp but not piercing

    Why this works in DnB: most drum and bass mixes are crowded in the upper-midrange during breaks and drops. A siren with a moving filter gives you a recognizable midrange identity without needing huge volume. It cuts through the edit while staying controllable.

    Automate the cutoff over 1 or 2 bars so the siren “speaks” instead of sitting static. A classic move is:

    - start slightly closed

    - open on the offbeat

    - close again before the snare hit

    That shape gives you tension against the break rhythm, which is exactly what makes edits feel alive.

    3. Add pitch contour and vibrato for authentic dub movement

    The character of a dub siren lives in the movement, not just the waveform.

    Use Wavetable’s pitch or modulation controls to create a slight siren rise and wobble:

    - Pitch envelope: small upward sweep of +2 to +7 semitones

    - Attack: very fast, almost immediate

    - Decay: 150 ms to 600 ms

    - Vibrato rate: roughly 4 Hz to 7 Hz

    - Vibrato depth: subtle, around 5% to 15%

    If you use LFOs, assign one to pitch or wavetable position for a wavering, unstable tone. Keep it musical. In DnB, too much pitch chaos can blur the downbeat and fight the break.

    Try this phrasing:

    - bars 1–2: subtle, almost hidden

    - bar 3: more intense pitch rise

    - bar 4: strongest movement before the edit lands

    That gives you a classic build-and-release shape.

    4. Control the motion with stock modulation and clip automation

    In Ableton Live 12, use clip envelopes or track automation to shape the siren across the arrangement. This is where it becomes a real edit tool rather than a raw sound.

    Automate at least three parameters:

    - filter cutoff

    - resonance

    - vibrato depth or wavetable position

    Practical range idea:

    - Cutoff: move between 250 Hz and 2.5 kHz

    - Resonance: move between 20% and 60%

    - Wavetable position: subtle shift through 10% to 35% for motion

    Keep the automation curves purposeful:

    - sharper ramps for build tension

    - softer curves for breakdown atmosphere

    - quick dips just before the snare to make the drum hit feel bigger

    If you’re building a break edit, sync the siren so it answers the break slice, not constantly fights it. You want it to appear on gaps, pushes, and transitions.

    5. Add distortion and saturation for grit without losing shape

    A dub siren in DnB usually needs a bit of edge so it can survive alongside crunchy breaks and aggressive bass.

    Use one or two stock devices:

    - Saturator

    - Roar if you want a more modern, heavier color

    - Drum Buss can also work if you want punch and density

    Try this chain:

    - Wavetable

    - Saturator

    - EQ Eight

    - Utility

    Good Saturator starting point:

    - Drive: 2 dB to 8 dB

    - Soft Clip: ON if needed

    - Output: compensate so you are not just louder

    EQ Eight ideas:

    - High-pass around 120 Hz to 200 Hz to avoid fighting the sub

    - Small boost around 1.5 kHz to 3 kHz if the siren needs bite

    - Cut harshness around 3.5 kHz to 6 kHz if it gets painful

    In darker DnB, a siren should feel like it’s tearing through fog, not drilling through your ears. The goal is presence with attitude.

    6. Resample the siren into audio for edit flexibility

    This is where the lesson becomes a proper Break Lab edit workflow.

    Record or resample your siren onto an audio track. Once it’s audio, you can:

    - slice it

    - reverse it

    - pitch it

    - gate it

    - trim it around drum hits

    - layer it under fills and impacts

    In Ableton:

    - create an audio track named `Siren Resample`

    - set its input to resample or route from the MIDI track

    - record a few bars of motion

    - consolidate the best parts

    Now chop the audio into smaller phrases:

    - 1-bar sweeps

    - half-bar hits

    - 1/4-note stabs

    - reversed pickups into a snare fill

    This is especially powerful in jungle edits because you can place the siren between break slices so it sounds like part of the arrangement, not pasted on top. For rollers, use longer swells and fewer chops for a more hypnotic effect.

    7. Build the edit around the break, not the other way around

    Load your break loop or break edit onto another track and shape the siren around it. If your break is busy, the siren should leave breathing room.

    A practical arrangement example:

    - 8-bar intro: siren appears very lightly with filtered ambience

    - bars 9–16: break enters with a low siren call every 2 bars

    - first drop: siren drops out on the main downbeat, then returns as a response in bars 3–4

    - switch-up: siren becomes more active with chopped resamples and pitch rises

    If the break has strong snare ghosts and swung hats, put the siren on contrasting rhythmic gaps. That creates the “edit” feeling where each element has a role.

    For example, if your break lands hard on the 2 and 4, let the siren phrase start just after the snare, then rise toward the next hit. That gives you tension and avoids masking the transient.

    8. Use utility and stereo discipline to keep the low end clean

    Even though the siren lives in the mids and highs, it can still mess with mix clarity if you spread it too wide or leave unnecessary low end in place.

    Use Utility to:

    - check mono compatibility

    - reduce width if the siren feels too smeared

    - keep it centered enough to sit with the snare and bass

    Useful moves:

    - Width: 70% to 100% depending on arrangement density

    - Bass Mono: not required on the siren itself, but make sure your actual sub is separate

    - High-pass the siren before any widening effects

    If you’re using a layered bassline or reese underneath, keep the siren focused in the upper mids so the bass and drums remain the foundation. In DnB, that separation is non-negotiable.

    Common Mistakes

  • Making the siren too bright too early
  • Fix: start with a closed filter and automate the brightness into the phrase. A siren that begins at full intensity usually feels cheap and leaves nowhere to go.

  • Letting the siren fight the snare
  • Fix: offset the siren phrase so it answers the snare instead of sitting on top of it. In breaks, the snare must stay king.

  • Leaving too much low end in the siren
  • Fix: high-pass it with EQ Eight around 120–200 Hz. The sub should belong to the bassline, not the effect layer.

  • Using too much vibrato or pitch modulation
  • Fix: keep the motion musical. If the siren sounds seasick, reduce depth and shorten the pitch envelope.

  • Over-widening the sound
  • Fix: check mono and keep the siren reasonably focused. Wide effects are great, but not if they smear the impact of the drop.

    Pro Tips for Darker / Heavier DnB

  • Resample then degrade slightly
  • Bounce the siren to audio, then add subtle Redux or Saturator drive for a grimier texture. Tiny amounts go a long way.

  • Use delay for atmosphere, not clutter
  • A Simple Delay or Echo can add haunted space. Keep feedback low:

    - Feedback: 10% to 25%

    - Filter the delay so the repeats sit behind the drums

  • Automate a band-pass sweep for tension
  • A band-pass can make the siren feel more focused and ritualistic in a breakdown. Bring it back to low-pass for the drop.

  • Pair the siren with break reverses
  • A reversed siren slice into a snare fill sounds huge in jungle and darkstep-style edits. It makes the transition feel hand-built.

  • Use call-and-response with bass
  • Let the siren hit in the empty spaces between bass phrases. This is especially strong in rollers: bass says one thing, siren answers with menace.

  • Keep the arrangement sparse around the siren moment
  • If the siren is the hook, pull back on hats, ride energy, or extra percussion for a beat or two so the listener actually feels it.

    Mini Practice Exercise

    Spend 10–20 minutes building a usable edit tool:

    1. Open a blank Ableton set at your usual DnB tempo, around 172–174 BPM.

    2. Create a `Dub Siren FW` MIDI track with Wavetable.

    3. Build a simple siren tone using saw/square oscillators, low-pass filtering, and a small pitch envelope.

    4. Write a 4-bar MIDI phrase with only 1–2 notes.

    5. Automate cutoff, resonance, and vibrato depth across the 4 bars.

    6. Resample the result to audio.

    7. Slice the audio into 4–6 pieces and arrange them against a break loop.

    8. Make one version for an intro, one for a drop fill, and one for a switch-up.

    Goal: end with three usable siren edits you could drop into a real DnB tune.

    Recap

  • Build the dub siren as a controlled framework, not just a flashy sound.
  • Use Wavetable, filter automation, and subtle pitch movement to create the core tone.
  • Resample to audio so you can chop, reverse, and arrange the siren like a proper edit element.
  • Keep the sub free, the snare clear, and the motion intentional.
  • In DnB, the siren works best when it adds tension, identity, and transition energy without cluttering the groove.

Ask GPT about this lesson

Chat with the lesson tutor, get follow-up help, or use quick actions.

Bigup 👽 Ask me anything about this lesson and I’ll answer in context.

Narration script

Show spoken script
Welcome back. In this lesson, we’re building a dub siren framework shape from scratch in Ableton Live 12, and we’re doing it in a way that actually works like a real Break Lab edit tool inside a drum and bass arrangement.

So this is not just about making a cool siren sound and throwing it on top of a track. We’re making something that can behave like a scene-change cue, a tension device, and a call-and-response hook that helps your breaks, fills, and drop transitions hit harder. In DnB, that matters a lot, because the strongest edits are never just there to fill empty space. They create movement. They tell the listener, “something is about to happen.”

The goal here is to build a siren that feels controlled, musical, and aggressive enough to live in a jungle edit, a dark roller, or even a more neuro-leaning transition without stepping on the drums or sub.

We’ll start on a fresh MIDI track and keep it separate from the rest of the arrangement. That makes editing faster later, and it keeps your workflow clean. Go ahead and name the track Dub Siren FW, just so you know exactly what this lane is for. Then load up Wavetable as the instrument.

Wavetable is a great choice here because it gives us enough control to build something classic, but also something that can be pushed into more modern territory if we want extra grit. For the basic shape, start with Oscillator 1 on saw and Oscillator 2 on square. Keep Osc 2 lower in level than Osc 1 so it adds body without taking over. A little detune is good, but don’t overcook it yet. We want a siren, not a blurry pad.

For voicing, keep it mono or legato if you want that classic one-note siren behavior. That’s important. A dub siren works best when it has a clear identity. It should feel like a signal, not a chord wash.

Now drop in a simple MIDI clip. One held note can already work, but a two-note phrase gives you more flexibility. In DnB, try placing the note around the key center of the tune, then test a second note a fifth above it. That little jump can create a lot of tension without making the part too busy.

And that’s a big point here: this kind of siren is usually better when it’s rhythmic and intentional rather than constantly moving. Short, decisive gestures often work better than a long line that never breathes.

Next, let’s shape the tone with the filter. Open the filter section in Wavetable and start with a low-pass 24. Set the cutoff relatively low at first, somewhere in the few-hundred-Hertz range, and bring it up only as needed. Add some resonance, but keep it controlled. Then drive it a little if you want the tone to get sharper and more urgent.

This filter-first mindset is a huge part of making the siren sit properly in DnB. The midrange gets crowded fast, especially once breaks and bass are both active. So instead of relying on raw volume, we create identity through movement. That way, the siren can cut through the edit without fighting the whole mix.

Now automate the cutoff over one or two bars. A classic move is to start a bit closed, open the tone on the offbeat, and then close it again before the snare lands. That shape gives the siren a speaking quality. It feels like it’s reacting to the break instead of sitting on top of it.

And here’s a teacher tip that really helps: if the siren starts feeling too loud or too annoying too quickly, don’t immediately reach for the fader. First shorten the note length. A shorter phrase often fixes masking more cleanly than just turning it down.

Now let’s bring in pitch movement and vibrato, because that’s where the dub character really comes alive. A siren is not just a waveform. It’s motion. Use a small pitch envelope to create a slight rise, maybe a few semitones, and keep the attack fast. The decay can be fairly short, just enough to give that classic lift.

Add a subtle vibrato as well. Keep the rate around the natural range where it feels alive but not seasick. You want movement, not chaos. If you push this too far, the siren can start to blur the downbeat and get in the way of the break. So keep it musical and measured.

A really effective phrasing trick is to let the motion build across four bars. Make the first two bars feel relatively restrained, then increase the intensity by bar three, and let bar four be the strongest moment before the edit lands. That gives you a proper build-and-release shape, which is exactly what you want in a tension tool.

Now we move into clip automation and track automation, because this is where the sound becomes a proper arrangement device. Automate at least three things: cutoff, resonance, and vibrato depth or wavetable position. This gives you movement over time, and it also lets the siren react differently in the intro, build, drop, and switch-up.

For the cutoff, think in terms of a wide but intentional range. Let it move from filtered and restrained to much brighter and more exposed. For resonance, use it to sharpen the voice when you need more urgency. And for wavetable movement or pitch-related modulation, keep it subtle enough that the tone still reads clearly.

The main idea is to have the siren answer the break, not fight it. If your break is busy, place the siren in the gaps. If the snare is strong on the two and four, let the siren phrase start just after the snare and rise toward the next hit. That creates tension without masking the transient. The snare still gets to be king.

Now let’s give the sound some grit. A dub siren in drum and bass usually needs a bit of edge if it’s going to survive next to crunchy drums and bass weight. A simple chain like Wavetable into Saturator, then EQ Eight, then Utility is a strong starting point.

Use the Saturator to add a little drive and maybe soft clip if needed. Don’t just make it louder. Make it denser, sharper, and a bit more menacing. Then use EQ Eight to clean up the low end. High-pass it so it doesn’t collide with the sub, and if the siren needs more bite, gently emphasize the upper midrange. If it gets painful, carve out the harsh zone instead.

This is one of those classic DnB mix decisions: the siren should feel like it’s tearing through fog, not drilling holes in your ears. You want presence with attitude, not a fatigue generator.

Once the MIDI version feels good, resample it to audio. This is where the workflow becomes much more flexible. Create an audio track, route the siren into it, and record a few bars of movement. Then keep the best parts and consolidate them.

Now you can chop the siren into different edit pieces. Maybe one-bar sweeps, half-bar hits, quarter-note stabs, or reversed pickups into a fill. This is the Break Lab mindset right here. Once it’s audio, it stops being just a synth part and starts becoming an edit tool.

That matters especially in jungle-style arrangements, where you can place the siren between break slices and make it feel like part of the performance. In rollers, you might keep it longer and more hypnotic. In darker, heavier sections, you can make it more surgical and leave more space around it.

Now bring in your break loop or break edit and start building the arrangement around that, not the other way around. That’s a key mindset shift. The siren should support the break’s rhythm and energy, not flatten it.

A really useful structure might look like this: in the intro, the siren is filtered and subtle. As the break comes in, the siren appears every couple of bars as a low, controlled call. In the drop, it drops out on the main downbeat, then comes back as a response later in the phrase. And in the switch-up, you can use chopped resamples and sharper pitch rises to create more activity.

That “pre-drop conversation” idea is powerful too. Let the break dominate first, then let the siren rise, then give a moment of space or silence, and then let the drop hit. That contrast makes the impact feel earned.

Let’s also make sure the siren sits correctly in the stereo field. Use Utility to check mono compatibility and keep the width under control. You don’t want the siren smeared all over the place, especially when the mix is dense. The actual sub should stay separate, and the siren should live mostly in the upper mids and highs. That separation is non-negotiable in DnB.

If you want to go a step further, keep multiple resampled versions. Save a clean one, a saturated one, a filtered one, and a reversed one. That gives you a small kit of flavors you can drag into the arrangement fast, which makes later writing a lot easier.

For a darker or heavier flavor, you can also add a little Redux or extra Saturator after resampling. Just go light. Tiny amounts of degradation can make the siren feel grimier and more hand-built.

You can also use delay carefully, if you want a haunted sense of space. The key is not to clutter the groove. Keep the feedback low, and filter the repeats so they sit behind the drums rather than on top of them.

Another nice variation is a band-pass or formant-like filter shape for breakdowns. That can make the siren feel more ritualistic and vocal. And if you want a bigger lift right before the drop, duplicate the clip and move one version up an octave for the last bar. That sudden rise can be more effective than just opening the filter wider.

Now, if you want to push this into advanced territory, try making two contrasting versions of the siren on separate tracks. One can be thin and nasal for fills, and the other wider and dirtier for transitions. You can also try a tiny micro-detune layer under the main siren to make it feel more human and less clinical.

You can even build a stuttered MIDI gate shape so the siren pulses rhythmically instead of just holding one note. That’s a great way to turn a sustained line into a percussive edit element.

So to recap the workflow: build the siren in Wavetable, shape it with filter and pitch movement, automate the key parameters, add controlled grit, resample it to audio, and then chop it into edit-friendly phrases that can live with the break. Keep the sub free, keep the snare clear, and make sure every movement has a purpose.

If the siren feels too aggressive, reduce the note length before you reduce the volume. If it feels too static, make the brightest moment happen slightly before the downbeat. That tiny anticipation can make the whole transition feel way more intentional.

Your practice challenge is to make three versions of the same siren for one DnB project. One filtered intro version with a long tail and minimal movement. One brighter drop-fill version that’s shorter and more aggressive. And one switch-up version that’s resampled, reversed in places, and processed a bit harder. Use the same base sound for all three, and export them into a dedicated Siren Edits folder so they’re easy to grab later.

That’s the whole idea here: don’t treat the dub siren like a random effect. Treat it like a framework. A controlled system. A musical signal that helps shape the energy of the tune. When you do that, your edits stop sounding pasted on and start sounding designed.

Alright, let’s build it, resample it, and make that break section talk.

Background music

Premium Unlimted Access £14.99

Any 1 Tutorial FREE Everyday
Tutorial Explain
Generating PDF preview…