Main tutorial
Lesson Overview
This lesson is about building an oldskool DnB breakbeat route from scratch in Ableton Live 12, then using automation to make it feel like a living drum performance instead of a loop pasted across a timeline. The goal is to take a raw break, edit it into a tight jungle-adjacent groove, and then automate filter, volume, reverb, and saturation movement so the break can carry energy through an intro, build, drop, or switch-up.
This technique lives right at the heart of DnB track writing: it’s the bridge between a loop and a record. In oldskool, jungle, rollers, and darker break-led DnB, the break often does three jobs at once: it provides identity, it drives momentum, and it creates tension before the bass fully takes over. Technically, automation matters because a break can get stale very fast if it stays static. Musically, the movement has to feel intentional, not decorative.
By the end, you should be able to hear a break that:
- feels chopped and rearranged with purpose
- grooves against the kick/snare hierarchy instead of fighting it
- evolves over 8 or 16 bars through automation
- stays punchy, readable, and DJ-friendly
- works as a real section inside a DnB arrangement, not just as a loop in isolation
- gritty but controlled
- tight in the low-mids
- punchy in the snare and ghost-note detail
- lively in the hats and ride fragments
- evolving across 8 or 16 bars without losing the core groove
- lean into a classic DnB break feel
- preserve the push-pull of the original performance
- include micro-variation between repeated bars
- support a bassline rather than clutter it
- works as the backbone of an intro, first drop, breakdown return, or a break-led bridge into heavier material
- can sit under a sub or Reese bass without masking the low end
- can be opened up or stripped down through automation for arrangement contrast
- Darkness comes more from restraint than from removing highs entirely. Keep the snare clear, but let the tops be slightly constrained. A break that is too bright will feel techno-clean instead of ominous. A gentle Auto Filter move over the phrase can create menace without mud.
- Automate small level dips before the snare lands. A tiny pre-snare pullback, even less than 1 dB, can make the backbeat punch harder when it returns. This is especially effective before a drop or switch.
- Use one “dirty” layer and one “clean” layer. If you split the break into two paths, keep the body and snare more controlled, then let a top layer carry grit and movement. This keeps the groove readable while still sounding raw.
- If the break is carrying the section, let the bass be simpler. A busy break plus a constantly moving bassline often becomes a blur. In darker DnB, a strong drum edit can be the drama while the bass stays disciplined.
- Automate density, not just tone. Muting or reducing a hat fragment for one bar can feel more powerful than sweeping a filter. Movement in drum density often reads more clearly on a dancefloor than movement in frequency alone.
- Resample your best loop and re-edit it. Once you’ve found the core groove, print it, then cut a second version with slightly different fill placement. That gives you a more human, less looped second-drop evolution.
- use only one sampled break as your source
- use no more than three automation lanes
- keep the core groove mostly dry
- include exactly one 2-bar variation
- an 8-bar clip that has a stable main groove, one fill or turnaround, and an automation move that opens the section before bar 8
- does the break still groove with the bass muted?
- can you identify the snare immediately?
- does the final bar feel like it’s leading somewhere, not just repeating?
This best suits oldskool DnB, jungle, amen-led rollers, darker breakbeat techno-DnB hybrids, and any track where the drum energy needs to sound organic but still disciplined.
What You Will Build
You will build an oldskool DnB break edit in Ableton Live 12 that starts as a raw sampled break, gets chopped into a playable drum phrase, then receives automation that adds motion, tension, and arrangement impact.
Sonically, the finished result should feel:
Rhythmically, it should:
Role in the track:
Success criteria: if you mute the automation, the break still grooves; if you unmute it, the section gains lift, tension, and forward movement without sounding over-processed. It should feel like the drums are “performing” the arrangement, not merely looping.
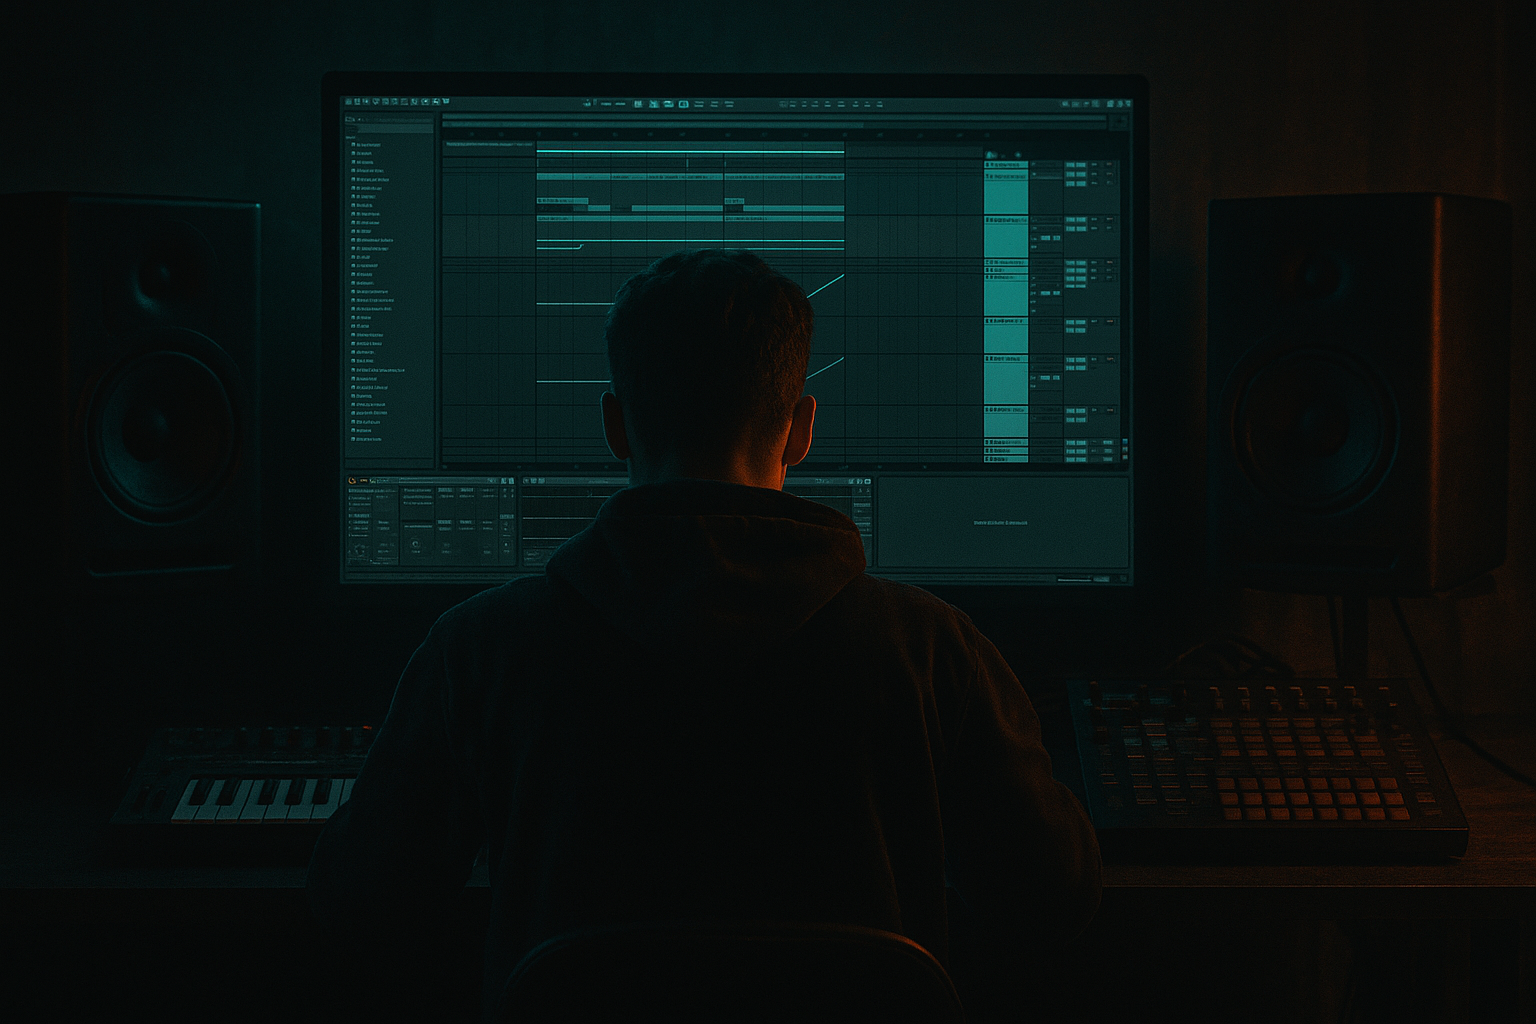
Step-by-Step Walkthrough
1. Start with a break that already has character, then clean it into usable sections
Drop a raw oldskool-style break into an Audio track. The classic choice is an amen, but a funky break, think-style loop, or anything with a clear snare backbone and ghost notes can work. Warp it so the transients land cleanly with the grid, but don’t flatten the feel. In Live, use transient preservation rather than over-tightening every hit.
First job: slice the break into a few useful zones — kick, snare, hats/tops, and a few ghost hit fragments. You are not trying to preserve the whole loop as a loop. You’re building a break kit from a performance. Keep at least one or two “messy” pieces from the original break; those imperfections are what make it sound like a human drum record rather than a programmed loop.
What to listen for: the snare should still hit with attitude after warping, and the ghost notes should feel like they sit behind the main hits, not like random ticks. If the warp has smeared the snare crack, try a different warp mode or reduce warp intervention on that clip.
2. Turn the break into a playable rhythm using Simpler or Slice to MIDI
For a fast route, drag the break into Simpler and use Slice mode, or slice it to a Drum Rack if you want separate pads for each hit. This gives you direct control over the rhythm without committing to one static phrase. In a DnB context, this is important because the break often needs to answer the bassline, duck around a vocal, or leave space for a snare fill.
Build a basic 2-bar pattern with:
- a strong backbeat on 2 and 4
- a supporting kick ghost or pickup before key snares
- one or two hat fragments for forward motion
- at least one small variation in bar 2
Keep the pattern musical, not over-detailed. A break edit should breathe. If every 16th is busy, the bassline loses its pocket.
Useful workflow tip: duplicate the MIDI clip once and make the second version a variation, rather than over-editing the original. That way you can compare “main groove” vs “lift version” quickly in arrangement.
3. Shape the drum hierarchy before automation: snare first, then groove, then texture
Before any movement automation, make sure the hierarchy is clear. The snare is the anchor in oldskool DnB, so it should read instantly. Use an EQ Eight on the break channel:
- high-pass gently around 25–35 Hz if there’s useless rumble
- check the 180–250 Hz area for boxiness
- if the snare needs more crack, a small lift around 2–5 kHz can help
- if hats are harsh, tame around 7–10 kHz carefully
If the break feels flat, add a mild Saturator before EQ or after, depending on whether you want to thicken the source or tame the harmonics afterward. A sensible starting point is a soft curve with Drive around 1–4 dB. Keep it subtle: in oldskool breaks, too much saturation turns ghost notes into sand.
What to listen for: the kick and snare should remain distinct when the bass is muted. If the break becomes one blurred sheet of noise, you’ve pushed the processing too far or you’ve lost the transient contrast.
4. Build the automation lane that will carry the section forward
This is the core of the lesson. Once the edit works in a static loop, automate the break so it evolves over 8 or 16 bars. The safest and most musical automation targets are:
- Auto Filter cutoff
- Utility gain
- Reverb Dry/Wet
- Saturator Drive
- Echo feedback or filter, if you use it lightly on selected fills
A strong oldskool DnB automation move is to keep the break mostly dry and full for the main groove, then open a low-pass filter slightly across the last 2 bars of a phrase. For example:
- bars 1–6: cutoff relatively low, keeping the break tight and dark
- bars 7–8: open the cutoff gradually so the hats and top-end energy lift before the next section
Another strong move is a tiny gain dip on select fills, then a return to full level on the downbeat. That creates a “breath in, hit out” effect that makes the drop feel bigger.
Why this works in DnB: the listener is tracking micro-energy over long DJ-friendly phrases. A break that opens up over the final bars of a section creates anticipation without needing a huge riser. That keeps the section rhythm-led, which is much more authentic to jungle and oldskool drum writing.
5. Use A versus B automation choices depending on the flavour you want
Here’s the key decision point:
A. Darker, tighter route
- automate Auto Filter only a little
- keep the break mostly mid-dark
- use a very subtle Saturator lift
- automate Utility gain by small amounts, usually no more than a couple dB
- result: more underground, more pressure, less obvious “effect”
B. More animated, rave-adjacent route
- open the filter further in the last 2 bars
- add a touch more Reverb Dry/Wet on specific fills
- push the tops slightly harder with saturation
- result: more lift, more air, more classic break movement
Choose A if the bassline is heavy, busy, or neuro-influenced. Choose B if the track needs a bigger sense of lift before a drop or if the break itself is a featured hook. Don’t combine both blindly; the risk is losing the grounded oldskool feel.
6. Automate in phrases, not randomly
Think in 4-bar and 8-bar sentences. In DnB, a break edit usually feels best when automation follows phrase logic:
- bars 1–4: establish the pocket
- bars 5–8: add one movement cue
- bars 9–12: repeat with a slight variation
- bars 13–16: open up or thin out before a transition
For example, on a 16-bar intro:
- bars 1–8: filtered break, slightly restrained top end
- bars 9–12: automate cutoff a little higher and introduce one extra ghost hit
- bars 13–16: bring in a reverse tail, widen a fill with reverb, then snap back dry on the drop
Arrangement example: if this break is leading into a drop, use the last 1 bar to strip the drums down to just snare ghosting and hats, then let the full break re-enter with bass on the downbeat. That reset makes the drop feel physically larger.
7. Create one fill that is committed to audio, then automate around it
Make a short fill from the break by resampling or duplicating the clip and editing a 1-beat or 2-beat turnaround. Print it to audio if needed. This is a good “commit this to audio if...” moment: if the fill is clearly working, freeze the shape and stop endlessly changing it. Printed audio gives you stronger control for automation later.
A practical fill structure:
- first half: snare + ghosted hat fragments
- second half: a short reverse or filtered tail
- final hit: strong snare or stripped kick into the next section
Then automate the fill’s filter or volume so it rises slightly into the impact and drops hard after. The payoff should be immediate and clean, not smeared across half a bar.
8. Check the break against drums and bass in context, not solo
This is where many edits fall apart. Pull in the bassline or at least a sub placeholder and check the break in context. A break that sounds exciting solo can be too noisy once bass enters.
Listen for:
- whether the kick still feels separate from the sub
- whether the snare still dominates the backbeat
- whether the hats are competing with bass movement
- whether automation makes the groove feel alive or just busier
If the bass is a Reese or moving mid-bass, keep the break’s automation more restrained in the 200–800 Hz region. If the bass is sub-heavy and sparse, you can let the break have more top-end motion.
Mono compatibility note: keep the break’s low end centered. If you use any widening, do it on higher-frequency texture only, not on the core kick/snare weight. In a club system, a widening trick that sounds glossy in headphones can cause the break to lose center punch in mono.
9. Add one subtle bus stage to unify the edit
Route the break elements to a Drum Bus or group and use a light Glue Compressor or Drum Buss if needed. This is not about flattening the break; it’s about making the chopped fragments feel like one performance.
Good starting point:
- Glue Compressor with gentle gain reduction, around 1–2 dB on peaks
- slow-ish attack so the snare transient survives
- medium release so the groove rebounds naturally
If using Drum Buss, keep Drive modest and Crush low enough that ghost notes remain audible. The goal is cohesion, not demolition.
Why it helps: automation can make separate pieces feel exciting, but a tiny amount of bus shaping makes the edit feel like one drum print that was performed and mixed, not assembled from isolated samples.
10. Finish with an arrangement move that proves the edit can carry a section
Don’t stop at the loop. Place the break in a real track context:
- intro: filtered and sparse, setting the mood
- first drop: full groove, bass support, minimal top-end automation
- switch-up: stripped fill, then a more open bar with extra hat motion
- second drop: same core break, but with one automation change so it feels evolved
A strong second-drop move might be:
- keep the main break identical
- automate a slightly faster filter opening
- add one extra snare ghost on the final bar
- remove a little reverb so the return feels drier and more forceful
The successful result should sound like the break is breathing with the track: tight enough to drive a dancefloor, raw enough to feel oldskool, and controlled enough that the bass can still dominate when it needs to.
Common Mistakes
1. Over-warping the break until it loses swing
Why it hurts: the original human push-pull disappears, and the break starts sounding pasted to the grid.
Fix: reduce warp pressure, use cleaner transient preservation, and keep some natural offset between hits. Don’t quantise every detail to perfection.
2. Automating too many things at once
Why it hurts: the break becomes obvious “FX” instead of a musical phrase, and the groove loses focus.
Fix: choose one main automation target per section, usually filter or gain. Add only one secondary movement if the arrangement genuinely needs it.
3. Pushing saturation until ghost notes vanish
Why it hurts: oldskool breaks need those little in-between articulations for forward motion.
Fix: back off Drive, or place saturation after EQ so the low-mid clutter is controlled before harmonic enhancement.
4. Letting hats and top-end fight the bass
Why it hurts: the mix gets tiring, and the break stops leaving room for the bassline to speak.
Fix: tame high frequencies with EQ Eight or automate the filter slightly darker during dense bass phrases.
5. Using a huge reverb on the whole break
Why it hurts: transient definition collapses, and the groove smears across the bar.
Fix: automate short reverb only on fills or turnaround hits. Keep the main groove dry and upfront.
6. Making the break too busy in every bar
Why it hurts: the section has no contrast, so the drop feels flat rather than driving.
Fix: preserve negative space. Use one or two variation bars per phrase, not constant detail everywhere.
7. Ignoring mono compatibility on the low end
Why it hurts: the break may sound wide and exciting in headphones but weak on a system.
Fix: keep kick and core snare centered. Reserve any width processing for top texture only.
Pro Tips for Darker / Heavier DnB
Mini Practice Exercise
Goal: build an 8-bar oldskool DnB break phrase with one clear automation arc.
Time box: 15 minutes.
Constraints:
Deliverable:
Quick self-check:
Recap
An oldskool DnB breakedit works when the break feels like a performance, not a pasted loop. Build the groove first, then automate one or two key parameters so the section breathes across phrases. Keep the snare dominant, protect the low end, and let the automation support the arrangement rather than distract from it. If the edit feels strong with bass, drums, and arrangement together, you’ve got a real DnB drum section — not just a break sample.

