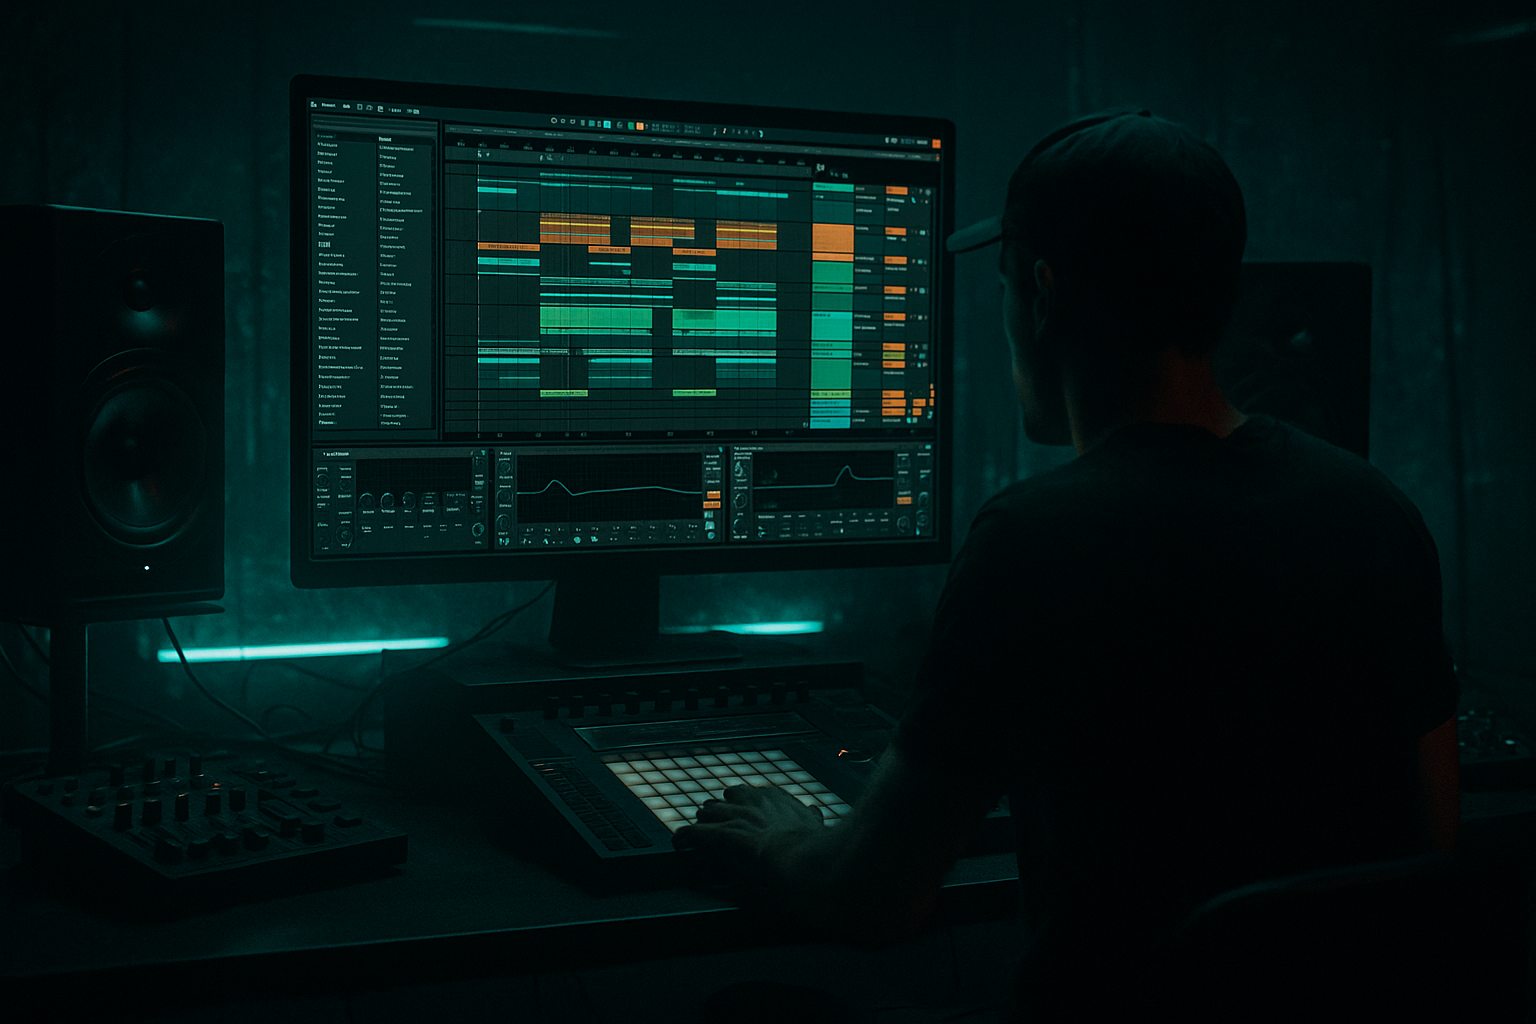
DNB COLLEGE

Drum & Bass Ableton Live 12 Tutorials

LESSON DETAIL

Break-noise cleanup for smoky late-night moods (Advanced)

An AI-generated advanced Ableton lesson focused on Break-noise cleanup for smoky late-night moods in the Mixing area of drum and bass production.

Back to lessons
Break-noise cleanup for smoky late-night moods (Advanced) cover image

Narrated lesson audio

The voice track includes the tutorial plus extra teacher commentary.

Open audio file

Main tutorial

```markdown

Break-noise cleanup for smoky late-night moods (Advanced DnB Mixing in Ableton Live) 🌒🔧

1) Lesson overview

In dark, late-night drum & bass, break noise is part of the vibe: vinyl crackle, room tone, tape hiss, micro-distortion, and those gritty “air” layers around classic breaks (Amen, Think, Funky Drummer, etc.).

The problem: once you start pushing subs, widening tops, and slamming the drum bus, that noise can turn into hashy, tiring fizz—especially in the 6–14 kHz zone—or it can pump weirdly when sidechained.

This lesson is about cleaning noise without sterilizing the break. You’ll keep the smoke, ditch the harshness, and make your break sit confidently over a rolling bassline.

---

2) What you will build

You’ll create a repeatable “Break Cleanup Rack” in Ableton Live for jungle/DnB breaks:

  • Transient-preserving noise control (not just aggressive gating)
  • Frequency-focused de-noise behavior (treat hiss differently than low rumble)
  • Parallel “smoke layer” so vibe stays even when you clean hard
  • Sidechain-aware behavior so noise doesn’t pump against your kick/sub
  • A fast workflow that works at 170–176 BPM, with chopped breaks and edits
  • ---

    3) Step-by-step walkthrough

    Step 0 — Prep: Gain staging + context first 🎚️

    1. Put your break in a Drum Group (e.g., `BREAK BUS`).

    2. Level it so peaks hit around -8 to -6 dBFS pre-processing.

    3. Loop an 8–16 bar section with bass + pads playing.

    You cannot judge noise in solo—especially in smoky mixes.

    Ableton tip: Add a Spectrum on the break bus and on the master for quick A/B.

    ---

    Step 1 — Split the break into “Body” and “Air/Noise” bands (surgical control)

    This is the core move: treat noise differently from drums.

    Option A (quick): Audio Effect Rack + Multiband split

    1. On the break track, add Audio Effect Rack.

    2. Create 3 chains: `LOW`, `MID`, `AIR`.

    3. Add an EQ Three (or EQ Eight) to each chain:

    - `LOW`: Low-pass around 180–250 Hz (24 dB/Oct)

    - `MID`: Band-pass 200 Hz – 6.5 kHz

    - `AIR`: High-pass around 6–8 kHz (12–24 dB/Oct)

    Why: Most “late-night hiss” that gets annoying lives in the AIR chain. You can now compress, gate, saturate, and widen only that region.

    ---

    Step 2 — Clean the LOW: remove rumble that makes “dirty smoke” become mud 🪵

    On the `LOW` chain:

    1. EQ Eight

    - HPF at 25–35 Hz, 24 dB/Oct (remove sub-rumble)

    - Optional: narrow cut 50–80 Hz if break has boomy room tone fighting your sub

    2. Glue Compressor (gentle)

    - Attack: 10–30 ms

    - Release: Auto or 0.3 s

    - Ratio: 2:1

    - Aim: 1–2 dB gain reduction on hits

    Goal: Keep low percussion punchy but stop uncontrolled low noise from smearing your bass.

    ---

    Step 3 — Clean the MID: keep crack + snare bite, reduce “papery” loop wear

    On the `MID` chain:

    1. Drum Buss

    - Drive: 2–6

    - Crunch: 0–10% (tiny)

    - Damp: 10–30% (tames brittle mids)

    - Boom: Off (you likely don’t want it fighting the sub)

    2. EQ Eight (optional problem-solving)

    - If the break feels “cardboard”: dip 300–600 Hz by 1–3 dB

    - If snare loses bite: small shelf at 3–5 kHz (+1 dB)

    DnB note: This mid chain is where the “rolling” energy lives—don’t over-clean it.

    ---

    Step 4 — Clean the AIR: de-noise without killing late-night shimmer 🌫️✨

    On the `AIR` chain, we’ll do controlled shaping, not brutal cuts.

    #### 4A) Dynamic-ish hiss control using Multiband Dynamics (stock “de-noiser” behavior)

    1. Add Multiband Dynamics.

    2. Focus on the High band:

    - Set High band crossover around 6–8 kHz (match your split).

    - In the High band, use Downward compression:

    - Ratio: 2:1 to 4:1

    - Attack: 1–5 ms

    - Release: 50–120 ms

    - Threshold: set so the high band compresses 2–5 dB when hats/snare occur, and more when hiss is constant.

    3. Keep Mid/Low largely untouched or very gentle.

    Why this works: Constant hiss gets controlled, but transients still poke through if you don’t overdo the threshold.

    #### 4B) Gate only the top, tuned to your break’s groove (so it doesn’t chatter)

    1. Add Gate after Multiband Dynamics.

    2. Settings to start:

    - Threshold: adjust until hiss reduces between hits (don’t fully mute)

    - Attack: 0.2–1 ms

    - Hold: 15–40 ms

    - Release: 60–150 ms

    - Floor: -12 to -24 dB (important: don’t slam to -inf unless you want that “hard gate” effect)

    3. Use the Gate’s Sidechain Filter (little triangle):

    - Enable filter

    - Band-pass around 2–8 kHz

    - This makes the gate respond to snare/hat articulation rather than random noise.

    Pro behavior: The Floor control is your “smoke knob.” Leaving a floor keeps the late-night atmosphere.

    #### 4C) De-harsh: tame 8–12 kHz “fizz” with a gentle shelf

    1. Add EQ Eight last in AIR.

    2. Add a high shelf:

    - Frequency: 9–11 kHz

    - Gain: -1 to -4 dB

    - Q: 0.5–0.7

    3. If there’s a nasty whistle, add a tight bell cut (Q 6–10) around the offender.

    ---

    Step 5 — Parallel “Smoke Layer” so vibe stays even when you clean hard 🕯️

    If you clean aggressively, breaks can feel too “digital.” We’ll re-add controlled dirt.

    1. Duplicate the break track (or add a parallel chain inside the Rack):

    - Name it `SMOKE`.

    2. On `SMOKE`:

    - Auto Filter

    - Band-pass mode

    - Center: 5–9 kHz

    - Resonance: 0.7–1.2 (subtle)

    - Saturator

    - Mode: Soft Clip on

    - Drive: 2–8 dB

    - Output down to match

    - Reverb (tiny room, dark)

    - Decay: 0.4–0.9 s

    - Size: small/medium

    - High Cut: 5–7 kHz

    - Dry/Wet: 5–12%

    3. Blend `SMOKE` back in at -18 to -10 dB under the clean break.

    Result: You retain “late-night air” without letting raw hiss dominate the full mix.

    ---

    Step 6 — Stop the noise from pumping against kick/sub (sidechain-aware cleanup) 🚦

    If your break bus is sidechained to kick, the noise often “breathes” unnaturally.

    Two fixes:

    #### Fix A) Sidechain only the BODY, not the AIR

  • Apply your kick sidechain (e.g., Compressor with sidechain input) on:
  • - `LOW` + `MID` chains

  • Keep `AIR` chain either:
  • - not sidechained, or

    - very gently sidechained (1–2 dB)

    This keeps hats/air stable while the body ducks for the kick/sub.

    #### Fix B) Duck the AIR only when bass hits (cleaner sub illusion)

  • Add a Compressor to `AIR` chain
  • Sidechain input: your SUB/BASS group
  • Settings:
  • - Ratio: 2:1

    - Attack: 5–15 ms

    - Release: 80–200 ms

    - Aim: 1–3 dB ducking on bass notes

    This keeps the top end from “masking” the perception of low-end weight.

    ---

    Step 7 — Arrangement: automate cleanup for intros vs drops 🎛️

    Smoky DnB often wants more noise in the intro, cleaner in the drop.

    Automate:

  • `AIR Gate Threshold` (more open in intro, tighter in drop)
  • `SMOKE return level` (higher in intro)
  • `High shelf cut` depth (less cut in intro, more cut in drop)
  • `Reverb Dry/Wet` on `SMOKE` (intro only)
  • Practical DnB move:

  • Intro (bars 1–33): more smoke, more width
  • Drop: tighter air, mono-compatible hats, less reverb
  • ---

    4) Common mistakes ❌

    1. Hard-gating the entire break

    Kills groove and makes edits clicky. Gate the AIR band, and use Floor.

    2. Over-highpassing

    If you HPF the break at 150 Hz because “sub is king,” you’ll lose the rolling glue. Clean rumble, don’t delete body.

    3. Solo-mixing the noise

    Noise that sounds bad solo can be perfect under bass/pads. Always mix in context.

    4. Over-saturating the AIR chain

    Distorted hiss becomes brittle and fatiguing fast. Saturate the MID more than the AIR.

    5. Sidechaining the whole break equally

    Makes the hiss pump. Sidechain body harder than air.

    ---

    5) Pro tips for darker/heavier DnB 🖤

  • Mono the low percussion:
  • Use Utility on `LOW` chain, Width 0–30%. Keeps subs stable and club-friendly.

  • Make snares feel closer without extra hiss:
  • Add a short, dark Reverb only on snare hits via a snare layer or transient-triggered clip, not on the entire break noise.

  • Add controlled “metal” in the tops:
  • Very subtle Corpus or resonant Auto Filter on the `SMOKE` layer can add that industrial shimmer—keep it low.

  • Use Clip Gain + fades on edits:
  • If you chop breaks, add tiny fades (1–5 ms) to prevent clicks that read as “extra noise.”

  • Reference classic rollers:
  • Compare your top-end density to a known rolling track. If your hats/noise feel like a constant white sheet, you’ve overdone AIR.

    ---

    6) Mini practice exercise 🧪

    Goal: Clean a classic break so it feels smoky but not harsh over a deep roller.

    1. Pick an Amen/Think-style break and set project to 174 BPM.

    2. Build the 3-band rack (LOW/MID/AIR) and the SMOKE parallel.

    3. In a 32-bar loop:

    - Bars 1–16: intro (pads + break)

    - Bars 17–32: drop (add sub + kick)

    4. Automate:

    - AIR Gate Threshold: looser in bars 1–16, tighter in bars 17–32

    - SMOKE level: -12 dB intro, -18 dB drop

    5. Print/export a 16-bar intro and 16-bar drop.

    Listen on headphones: the intro should feel atmospheric, the drop should feel clean and heavy with no harsh “spray” on top.

    ---

    7) Recap ✅

  • Split breaks into LOW/MID/AIR so you can treat noise surgically.
  • Control hiss with Multiband Dynamics + Gate (with Floor) on the AIR band.
  • Preserve vibe with a parallel SMOKE layer (filtered + lightly saturated + dark reverb).
  • Avoid weird pumping by sidechaining body more than air.
  • Automate cleanup so intros stay hazy and drops stay tight.

If you want, tell me what type of break you’re using (Amen, Think, etc.) and whether your bass is more deep roller or neuro/tech, and I’ll suggest exact crossover points and sidechain timings for that vibe. 🌒

```

Ask GPT about this lesson

Chat with the lesson tutor, get follow-up help, or use quick actions.

Bigup 👽 Ask me anything about this lesson and I’ll answer in context.

Narration script

Show spoken script
Break-noise cleanup for smoky late-night moods, advanced drum and bass mixing in Ableton Live.

Alright, let’s go after a problem that hits hardest in dark, late-night rollers: break noise that feels vibey and smoky… until you start pushing the mix. Then it turns into that hashy, tiring fizz, usually up in the six to fourteen k zone, or it starts pumping in a weird way when your kick and sub are doing their thing.

The goal today is not to sterilize your break. The goal is to keep the smoke, keep the grit, keep the late-night air… but ditch the harshness, the fatigue, and the “why is my noise breathing” sidechain artifacts.

By the end, you’ll have a repeatable Break Cleanup Rack: you’ll control noise without killing transients, treat hiss differently from low rumble, keep a parallel smoke layer so the vibe survives heavy cleanup, and make the whole thing sidechain-aware at typical drum and bass tempos, around 170 to 176.

Step zero: prep, gain staging, and context.

Put your break in a drum group. Name it something like BREAK BUS so you treat it like a real instrument, not a random loop. Set the level so your break peaks around minus eight to minus six dBFS before processing. Not because that number is magic, but because it gives your plugins room to behave predictably.

Now the big rule: do not judge noise in solo. Loop an eight or sixteen bar section with your bass and pads playing. The whole point is “smoky late-night mood,” and that mood only exists in context. Drop a Spectrum on the break bus, and another on the master, so you can A/B quickly and see what you’re actually fighting.

Quick coach move before any plugins: do a noise audit.

Go into Clip View and find a moment where it’s mostly noise. Like the tail after a snare, or a gap between chops. Loop that. Look at Spectrum.

If you see a hump below about 120 Hz, that’s rumble. Turntable, room, handling noise. That will smear your sub, so we treat that differently.

If you see more of a flat blanket above about seven k, that’s hiss and air. That’s the stuff that becomes fatiguing when you compress and widen.

If you see spiky lines, like a tone or whine, that’s not “vibe,” that’s a problem. That’s when you use narrow notches.

Okay. Now we build the core structure.

Step one: split the break into body and air.

Create an Audio Effect Rack on your break. Make three chains: LOW, MID, and AIR. This split is the main reason this workflow works. Because if you try to clean noise on the full-range break, you always end up dulling the drums or wrecking the groove.

On the LOW chain, put an EQ and low-pass around 180 to 250 Hz with a steeper slope, like 24 dB per octave. You’re aiming to catch kick thump, tom energy, low snare meat, and low percussion… but none of the airy stuff.

On the MID chain, band-pass roughly 200 Hz up to about 6.5 kHz. This is where the “rolling” lives. The crack, the snare smack, the ghost-note motion.

On the AIR chain, high-pass around 6 to 8 kHz. Slope can be 12 to 24 dB per octave depending on how much you want to isolate the haze. This is where hiss and brittle fizz show up… and this is where we clean surgically.

Now: process each band like it’s its own instrument.

Step two: clean the LOW, so smoke doesn’t become mud.

On the LOW chain, add EQ Eight. High-pass at 25 to 35 Hz, 24 dB per octave. This is “remove sub-rumble,” not “delete the break’s body.” If your break has a boomy room tone that’s fighting your sub, try a narrow cut around 50 to 80 Hz. Don’t go wild; one to three dB can be enough.

Then add Glue Compressor, gentle. Attack 10 to 30 milliseconds, so the transient still pops. Release on Auto or around 0.3 seconds. Ratio two to one. Aim for one to two dB of gain reduction on the hits. The point is not to squash; it’s to stop low-end noise from surging unpredictably.

Teacher note: if your bassline is sustained and heavy, you usually want the break low-end to be stable and slightly controlled. If your bass is more plucky and short, you can let the break low-end breathe a little more.

Step three: clean the MID, keep bite, reduce loop wear.

On the MID chain, put Drum Buss. Drive around two to six. Crunch very low, like zero to ten percent. Damp at ten to thirty percent to calm brittle midrange. Keep Boom off; you probably do not need extra low-end competing with the sub.

Optional EQ Eight moves: if the break feels like cardboard, dip 300 to 600 Hz by one to three dB. If the snare loses bite after cleanup, a small shelf or gentle bell around three to five k, like plus one dB, can bring articulation back without reintroducing hiss.

Key reminder: over-cleaning the midrange is how you kill the roll. You want the break to still feel like it’s dragging you forward.

Step four: clean the AIR. This is the main event.

We’re going to do controlled, dynamic shaping. Not a giant low-pass that deletes your life.

First, dynamic-ish hiss control with Multiband Dynamics.

Put Multiband Dynamics on the AIR chain. Focus on the high band behavior, and match the crossover to your split, around six to eight k.

Use downward compression on the high band. Ratio somewhere between two to one and four to one. Attack one to five milliseconds. Release around 50 to 120 milliseconds.

Set the threshold so that when hats and snares occur, the high band compresses maybe two to five dB. But the constant hiss gets controlled even more. The balancing act is this: you want transients to still poke through, but you don’t want the steady noise bed to sit on your face.

Coach tip: tune release to tempo. If the top end feels like it’s flapping, your release time is off. At 174 BPM, a starting point is roughly 20 to 90 milliseconds, like the feel of a sixty-fourth to a thirty-second note. Then adjust until the decay between hits feels musical, not like a switch.

Next, gate only the top, and don’t hard-mute it.

After Multiband Dynamics, add Gate. Set the threshold so hiss reduces between hits, but doesn’t disappear completely. Attack fast, 0.2 to 1 millisecond. Hold 15 to 40 milliseconds. Release 60 to 150 milliseconds.

Now the magic control: Floor. Set the Floor to something like minus twelve to minus twenty-four dB. This is your smoke knob. If you slam it to minus infinity, you get that obvious hard gate effect, and the break starts sounding chopped in a bad way.

Now open the gate’s sidechain filter and band-pass it around two to eight k. That makes the gate respond to actual hat and snare articulation instead of random noise spikes.

Extra coach note: don’t let cleanup change your perceived groove. Heavy dynamic control on AIR can shift how you perceive swing and ghost notes. When you A/B, level-match. Put a Utility at the end of the rack and match output gain so you’re not tricked by “cleaner is quieter.”

Now de-harsh the fizz.

Put EQ Eight last on the AIR chain. Add a gentle high shelf at nine to eleven k. Pull it down one to four dB. Keep the Q broad, around 0.5 to 0.7. If there’s a specific whistle or squeal, that’s when you add a tight bell cut with a higher Q, like six to ten, and take out just the offender.

Advanced variation you should try if it’s really aggressive: two-stage de-harsh. Do a tiny static shelf cut, like one to two dB, then let Multiband Dynamics do only one to three dB of additional control dynamically. Two small moves sound way more natural than one big “blanket” move.

Step five: parallel smoke layer, so the vibe stays alive even if you clean hard.

If you do a great job cleaning, you can accidentally make the break feel too polite. So we re-add controlled dirt, on purpose.

Make a parallel chain or duplicate the track and call it SMOKE.

On SMOKE, add Auto Filter in band-pass mode. Center it around five to nine k, resonance subtle, about 0.7 to 1.2. Then add Saturator with Soft Clip on, drive two to eight dB, and bring output down to match.

Then a tiny dark reverb. Decay 0.4 to 0.9 seconds, small to medium size, high cut around five to seven k, dry/wet five to twelve percent.

Blend this under the clean break, typically minus eighteen to minus ten dB. You want to miss it when it’s gone, not notice it when it’s there.

Pro move if you want “vinyl smoke” that doesn’t explode when you compress the drum bus: don’t route your smoke bed through the drum bus compressor. Send it more directly to the mix bus or a texture group, so your punch processing doesn’t pump the atmosphere.

Step six: stop noise from pumping against the kick and sub.

If you sidechain your whole break equally to the kick, the hiss will breathe, and it sounds amateur fast. So you’ve got two clean fixes.

Fix A: sidechain only the body.

Put your kick sidechain compressor on LOW and MID, not on AIR. Or sidechain AIR very lightly, like one to two dB. That keeps the hats and air stable while the body ducks out of the way for the kick and sub.

Fix B: duck the AIR only when the bass hits.

Add a compressor on the AIR chain. Sidechain it from your SUB or BASS group. Ratio two to one, attack five to fifteen milliseconds, release 80 to 200 milliseconds. Aim for one to three dB of ducking when bass notes hit. This can make the low end feel bigger because you’re reducing masking up top exactly when the bass needs attention.

Step seven: automate for arrangement. Noise is a narrative tool.

Smoky DnB often wants more haze in the intro, then cleaner in the drop.

Automate your AIR gate threshold so it’s looser in the intro, tighter in the drop. Automate SMOKE blend louder in the intro, lower in the drop. Automate how deep your high shelf cut is, and even automate width.

And yes, width matters. A lot of the “spray” lives in the sides. Put Utility on the AIR chain and try narrowing it to 60 to 90 percent. Or widen in the intro and narrow in the drop. This reduces fatigue without dulling the center punch.

Arrangement trick for impact: right at the drop, mute or clamp the AIR for an eighth note to a quarter note, then bring it back. That tiny contrast makes the transient punch feel huge, and the noise floor feels controlled even when it returns.

Now, common mistakes to dodge.

Hard-gating the entire break kills groove and makes edits clicky. If you need gating, do it on AIR, and use Floor.

Over-highpassing because “sub is king” will delete the roll. Clean rumble, don’t delete body.

Solo-mixing the noise will lead you into bad decisions. Always check with bass and pads.

Over-saturating the AIR chain turns hiss into brittle glass. Saturate MID more than AIR.

And sidechaining the whole break equally is the fastest way to make hiss pump. Sidechain body harder than air.

Mini practice exercise.

Set your project to 174 BPM. Grab an Amen or Think style break. Build the three-band rack and the SMOKE parallel.

Make a 32-bar loop. Bars one to sixteen: intro with pads and break. Bars seventeen to thirty-two: drop with sub and kick.

Automate AIR gate threshold looser in the intro, tighter in the drop. Set SMOKE level around minus twelve dB in the intro, minus eighteen in the drop as a starting point.

Then bounce sixteen bars of intro and sixteen bars of drop, and do the real checks: on headphones, you shouldn’t get sandpaper fatigue after thirty seconds. With the sub loud, the noise should not swell on each bass note. In mono, the break should still feel present, not hollow. And at low volume, you can still read the hats without cranking the mix.

Final recap.

Split the break into LOW, MID, AIR so you can treat noise surgically. Control hiss with Multiband Dynamics and a top-only gate using Floor and a sidechain filter. Preserve vibe with a parallel SMOKE layer. Avoid pumping by sidechaining the body more than the air. And automate cleanup across the arrangement so the intro stays hazy and the drop stays tight.

If you tell me what break you’re using and whether your bass is sustained roller style or more plucky techy stuff, I can suggest crossover points and sidechain release times that lock to that groove.

mickeybeam

Go to drumbasscd.com for +100 drum and bass YouTube channels all in one place - tune in!

Generating PDF preview…