DNB COLLEGE

Drum & Bass Ableton Live 12 Tutorials

LESSON DETAIL

Break transient control from scratch using Session View (Beginner)

An AI-generated beginner Ableton lesson focused on Break transient control from scratch using Session View in the Drums area of drum and bass production.

Back to lessons
Break transient control from scratch using Session View (Beginner) cover image

Narrated lesson audio

The voice track includes the tutorial plus extra teacher commentary.

Open audio file

Main tutorial

```markdown

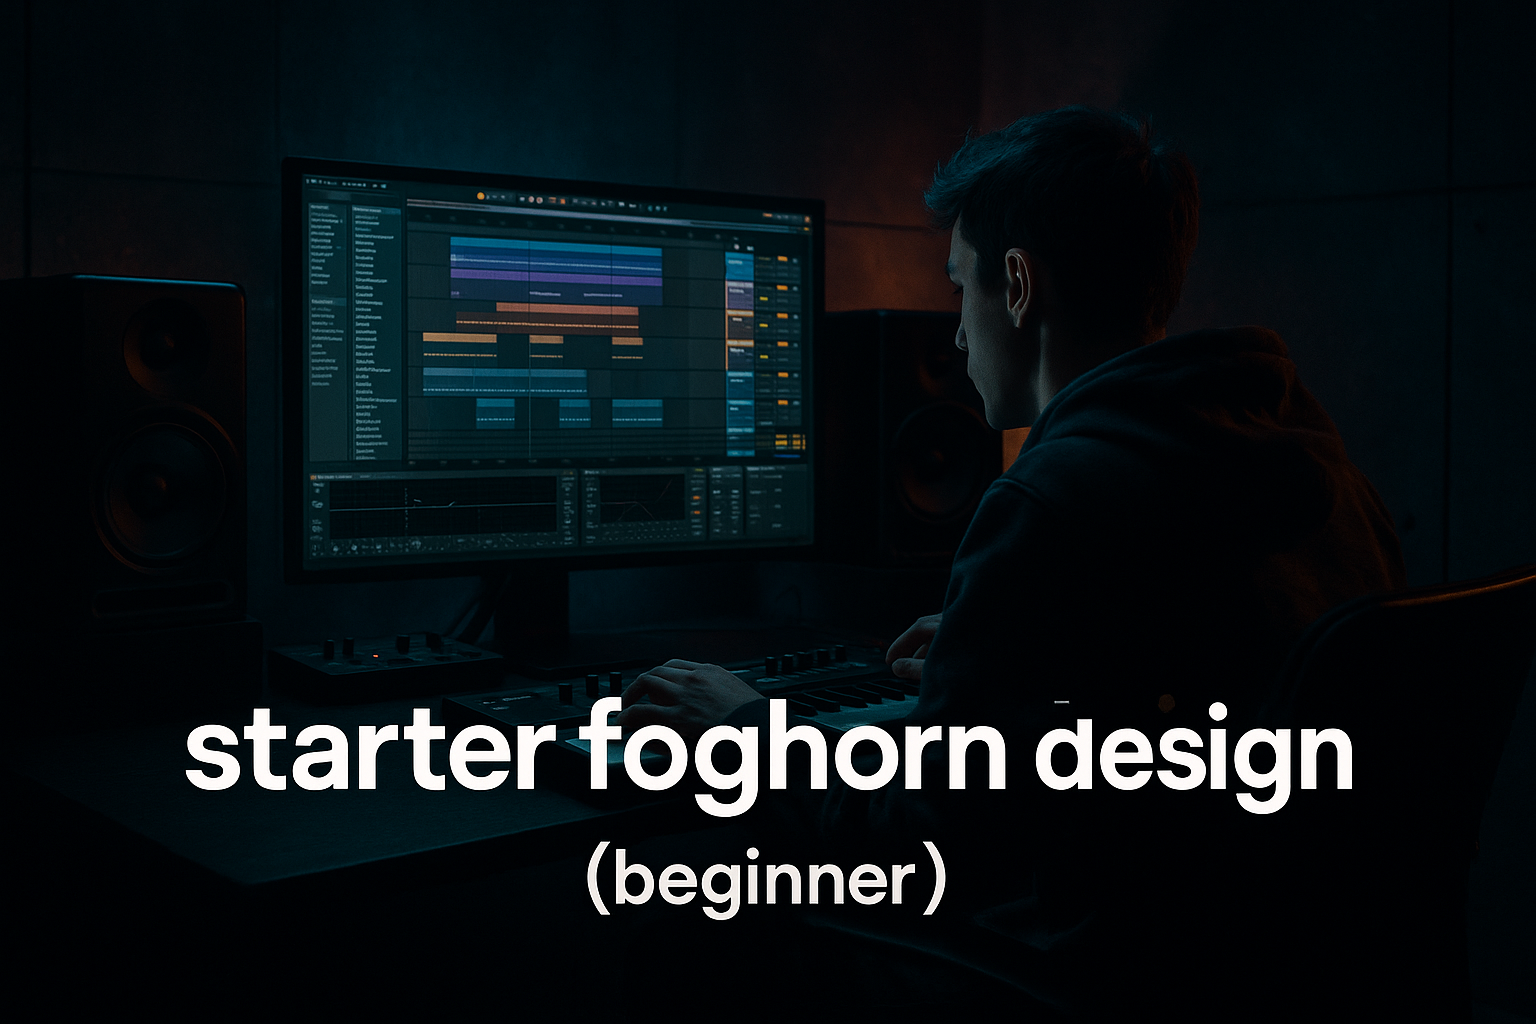
Break Transient Control from Scratch (Session View) — Drum & Bass in Ableton Live 🥁⚡

1) Lesson overview

In drum & bass, break transients are everything: the snap of the snare, the tick of the hats, the bite of the ghost notes. If the transients are too sharp, your break fights the kick/snare and feels messy. If they’re too soft, the groove loses urgency.

This lesson shows you how to control break transients from scratch using Session View in Ableton Live, using mainly stock devices and a repeatable workflow you can apply to any break (Amen, Think, Funky Drummer, etc.). 🎛️

---

2) What you will build

A Session View performance-ready break processing rack, including:

  • A cleanly warped break loop that stays tight at ~174 BPM
  • A transient shaping chain (attack + sustain control)
  • Parallel punch (New York/parallel compression style)
  • Optional “crunch” layer (saturation + clip)
  • A simple macro workflow so you can dial in punch quickly
  • Scene-based ideas for DnB/jungle variation (rolls, drops, half-time)
  • ---

    3) Step-by-step walkthrough

    Step 0 — Session setup (DnB-friendly)

    1. Set Tempo to 174 BPM (classic rolling DnB).

    2. In Session View, create:

    - 1 Audio Track named `BREAK`

    - 1 Return Track named `PARA COMP` (we’ll use it later)

    - 1 Return Track named `CRUNCH` (optional)

    Workflow tip: Color your break track bright (yellow/orange) so you always see it. ✅

    ---

    Step 1 — Load a break and warp it properly (this is crucial)

    1. Drag a break loop into an empty clip slot on `BREAK`.

    2. Click the clip → go to Clip View:

    - Turn Warp = On

    - Set Seg. BPM close to the original if Live guessed wrong.

    3. Choose Warp Mode:

    - Start with Beats

    - Set Preserve to 1/16 (good for break detail)

    - Try Transient Loop Mode = Forward

    - If it gets too clicky, test Transient Envelope (depending on Live version)

    Quick DnB check:

    Hit play. If the snare flams or feels late, don’t process yet—fix warp markers first.

    Tightening warp fast:

  • Right-click the first strong downbeat → Set 1.1.1 Here
  • Right-click → Warp From Here (Straight)
  • Nudge warp markers so the main snare lands consistently on 2 and 4.
  • ---

    Step 2 — Clip Gain staging (so transient tools behave)

    Before any devices:

  • Aim for clip peaks around -6 dB to -3 dB on the track meter.
  • Use Clip Gain (in Clip View) or Utility to adjust.
  • Why: transient shapers, saturators, and compressors react very differently if your break is too hot.

    ---

    Step 3 — Build a “Transient Control” device chain (stock)

    On the `BREAK` track, add devices in this order:

    #### 1) EQ Eight (clean the lows + harshness)

  • Enable HP filter (leftmost filter type):
  • - Frequency: ~80–120 Hz (depends on break)

    - Slope: 24 dB/Oct

  • If the break is papery/harsh:
  • - Add a gentle dip ~3–6 kHz, -2 to -4 dB, Q ~1.5

  • If the hats are piercing:
  • - Try a small dip ~9–12 kHz

    DnB logic: Your sub + kick need the low space; breaks shouldn’t own 40–100 Hz.

    #### 2) Drum Buss (easy transient shaping)

    Drum Buss is your best “from scratch” transient control tool.

    Start settings:

  • Drive: 5–15% (taste)
  • Crunch: 0–15% (optional)
  • Boom: OFF (usually off for breaks in DnB, unless you want vintage jungle weight)
  • Damp: 10–30% (tames harsh top)
  • Transient:
  • - To add attack: +10 to +30

    - To soften attack: -10 to -30

    What to listen for:

  • Positive transient = snare crack and hat tick come forward
  • Negative transient = smoother, more “glued” and less spitty
  • #### 3) Saturator (control peaks + add density)

  • Mode: Analog Clip (great for breaks)
  • Drive: 2–6 dB
  • Turn on Soft Clip
  • Optional: set Output down to match level (gain match!)
  • Goal: mild clipping “rounds” peaks and increases perceived loudness without destroying the groove.

    #### 4) Glue Compressor (optional but very common in DnB)

    Start here:

  • Attack: 3 ms (lets transient through)
  • Release: Auto (or 0.1–0.3 s)
  • Ratio: 2:1
  • Threshold: adjust for 1–3 dB gain reduction
  • Makeup: Off (gain match manually)
  • Soft Clip: On (optional)
  • If your break loses snap, slow the attack (10 ms). If it’s too pokey, speed up attack (1 ms).

    ---

    Step 4 — Parallel compression return (DnB punch without killing transients) 💪

    On return track `PARA COMP`, add:

    #### Glue Compressor (heavy)

  • Ratio: 4:1 or 10:1
  • Attack: 0.3–1 ms (grabs hard)
  • Release: 0.1 s (or Auto)
  • Threshold: push until it’s smashing (10+ dB GR is fine here)
  • Optional Soft Clip: On
  • Then add EQ Eight after it:

  • High-pass around 120 Hz (keep low-end clean)
  • Optionally tame harsh highs if it gets fizzy.
  • Now send your `BREAK` to `PARA COMP`:

  • Start send around -18 dB
  • Bring up until the break feels thicker and louder but not obviously squashed.
  • This is a classic rolling DnB technique: you keep the original transients but add a compressed “body” underneath.

    ---

    Step 5 — Optional “Crunch” return for jungle grit 🔥

    On return `CRUNCH`:

    1. Saturator (Analog Clip)

    - Drive 6–12 dB

    - Soft Clip ON

    2. Redux (very light)

    - Downsample slightly (try 22–30 kHz)

    - Bit reduction subtle (0–2)

    3. EQ Eight

    - HP around 200 Hz

    - Maybe a small presence bump around 3–5 kHz if you want bite

    Send the break lightly (start -24 to -18 dB). This gives that old-school rave edge without ruining the main break.

    ---

    Step 6 — Session View scenes for DnB/jungle movement 🎚️

    Make 4 clip variations of the same break in Session View:

    1. Scene 1: “Clean Roll”

    - Your main chain, no extra sends

    2. Scene 2: “Tighter”

    - In Drum Buss: Transient slightly negative (e.g., -10)

    - Slightly more Glue compression

    3. Scene 3: “Hyped Drop”

    - Transient +20

    - Add more parallel compression send

    4. Scene 4: “Rinse / Jungle”

    - Add Crunch send

    - Maybe swap Warp Mode to Texture briefly for artifacts (careful!)

    Arrangement idea:

  • Intro: Scene 2 (tighter, controlled)
  • Drop: Scene 3 (hyped)
  • Mid-16 switch: Scene 4 (gritty rinse)
  • Outro: back to Scene 1
  • ---

    Step 7 — (Optional) Build a Macro Rack for fast control

    Group your break devices into an Audio Effect Rack:

  • Select EQ Eight + Drum Buss + Saturator + Glue → Cmd/Ctrl + G
  • Map these to macros:

  • Macro 1: Drum Buss Transient
  • Macro 2: Saturator Drive
  • Macro 3: Glue Threshold
  • Macro 4: EQ Eight high-shelf or presence dip frequency (optional)
  • Macro 5: Send to `PARA COMP`
  • Macro 6: Send to `CRUNCH`
  • Now you can “play” transient character per scene like an instrument. 🎛️

    ---

    4) Common mistakes

  • Warping wrong = everything else fails. If the break timing is off, transient shaping makes it worse, not better.
  • Too much Transient boost (+40+) → clicky hats, brittle snare, ear fatigue fast.
  • Over-saturating before EQ → harshness you then “chase” with EQ cuts.
  • Parallel comp too loud → you lose groove dynamics and it turns into a flat roar.
  • Ignoring gain matching → louder sounds “better,” so you’ll overprocess without realizing.
  • ---

    5) Pro tips for darker/heavier DnB 🖤

  • Carve space for the sub: high-pass breaks higher than you think (often 100–150 Hz) so the sub can dominate cleanly.
  • Shorten sustain for “modern neuro/tech” cleanliness:
  • Use Drum Buss Transient negative + slightly faster compressor release to reduce tail and reverb-y loopiness.

  • Make snares feel heavier without more volume:
  • Push parallel comp, then reduce top-end a touch with EQ Eight so it feels weighty, not bright.

  • Add controlled aggression:
  • Use Saturator Analog Clip with Soft Clip, then tame fizz with a small EQ dip around 7–10 kHz.

  • Mid/Side cleanup (advanced but stock):
  • In EQ Eight, switch to M/S mode and slightly reduce harsh highs on the Sides so the center punch stays strong.

    ---

    6) Mini practice exercise (10–15 minutes) ⏱️

    1. Load a classic break (Amen/Think) and warp it tight at 174 BPM.

    2. Build the chain: EQ Eight → Drum Buss → Saturator → Glue.

    3. Create `PARA COMP` return and blend it in.

    4. Make 3 scenes:

    - A: Clean (Transient 0, low send)

    - B: Punchy (Transient +20, more parallel)

    - C: Controlled (Transient -10, less top end)

    5. Record a 32-bar performance into Arrangement:

    - 8 bars A (intro)

    - 16 bars B (drop)

    - 8 bars C (breakdown)

    Listen back: do the transients stay exciting without stepping on the kick/snare?

    ---

    7) Recap

  • Tight warping is the foundation for clean transient control.
  • Drum Buss Transient gives fast attack/sustain shaping for breaks.
  • Saturator (Analog Clip + Soft Clip) controls peaks and adds density.
  • Parallel Glue compression boosts body without killing the original snap.
  • Session View scenes + macros let you perform break character like a DnB DJ rinse-up. 🔊

If you tell me what break you’re using (Amen/Think/etc.) and your sub style (roller vs neuro vs jungle), I can suggest exact starting values for warp mode, HP frequency, and transient amount.

```

Ask GPT about this lesson

Chat with the lesson tutor, get follow-up help, or use quick actions.

Bigup 👽 Ask me anything about this lesson and I’ll answer in context.

Narration script

Show spoken script
Welcome back. Today we’re building something that’s secretly a superpower in drum and bass: break transient control, from scratch, using Session View in Ableton Live.

Because in DnB, transients are the attitude. The snap of the snare, the tick of the hats, the little ghost notes that make a loop feel alive. And the problem is, if those transients are too sharp, your break starts fighting your kick and snare and the whole drum bus turns into a messy argument. If they’re too soft, the groove loses that urgent, forward motion that makes 174 feel like it’s rolling.

So in this lesson, you’re going to build a performance-ready Session View setup where you can dial in punch quickly, blend parallel weight underneath, add optional grit, and then create multiple scene “characters” you can launch like a DJ.

Before we touch any devices, here’s the mindset: decide what you’re fixing.
Is your break too spiky? Like hat clicks, needle snare, fizzy top?
Or is it too soft? Like it’s looping, but it’s not exciting?

That one decision will stop you from endlessly tweaking in circles.

Alright, let’s set up the session.

Set your tempo to 174 BPM. Classic rolling territory.

In Session View, create one audio track and name it BREAK. Make two return tracks: one called PARA COMP, and one called CRUNCH. CRUNCH is optional, but it’s really fun for jungle edge.

Quick workflow tip: color the BREAK track something loud like yellow or orange. It sounds silly, but when your set grows, your eyes find it instantly.

Now, Step one: load a break and warp it properly. This is crucial.
Drag your break loop into an empty clip slot on the BREAK track. Click the clip so you’re looking at Clip View.

Turn Warp on.

If Ableton guessed the original tempo wrong, set the Seg BPM closer to the real one. Don’t overthink it, just get it in the ballpark.

For warp mode, start with Beats. Set Preserve to 1/16. That usually keeps the detail of break hits intact, especially hats and ghost notes. Set transient loop mode to Forward.

Now hit play and do a quick reality check. If the snare feels late, or you hear flamming, or the groove feels like it’s leaning weird… stop. Don’t process. Fix warp first. Transient shaping on a badly warped break just makes the wrongness more obvious.

Here’s a fast tightening method.
Find the first strong downbeat. Right-click and choose Set 1.1.1 Here.
Then right-click again and choose Warp From Here, Straight.

Now scan through. In DnB, a quick anchor is making sure the main snare lands consistently on beats 2 and 4. Nudge warp markers until that feels locked. You’re not trying to sterilize the loop—you’re trying to make it sit confidently at 174.

Cool. Step two: clip gain staging.
Before adding devices, aim for peaks around minus six to minus three dB on your track meter. If it’s slamming near zero, everything you add later will overreact: transient tools will get aggressive, saturators will splatter, compressors will clamp down too early.

Use clip gain in Clip View, or drop a Utility at the front and trim it. This is one of those boring steps that makes everything sound more “pro” instantly.

Now we’re building the transient control chain on the BREAK track. Stock devices, in a reliable order.

First, EQ Eight.
Put a high-pass filter on it. Somewhere around 80 to 120 Hz as a starting point, with a 24 dB per octave slope. The exact number depends on the break, but the philosophy is simple: your sub and kick need that low space. Most breaks do not need to own 40 to 100 Hz in modern DnB.

If the break sounds papery or harsh, try a gentle dip around 3 to 6 kHz, maybe two to four dB, with a medium Q. If the hats are piercing, a small dip around 9 to 12 kHz can calm things down.

Second, Drum Buss.
This is your main “from scratch” transient control lever.

Start with Drive around 5 to 15 percent. Crunch at zero to 15 percent if you want a little edge. Boom is usually off for breaks in DnB, because we’re not trying to add low-end thump from the loop. Damp around 10 to 30 percent is great for taming harsh top.

Now the big one: the Transient knob.
If you go positive, the attack jumps forward. Snare crack gets more present, hats tick harder.
If you go negative, it smooths the front edge and glues the loop a bit.

As a beginner, don’t go crazy. Think plus 10 to plus 30 for hype, or minus 10 to minus 30 to soften. And listen carefully for this: if you push transient too far positive, hats start turning into clicks and the snare can get brittle fast.

Third, Saturator.
Set it to Analog Clip. Drive around 2 to 6 dB. Turn on Soft Clip. Then gain match. That last part matters a lot.

Here’s the teacher trick: louder almost always sounds better, so if you don’t match level, you’ll convince yourself you improved it when you really just boosted it. After Saturator, pull down the output so the level feels about the same as before.

The goal here is gentle clipping: rounding peaks, adding density, increasing perceived loudness without destroying the groove.

Fourth, Glue Compressor. Optional, but extremely common in DnB.
Set attack to 3 milliseconds so some transient gets through. Release on Auto, or try 0.1 to 0.3 seconds. Ratio 2 to 1. Then lower the threshold until you see about 1 to 3 dB of gain reduction.

If the break loses snap, slow the attack to 10 ms. If it’s too pokey and spitty, speed the attack up to 1 ms. Keep makeup gain off and match volume manually.

At this point, you should already have a break that’s tighter, more controlled, and easier to place next to a kick and snare.

Now we add the secret sauce: parallel compression on a return. This gives you body without killing your original transients.

Go to the return track called PARA COMP.
Add a Glue Compressor and go heavy. Ratio 4 to 1 or even 10 to 1. Attack 0.3 to 1 ms. Release around 0.1 seconds or Auto. Now push the threshold until it’s smashing. Ten dB or more of gain reduction is totally fine here, because this is the parallel channel, not the main.

After that compressor, add EQ Eight. High-pass around 120 Hz to keep the low-end clean. If the parallel sounds fizzy, do a small high cut or a little dip where it hurts.

Now on your BREAK track, bring up the send to PARA COMP. Start low, around minus 18 dB, and raise it until the break feels thicker and louder, but not obviously crushed.

What you’re listening for is this: the original break still has its snap and detail, but there’s a controlled, compressed “body” underneath that makes it roll on smaller speakers and feel more consistent in the mix.

Next: optional CRUNCH return for jungle grit.
On the CRUNCH return, add Saturator, Analog Clip, drive it harder, like 6 to 12 dB, with Soft Clip on.
Then add Redux, very lightly. Downsample to something like 22 to 30 kHz, and keep bit reduction subtle, like zero to two. This is texture, not destruction.
Then EQ Eight: high-pass around 200 Hz, and if you want extra bite, a small presence bump around 3 to 5 kHz.

Now send your break into CRUNCH gently. Minus 24 to minus 18 dB is a good start. You want it to feel like the break got rougher and more “ravey,” but the main groove should still be readable and punchy.

Now we turn Session View into your performance tool: scenes and clip variations.

Duplicate your break clip so you’ve got four versions of the same loop in different clip slots. Same audio, different settings, different vibe.

Scene one: Clean Roll. Your main chain, minimal sends.
Scene two: Tighter. Make Drum Buss transient slightly negative, like minus 10. Maybe a touch more Glue compression on the main chain. The goal is controlled, clean, almost more modern.
Scene three: Hyped Drop. Drum Buss transient up, like plus 20. Bring up the parallel send. This is your “lift the room” scene.
Scene four: Rinse or Jungle. Bring up the Crunch send. And if you want a quick artifact moment, you can experiment with switching warp mode to Texture briefly, but be careful: artifacts are seasoning, not the whole meal.

A really usable arrangement plan is: intro on Tighter, drop on Hyped, a mid-phrase switch to Rinse, and then back to Clean.

Now, an extra pro move: don’t ignore Session View clip tools. They’re basically pre-processing, and they can save you from over-compressing.

If the loudest snare peaks are making your compressor overreact, go into Clip Envelopes and draw tiny gain dips just on those peaks. Now your compressor behaves better without you flattening the whole loop.

You can also create variation without slicing by changing the clip start offset. Make a second clip that starts a little later in the loop. Same break, different accent feel. That’s instant movement.

And here’s something that’s easy to forget: check your transient decisions in context early.
Keep a simple kick and sub playing. A break can sound amazing solo and totally wrong once the kick enters.
Ask two questions:
Does the break attack compete with the kick transient?
And is the break body masking the main snare fundamental?

Now let’s make it fast to control: build a macro rack.
Select EQ Eight, Drum Buss, Saturator, and Glue Compressor, and group them into an Audio Effect Rack.

Map macros like this:
Macro 1: Drum Buss Transient.
Macro 2: Saturator Drive.
Macro 3: Glue Threshold.
Macro 4: optional EQ presence dip frequency, if you want quick harshness control.
Macro 5: send level to PARA COMP.
Macro 6: send level to CRUNCH.

And set sensible ranges so you can’t wreck it mid-performance. For example, transient from minus 15 to plus 25. Saturator drive from zero to plus 6 dB. Parallel send from off up to around minus 10 dB, depending on how loud your return is.

Now you can literally perform break character. Clean, tight, hyped, gritty, all from a few knobs and scenes.

Quick common mistakes to avoid while you’re working:
If warping is wrong, everything else fails. Fix timing first.
Don’t boost transient into the +40 zone unless you actively want clicky, brittle fatigue.
Don’t let parallel compression get louder than your dry break; it’ll turn into a flat roar.
And always gain match when you A/B. If it only sounds good when it’s louder, it’s not actually better yet.

Let’s wrap with a mini practice routine you can do in 10 to 15 minutes.
Load an Amen or Think break and warp it tight at 174.
Build the chain: EQ Eight, Drum Buss, Saturator, Glue.
Create the PARA COMP return and blend it.
Make three scenes: Clean with transient at zero, Punchy with transient around plus 20 and more parallel, and Controlled with transient around minus 10 and slightly less top end.
Then record a 32-bar performance into Arrangement: 8 bars clean intro, 16 bars punchy drop, 8 bars controlled breakdown.

When you listen back, the goal is simple: do the transients stay exciting without stepping on your kick and snare?

And if you want to go one step further after this lesson, the next upgrade is frequency-specific transient control: splitting the break into a HI track for hats and a MID track for snare and body, so you can smooth the hats while keeping snare snap. That’s one of the fastest “wow it sits instantly” tricks once you’re ready.

You’ve now got a repeatable, stock-device workflow that works on basically any break: tight warping, clean gain staging, Drum Buss for attack shaping, Saturator for peak control and density, parallel Glue for weight, and Session View scenes and macros to perform the vibe.

If you tell me which break you’re using and whether your kick is short and punchy or long and boomy, I can suggest starting points for the high-pass frequency, the transient range, and whether a two-band split will help your specific loop.

mickeybeam

Go to drumbasscd.com for +100 drum and bass YouTube channels all in one place - tune in!

Generating PDF preview…