Main tutorial
Lesson Overview
This lesson is about making a darkside intro feel alive, unstable, and DJ-useful by using Ableton Live 12’s Groove Pool to bend a jungle / oldskool DnB edit without destroying the pulse. The goal is not to “randomize” your intro; it’s to create controlled drag, swing, and microscopic timing pressure so the loop feels like it is leaning into the drop with intent.
This technique lives right at the front of a track: the intro, the first 8, 16, or 32 bars, and the transitional edits that carry the DJ from one record into yours. In dark jungle and oldskool-influenced DnB, the intro often needs to feel haunted and unstable while still leaving room for the kick/snare hierarchy, sub entrance, and mix-out usability. Groove Pool lets you humanize or exaggerate the feel of break edits, stab hits, hats, and atmospheres in a way that supports the vibe without manually nudging every clip by hand.
Why it matters musically: dark intros often rely on tension through offset rhythm, not just sound choice. Why it matters technically: if you simply slap swing on everything, your kick/snare relationship, sub phase, and mono clarity can collapse fast. By the end, you should be able to make an intro that feels like a grimy half-broken cassette loop with modern club control — something that still locks to the grid when the drop lands.
Best suited for: jungle intros, dark rollers with broken-beat openings, oldskool-referencing edits, neuro-leaning atmospheres before the drop, and any DnB arrangement that needs a shadowy, unstable pre-drop section with DJ-friendly phrasing.
What You Will Build
You will build a dark intro edit made from a drum break, a few ghosted percussion hits, a low drone or bass texture, and a tension layer, all shaped by Groove Pool timing and velocity so the rhythm feels swung, decayed, and slightly wrong in a musical way.
Sonic character: smoky, tense, slightly degraded, with break edits that feel pushed and pulled rather than quantized flat. The groove should suggest old tape, chopped amen culture, or a damp warehouse system warming up.
Rhythmic feel: a lopsided pocket with clear backbeat identity. The snare still reads as the anchor, but ghost notes and hats breathe around it. The intro should have motion without sounding sloppy.
Role in the track: it sets mood, implies the drop’s aggression, and gives the DJ a usable phrase to mix from. It should create anticipation rather than full disclosure.
Mix-ready target: polished enough that the intro can sit before a drop without needing rescue EQ. The sub should stay controlled, the break should not smear the kick/snare center, and any stereo atmosphere should collapse safely in mono.
Success sounds like this: the loop feels dark, intentional, and slightly haunted; the swing adds menace rather than bounce; and when the drums and bass arrive, the listener feels the drop “arrive” instead of just “start.”
Step-by-Step Walkthrough
1. Build a minimal intro canvas before touching Groove Pool
Start with a short section, ideally 8 or 16 bars, and place only the core elements you want the listener to feel: a chopped break, one anchor snare or clap if needed, a low drone or reese texture, and one atmospheric one-shot or stab. Keep the arrangement thin on purpose. Groove works best when you can hear exactly what it is doing.
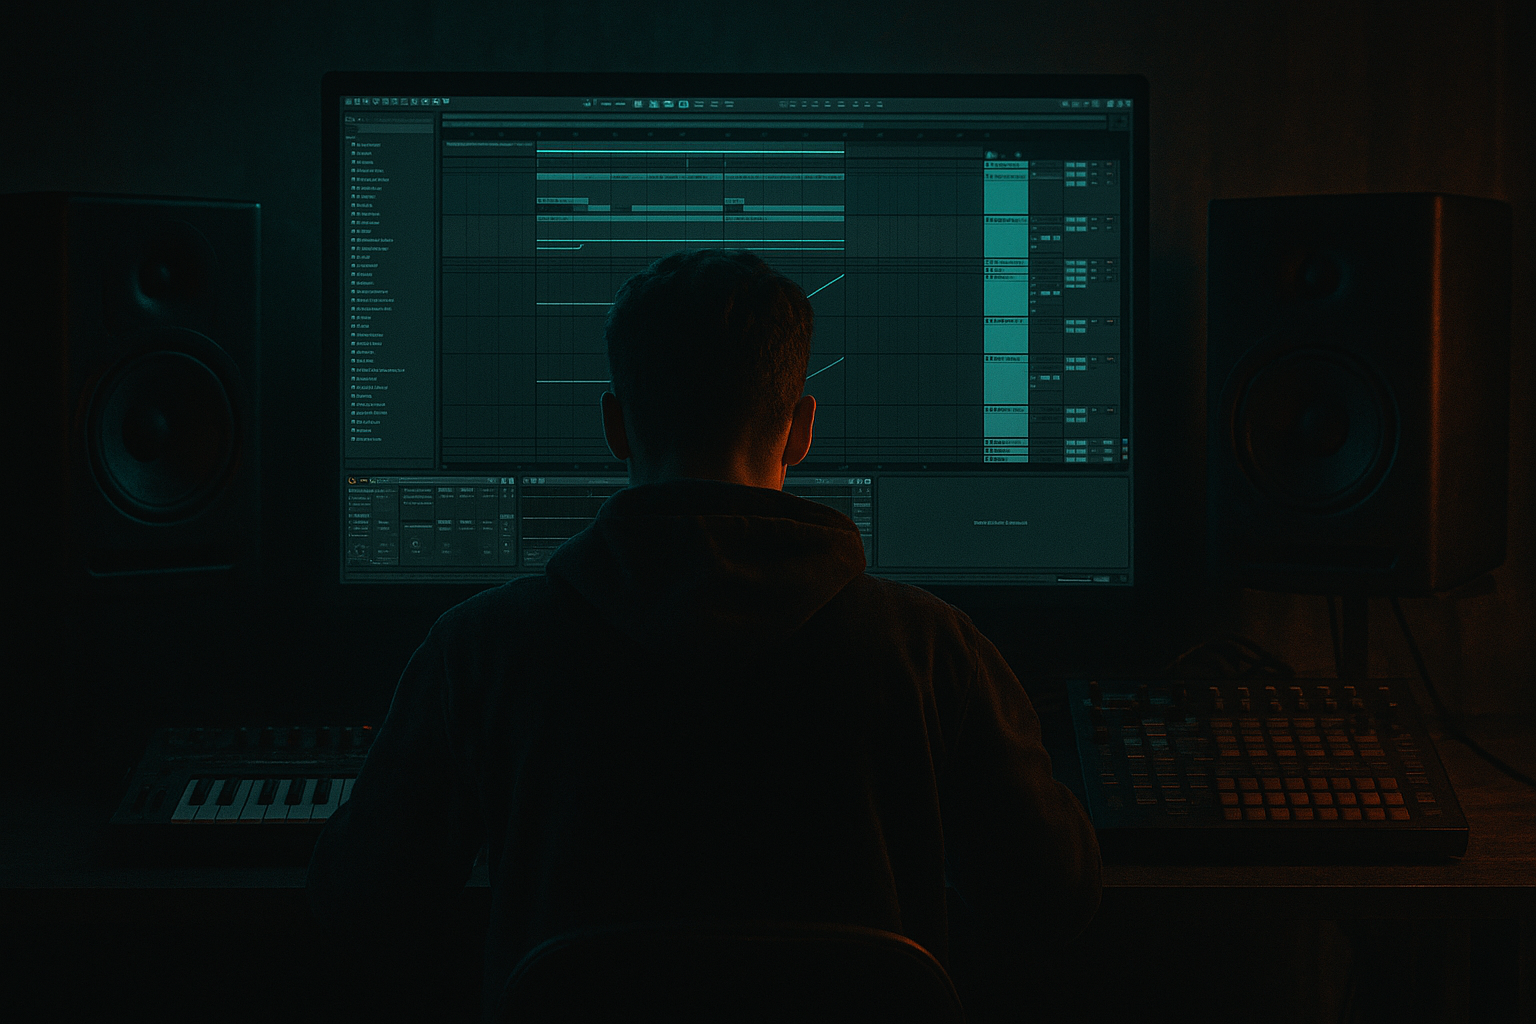
In Ableton Live 12, put your break on one audio track, any supporting hats or percussion on another, and your bass/drone on a separate track. If the break is already looped, trim it tightly so the start point is clean. If needed, use Warp to keep the source stable, but do not over-edit the timing yet.
Why this matters: Groove Pool is easiest to judge when the loop has a simple role structure. In dark DnB intros, the break usually carries the movement, while the bass drone supplies pressure. If you start with too many layers, you will not know whether the groove is enhancing the feel or just making the whole intro muddy.
What to listen for: the break should already imply the pulse before groove is added. If the raw loop feels dead, no swing will fix the arrangement. You need a clear snare identity and some rhythmic material worth pushing around.
2. Choose your groove source: authentic swing or deliberate drag
Open Groove Pool and decide whether your starting point should feel like:
- A: a classic break-driven swing that references jungle / oldskool momentum
- B: a more dragged, ominous pocket that feels heavy and unstable
- Choose A if you want a more dancefloor-recognizable jungle energy, with the intro hinting at breakbeat tradition.
- Choose B if you want a colder, more oppressive tension bed where the groove feels like the track is limping toward the drop.
- Timing Amount: 30–50% for break slices
- Velocity Amount: 15–35% if the break has useful ghost-note contrast
- Base resolution: 1/16 for hats and micro-edits, 1/8 for larger chopped sections
- Anchor layer: snare, main kick, or a key low hit that defines the downbeat
- Motion layer: hats, break ghosts, rim clicks, reversed textures, and transitional fills
- Drum Buss for subtle drive and transient shaping
- EQ Eight to trim low mud around 150–300 Hz if the break is fighting the bass
- Glue Compressor very lightly if the edit needs to sit together, but keep the attack slower so the snare still punches
- Auto Filter to automate low-pass opening over 8 or 16 bars
- Saturator with modest Drive, roughly 2–6 dB, to help it read on smaller systems
- Utility to narrow the low end or collapse the layer to mono below the sub region if needed
- The snare should still land like a statement, not a suggestion.
- The ghost notes should create tension before and after the snare, not clutter the same transient zone.
- Bars 1–8: filtered break ghosts, distant drone, minimal snare hints
- Bars 9–16: full break pocket with stronger groove, more hat detail
- Bars 17–24: add one tension stab or reversed fill
- Bars 25–32: strip the sub again or pause a layer before the drop
- Does the bass entry feel like a natural escalation?
- Does the kick/snare in the intro leave enough space for the sub to appear cleanly?
- In mono, does the break still feel centered, or does it collapse into mush?
- Keep more groove in the hats and ghost notes
- Let the break breathe with stronger timing variation
- Use a slightly more active hat pattern and occasional fill rolls
- Best for jungle-leaning intros that nod to classic break energy
- Reduce groove on the main break
- Keep anchor hits tight and forceful
- Use groove only on small transitional hits or atmospheres
- Best for darker rollers or neuro-drenched intros where the menace comes from restraint
- chop the audio for a fill before the drop
- reverse the last hit or two for tension
- mute a ghost note for a cleaner phrase ending
- tighten a specific transient if the groove made it land awkwardly
- Use EQ Eight to cut unnecessary low rumble on non-bass layers below roughly 120–180 Hz
- Keep any wide reverb or delay returns high-passed so they do not smear the groove
- Use Saturator lightly on the break or atmosphere if the intro disappears on smaller speakers
- If a layer feels over-wide, narrow it with Utility so the groove stays centered and punchy
- Use groove to imply damage, not chaos. A dark intro often feels heavier when the rhythm is slightly delayed or uneven in a controlled way. That tiny drag can make the whole record feel more dangerous.
- Keep the sub line more rigid than the break. This contrast is powerful in DnB: the drums wobble emotionally while the low end remains physically reliable.
- Resample a groove-heavy break phrase once it feels right, then chop the audio for your transitions. Printing the feel lets you build fills, reverse hits, and pre-drop pauses with more confidence.
- If the intro needs menace, favor timing displacement over more distortion. Distortion is easy to overdo; a slightly off-center rhythm can feel more sinister and leaves more headroom.
- Let the groove evolve across the intro. For example, keep the first 8 bars more restrained, then increase the movement in bars 9–16 so the listener feels the record warming up.
- When using a reese or drone under a grooved intro, keep the stereo spread in the mids and highs, but protect the low band. A wide low-mid layer can smear the pocket fast.
- A strong dark intro often has one “wrong” hit on purpose — a slightly late stab, a clipped fill, or a ghost note that lands behind the pocket. Use that once, not everywhere.
- If the break loses punch after groove application, reduce the groove amount before reaching for more compression. Groove should shape time; compression should support impact.
- Use only stock Ableton devices.
- Use one break, one bass/drone layer, and one atmospheric layer.
- Apply groove to no more than two clips.
- Keep the sub or low bass mostly straight.
- Make at least one automation move with Auto Filter or volume.
- An 8-bar loop with a clearly audible swing or drag in the break
- A filtered tension layer that opens over the phrase
- A final bar that hints at the drop with a fill, reverse, or mute
- Can you still clap the snare pulse easily?
- Does the groove feel intentional rather than sloppy?
- Does the loop stay clear in mono?
- Does the intro feel like it leads somewhere, or is it just cycling?
- Use Groove Pool to shape tension and personality in dark DnB intros, not to randomize the beat.
- Keep the snare and low end more stable than the ghost notes and hats.
- Use groove on motion layers first; treat anchor hits with restraint.
- Pair timing groove with filtering, automation, and arrangement phrasing so the intro evolves across 8 or 16 bars.
- Check the result in context with the bass and in mono before you commit.
- Once the feel is right, print it and edit the audio like a real record.
For A, use a groove with a more obvious rhythmic lilt — something that nudges offbeats and ghost notes forward in a way that feels like chopped break culture. For B, use a subtler groove with less forward bounce and more behind-the-beat pressure. In either case, don’t apply the groove blindly to everything.
A good starting move is to apply the groove to your break track only, then adjust Timing Amount roughly in the 20–60% zone depending on how strong the source groove is. Keep Velocity Amount lower at first, around 10–30%, so you do not flatten the drum hierarchy too early. If the groove has Random or similar feel, keep it conservative for this style; darkside intros usually benefit more from intentional swing than from loose unpredictability.
Why this works in DnB: jungle and oldskool edits are built on implied human push-pull. The groove makes the intro feel “played,” which helps the listener accept the later drop as a force entering a living rhythm rather than a sterile loop.
Decision point:
3. Extract or shape a groove from your own break for a more authentic pocket
If your source groove feels too generic, take a break that already has character and make it the timing reference. In Live, you can use a captured groove from a clip or derive feel from a real break performance, then use that groove on your edited elements. This is especially effective if your intro uses chopped amen, think-style, or other classic break material.
Keep the break edits fairly short at first: 1/16 and 1/8 slices are enough to create motion. Use warp markers only where the source needs cleanup, not as a creative crutch. If a hit is late or early in a musical way, preserve it. The goal is to retain the personality of the original break while controlling how much of that personality reaches the grid.
Useful starting points:
What to listen for: the snare should stay authoritative, while ghost hits and hat chatter sit slightly behind or ahead in a way that creates forward motion. If the groove makes the snare feel late enough to weaken the downbeat, you have gone too far.
4. Separate the intro into “anchor” and “motion” layers before applying groove
Do not treat every element the same. Split your intro into:
Apply a stronger groove to the motion layer and a milder groove to the anchor layer. This is the difference between a controlled dark intro and a wobbly mess. For example, leave the anchor at around 10–20% Timing Amount, but give the motion layer 35–60% if the source groove supports it.
A simple stock-device chain for the break track:
A second chain for an atmosphere or drone:
Why this matters: in DnB, the groove is not just a feel choice, it is a hierarchy choice. The anchor gives the DJ something to trust. The motion layer gives the intro character without stealing the frame.
5. Use clip-level groove timing to make the break breathe around the snare
Once the groove is assigned, start editing clip timing with intent. In a dark intro, the most useful move is often leaving the main snare almost fixed while allowing adjacent hats, ghost hits, and little percussion stabs to shift into the groove. This creates a pocket where the listener feels the rhythm breathe around the backbeat.
If your break has a strong snare on 2 and 4, keep that snare from drifting too much. Push the surrounding hits more aggressively. If needed, duplicate the break and use one version for the main backbeat and another for the chopped embellishments. That way the groove can be more expressive on the second layer without compromising the core.
Listen for two things:
If the groove is making the intro feel too “jazzy” or too loose for darkside, reduce Timing Amount on the master groove source and re-evaluate. In this context, a little instability is powerful; too much becomes genre drift.
6. Make the intro darker by pairing Groove Pool with filtering and decay control
Now use Groove Pool in combination with automation to create a living intro. For the first 8 bars, keep a low-pass filter fairly closed on the atmospheric layer, then open it gradually as the groove becomes more exposed. A useful move is to automate Auto Filter from roughly 150–300 Hz up toward 2–5 kHz across the intro, depending on how murky you want the reveal.
For the break, you can subtly shorten decay or tighten the tail of certain hits using clip envelopes or simpler processing so the groove feels more percussive. If the break tail is washing over the snare, the groove loses definition. A touch of Drum Buss or Gate-style shaping on the break can help, but be careful not to make the loop too hard-edged.
This is a strong oldskool DnB trick: keep the intro low and moody, but let the timing movement become clearer over time. The groove feels like it is emerging from fog.
Arrangement example:
This creates a clean DJ-friendly phrase without making the intro static.
7. Check the groove in context with drums and bass before you commit it
Stop here if the intro already feels good in isolation but not with the rest of the track. Bring in the sub or main bass and see whether the groove supports or fights it. This is the real test.
In many dark DnB tracks, the bass wants to sit straighter than the intro break. If your intro groove is too elastic, it can blur the transition into a more rigid drop. On the other hand, if the intro is too rigid, the drop may feel abrupt and lifeless. You want contrast, but the phrase should still feel like the same record.
What to listen for:
Use Utility on stereo layers and keep low-end-bearing elements narrow or mono-compatible. If your intro drone is wide, high-pass it first so the stereo content is not dragging the low end around. This is crucial when the DJ is blending records and the intro is running through a club system.
8. Make one deliberate A/B choice: swingy menace or dead-eyed pressure
At this point, choose one of two valid directions and commit the intro toward it:
A: Swingy menace
B: Dead-eyed pressure
This decision affects the entire emotional meaning of the intro. The first option feels haunted and alive. The second feels colder and more controlled. Both can be valid, but mixing them without intent often creates a confused pre-drop.
If you are unsure, choose the version that leaves more room for the drop to feel bigger. In DnB, a good intro is often less about complexity and more about how well it frames the impact.
9. Commit the groove to audio once the feel is right
When the groove and automation are doing what you want, commit the main break edit to audio. This is where you lock in the feel and protect the arrangement from accidental drift. In a real session, this is a workflow win: once the groove is musically correct, printing it lets you edit fills, reverse tails, and transitions more decisively.
After printing, you can:
This is also a good moment to version the project. Save the groove-heavy intro as a separate pass so you can compare it against a straighter version later. Sometimes the best dark intro is the one that feels 10% less clever but 20% more direct.
10. Polish the intro so it survives club playback and DJ mixing
Finish by checking the intro against a loud master reference in the same project. The groove should still read when the low end is compressed by club playback, not just on headphones.
A few practical polish moves:
The intro should sound like a dark, confident invitation, not an unfinished loop. If the groove is strong, the listener should feel tension without hearing the mechanics. That’s the sweet spot.
Common Mistakes
1. Applying the same groove to every track
Why it hurts: it flattens the hierarchy and makes the whole intro feel elastic in the wrong places.
Fix: apply stronger groove only to motion layers, and keep the snare / anchor layer closer to the grid.
2. Swinging the sub or low bass too much
Why it hurts: low-end timing drift makes the drop feel vague and can blur phase with the kick.
Fix: leave sub parts mostly straight; use groove on the drum edits and upper textures instead.
3. Letting the groove move the snare too far
Why it hurts: the backbeat stops reading as a reference point.
Fix: reduce Timing Amount on the snare-bearing clip, or split the break so the snare sits on a steadier layer.
4. Using heavy velocity changes on already busy break slices
Why it hurts: the groove can make the break feel chaotic instead of intentional.
Fix: keep Velocity Amount modest, around 10–30%, and use it mainly to enhance ghost-note contrast.
5. Ignoring mono compatibility on wide intro textures
Why it hurts: dark intros often rely on atmosphere, but if the width collapses, the groove can disappear too.
Fix: keep low frequencies mono, high-pass wide layers, and check the intro with Utility in mono.
6. Over-processing before the groove is set
Why it hurts: compression and saturation can mask whether the rhythm actually works.
Fix: get the groove feeling right first, then add Drum Buss, Saturator, EQ, and light compression.
7. Making the intro too busy for the DJ
Why it hurts: if the intro has too many rhythmic ideas, it becomes hard to mix and weakens phrase clarity.
Fix: simplify to one main break idea plus one tension layer, then evolve with automation over 8 or 16 bars.
Pro Tips for Darker / Heavier DnB
Mini Practice Exercise
Goal: create an 8-bar dark intro edit that feels like jungle-oldskool tension, using Groove Pool to make the break and atmospheres move without breaking the backbeat.
Time box: 15 minutes.
Constraints:
Deliverable:
Quick self-check:

