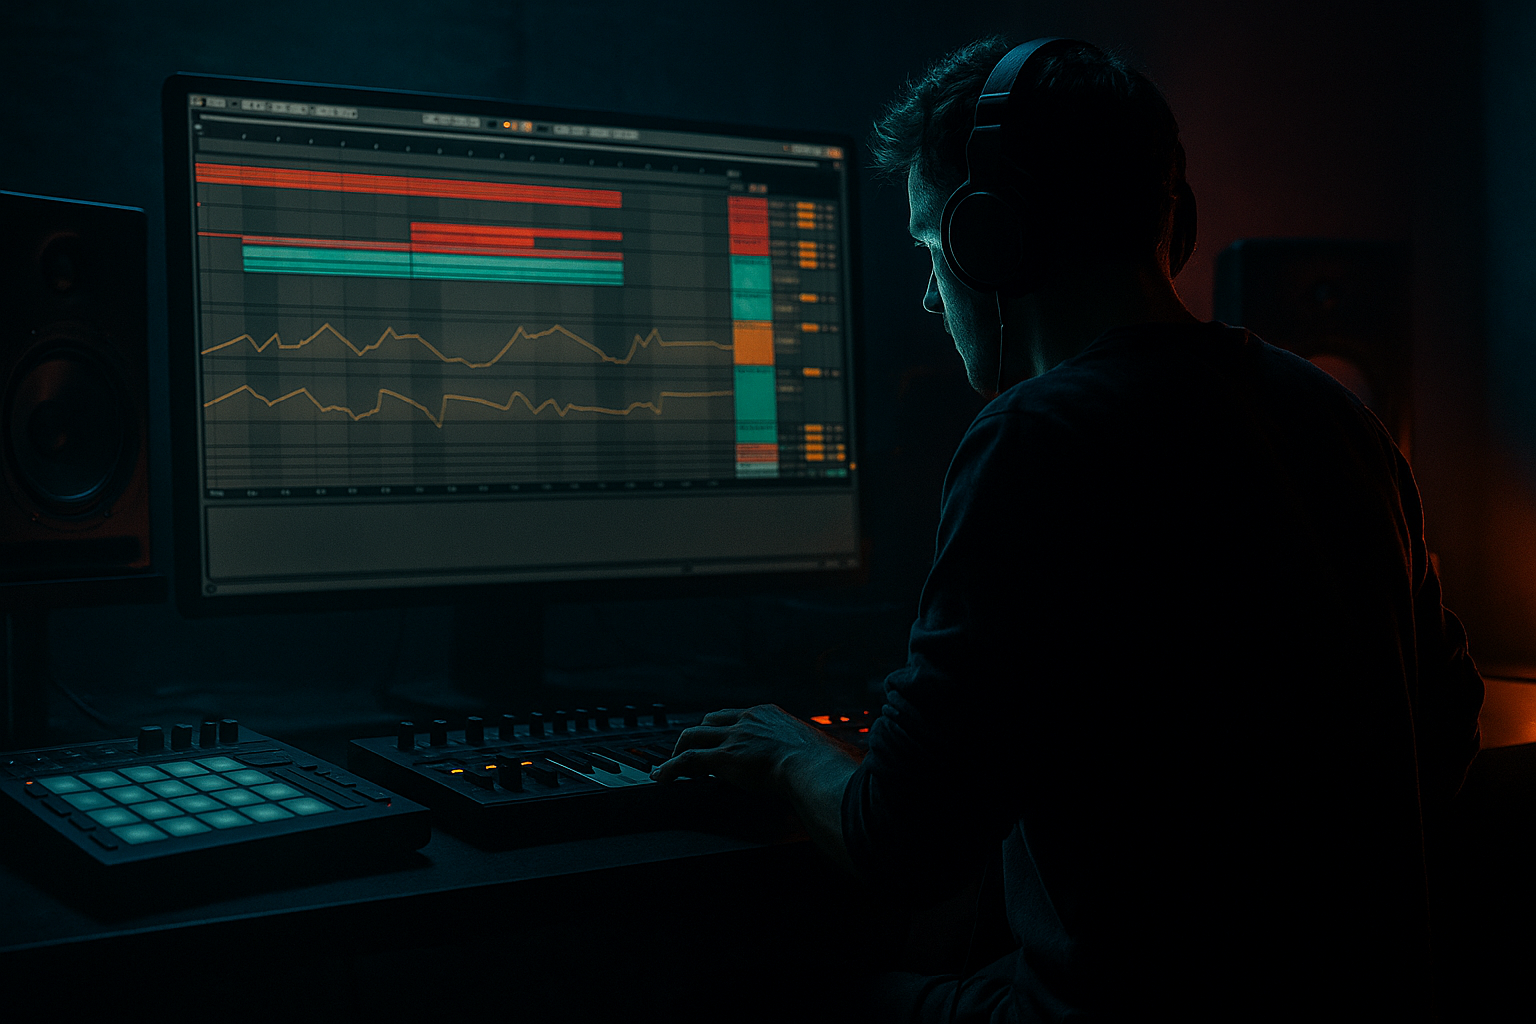
DNB COLLEGE

Drum & Bass Ableton Live 12 Tutorials

LESSON DETAIL

Dub chamber sends from scratch for smoky late-night moods (Beginner)

An AI-generated beginner Ableton lesson focused on Dub chamber sends from scratch for smoky late-night moods in the FX area of drum and bass production.

Back to lessons
Dub chamber sends from scratch for smoky late-night moods (Beginner) cover image

Narrated lesson audio

The voice track includes the tutorial plus extra teacher commentary.

Open audio file

Main tutorial

Dub Chamber Sends From Scratch (Smoky Late‑Night Moods) — Ableton Live (DnB FX) 🌒🎛️

1) Lesson overview

A “dub chamber” send is a dedicated return track that makes your drums, bass stabs, and snippets feel like they’re echoing through a dark room—tight enough for rolling drum & bass, but spacious and moody like classic dub techniques. In DnB, the trick is controlled space: the groove stays punchy while the ambience blooms in the gaps.

In this lesson you’ll build a single Return track that gives you:

  • Dubby delay throws (tempo-synced, filtered, slightly dirty)
  • A compact “chamber” reverb tail (short, smoky, not washy)
  • Movement + width without losing mono focus in the low end
  • All using Ableton stock devices.

    ---

    2) What you will build

    One Return track called “Dub Chamber” with this chain:

    1. EQ Eight (pre-filter so only mids/highs hit the space)

    2. Echo (tempo delay with dub filtering + subtle wobble)

    3. Reverb (short chamber vibe, dark and dense)

    4. Saturator (warmth + glue)

    5. Compressor (sidechained from the kick/snare to keep space tucked)

    6. Utility (low-end mono + final gain trim)

    You’ll then send drums, percussion, and occasional bass shots into it, and automate sends for classic dub “throws”.

    ---

    3) Step-by-step walkthrough

    Step 0 — Set the context (quick DnB starting point) 🥁

  • Tempo: 170–176 BPM
  • Have at least:
  • - Kick track

    - Snare track (or a full drum bus)

    - Hats/perc track

    - Optional: Vocal chop / stab / FX hit

    - Optional: Reese / bass (we’ll be careful with this)

    ---

    Step 1 — Create your Return track

    1. In Ableton, right‑click in the Return area → Insert Return Track

    2. Name it: Return A – Dub Chamber

    3. Important: On return tracks, time-based devices should usually be 100% wet (because the dry signal stays on the original track).

    ---

    Step 2 — Pre-filter with EQ Eight (keep the groove clean)

    Add EQ Eight first on the Return.

    Suggested settings:

  • High-pass filter (HP):
  • - Frequency: 200–350 Hz (start at 250 Hz)

    - Slope: 24 or 48 dB/oct

  • Optional gentle dip to reduce harshness:
  • - Bell at 3–5 kHz, -2 to -4 dB, Q ~ 1.5

  • Optional low-pass to darken:
  • - LP around 9–12 kHz, gentle slope

    Why: Your kick/bass energy shouldn’t be swimming in the chamber. This keeps the send “smoky” not “muddy”.

    ---

    Step 3 — Build the dub delay with Echo ⏱️

    Add Echo after EQ Eight.

    Core settings (great starting point for rolling DnB):

  • Sync: On
  • Time:
  • - Left: 1/8

    - Right: 1/8 dotted (or 3/16) for groove and stereo interplay

  • Feedback: 25–45% (start 35%)
  • Dry/Wet: 100% (since it’s a Return)
  • Filter:
  • - HP: 250–500 Hz

    - LP: 4–8 kHz (start 6 kHz)

  • Modulation: subtle movement
  • - Amount: 5–12%

    - Rate: 0.10–0.30 Hz (slow wobble)

  • Stereo:
  • - Width ~ 120–160% (don’t go too wide if your mix gets phasey)

    Optional “dub dirt” inside Echo:

  • Turn on Noise very low (if available in your Echo mode) or use external saturation later.
  • Goal: You want repeats that feel tucked back and dark, not bright EDM ping-pong.

    ---

    Step 4 — Add a tight, dark chamber with Reverb 🏚️

    Add Reverb after Echo.

    Suggested settings:

  • Quality: High (if CPU allows)
  • Size: 20–35% (small chamber vibe)
  • Decay Time: 0.8–1.6 s (start 1.2 s)
  • Pre-delay: 8–20 ms (start 12 ms)
  • Helps keep the initial drum transient clear.

  • Diffusion: 70–90% (dense tail)
  • Low Cut: 250–450 Hz
  • High Cut: 5–8 kHz (start 6.5 kHz)
  • Dry/Wet: 100% (Return track)
  • DnB note: For “late-night” mood, darker is better. If you hear hissy highs, lower the High Cut.

    ---

    Step 5 — Glue + grit with Saturator 🔥

    Add Saturator after Reverb.

    Settings:

  • Drive: 2–6 dB (start 3 dB)
  • Soft Clip: On
  • Output: reduce to match level (keep return from getting louder than your dry drums)
  • Why: Saturation thickens the tail and makes the space feel “smoked”, not sterile.

    ---

    Step 6 — Sidechain the return so it breathes (key DnB trick) 🎚️

    Add Compressor after Saturator.

    1. Turn Sidechain On

    2. Audio From: your Kick (or a Drum Bus if that’s your groove anchor)

    3. Settings:

    - Ratio: 3:1 to 6:1 (start 4:1)

    - Attack: 1–5 ms (fast)

    - Release: 80–200 ms (time it to your groove; start 120 ms)

    - Lower Threshold until the reverb/delay ducks 2–6 dB on hits

    Result: Your chamber swells in the spaces between hits—perfect for rolling drums.

    ---

    Step 7 — Mono-protect the low end + final trim with Utility

    Add Utility last.

  • Bass Mono: On
  • Bass Mono Freq: 120–180 Hz (start 150 Hz)
  • Optional: reduce overall width if needed:
  • - Width: 90–110%

  • Gain: adjust so the return isn’t dominating
  • ---

    Step 8 — Sending signals (what to feed the chamber)

    Now use the Send A knob on tracks.

    Great starting send amounts (ballpark):

  • Snare: -15 to -8 dB (more send = more atmosphere)
  • Clap layer (if any): slightly less than snare
  • Closed hats: tiny (-25 to -18 dB)
  • Open hats/rides: small to medium (-22 to -14 dB)
  • Perc fills / ghost hits: medium (-18 to -10 dB)
  • Vocal chops / stabs: medium to high (-14 to -6 dB) for dub throws
  • Bass: usually very little or none
  • If you do, only send midrange bass shots (see Pro Tips).

    Workflow tip: Start with snare + a couple perc elements. Get the vibe, then add tiny amounts from other tracks.

    ---

    Step 9 — Classic “dub throws” with automation ✍️

    This is where the mood becomes musical.

    Method A: Automate the Send knob

    1. In Arrangement View, press A (Automation Mode)

    2. Choose the track → automate Send A

    3. Do short ramps (a “throw”) at the end of a phrase:

    - Example: last snare before a fill → send jumps up for 1 hit, then back down

    Throw ideas (DnB-friendly):

  • Every 8 bars: throw a snare into the chamber
  • Before a drop: throw a vocal chop, then cut it suddenly on the downbeat
  • During breakdown: slowly increase sends on hats/perc for rising haze
  • Method B: Clip Automation (Session View)

    Great for jamming jungle patterns:

  • Put your drum loop in a clip → automate Send A inside the clip for periodic throws.
  • ---

    Step 10 — Arrangement ideas for smoky late-night DnB 🌫️

    Try these patterns:

  • Verses (rolling sections): low sends, tight groove
  • Pre-drop / build: increase sends on percussion + vocal bits
  • Drop: reduce sends again, but use occasional snare throws for space
  • Post-drop turnaround: one big throw on the last hit of the 16-bar phrase
  • A common pro move: space is a reward—use it to mark transitions.

    ---

    4) Common mistakes

    1. Too much low end in the return → mud and weak kick/bass

    Fix: raise EQ Eight HP to 300–450 Hz.

    2. Return not 100% wet → phasey/washed sound

    Fix: set Echo/Reverb Dry/Wet to 100%.

    3. Feedback too high → endless clutter in fast DnB

    Fix: keep Echo feedback under ~45%, and automate throws instead.

    4. No sidechain ducking → groove loses punch

    Fix: sidechain the return from the kick or drum bus.

    5. Over-wide FX → mono collapse / weirdness

    Fix: Utility width closer to 100%, and mono the low end.

    ---

    5) Pro tips for darker/heavier DnB 🖤

  • Make the chamber darker than you think:
  • High cut around 5–7 kHz is often the sweet spot for late-night.

  • “Send only the bite” of bass:
  • Duplicate your bass track → high-pass it at 200–400 Hz → send that to the Dub Chamber. Keeps subs clean while the midrange growls echo.

  • Add a “tape-ish” wobble subtly:
  • In Echo, keep modulation low (5–10%). You want mood, not seasickness.

  • Gate the reverb tail for tight drums:
  • Add Gate after Reverb (before Saturator) with gentle settings to shorten tails between hits.

  • Resample FX throws:
  • Record the return into audio (Resampling) and place it as one-shots before drops. Very jungle/DnB-friendly for ear candy.

    ---

    6) Mini practice exercise (10–15 minutes) 🎯

    1. Build the Dub Chamber return exactly as above.

    2. Use a basic 2-step DnB pattern (kick on 1, snare on 2 & 4 feel).

    3. Set sends:

    - Snare: medium

    - Hats: tiny

    - One vocal chop: high

    4. Automate:

    - A snare throw every 8 bars

    - One big vocal throw 1 bar before the drop

    5. Bounce/export a 16-bar loop and listen on low volume:

    - Do you still feel punch?

    - Does the space fill gaps rather than smear hits?

    If it smears: increase sidechain ducking or shorten Reverb decay.

    ---

    7) Recap ✅

  • You built a DnB-ready dub chamber send using EQ Eight → Echo → Reverb → Saturator → Sidechain Compressor → Utility.
  • You kept it smoky by filtering lows/highs, using short chamber decay, and adding subtle saturation.
  • You made it musical with send automation (“throws”) and kept the groove tight with sidechain ducking.

If you tell me your subgenre (rollers, jungle, neuro, minimal) and what elements you want to feel “dubby” (snare, vocals, stabs, pads), I can suggest a few tailored settings and throw patterns for your vibe.

Ask GPT about this lesson

Chat with the lesson tutor, get follow-up help, or use quick actions.

Bigup 👽 Ask me anything about this lesson and I’ll answer in context.

Narration script

Show spoken script
Title: Dub chamber sends from scratch for smoky late-night moods (Beginner)

Alright, let’s build a dub chamber send from scratch in Ableton Live, using only stock devices, and make it fit drum and bass properly. The goal is that smoky late-night mood where the space feels deep and alive, but the groove stays punchy and fast.

Quick concept first: a dub chamber send is a return track that you feed with little bits of your drums, stabs, and chops. Instead of putting reverb and delay on every channel, you build one “room” and throw sounds into it on purpose. In drum and bass, the secret is controlled space. The ambience should bloom in the gaps, not smear the transients.

By the end, you’ll have one return track called “Dub Chamber” with this chain:
EQ Eight into Echo into Reverb into Saturator into a sidechained Compressor into Utility.
Then we’ll set up sensible send levels, and I’ll show you how to do those classic dub “throws” with automation.

Step zero: set the context.
If you’re not already in the zone, set your tempo somewhere around 170 to 176 BPM. Make sure you’ve got at least a kick, a snare, and some hats or percussion. Optional but fun: a vocal chop, a stab, or an FX hit. And if you’ve got a reese or bass, we can use it carefully, but we’re not about to drown the sub in reverb. That’s how mixes fall apart.

Now Step one: create the return.
Go to Ableton’s Return track area, right-click, and choose Insert Return Track. Name it “Return A – Dub Chamber.”

Important beginner rule that saves you from weird phasey mush: on return tracks, time-based effects like delay and reverb should usually be 100% wet. Your dry sound is already on the source channel. The return is only the space.

Before we build anything, quick routing coach note.
Make sure the return’s Audio To is going to the Master, not “Sends Only,” unless you’re intentionally doing a print-style workflow. And for your source tracks, your sends are usually post-fader. Post-fader means if you turn the track down, the send follows it. Pre-fader is a special trick for when you want the dry sound to disappear but the dub tail keeps ringing out. Both are useful, but start post-fader so your mix behaves.

Step two: pre-filter with EQ Eight.
Drop EQ Eight first on the return. This is the mud prevention device. We want the chamber to feel smoky, not boomy.

Turn on a high-pass filter. Start around 250 Hz. Use a steep slope, like 24 or even 48 dB per octave. You can move this higher later if the groove starts to feel cloudy, like 300 to 450 Hz.

Optional: if your snare or hats get pokey once you add space, do a gentle bell dip around 3 to 5 kHz, just a couple dB, medium Q. And if you want it darker overall, add a low-pass around 9 to 12 kHz. For late-night vibes, darker usually wins.

Step three: build the dub delay with Echo.
Add Echo after EQ Eight. Turn Sync on.

Set left time to one eighth note. Set right time to one eighth dotted, or 3/16. That offset gives you a rolling stereo interplay that feels rhythmic without going full “big EDM ping-pong.”

Set Feedback to about 35% to start. In drum and bass, feedback can get out of control fast, so try to keep it under about 45% unless it’s a special moment.

Dry/Wet goes to 100% because it’s a return.

Now the key part: filtering inside Echo.
Set the high-pass somewhere between 250 and 500 Hz. Set the low-pass around 6 kHz to start, somewhere in the 4 to 8 kHz range depending on how dark you want it. You’re aiming for repeats that feel tucked back and smoky, not bright and shiny.

Add subtle modulation for a tape-ish wobble. Keep it gentle. Amount maybe 5 to 12%, rate around 0.1 to 0.3 Hz. Slow drift, not seasickness.

And stereo width: you can try 120 to 160%, but if your mix starts feeling phasey or hollow, pull it back. We’ll also do a mono check later.

Step four: add a tight, dark chamber reverb.
Drop Ableton Reverb after Echo. Set Quality to High if your CPU can handle it.

For that compact “room in the dark” vibe, set Size around 20 to 35%. Decay time around 0.8 to 1.6 seconds; start at 1.2.

Set pre-delay to around 12 milliseconds. This is a huge trick: it keeps your drum transient upfront, and the room arrives just behind it, like depth instead of blur.

Diffusion: go dense, like 70 to 90%.

And then filter the reverb.
Low Cut around 250 to 450 Hz. High Cut around 5 to 8 kHz; start at 6.5. If you hear hissy, fizzy air, pull that high cut down. Late-night DnB usually likes the top rolled off.

Dry/Wet to 100%.

Teacher note here: if your snare starts losing bite, don’t instantly turn the send down. First try a touch more pre-delay or a slightly shorter decay. That often fixes the “snare got pushed back” problem while keeping the atmosphere.

Step five: glue and grit with Saturator.
Add Saturator after Reverb. Set Drive around 3 dB to start, anywhere from 2 to 6 depending on how thick you want it. Turn Soft Clip on.

Then match the output so the return doesn’t just get louder. Saturation is not “make it louder,” it’s “make it denser.” This is how you turn clean digital space into something that feels smoked-out and warm.

Optional extra texture idea, if you want dusty “age” without obvious distortion: later you can add Redux very gently after Saturator with a tiny bit of bit reduction and low dry/wet. But for now, keep it simple.

Step six: sidechain the return so it breathes.
Add Compressor after Saturator. Turn Sidechain on. Set Audio From to your Kick, or your Drum Bus if that’s your main groove anchor.

Start with ratio around 4:1. Attack fast, 1 to 5 milliseconds. Release around 120 milliseconds to start. Then lower the threshold until you’re ducking the return maybe 2 to 6 dB when the kick hits.

This is one of the biggest “DnB makes sense” moments: the space gets out of the way on impact, then swells back in the gaps. That’s the roll.

And here’s the coaching part: the release time is the feel.
Too short and the chamber chatters nervously. Too long and the groove loses energy because the return never really comes back in time.
A practical dial-in: get consistent gain reduction happening, then adjust release so the tail swells back just before the next snare lands.

Advanced option you can try later: two-stage ducking.
One compressor keyed to the kick for gentle control, then a second compressor keyed to the snare to make the chamber bloom after snares. That’s super intentional and very “engineered,” but not required today.

Step seven: Utility for mono protection and trim.
Put Utility last.

Turn on Bass Mono. Set it around 150 Hz, anywhere from 120 to 180 depending on your track. This is your “don’t ruin the low end” button, especially if your delay and reverb have stereo movement.

If the return feels too wide or weird, pull Utility width closer to 100%, maybe even 90%. Then adjust gain so the return sits right.

Quick gain staging check: a good target is the return peaking about 10 to 15 dB lower than your dry drum bus most of the time. Quick test: mute and unmute the return. If the groove changes more than it sweetens, it’s probably too loud.

Now Step eight: sending signals into the chamber.
Go to your tracks and use Send A.

Start simple. Feed the chamber from the snare first, and maybe one or two percussion elements. Get the vibe, then sprinkle in tiny amounts elsewhere.

Ballpark starting points:
Snare: medium, around minus 15 to minus 8 dB.
Closed hats: tiny, minus 25 to minus 18.
Open hats or rides: small to medium, minus 22 to minus 14.
Perc fills or ghost hits: medium, minus 18 to minus 10.
Vocal chops or stabs: medium to high, minus 14 to minus 6 for proper dub throws.

Bass: usually very little or none.
If you want dubby bass echoes, do this safer trick: duplicate your bass, high-pass that duplicate around 200 to 400 Hz so it’s only midrange bite, and send that to the chamber. Your sub stays clean, your mid growl gets the atmosphere.

Step nine: classic dub throws with automation.
This is where it becomes musical, not just “effects on.”

Method A: arrangement automation.
Go to Arrangement View and press A for automation mode. On a track, automate Send A.

Think of throws as quick spikes: one hit or one word gets sent hard into the chamber, then you pull it right back down. Try a throw on the last snare before a fill. Or throw a vocal chop one bar before the drop, then cut it dead on the downbeat for drama.

A simple DnB-friendly plan:
Every 8 bars, do one snare throw.
Before the drop, do one bigger vocal throw.
In a breakdown, slowly raise sends on hats and perc to build haze, then bring it back down on the drop so the drums hit clean again.

Method B: clip automation in Session View.
If you like jamming patterns, automate Send A inside a clip so it throws periodically. Then record your performance into Arrangement.

Arrangement coaching idea: space is a reward.
Keep verses and rolling sections tight with lower sends. Let the chamber show up more in builds, turnarounds, and phrase endings. That’s how you keep the mood without washing out the drums.

Now quick common mistakes, because these happen to everyone.
If it sounds muddy, your return has too much low end. Raise the EQ Eight high-pass toward 300 or even 450.
If it sounds phasey or weirdly washed, your Echo or Reverb probably isn’t 100% wet on the return.
If the delay clutters the fast tempo, feedback is too high. Keep it under about 45%, and use automation throws instead of constant repeats.
If the groove loses punch, you need sidechain ducking on the return, or a better release time.
If mono sounds hollow, reduce stereo width in Echo, or narrow the return with Utility.

Do a fast mono compatibility check right now: put a Utility on your Master, hit Mono for a moment, and listen. If the chamber disappears or turns hollow, don’t panic. Just reduce width a bit until it holds up.

Mini practice exercise, about 10 to 15 minutes.
Build the Dub Chamber return exactly like we did.
Make a basic two-step DnB pattern.
Set sends: snare medium, hats tiny, one vocal chop high.
Automate a snare throw every 8 bars.
Automate one big vocal throw one bar before the drop.

Then bounce a 16-bar loop and listen quietly. Low volume is honest. Ask yourself: do I still feel punch? And does the space fill gaps instead of smearing hits?
If it smears, increase ducking or shorten reverb decay.

Before we wrap, a couple fun upgrade ideas you can try once the basic version works.
If you want a tighter roller vibe, try a “Dub Chamber Lite”: make Echo more rhythmic, like 1/16 plus 1/8, lower the feedback, shorten the reverb decay.
If you want subtle movement, add Auto Filter before Echo, low-pass mode, slow LFO, tiny amount. That makes the chamber “breathe” tonally over time.
If you want print-style control, set the return to Sends Only and record it onto an audio track like an effect stem, then chop and place the best tails as ear candy before fills or drops.

Recap.
You built a DnB-ready dub chamber send using EQ Eight, Echo, Reverb, Saturator, a sidechained Compressor, and Utility.
You kept it smoky by filtering lows and highs, using a short dark chamber, and adding subtle saturation.
And you made it musical with send automation throws, while keeping the groove tight with sidechain ducking.

If you tell me your subgenre—rollers, jungle, neuro, minimal—and which elements you want to feel dubby—snare, vocals, stabs, pads—I can suggest a tight set of throw patterns and a version of this return tuned for your exact vibe.

mickeybeam

Go to drumbasscd.com for +100 drum and bass YouTube channels all in one place - tune in!

Generating PDF preview…