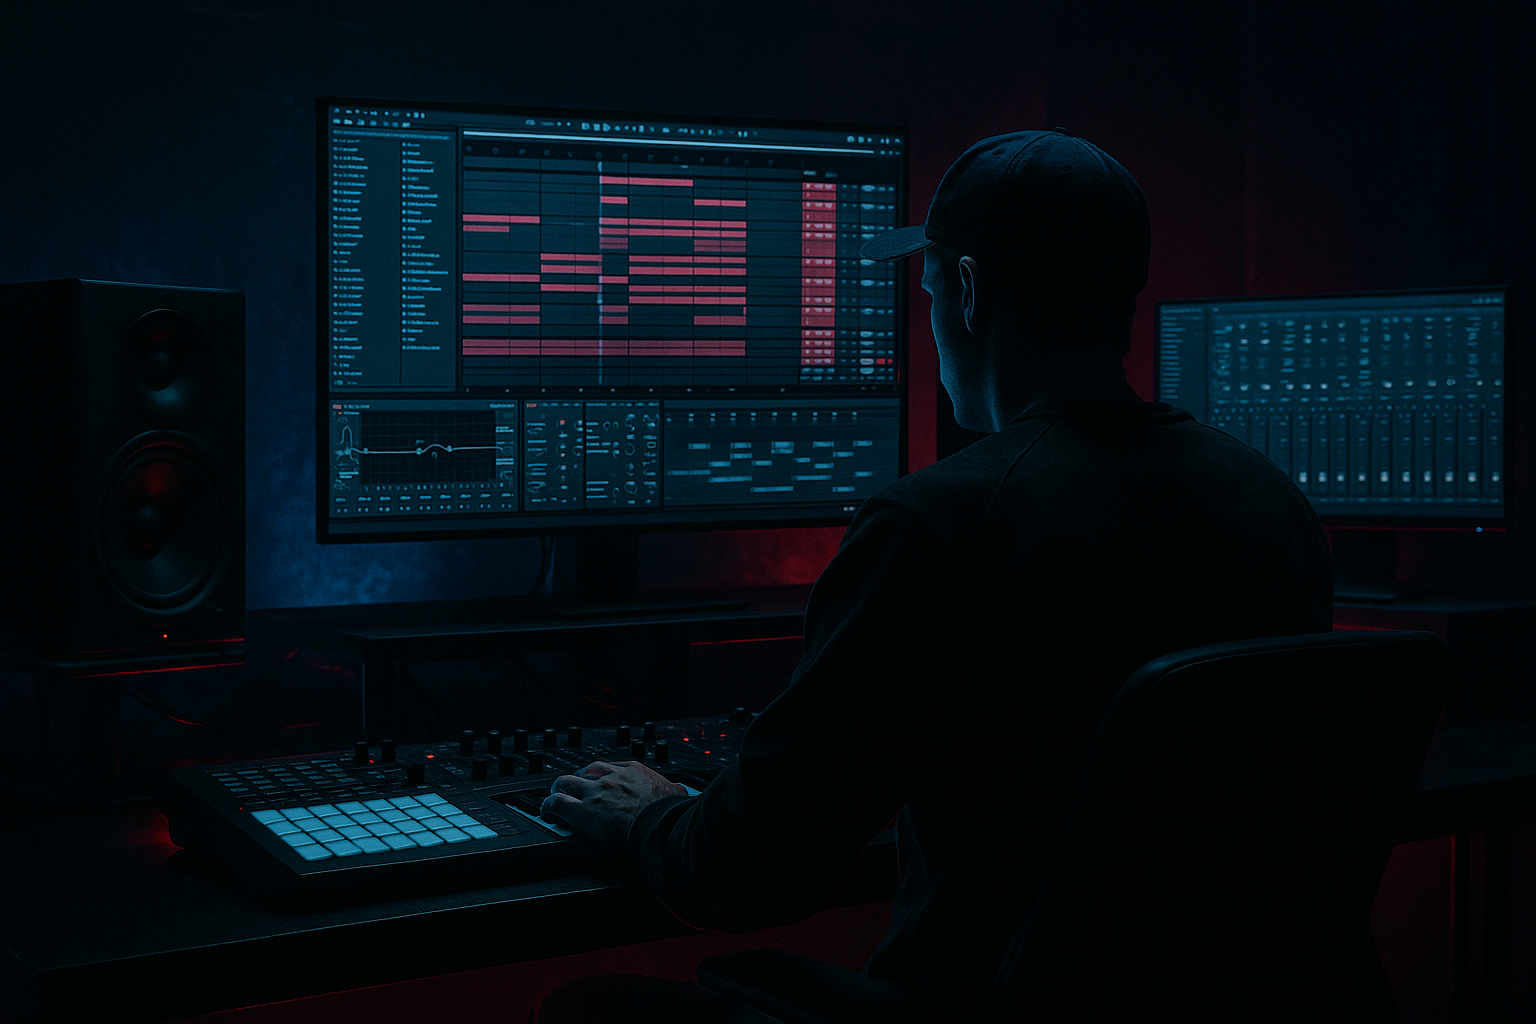
DNB COLLEGE

Drum & Bass Ableton Live 12 Tutorials

LESSON DETAIL

Dub stab send rides by phrase (Intermediate)

An AI-generated intermediate Ableton lesson focused on Dub stab send rides by phrase in the Automation area of drum and bass production.

Back to lessons
Dub stab send rides by phrase (Intermediate) cover image

Narrated lesson audio

The voice track includes the tutorial plus extra teacher commentary.

Open audio file

Main tutorial

```markdown

Dub Stab Send Rides by Phrase (DnB Automation in Ableton Live) 🎛️⚡

1) Lesson overview

In rolling drum & bass, dub stabs are often simple sounds that feel alive because they move through space. One of the cleanest pro moves is riding your dub stab into delays/reverbs by phrase, not just leaving FX on constantly.

In this lesson you’ll build a practical Ableton Live workflow using Return tracks + automation to make your dub stabs “bloom” at the end of 4/8/16-bar phrases—classic jungle/dubwise energy without washing out the groove.

---

2) What you will build

You’ll create:

  • A Dub Stab track (any chord stab sample or synth stab)
  • Two FX Returns:
  • - Return A: Dub Delay (tempo-synced, filtered, dubby)

    - Return B: Dub Verb (short/plate-ish, filtered, controlled)

  • Phrase-based Send automation rides (A/B) that:
  • - keep stabs tight in the main groove

    - push them wider/longer at phrase ends (fills, transitions, drops)

  • Optional: a “Dub Freeze” moment using Capture/Freeze-style moves (Delay feedback automation)
  • ---

    3) Step-by-step walkthrough

    Step 0 — Set your DnB context (so the automation makes sense)

  • Tempo: 172–176 BPM
  • Arrangement grid idea: 16-bar sections (Intro → Drop → 2nd phrase → Variation)
  • Put your drums and bass in first (even rough), because send rides should serve the groove.
  • ---

    Step 1 — Build/choose a dub stab that suits DnB

    Option A: Audio sample stab (fastest)

    1. Create Audio Track → drop in a dub chord stab sample.

    2. Warp mode: Beats (Preserve: Transients) for tight timing.

    3. Add Simpler (optional if you want MIDI control): right-click sample → Slice to New MIDI Track or drag into Simpler.

    Option B: Synth stab (clean + controllable)

    1. Create MIDI Track → load Wavetable (stock).

    2. Start with a simple patch:

    - Osc 1: Saw, 2–4 voices, slight detune

    - Filter: LP24, cutoff around 300–1.5kHz depending on tone

    - Amp Env: Short decay (150–400ms), low sustain

    3. Add Chord (MIDI effect) to get instant dub voicing:

    - Try +7 semitones and +10 semitones (minor 7-ish color)

    4. Add Saturator (stock) lightly:

    - Drive: 2–6 dB, Soft Clip ON

    DnB feel tip: Place stabs on offbeats or syncopated gaps around the snare:

  • Example pattern (1 bar): hits on 1.2, 1.3.3, 1.4.2 (adjust to taste)
  • ---

    Step 2 — Create Return A: “Dub Delay” (tempo-synced space)

    1. Create Return Track A

    2. Add devices (in this order):

    - Echo

    - Sync: ON

    - Time: try 1/8 dotted or 1/4 (classic dub bounce)

    - Feedback: 25–45% (start safe)

    - Character: Noise OFF, Wobble 5–15% for movement

    - Filter: HP around 250–500 Hz, LP around 4–7 kHz

    - Dry/Wet 100% (because it’s a return)

    - Auto Filter

    - Mode: Band-Pass or Low-Pass

    - Map cutoff later if you want evolving tails

    - Compressor (optional but useful)

    - Just catch peaks from feedback: Ratio 2:1, fast attack, medium release

    Goal: A delay return that is mid-focused and doesn’t fight the bass or hats.

    ---

    Step 3 — Create Return B: “Dub Verb” (controlled wash)

    1. Create Return Track B

    2. Add devices:

    - Hybrid Reverb (or Reverb if you prefer)

    - Algorithmic side: Plate or Room

    - Decay: 1.2–2.8s (DnB usually wants shorter than dub techno)

    - Pre-delay: 10–30 ms (keeps stab punch)

    - Dry/Wet 100%

    - EQ Eight

    - HP filter: 200–400 Hz (steeper if needed)

    - Optional dip around 300–600 Hz if it’s boxy

    - Gentle LP around 8–12 kHz to keep it dark

    - Saturator (optional)

    - Drive 1–3 dB to thicken the verb tail

    Goal: Width and tail, but not a constant fog.

    ---

    Step 4 — Route your dub stab into the returns (and keep it clean)

    On your Dub Stab track:

  • Send A (delay): start at -inf (off)
  • Send B (reverb): start at -inf (off)
  • Keep the track mostly dry by default.
  • Optional but highly recommended:

  • Put an EQ Eight on the Dub Stab track itself:
  • - HP around 150–300 Hz to leave room for rolling bass

  • Put Utility at the end:
  • - If it’s too wide and fights the mix, reduce Width to 80–120% depending on source.

    ---

    Step 5 — Automate send rides “by phrase” (the main technique) 🧠

    This is where it becomes musical.

    #### A) Decide your phrase structure

    Common DnB phrasing:

  • 4 bars: micro-change (little ear candy)
  • 8 bars: noticeable movement
  • 16 bars: major change/fill/transition
  • #### B) Write basic automation lanes

    1. Go to Arrangement View

    2. Hit A (Automation Mode)

    3. On the Dub Stab track, choose:

    - Sends Only → Send A (Echo return)

    - Draw automation so it rises at the end of every 4 or 8 bars

    4. Do the same for Send B (Reverb return), but usually less often.

    Practical automation shapes (use these as templates):

  • End-of-4-bar push (subtle):
  • - Send A: from -inf → -18 dB over the last 1/2 bar

    - Snap back to -inf right after the phrase resets

  • End-of-8-bar lift (classic):
  • - Send A: -inf → -12 dB over 1 bar

    - Send B: -inf → -20 dB over 1 bar (just a hint of wash)

  • End-of-16-bar transition (bigger):
  • - Send A: ramp up to -8 to -6 dB

    - Send B: ramp up to -14 to -10 dB

    - (Optional) do this on the last stab hit only by drawing a quick spike

    Why this works in DnB: You keep the rolling momentum clean, then let the space “answer” the stab at phrase ends—like a call-and-response with the room.

    ---

    Step 6 — Make the delay dub (feedback rides + filtering)

    If you want that proper dub engineer vibe, automate inside the return too.

    On Return A (Echo) automate:

  • Feedback
  • - Normal: 25–35%

    - Phrase end: push to 45–60% for 1 beat or 1/2 bar

    - Drop back quickly to avoid runaway chaos

  • Filter cutoff
  • - Close it down during heavy sections (darker)

    - Open slightly on transitions to lift energy

    Safety tip: If you push feedback, add a Limiter at the end of Return A:

  • Ceiling: -0.5 dB
  • This prevents sudden feedback spikes from clipping your master.
  • ---

    Step 7 — Glue it into the drums: sidechain the returns (DnB clarity hack) 🥁

    To keep your snare and hats clean:

    1. On Return A add Compressor

    - Sidechain: From your Drum Bus or Snare track

    - Ratio: 3:1

    - Attack: 1–5 ms

    - Release: 80–200 ms

    - Aim for 2–5 dB gain reduction when snare hits

    2. Do the same on Return B (reverb), usually lighter.

    This gives you massive atmosphere while the break/2-step stays punchy.

    ---

    Step 8 — Arrangement ideas (very DnB / jungle rooted)

    Try these placements:

  • Bars 1–8 (Drop start): minimal sends, dry stabs → tight and heavy
  • Bars 9–16: start small Send A rises every 4 bars
  • Bar 16 (turnaround): big Send A + small Send B lift
  • Second 16: introduce a new stab rhythm OR same rhythm but different send curve
  • Pre-breakdown: exaggerate sends, then hard cut them for impact on next drop
  • ---

    4) Common mistakes

  • Leaving sends up constantly → your groove gets washed and “far away.”
  • Too much low end in the returns → mud fights the sub and kick. High-pass your returns.
  • Over-automating both delay + reverb at once → loses definition. Pick a “lead FX” per phrase.
  • Runaway delay feedback → sudden screech/clipping. Use a Limiter and keep feedback rides short.
  • Automation not snapping back → tails spill into the next phrase and blur the drop.
  • ---

    5) Pro tips for darker/heavier DnB 🖤

  • Make the returns darker than you think:
  • - Low-pass the delay/reverb to 5–9 kHz so cymbals stay crisp in the dry mix.

  • Saturate the FX, not the dry stab (or both subtly):
  • - Saturator on returns adds density without making the dry hit harsh.

  • Add subtle pitch drift for dread:
  • - In Echo, add a touch of Wobble or use Chorus-Ensemble very lightly on the return.

  • Use mid/side control:
  • - Add Utility on returns: set Width 120–160% while keeping dry stab more mono.

  • “One-hit send spike” for impact:
  • - Instead of ramping a whole bar, spike Send A on just the last 1/16 stab before a fill—super effective in rollers.

    ---

    6) Mini practice exercise (10–15 minutes) ⏱️

    1. Load any dub stab and program a 2-bar loop with 3–5 hits.

    2. Create Return A (Echo) + Return B (Hybrid Reverb) using the settings above.

    3. Duplicate your loop to 16 bars in Arrangement.

    4. Automate:

    - Send A: small rise on bars 4, 8, 12, bigger rise on 16

    - Send B: only on 8 and 16

    5. Add sidechain compression on both returns keyed from the snare.

    6. Bounce a quick audio export and listen:

    - Does the groove stay tight?

    - Do phrase endings feel bigger without getting louder?

    ---

    7) Recap

  • You built two controlled return FX chains (dub delay + dub reverb).
  • You used send automation rides by phrase (4/8/16 bars) to create movement without clutter.
  • You kept DnB clarity by filtering returns and sidechaining FX to drums.
  • You added dub character with feedback + filter automation (carefully, with limiting).

If you want, tell me what style you’re aiming for (liquid roller, jungle, neuro-ish minimal, etc.) and I’ll suggest exact send curves and Echo timings that match the vibe.

```

Ask GPT about this lesson

Chat with the lesson tutor, get follow-up help, or use quick actions.

Bigup 👽 Ask me anything about this lesson and I’ll answer in context.

Narration script

Show spoken script
Title: Dub Stab Send Rides by Phrase (Intermediate)

Alright, let’s get into a super practical drum and bass automation move that instantly makes your track feel more pro: dub stab send rides by phrase.

In rolling DnB, a dub stab is often not that complicated. It might be a basic chord stab, maybe even a one-shot. But what makes it feel alive is that it doesn’t just sit there. It moves through space at the right moments. And the key phrase there is “at the right moments.”

Instead of leaving delay and reverb on all the time and washing out your groove, we’re going to treat FX like punctuation. Tight and dry in the main pocket… then at the end of a phrase, you throw it into space, let it bloom, and snap it back. Classic dubwise energy, jungle attitude, and it still hits hard.

By the end of this lesson, you’ll have one dub stab track, two return tracks—one for dub delay, one for dub reverb—and you’ll automate the sends so the throws happen at the ends of 4, 8, and 16 bar phrases. And if you want extra sauce, we’ll do a quick feedback ride in the delay return for that “dub engineer at the desk” moment.

First, set the context so the automation actually makes musical sense.

Put your project around 172 to 176 BPM. And I recommend you get at least rough drums and bass playing first. Even if they’re placeholders. Because send rides are not a “sound design in a vacuum” thing. They’re a mixing and arrangement move. The whole point is: the space should serve the groove, not compete with it.

Now let’s make, or choose, a dub stab.

Fast option: use an audio sample. Create an audio track, drop in a chord stab, set Warp to Beats, preserve transients, and make sure it’s snapping tight to the grid. If you want MIDI control, you can drag it into Simpler, or slice it to a new MIDI track—either works.

Clean option: make a synth stab. Create a MIDI track, load Ableton Wavetable. Start simple: a saw wave, maybe 2 to 4 voices, a little detune. Then filter it with a low-pass 24 dB filter, and set the cutoff somewhere around 300 Hz up to maybe 1.5 kHz depending on how bright you want it. Then shape the amp envelope: short decay, low sustain. You want it to hit and get out of the way, because the delay and verb are going to do the “tail” job later.

Now for instant dub harmony, add the Chord MIDI effect. A nice starting voicing is plus 7 semitones and plus 10 semitones. That gives you a minor-7-ish color that just screams dub and jungle without being too happy.

And then, lightly saturate. Ableton Saturator, drive around 2 to 6 dB, Soft Clip on. Don’t go crazy yet—we’re trying to make it speak, not shred your mix.

Rhythm tip before we move on: place your stabs in the gaps. Offbeats, syncopation, little pockets around the snare. Think of the stab as a conversation with the drums. If your snare is the statement, the stab is the response that teases the next bar.

Okay. Now we build the space using return tracks.

Create Return Track A, and this is your Dub Delay.

Put Echo on it. Turn Sync on. For timing, try 1/8 dotted if you want that classic bounce, or 1/4 if you want something more spacious and obvious. Set feedback somewhere safe to start—say 25 to 45 percent. Then add a little movement: wobble around 5 to 15 percent. You don’t need noise unless you really want texture; you can keep it off for clean control.

Now filter the delay. This is important in DnB. High-pass the delay somewhere around 250 to 500 Hz so it doesn’t smear your sub and kick pocket. And low-pass it around 4 to 7 kHz so it stays darker than your hats and cymbals. The goal is: your delay sits in the midrange and feels like depth, not like extra brightness.

And remember: on a return track, Echo should be 100% wet. Because the dry signal is already on your stab track.

After Echo, add Auto Filter. You can use band-pass for that “talking dub” vibe, or low-pass for dark control. We’ll automate this later if you want movement in the tails.

Optional but helpful: add a compressor after that, just to catch peaks if you start riding feedback later. Nothing heavy—ratio 2:1, fast attack, medium release. This is just a seatbelt.

Now create Return Track B. This is your Dub Verb.

Add Hybrid Reverb if you have it. If not, Ableton Reverb works fine. Choose a plate or a room style. Set decay around 1.2 to 2.8 seconds. In drum and bass, you usually want it shorter than dub techno because the groove is so fast. Add a little pre-delay—10 to 30 milliseconds—so your stab keeps its punch and the verb doesn’t swallow the transient.

Set the reverb to 100% wet since it’s a return.

Then EQ it. High-pass around 200 to 400 Hz. If it gets boxy, dip a bit around 300 to 600. And if it’s too shiny, low-pass gently around 8 to 12 kHz. Again, we’re building a darker space behind a bright drum kit.

Optionally, add a tiny bit of saturation after the reverb—one to three dB of drive. This thickens the tail and makes it feel more “like a layer” instead of a generic reverb.

Now route your stab into the returns.

On the dub stab track, set Send A and Send B to minus infinity to start. Off. This part matters: your default state should be dry authority. Then you choose when to throw.

Also, do a quick cleanup on the stab track itself. Put an EQ Eight on it and high-pass somewhere around 150 to 300 Hz. The exact number depends on the stab, but in DnB, you want to protect the low end for the bass and kick. And if your stab is wide and messy, put Utility at the end and narrow it a bit. Even pulling width down to 80 to 120 percent can make your center feel stronger. Here’s the mindset: stable center in the dry sound, width in the returns.

Now we’re at the main technique: automate send rides by phrase.

Go to Arrangement View. Hit A to enter automation mode.

We’re going to work with phrasing like a DnB producer: 4 bars for a micro-change, 8 bars for noticeable movement, and 16 bars for the big turnarounds.

Before you draw anything, decide what the FX is doing. Is it a question-and-answer thing, where the dry stab asks and the wet tail answers at the barline? Is it an energy lift that tells the listener “next phrase is coming”? Or is it misdirection—one huge throw to fake a fill without adding extra notes?

Now pick Send A first, because delay throws are usually the star in rollers.

On your stab track, choose the automation lane for Sends Only, Send A. Here are a few shapes you can copy.

For a subtle end-of-4-bar push: over the last half bar of bar 4, ramp Send A from off up to around minus 18 dB. Then right after the phrase resets—bar 5 beat 1—snap it back to off. That snap-back is crucial. It’s what keeps the next phrase clean.

For an end-of-8-bar lift: ramp Send A from off up to around minus 12 dB over the last bar of the 8. Then maybe add just a hint of reverb—Send B from off up to around minus 20 dB over that same last bar. The delay gives you rhythm and motion; the reverb just glues it into the room.

For the end-of-16-bar transition: this is where you go bigger. Send A can ramp to minus 8, even minus 6 dB if your return level is controlled. Send B can ramp to around minus 14 to minus 10 dB. And a really clean trick is to do it only on the last stab hit, not the entire bar. Draw a quick spike on the final 1/8 or 1/16 note so it feels like a deliberate throw, not a general wash.

Teacher tip here: calibrate your sends so the automation is easy to read. Turn the send up until it’s clearly audible in the mix, then back it off by three to six dB. Now you’ve found a useful range, like minus 24 to minus 12, where small moves actually matter. If you don’t do this, you’ll draw automation for ten minutes and wonder why nothing’s happening.

Another workflow tip: use automation islands. Highlight just the last one or two bars of each 8 or 16 bar phrase and only write automation there. Everything else stays flat and consistent. This keeps your groove stable and makes edits fast later.

Okay, now let’s make the delay return feel like dub. This is where it gets fun, but also where it can explode if you’re careless.

Go to Return A, Echo, and automate Feedback. Keep it normal around 25 to 35 percent. Then, at the phrase end, push it up briefly—45 to 60 percent—for maybe one beat or half a bar, then drop it back quickly. The length of time matters more than the exact value. Short rides feel intentional. Long rides feel like you lost control.

And while you’re there, automate filter cutoff either in Echo’s filter or your Auto Filter after it. Closing it down during heavy sections keeps things dark and tucked. Opening it slightly on transitions lifts the energy without adding new instruments.

Safety move: put a Limiter at the end of Return A. Ceiling at minus 0.5 dB. If feedback gets spicy, the limiter keeps your master from getting clipped by a surprise delay scream.

Now let’s glue the whole thing into the drums, because DnB demands clarity.

On Return A, add a Compressor and sidechain it from your Drum Bus or your Snare track. Ratio around 3:1. Attack 1 to 5 milliseconds. Release 80 to 200 milliseconds. You’re aiming for maybe two to five dB of gain reduction on snare hits. That way, the delay tail ducks out of the way when the snare smacks, then rises back up between hits. Massive atmosphere, clean punch.

Do the same on Return B, usually lighter. You want the reverb to breathe with the drums, not sit on top of them like a blanket.

Now a few advanced variations you can try once the basics are working.

First: pre-throw versus post-throw. Pre-throw means the send rises slightly before the stab hits, so the space grabs immediately. Post-throw means you let the transient stay dry and punchy, then the send rises just after, so the tail blooms behind it. In practice, this can be as tiny as a few milliseconds, or as musical as a 1/64 to 1/32 note offset. The emotional difference is real: pre-throw feels more like a splash; post-throw feels cleaner and more controlled.

Second: the throw-catcher trick. When you do a big send spike, you can dip the dry stab slightly at the same moment—like one to three dB down with Utility gain or track volume—so the throw is the star, not the dry hit stacking on top. It’s subtle, but it makes throws sound expensive.

Third: if your stabs are MIDI, you can humanize throws with velocity-to-send. Use Expression Control, map Velocity to Send A with a small range, like off up to around minus 18 dB. Now louder hits naturally throw into the delay without you drawing extra automation everywhere.

Fourth: micro-duck the return keyed by the stab itself. Sidechain the delay return compressor from the stab track, very fast attack, short release. The stab stays clean, and the tail blooms after it. This can be incredible in dense rollers where the drums are already busy.

Now arrangement ideas, because this technique really shines over 16 to 32 bars.

Try this structure. Bars 1 to 8 of the drop: minimal sends, mostly dry stabs. Establish the groove and weight. Bars 9 to 16: introduce a small Send A rise every 4 bars, so the listener starts to learn the pattern. Bar 16: big throw—Send A up, a touch of Send B, maybe a feedback bump. Second 16: either change the stab rhythm, or keep the same rhythm but change the send curve so it feels like progression. Then before a breakdown or before the next section, exaggerate sends, and then hard cut them right before the next downbeat for impact.

And remember a powerful arranging principle: subtraction makes throws feel bigger. In the last bar before a major throw, remove a tiny element—one hat layer, a small percussion tick, a ghost note. Suddenly the same amount of delay feels twice as dramatic, because the mix made room for it.

Quick list of common mistakes to avoid.

If you leave sends up constantly, your groove gets washed out and feels far away. If there’s too much low end in your returns, you’ll fight the sub and kick—high-pass those returns. If you automate delay and reverb heavily at the same time, you lose definition—pick one lead FX per phrase. If you ride feedback too long, you’ll get runaway chaos—keep it short and use a limiter. And if your automation doesn’t snap back to off, tails will spill into the next phrase and blur your drop.

Now let’s do a mini practice exercise you can finish in about 10 to 15 minutes.

Load any dub stab, program a 2-bar loop with three to five hits. Create Return A with Echo and Return B with Hybrid Reverb. Duplicate your loop out to 16 bars in Arrangement. Automate Send A with small rises on bars 4, 8, and 12, and a bigger rise on bar 16. Automate Send B only on bars 8 and 16. Add sidechain compression on both returns keyed from the snare. Then bounce a quick export and listen for two things: does the groove stay tight, and do phrase endings feel bigger without just getting louder?

If your phrase end feels louder, here’s a real gain staging fix: instead of reducing the send and losing the “throw” vibe, trim the return track output by two to six dB. That keeps the gesture but seats it in the mix.

And one last pro workflow move: when you nail a ride, print it. Create a new audio track, set input to Resampling, or record just Return A or Return B, capture 8 to 16 bars. Now you can chop tails, reverse bits, fade into transitions, and you’re not locked into a million automation lanes.

Let’s recap the core idea.

You built two controlled return FX chains: a mid-focused dub delay and a filtered, controlled dub reverb. You kept the stab mostly dry, and you automated send rides by phrase—4, 8, and 16 bars—to create movement without clutter. You kept DnB clarity by filtering low end out of returns and sidechaining the FX to your drums. And if you wanted extra dub character, you added short feedback and filter rides inside the delay return, with a limiter for safety.

If you tell me what lane you’re in—liquid roller, jungle, minimal, neuro-ish—and whether your stab is audio or synth, I can suggest a signature throw shape and an Echo timing that tends to fit that vibe.

mickeybeam

Go to drumbasscd.com for +100 drum and bass YouTube channels all in one place - tune in!

Generating PDF preview…