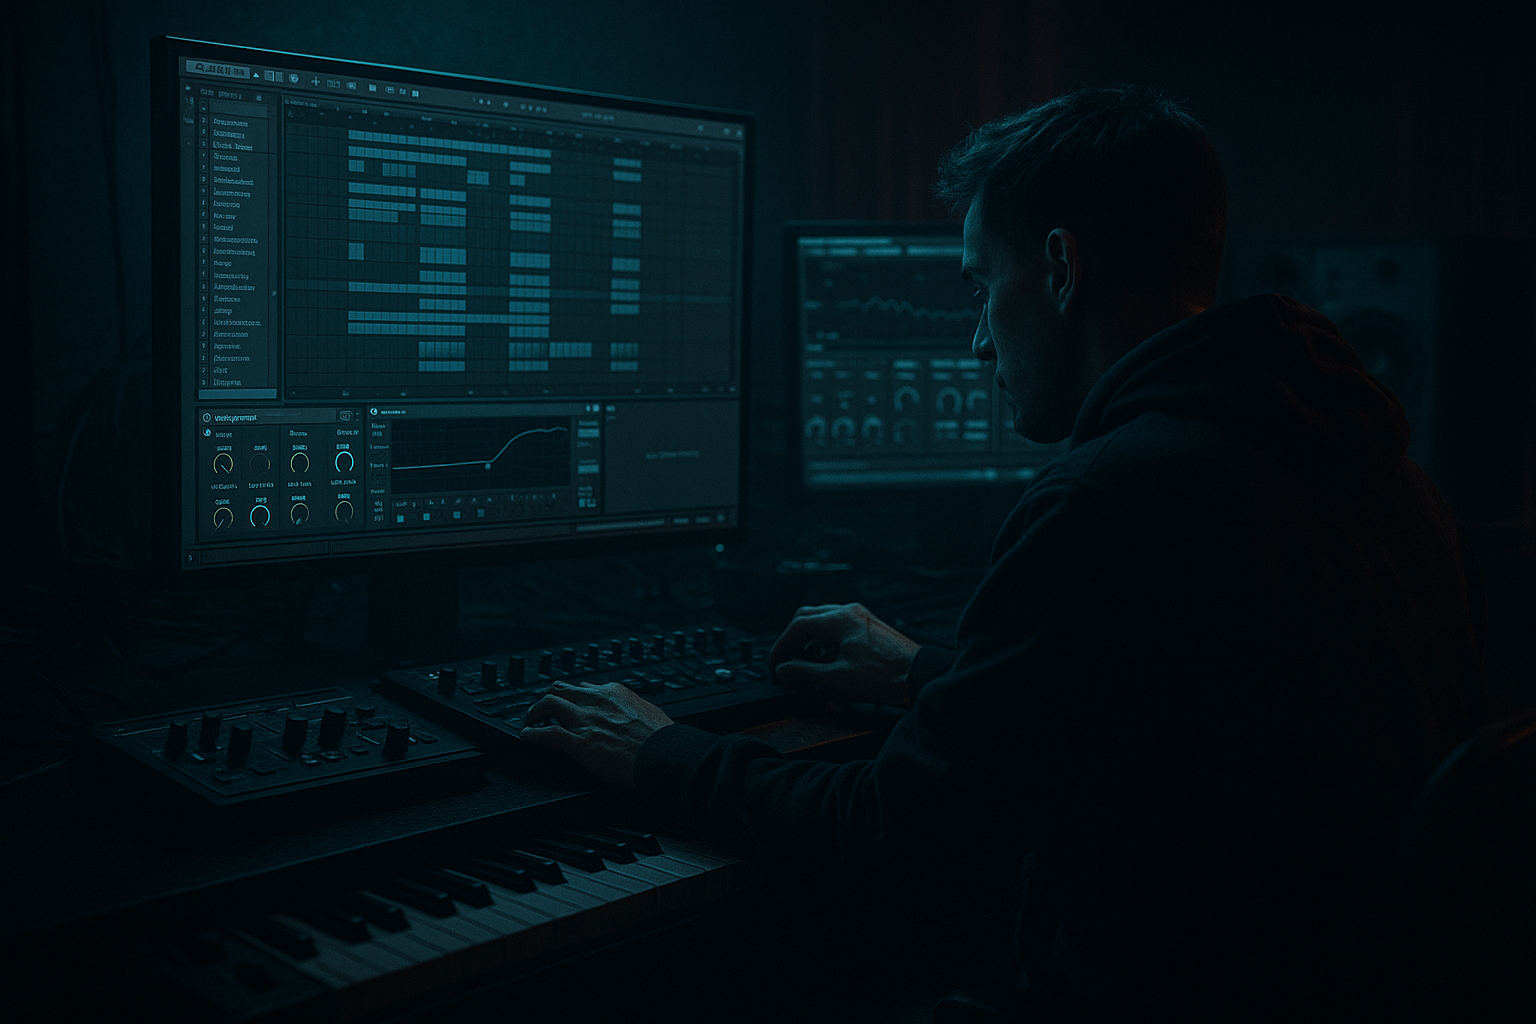
DNB COLLEGE

Drum & Bass Ableton Live 12 Tutorials

LESSON DETAIL

Fast A/B referencing with Live 12 stock packs (Intermediate)

An AI-generated intermediate Ableton lesson focused on Fast A/B referencing with Live 12 stock packs in the Mixing area of drum and bass production.

Back to lessons
Fast A/B referencing with Live 12 stock packs (Intermediate) cover image

Narrated lesson audio

The voice track includes the tutorial plus extra teacher commentary.

Open audio file

Main tutorial

```markdown

Fast A/B Referencing with Live 12 Stock Packs (DnB Mixing) 🎚️⚡

1) Lesson overview

Fast A/B referencing is the quickest way to stop “mixing in a vacuum” and get your drum & bass track hitting like real releases. In this lesson you’ll build a clean, repeatable workflow in Ableton Live 12 using only stock tools (and stock Packs where relevant) so you can:

  • Compare your mix to 1–3 reference tracks instantly (level-matched)
  • Flip between full mix and key focus bands (subs / low-mids / tops)
  • Check mono, stereo width, and dynamics without leaving creative flow
  • Avoid the classic DnB traps: over-sub, brittle tops, smeared reese low-mids, clipped drum transients
  • Skill level: Intermediate (you know routing, groups, basic EQ/comp).

    ---

    2) What you will build

    A Reference & Monitoring setup that lives in every DnB template:

  • A REFERENCE track with:
  • - Hot-swappable reference clips (drag in WAV/AIFF)

    - Level matching (so you don’t get tricked by loudness)

    - Quick band checks (sub / punch / air)

    - Mono check + optional side-only check

  • A MIX BUS chain that lets you A/B your mix against the reference without changing your export chain
  • You’ll end with a workflow where you can hit one key and go:

    Mix → Reference → Mix → Reference in seconds.

    ---

    3) Step-by-step walkthrough

    Step 0 — Pick references that actually match your subgenre 🎧

    Choose 2–3 tracks in the lane you’re producing:

  • Rolling / minimal: tight kick-bass relationship, controlled low-mids
  • Jungle: snare crack + amen tops, more dynamic breaks
  • Dark/heavy: thick 150–350 Hz, aggressive mids, controlled air
  • Tip: Use references that are close in tempo (170–176) and vibe (roller vs neuro vs jungle).

    ---

    Step 1 — Create your routing: MIX BUS vs REFERENCE

    1. Group your entire song (everything you’re mixing) into one Group:

    - Select all your musical tracks (Drums, Bass, Music, FX, Vocals)

    - `Cmd/Ctrl + G` → name it MIX BUS

    2. Create a new Audio Track and name it REFERENCE

    3. Create a new Audio Track and name it MONITOR (this will be your final listening point)

    Now route like this:

  • On MIX BUS:
  • - Audio To: `MONITOR`

  • On REFERENCE:
  • - Audio To: `MONITOR`

  • On MONITOR:
  • - Audio To: `Master` (or your audio interface output)

    Why this matters: your Master channel stays clean, and you can build monitoring tools on MONITOR without accidentally printing them into exports.

    ---

    Step 2 — Load references fast (and keep them organized)

    1. Drag your reference WAVs onto the REFERENCE track in Arrangement View

    2. Put them on separate lanes or back-to-back (8–16 bars each is enough)

    3. Set Warp properly:

    - For referencing, you often want Warp OFF (preserve original transients and low end)

    - In Clip View, disable Warp

    - If you must match tempo, use Complex Pro carefully (but expect slight low-end change)

    DnB-specific note: Warping can subtly smear breaks and sub phase—don’t warp unless you really need to.

    ---

    Step 3 — Instant A/B switching (two reliable methods)

    #### Method A: Solo-safe A/B (fastest, least mental overhead)

  • Keep MONITOR always playing.
  • A/B by soloing either MIX BUS or REFERENCE.
  • Setup:

    1. Right-click MIX BUS → enable Solo Safe?

    - (Ableton doesn’t label it exactly like some DAWs, but you can manage solo logic by:

    - keeping only one of the two tracks soloed at a time

    - or mapping solo buttons to a controller/key)

    2. Map:

    - `MIDI Map Mode` / `Key Map Mode`

    - Map Solo on MIX BUS to a key (e.g., `1`)

    - Map Solo on REFERENCE to a key (e.g., `2`)

    Now you can A/B with one finger.

    #### Method B: Utility mute A/B (cleaner if you hate solo logic)

    1. Put Utility on MIX BUS and another Utility on REFERENCE

    2. Map Mute on each Utility:

    - MIX BUS Utility Mute → key `1`

    - REFERENCE Utility Mute → key `2`

    This avoids solo interactions with other tracks.

    ---

    Step 4 — Level match the reference (do not skip this) ⚖️

    If the reference is louder, you’ll always think it “sounds better.”

    On the REFERENCE track:

    1. Add Utility

    2. Start with Gain: -6 dB

    3. Add Limiter after Utility (for safety only)

    - Ceiling: `-1.0 dB`

    - Lookahead: default is fine

    Then do a quick ear match:

  • Switch Mix/Ref rapidly while listening to snare impact and vocal/mid presence
  • Adjust Utility gain until the perceived loudness is similar
  • DnB anchor tip: Level-match using the drop, not the intro. Drops are where density lies.

    ---

    Step 5 — Build “band focus” checks (sub / punch / air)

    You want quick answers like:

  • “Is my sub as solid as the ref?”
  • “Is my 200 Hz muddy compared to the ref?”
  • “Are my tops too fizzy?”
  • On the MONITOR track, add this chain:

    1. EQ Eight (for band solo-style checks)

    - Create 3 presets (save as Audio Effect Rack if you want):

    - SUB CHECK (20–90 Hz)

    - HP at 20 Hz (24 dB/oct)

    - LP at 90 Hz (24 dB/oct)

    - PUNCH CHECK (90–250 Hz)

    - HP at 90 Hz (24 dB/oct)

    - LP at 250 Hz (24 dB/oct)

    - TOPS CHECK (4 kHz–18 kHz)

    - HP at 4 kHz (24 dB/oct)

    - Optional gentle LP at 18 kHz

    2. Audio Effect Rack to macro-switch these bands quickly:

    - Put EQ Eight in 3 parallel chains (Sub / Punch / Tops)

    - Use Chain Selector mapped to Macro 1: “Band Focus”

    - Add a 4th chain called FULL (no EQ)

    - Map chain ranges so Macro 1 steps through FULL → SUB → PUNCH → TOPS

    Now, while A/B’ing, you can also flip band focus instantly.

    ---

    Step 6 — Mono + Side checks (crucial for club translation) 🔄

    Still on MONITOR, after the band-focus rack:

    1. Add Utility

    - Map Width to a Macro:

    - 0% = Mono

    - 100% = Normal

    - 140% = “Is my stereo doing something weird?” check

    2. Optional: Side-only check (great for jungle tops and neuro atmos)

    - Create an Audio Effect Rack with two chains:

    - Mid: Utility → Width 0% (mono mid)

    - Side: use Utility with Bass Mono ON, and reduce Width?

    - Live stock doesn’t have a perfect “solo side” one-button, but you can approximate:

    - Use EQ Eight in M/S mode:

    - Set to M/S

    - Cut everything on Mid (turn Mid gain way down across bands)

    - Leave Side up (or vice versa)

    - Map a Macro to switch Mid/Side chains via Chain Selector

    DnB reality check: Sub should survive mono perfectly. If your bass disappears in mono, you’ve probably relied on stereo modulation too low.

    ---

    Step 7 — Add analyzers for quick truth (use sparingly)

    On MONITOR at the end:

  • Spectrum
  • - Block: `4096` or `8192` for low-end clarity

    - Avg: `Medium`

    - Use it to confirm what you hear, not to mix by sight

  • Tuner (optional)
  • - Useful for checking if your sub is actually hitting the intended fundamental (e.g., F, F#, G)

    DnB note: If your reference has a strong fundamental at ~43–55 Hz (F–A), compare the shape and balance, not exact peaks—different keys will differ.

    ---

    Step 8 — Arrange your referencing moments (don’t A/B randomly)

    In DnB, do checks at the same structural points:

  • 16 bars into the drop (when elements settle)
  • The fill into the second phrase (drum density + risers)
  • The break (space, reverb tails, tonal noise)
  • Workflow suggestion:

  • Put Locators named:
  • - `DROP A - BAR 1`

    - `DROP A - BAR 17`

    - `BREAK`

    - `DROP B`

  • Do 10-second A/B loops at each locator:
  • - Loop 8 bars

    - A/B every 2–4 bars while toggling Band Focus macros

    This keeps your decisions consistent.

    ---

    4) Common mistakes

    1. Not level-matching the reference

    You’ll chase loudness instead of balance and punch.

    2. Warping references carelessly

    Warped breaks can lose snap; sub can phase-shift.

    3. A/B’ing different song sections

    Comparing your intro to the reference drop is meaningless.

    4. Over-correcting after every switch

    Do 2–3 focused notes, then mix for 10–15 minutes, then re-check.

    5. Ignoring mono compatibility

    Stereo subs or wide low-mids can feel huge in headphones but collapse on systems.

    ---

    5) Pro tips for darker/heavier DnB 🖤

  • Low-mid discipline (150–400 Hz):
  • Dark rollers often feel “heavy” here, but too much turns to cardboard.

    Use A/B in PUNCH CHECK to set the weight without mud.

  • Transient control without killing snap:
  • On drums, use Drum Buss (stock) subtly:

    - Drive: `2–6`

    - Crunch: low (0–15%)

    - Boom: careful (can fight sub)

    Reference snare punch while toggling.

  • Clip the right thing, not everything:
  • If you’re using saturation, compare hi-hat fizz against the reference in TOPS CHECK.

    Stock Saturator in Soft Clip mode can add edge—A/B to avoid brittle 8–12 kHz buildup.

  • Reese translation test:
  • A/B mono during the drop. If your reese loses power, consider:

    - keep a mono layer under it (Operator/Wavetable sine/triangle)

    - push stereo movement above ~150 Hz (EQ Eight split or separate layers)

    ---

    6) Mini practice exercise (15 minutes) ⏱️

    1. Load two pro references (one clean roller, one darker/heavier)

    2. Build the routing: MIX BUS + REFERENCE → MONITOR

    3. Create a Band Focus Rack (FULL/SUB/PUNCH/TOPS)

    4. Loop 8 bars of your drop

    5. Do three passes:

    - Pass 1 (FULL): level-match and note 2 differences (e.g., “snare too loud”, “sub too soft”)

    - Pass 2 (SUB): adjust only kick/bass balance (no other changes)

    - Pass 3 (TOPS + Mono): check hats/air and mono compatibility, adjust only with EQ and Utility width

    Goal: end with 3 specific mix moves written down and applied—not a total remix.

    ---

    7) Recap

  • Route MIX BUS and REFERENCE into a dedicated MONITOR track so your master stays clean ✅
  • A/B fast using mapped Solo or Utility mute
  • Level match references with Utility (don’t trust louder) ✅
  • Add a Band Focus Rack (Sub/Punch/Tops) to make decisions quickly ✅
  • Use Mono/Width checks to ensure club-ready translation ✅
  • Compare the same section (DnB drop vs DnB drop) with short loops ✅

If you want, tell me your subgenre (roller / jungle / neuro / halftime), and I’ll suggest a specific MONITOR rack macro layout and “what to listen for” checklist tailored to it.

```

Ask GPT about this lesson

Chat with the lesson tutor, get follow-up help, or use quick actions.

Bigup 👽 Ask me anything about this lesson and I’ll answer in context.

Narration script

Show spoken script
Welcome back. In this intermediate Ableton Live 12 lesson we’re dialing in one of the highest leverage mixing habits you can build for drum and bass: fast A/B referencing.

Because in DnB, it’s ridiculously easy to mix in a vacuum. You nudge the sub up, the track feels huge for a minute… then you check it against a real release and suddenly your low end is either eating the whole mix, or your tops are turning into sandpaper, or your drums have lost that clean, clipped punch.

Today you’re going to build a simple, repeatable “Reference and Monitoring” setup using only Live 12 stock devices, and optionally stock packs for your sounds. The goal is that you can switch Mix to Reference to Mix to Reference in seconds, level-matched, and with quick band-focus and mono checks, without breaking your creative flow.

Alright, let’s build it.

First, pick references that actually match what you’re making. This matters more than people think. Choose two or three tracks that sit in the same lane: rolling or minimal, jungle, dark heavy, neuro, whatever you’re aiming at. Ideally they’re close in tempo, around 170 to 176, and close in vibe. Don’t grab a liquid roller reference if you’re making a brutal, mid-forward neuro thing. You’ll end up “fixing” the wrong problems.

And here’s a coach tip: don’t reference intros. You want the drop. The drop is where density, sub balance, snare presence, and top texture are actually revealed.

Now, inside Ableton, we’re going to separate your mix audio from your monitoring tools so you never accidentally print your checking chain into an export.

Step one: create the routing. Select all of your musical tracks. Drums, bass, music, FX, vocals, everything that’s part of your song mix. Group them with Cmd or Ctrl plus G. Name that group MIX BUS.

Then create a new audio track and name it REFERENCE.

Then create one more audio track and name it MONITOR. Think of MONITOR as your final listening checkpoint.

Now route it like this. On the MIX BUS group, set Audio To to MONITOR. On the REFERENCE track, set Audio To to MONITOR as well. And on MONITOR, set Audio To to your Master, or directly to your audio interface output depending on your setup.

The important idea is: the Master channel stays clean. MONITOR becomes the place where you put band filters, mono checks, analyzers, and anything you do not want baked into exports.

Next, load your reference audio fast, and keep it organized. Drag your reference WAVs or AIFFs onto the REFERENCE track in Arrangement View. Give yourself maybe 8 to 16 bars per reference, or go 16 to 32 if you want a bit more context.

Now check the Warp setting. For referencing, you often want Warp off. Warping can subtly smear break transients and it can mess with the phase and feel of the low end, which is basically the whole game in drum and bass. So click the clip, go to Clip View, and turn Warp off.

If you absolutely must match tempo, use Complex Pro carefully, but understand you’re trading accuracy for convenience. My preference: keep Warp off, and just reference in short loops. Your ears will learn the target balance even if the reference is a couple BPM different.

Now we need instant A/B switching. You’ve got two reliable options, and you should pick the one that feels simplest in your brain.

Method A is solo-based A/B. You keep MONITOR playing, and you A/B by soloing either MIX BUS or REFERENCE. Then you map those solo buttons to keys. For example, map Solo on MIX BUS to key 1, and map Solo on REFERENCE to key 2. Now you can literally flip back and forth with one finger.

One caution: solo logic can get weird if you’re soloing other tracks while mixing. If you hate that, use Method B.

Method B is Utility mute A/B. Put a Utility device on MIX BUS, and another Utility on REFERENCE. Then map the Mute button on each Utility to keys. Same idea: key 1 toggles the mix, key 2 toggles the reference. This keeps your solo workflow untouched.

Now the big one. Level match the reference. Do not skip this.

If the reference is louder, you will think it’s better. Your brain is not impartial about loudness, even if you’ve been mixing for years.

On the REFERENCE track, add a Utility. Start by pulling the gain down about minus 6 dB. Then add a Limiter after it, purely as safety, ceiling at minus 1 dB. We’re not trying to master the reference, we’re just preventing any surprises from clipping.

Now do a quick ear match. Loop the drop section of your track. Flip Mix and Reference quickly. Listen for a couple anchors: snare impact and the mid presence, not just the sub. Adjust the Utility gain on the reference until the perceived loudness is similar.

DnB-specific tip here: level match using the drop, not the intro. Drops are where the density lies, and that’s where loudness tricks you hardest.

Extra coach note: calibrate your listening level once, then stop chasing loudness. Pick a comfortable monitor volume or headphone level and keep it there. If you notice you keep turning up as you work, put one more Utility at the very end of MONITOR and name it LISTEN LEVEL. That is the only thing you touch for volume. Once your mix and reference are matched, don’t mess with their gains again.

Alright, now we’re going to build the secret weapon: fast band-focus checks. This is how you get answers fast, instead of vague feelings like “the mix isn’t hitting.”

On the MONITOR track, add EQ Eight. We’re going to create focus bands that you can switch instantly: full mix, sub, punch, and tops.

Here are solid ranges for drum and bass.

Sub check, roughly 20 to 90 Hz. Use a high-pass around 20 Hz with a steep slope, and a low-pass around 90 Hz, also steep. This tells you if your sub is stable, if the kick and sub relationship is speaking, and if you’re overdoing the very bottom.

Punch check, 90 to 250 Hz. High-pass at 90, low-pass at 250, steep slopes again. This is where weight lives. This is also where mud lives. This band reveals if your reese is smearing the low mids, if your kick body is too thick, and if the groove is getting “cardboardy.”

Tops check, around 4 kHz up to 18 kHz. High-pass at 4k, and optionally a gentle low-pass around 18k if you want to focus the air region. This band reveals hat texture, snare crack, distortion fizz, and whether your top end is controlled or just noisy.

Now make it fast. Put those into an Audio Effect Rack on MONITOR. Create four chains: FULL with no EQ, SUB, PUNCH, and TOPS, each with its own EQ Eight configured. Then map the Chain Selector to Macro 1 and name it Band Focus. Set the chain zones so the macro steps cleanly through FULL, then SUB, then PUNCH, then TOPS.

Now you can A/B your mix and reference, and also A/B your frequency focus, without stopping playback. That’s how you stay in the flow.

Next up: mono and side checks, because club translation is ruthless.

Still on MONITOR, after your band-focus rack, add a Utility. Map Width to a macro. Name it Mono or Width, whichever you prefer. At 100% you’re normal. At 0% you’re mono. If you want an extra “safety check,” you can temporarily push up to 140% just to see if your stereo field is doing anything sketchy, but don’t mix at 140. It’s a test, not a destination.

And here’s the DnB reality check: sub should survive mono perfectly. If your bass disappears in mono, you’re relying on stereo modulation too low in the spectrum. The fix is usually keeping the fundamental mono and pushing movement above about 150 Hz, either with layers or with M/S style processing.

If you want an approximate side-only check using stock tools, you can build a rack using EQ Eight in M/S mode and aggressively cut the Mid while leaving the Side. It’s not as perfect as a dedicated side solo button, but it gets you useful information: are your hats and atmos living in the sides, and is any important musical hook accidentally disappearing when you collapse to mono?

Now, analyzers. Use them sparingly, but use them smart.

At the end of the MONITOR chain, add Spectrum. Set the block size to 4096 or 8192 so you can see low end clearly. Set averaging to medium. The key mindset is: spectrum is there to confirm what you hear, not to tell you what to do.

Optionally add Tuner. In DnB it’s actually useful to confirm your sub is hitting the intended fundamental note. Just remember: different reference tracks are in different keys. Compare the shape and balance, not exact peak frequency.

Now let’s talk workflow, because even a perfect setup doesn’t help if you reference randomly.

Don’t A/B the wrong sections. Comparing your intro to a reference drop is meaningless. Instead, create anchor moments. Put locators at consistent points like: bar one of the drop, 16 bars into the drop when elements settle, the fill into the next phrase, and the break.

Then do short loops. Eight bars is perfect. And when you A/B, don’t ask “is my mix good?” Ask one question per pass.

For example:
Is my kick plus sub first hit speaking immediately like the reference?
Is my snare on two and four poking too much, or sitting too far back?
Is my hat pattern texture controlled, or is it constant noise?

One question. One pass. That’s how you stop spiraling.

And another coach move that changes everything: make your reference clips drop-only on purpose. Trim a 16 or 32 bar region that starts exactly on the reference drop, then consolidate it into a dedicated clip. That way every time you audition a reference, you immediately hear the most mix-revealing part, without hunting.

Also, don’t compare stereo vibe until your tonal balance is close. Width and reverb excitement can trick you into thinking the reference is “clearer,” when actually it’s just less low-mid clutter. Rule of thumb: get low end and low mids comparable first, then evaluate width and space.

Now let’s hit some common drum and bass traps this setup will help you catch fast.

If your sub is too loud, your mix will feel huge but your snare will shrink, your limiter will hate you, and your drop will feel like it’s leaning forward. The SUB check makes that obvious immediately.

If your low mids are smeared, especially with reeses, you’ll feel “energy” but no separation. The PUNCH check will reveal that cardboard zone around 150 to 400. And sometimes the fix isn’t EQ, it’s arrangement: too many kick and bass overlaps, or bass fills stepping on snares. Try shortening the bass note right on the snare hit for a bar or two each phrase, then re-check. Clarity often jumps instantly.

If your tops are brittle, it’s often saturation and clipping building up in the 8 to 12k zone. The TOPS check helps you match the material of the hats. Pro DnB hats are often smoother than you think. If yours sound like constant hiss, the fix might be shorter decays and cleaner sample choice, not just EQ.

For darker or heavier DnB specifically, pay attention to low-mid discipline. That 150 to 400 area is where “heavy” lives, but too much turns into mud fast. Use the PUNCH focus and compare the weight without losing the shape of the drums.

If you’re using Drum Buss on drums, keep it subtle. A little drive, low crunch, watch the Boom because it can fight your sub. A/B the snare punch while toggling.

If you’re using Saturator with soft clip, use the TOPS focus and compare hi-hat fizz against the reference. It’s easy to overdo edge.

And if your reese collapses in mono, you probably need a mono layer under it. Operator sine or triangle for the weight, mono, low-passed around 120 to 180. Then keep the stereo movement on the character layer above roughly 150. Reference in mono during the drop and you’ll know immediately if your bass foundation is real or just headphone width.

Now, quick 15-minute practice exercise so you actually lock this in.

Load two pro references. One clean roller and one darker, heavier reference works great.

Build the routing: MIX BUS and REFERENCE both into MONITOR.

Create the band focus rack: full, sub, punch, tops.

Loop eight bars of your drop.

Pass one in full mode: level match and write down two differences. Only two. Something like, “snare too loud,” or “sub too soft,” or “hats too sharp.”

Pass two in sub mode: only adjust kick and bass balance. Nothing else. This constraint trains you to solve the right problem instead of spinning.

Pass three in tops mode, then flip mono: check hats and air, and check mono compatibility. Make only EQ and width moves.

The goal is not a total remix. The goal is three specific, correct mix moves applied.

One more productivity tip before we wrap: save mix notes inside Live so you don’t loop forever. Create a MIDI track called MIX NOTES, make an empty MIDI clip, and use the Notes field to log decisions. Stuff like, “Drop: snare body at 200 feels thick versus ref,” or “Hats: reduce 9 to 11k shelf by 1.5 dB.” When you’re referencing fast, you want to capture decisions immediately, then get back to mixing.

Recap.

You routed MIX BUS and REFERENCE into a dedicated MONITOR track so the master stays clean.

You set up fast A/B switching using either mapped solos or Utility mutes.

You level-matched the reference so louder doesn’t automatically win.

You built a band focus rack so you can judge sub, punch, and tops instantly.

You added mono and width checks so your mix translates to clubs and real systems.

And you compare the same section, drop to drop, in short loops, with anchor moments and one question per pass.

If you tell me your exact substyle, roller, jungle, neuro, halftime, and one reference track you’re using, I can suggest the most revealing band ranges to use in your rack and the two or three anchor moments that will expose problems the fastest.

mickeybeam

Go to drumbasscd.com for +100 drum and bass YouTube channels all in one place - tune in!

Generating PDF preview…