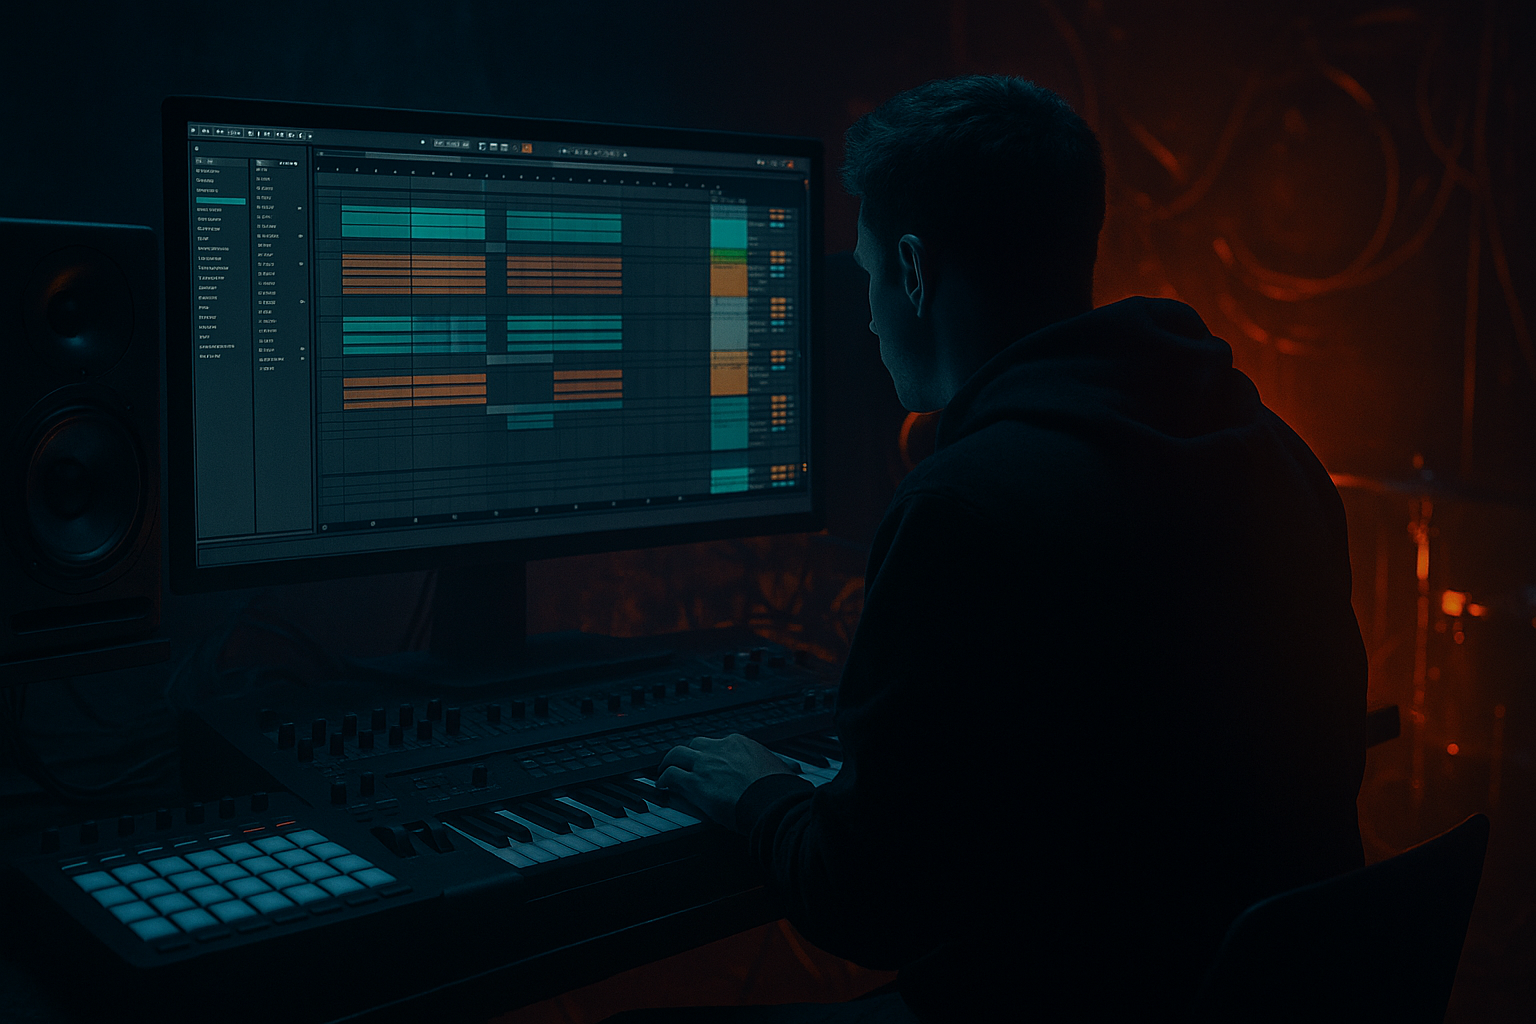
DNB COLLEGE

Drum & Bass Ableton Live 12 Tutorials

LESSON DETAIL

Formant automation on vocal snippets (Intermediate)

An AI-generated intermediate Ableton lesson focused on Formant automation on vocal snippets in the Automation area of drum and bass production.

Back to lessons
Formant automation on vocal snippets (Intermediate) cover image

Narrated lesson audio

The voice track includes the tutorial plus extra teacher commentary.

Open audio file

Main tutorial

```markdown

Formant Automation on Vocal Snippets (DnB in Ableton Live) 🎛️🗣️

1. Lesson overview

Formant automation is one of the fastest ways to turn a basic vocal chop into a signature DnB hook: creepy textures, call-and-response riffs, or that “talking synth” energy—without changing the musical pitch. In this lesson you’ll build a tight workflow in Ableton Live using mostly stock devices (plus Live’s built-in audio warping) to create formant movement that sits perfectly over rolling drums and bass.

We’ll focus on short vocal snippets (1–4 words or a single syllable), then automate formant for groove, tension, and transitions. ⚡

---

2. What you will build

By the end, you’ll have:

  • A vocal chop rack with:
  • - Warp mode choices for clean vs gnarly results

    - A formant control macro you can automate

    - A parallel “dark” layer for heavier DnB

  • A 16-bar DnB arrangement concept where formant automation creates:
  • - A hook in the drop

    - Variation every 4 bars

    - Tension ramps into fills and switches

    ---

    3. Step-by-step walkthrough

    Step 0 — Prep: choose the right vocal source

    Goal: clean, short, and expressive.

    1. Pick a vocal line with clear vowel tone: “ah”, “oh”, “yeah”, “come”, “run”, etc.

    2. Keep it short: 100–600 ms works great for DnB chops.

    3. If it’s a full phrase, chop it down later—don’t try to automate formants on a messy, reverby long take (yet).

    DnB vibe tip: One dry vocal chop often hits harder than a lush vocal in the drop—space is for drums + bass.

    ---

    Step 1 — Warp the vocal correctly (this is where “formant” really lives in Live)

    Ableton doesn’t have a universal “Formant” knob on every device, but Warp modes give you formant-ish behavior that you can automate via clip settings and transposition workflows.

    #### Option A (clean + controllable): Complex Pro

    1. Double-click the vocal clip.

    2. Turn Warp on.

    3. Set Warp Mode: Complex Pro.

    4. Start settings:

    - Formants: ON

    - Envelope: 80–130 (lower = more robotic/phasey, higher = smoother)

    Why: Complex Pro preserves vocal character better and is reliable for automation-style sound design.

    #### Option B (gnarly jungle texture): Texture mode

    1. Warp Mode: Texture

    2. Try:

    - Grain Size: 20–60

    - Flux: 10–30

    3. This can smear into a wicked “ghost” vocal when automated and filtered.

    ---

    Step 2 — Make it playable (Slice to a Drum Rack)

    This is the classic DnB workflow: chop → trigger rhythmic patterns → automate for movement.

    1. Right-click the warped audio clip → Slice to New MIDI Track.

    2. Choose:

    - Slice by: Transients (good starting point)

    - Or Slice by: 1/8 or 1/16 for more “machine-gun” chops

    3. This creates a Drum Rack where each slice is on a Simpler.

    Workflow suggestion: Rename the rack “Vox Chop Rack” and color it so you can find it fast in a big session.

    ---

    Step 3 — Put each slice into a formant-friendly Simpler mode

    1. Open one Simpler in the Drum Rack.

    2. In Simpler, switch to Classic mode (or keep One-Shot if you prefer, but Classic gives better control).

    3. Set:

    - Trigger (for consistent playback on MIDI notes)

    - Voices: 1 (prevents overlap mud)

    - Filter: ON (we’ll automate this later optionally)

    4. Copy settings to other slices:

    - In Drum Rack, right-click the Simpler pad → Copy

    - Multi-select other pads → Paste

    ---

    Step 4 — Create the “Formant” movement (two practical methods)

    #### Method 1: Formant-style motion using warp transposition + pitch compensation

    This is a very “Ableton” way to get vocal character shifts while keeping musical pitch stable enough for DnB.

    Concept: Automate clip transposition (changes timbre/formant feel) while compensating with pitch at the instrument stage.

    How:

    1. In the original audio clip (before slicing), duplicate it into two tracks:

    - Track A: “Vox Formant”

    - Track B: “Vox Reference” (optional)

    2. On Track A, automate Clip Transpose (in Clip View).

    3. Then, after slicing, tune the Simpler slices back using Transpose inside Simpler so the hook stays in key.

    Settings to try:

  • Clip Transpose automation moves: -3, -5, -7 semitones for darker throatiness
  • Or +2, +5 semitones for chipmunk/spy voice (use sparingly in DnB)
  • Arrangement use:

  • Drop bar 1–4: mostly neutral (0 to -2)
  • Bar 5–8: deeper dips (-5 to -7) on the last chop of each 2-bar phrase
  • Bar 9–16: ramp automation into fills
  • This method is “feel-based,” but it’s very effective in a mix.

    ---

    #### Method 2: “Talking” formants via Auto Filter + resonant movement (stock + extremely DnB-friendly)

    Not true formants scientifically, but musically it reads as vowel movement—perfect for rolling bass music.

    Device Chain (per vocal rack track):

    1. Auto Filter

    2. Saturator

    3. EQ Eight

    4. Reverb (short, dark)

    5. (Optional) Compressor (sidechain from drums)

    Auto Filter settings (start here):

  • Filter type: Band-Pass 12 or Band-Pass 24
  • Frequency: 400 Hz – 2.5 kHz (this is where “vowel” lives)
  • Resonance: 0.70 – 1.20
  • Drive: 2–6 dB (if available in your filter model)
  • Automation target:

    Automate Frequency to sweep through “ah → oh → ee” impressions:

  • “Ah”: ~700–1k
  • “Oh”: ~400–700
  • “Ee”: ~1.8k–2.5k
  • Add bite: Saturator

  • Mode: Analog Clip
  • Drive: 3–8 dB
  • Soft Clip: ON
  • This helps the resonant peaks speak in a dense DnB mix.

    Clean-up: EQ Eight

  • High-pass at 100–160 Hz (keep room for sub + kick)
  • Optional dip at 2.5–4 kHz if it gets harsh when resonance sweeps
  • ---

    Step 5 — Map it to Macros for fast automation (essential for arrangement)

    If you’re using a Drum Rack, you can macro-control the whole vocal bus.

    1. Put your FX chain on the Drum Rack return chain or on the track hosting the rack.

    2. Group the effects: select devices → Cmd/Ctrl + G (Audio Effect Rack).

    3. Map key controls:

    - Macro 1: “Formant Sweep” → Auto Filter Frequency

    - Macro 2: “Nasal/Res” → Auto Filter Resonance

    - Macro 3: “Grit” → Saturator Drive

    - Macro 4: “Air Cut” → EQ Eight high shelf gain (or a low-pass cutoff)

    Now you can write one automation lane per macro and get consistent, musical motion. ✅

    ---

    Step 6 — Write DnB automation that grooves (not random wiggles)

    Rule: Automate to the grid and phrasing, not constantly.

    Try these patterns:

    #### Pattern A: Call & response (2 bars)

  • Bar 1: formant “neutral” (Macro around 40–50%)
  • Bar 2: push it darker (Macro 20–30%) on the last 2 hits
  • MIDI idea: vocal hits on 1.2, 1.4, 2.2, 2.3.3 (syncopated, rolling)

    #### Pattern B: 4-bar evolution

  • Bar 1: steady
  • Bar 2: slight rise on the offbeats
  • Bar 3: deeper dips for tension
  • Bar 4: ramp up into a fill (then hard reset on the drop repeat)
  • #### Pattern C: “Switch cue” automation (classic DnB trick)

    In the final half bar before a drop switch:

  • Slam resonance slightly up
  • Sweep band-pass down quickly
  • Add a short reverb bloom (automate Reverb Dry/Wet from 8% → 18% just for the fill)
  • ---

    Step 7 — Add a parallel dark layer (for heavy rollers) 😈

    Duplicate the vocal track (or create an Audio Effect Rack with parallel chains).

    Chain 1: Clean

  • Mild Auto Filter movement
  • Light saturation
  • Chain 2: Dark

  • Redux:
  • - Downsample: 2–6

    - Bit Reduction: 0–2 (subtle)

  • Overdrive:
  • - Freq: 700–1.2k

    - Drive: 20–45%

  • Auto Filter (LP24):
  • - Cutoff: 2–6 kHz

    - Resonance: 0.3–0.7

  • Optional: Grain Delay (very low mix):
  • - Dry/Wet: 3–8%

    - Freq: 1–2 kHz

    - Random Pitch: 0.10–0.25

    This adds that haunted, metallic edge without washing out the groove.

    Blend dark chain at -10 to -18 dB under the clean chain.

    ---

    Step 8 — Place it in a 16-bar DnB drop arrangement

    A practical template:

  • Bars 1–4: Hook introduced (minimal automation, establish identity)
  • Bars 5–8: Increase formant movement on every 2nd phrase (variation)
  • Bars 9–12: Add parallel dark layer + slightly higher resonance (intensity)
  • Bars 13–16: Big automation ramp into a fill/switch, then reset
  • Key DnB principle: automation should support the drum energy—let the snare hits and bass phrases breathe.

    ---

    4. Common mistakes

  • Over-automating every hit: it stops feeling like a hook and starts sounding like a plugin demo.
  • Too much resonance without EQ control: you’ll get piercing peaks around 2–4 kHz that fight snares and cymbals.
  • Leaving lows in the vocal: anything below ~120 Hz is usually just mud in DnB.
  • No timing intention: formant sweeps that ignore phrasing will feel “off,” even if they sound cool solo.
  • Not gain-staging: saturation + resonance can jump in volume—use Utility or Compressor to control it.
  • ---

    5. Pro tips for darker/heavier DnB

  • Automate into the snare gaps: put the biggest formant moves between snare hits so the snare stays dominant.
  • Make it “answer” the bass: if your bass has a call phrase, automate the vocal formant to respond on the next 1/2 bar.
  • Use subtle pitch dips + formant dips together: a quick -1 or -2 semitone dip plus a darker sweep sells “menacing” instantly.
  • Sidechain the vocal to the kick + snare:
  • Ableton Compressor sidechain, 2–4 dB GR, fast-ish attack, medium release—keeps vocals tucked into the roll.

  • Print & resample: once you’ve got a great automation pass, Freeze → Flatten or resample to audio, then re-chop for even tighter jungle-style edits.
  • ---

    6. Mini practice exercise (15 minutes) 🧪

    1. Find a 1-word vocal (“yeah” works great).

    2. Warp it in Complex Pro (Formants ON, Envelope 100).

    3. Slice to Drum Rack (Transients).

    4. Add FX chain on the track:

    - Auto Filter (BP24, Res 0.9)

    - Saturator (Analog Clip, Drive 6 dB, Soft Clip ON)

    - EQ Eight (HP at 140 Hz)

    5. Map Auto Filter Frequency to a macro called Formant.

    6. Program a 2-bar MIDI loop at 174 BPM with 6–10 vocal hits.

    7. Automate Formant:

    - Bar 1: 900 Hz → 1.4 kHz (gentle rise)

    - Bar 2: dip to 500–700 Hz on the last two hits

    8. Bounce/resample the loop and chop the best 2 hits into a fill.

    Deliverable: a 2-bar vocal hook that evolves without getting messy.

    ---

    7. Recap

  • Use Warp modes (especially Complex Pro) to preserve vocal identity and enable controlled transformations.
  • For musical “formant-like” movement that reads in a mix, Auto Filter band-pass + resonance + saturation is a killer stock combo.
  • Map controls to Macros, automate with intention (2/4/8-bar phrasing), and build variation like you would with bass design.
  • For heavier DnB, add a parallel dark chain (Redux/Overdrive/LP filter) and keep it tucked under the clean layer.

If you want, tell me your subgenre (rollers, neuro, jungle, dancefloor) and the type of vocal (male/female/rap/acapella), and I’ll suggest a specific macro range + 16-bar automation plan that matches that vibe.

```

Ask GPT about this lesson

Chat with the lesson tutor, get follow-up help, or use quick actions.

Bigup 👽 Ask me anything about this lesson and I’ll answer in context.

Narration script

Show spoken script
Title: Formant Automation on Vocal Snippets (Intermediate)

Alright, let’s take a basic vocal chop and turn it into something that feels like a signature drum and bass hook. The key move today is formant automation: making the vocal feel like it’s changing mouth shape, throat size, vowel color… without it just sounding like you’re pitching it up and down like a cartoon.

And here’s the important Ableton reality check: Live doesn’t give you one magical “Formant” knob everywhere. So we’re going to build two very practical “formant flavors” that actually work in a mix.

Flavor one is warp-character shifts, mainly Complex Pro or Texture. That gets you closer to true vowel and throat changes, but it can get phasey and unpredictable if you push it.

Flavor two is the resonant vowel illusion: a band-pass filter with resonance, plus saturation. Not scientifically perfect, but musically, in DnB, it reads instantly as talking, moving, vowel-like energy. And it’s way easier to automate cleanly.

In this lesson, pick one flavor as your main character. Keep the other as a subtle spice. If you go hard on both at the same time, you’ll spend the entire session fighting chaos instead of writing a hook.

Step zero is vocal choice, because this makes or breaks everything. Choose something short and expressive. One syllable, or one to four words max. The sweet spot for DnB chops is often around 100 to 600 milliseconds. Also, look for strong vowels: “ah,” “oh,” “yeah,” “come,” “run.” If the vocal is super wet, super reverby, or it’s a long emotional phrase, save it for later. For the drop, one dry, punchy chop often hits harder because the drums and bass need space.

Now Step one: warping, because in Ableton this is where a lot of “formant” behavior lives.

Double-click your vocal clip. Turn Warp on.

Option A, the clean and controllable route: set Warp Mode to Complex Pro. Turn Formants on, and set Envelope somewhere around 80 to 130. Lower envelope tends to get more robotic and phasey; higher tends to smooth out.

Option B, the gnarlier jungle-ghost route: Texture mode. Try Grain Size around 20 to 60 and Flux around 10 to 30. Texture can smear in a cool way, but it’s also easier to overdo. If you can’t understand the word at all, you probably pushed too far for a hook. Unless that’s the point.

Step two: make it playable with Slice to a Drum Rack. This is the classic DnB workflow: chop it, trigger it rhythmically, then automate movement on top.

Right-click your warped audio clip and choose Slice to New MIDI Track. Start with slicing by transients. If you want more machine-gun edits, try slicing by eighths or sixteenths.

You’ll get a Drum Rack where each slice is inside a Simpler. Rename it something like Vox Chop Rack, and color it. That sounds basic, but it saves you when your project gets big.

Step three: get each slice into a good Simpler setup.

Open one Simpler from the Drum Rack. Switch it to Classic mode if you want more control. Set it to Trigger so every MIDI hit is consistent. Set Voices to 1 to prevent overlaps turning into mush, especially in fast DnB patterns. Turn the filter on; we might automate it later, but even if we don’t, it’s ready.

Then copy that Simpler setup to the other pads so the whole rack behaves consistently. Teacher note here: one of the biggest reasons vocal chops feel amateur is every slice behaving differently. Consistency is your friend. Variation should come from intentional automation, not from random slice settings.

Now we build the formant movement. Two methods.

Method one: warp-transpose character shifts with pitch compensation.

Conceptually, we’re doing something very Ableton: we automate clip transposition to shift the character, and then we tune back after slicing so the hook stays in key.

A practical workflow is to duplicate the original audio clip to two tracks. One track is your “Vox Formant” design track, and the other is a “Vox Reference” you keep clean, just so you don’t lose the original vibe while you experiment.

On the Vox Formant clip, automate Clip Transpose. Try moves like minus three, minus five, minus seven semitones for darker, throatier energy. Or plus two or plus five for a spy voice or chipmunk moment, but be careful: in DnB, that can take over the whole mix fast.

Then once you slice and you’re triggering the rack, you can compensate with Simpler’s Transpose so the musical pitch feels correct again. This method is feel-based. It won’t always be mathematically “the same pitch,” but musically it works. Especially with fast chops, your ear hears the gesture more than the tuning spreadsheet.

Arrangement idea if you want a plan: bars one to four, keep it pretty neutral, like zero to minus two semitones of character shift. Bars five to eight, add deeper dips, like minus five to minus seven, but only on the last chop of each two-bar phrase. Bars nine to sixteen, ramp it more aggressively into fills, then reset. Resetting is huge in DnB. If everything keeps escalating, nothing feels like a drop anymore.

Method two: the “talking” formants, the mix-friendly way. Auto Filter plus resonance plus saturation.

Put your effects on the Drum Rack track, not on every slice. This is the “one rack to rule them all” approach. It keeps your hook cohesive and makes your automation lanes clean.

Build this chain: Auto Filter, then Saturator, then EQ Eight, then a short dark reverb. Optionally a compressor with sidechain from kick and snare.

Auto Filter settings: choose band-pass 12 or band-pass 24. Set frequency somewhere in the 400 hertz to 2.5 kilohertz zone. That’s the vowel zone where the mouth illusion lives. Set resonance around 0.7 to 1.2. Add a bit of drive if your filter model has it, something like 2 to 6 dB.

Now the automation target is the Auto Filter frequency. When you sweep it, you’ll hear vowel impressions. Rough guide: “oh” tends to feel lower, like 400 to 700. “ah” sits around 700 to 1k. “ee” feels higher, like 1.8k to 2.5k. Don’t treat these like laws. Treat them like starting coordinates.

Then Saturator: set it to Analog Clip. Drive around 3 to 8 dB. Soft Clip on. The reason we saturate is that resonance by itself can be thin and spiky. Saturation gives it teeth, so the vowel reads through drums and bass.

Then EQ Eight: high-pass around 100 to 160 hertz. In DnB, that low area is sacred territory for kick and sub. If the vocal has anything down there, it’s usually just mud. And if your resonance sweep gets harsh, dip somewhere around 2.5 to 4k a bit. That’s often where snares and bright percussion live too, so you want to be careful.

Before we automate like crazy, one crucial coach note: level management is half the battle. Resonant moves spike. Saturation spikes. So put a Utility after your vocal FX and map its gain to a Trim macro. If you’re pushing it, add a Glue Compressor at 2 to 1 just catching one to two dB of gain reduction. You’re not trying to squash it. You’re trying to prevent surprise jumps that wreck your balance.

Now Step five: macro mapping, because this is what makes it arrangement-friendly.

Group the effects into an Audio Effect Rack. Map Macro 1 to Auto Filter frequency and call it Formant Sweep. Macro 2 maps to resonance, call it Nasal or Res. Macro 3 maps to Saturator drive, call it Grit. Macro 4 can be an air control, like an EQ shelf or a low-pass cutoff.

And a pro move: constrain your macro ranges on purpose. Don’t map Formant Sweep from 20 hertz to 20k. That’s not musical; it’s a roulette wheel. Instead, map it to the window you actually want, like 450 hertz to 2.2k. Suddenly every automation move lands in a usable vowel zone and you work ten times faster.

Now Step six: write DnB automation that grooves. The rule is: automate to phrasing, not constantly. If you scribble a random wiggle over every hit, it stops feeling like a hook and starts sounding like you’re auditioning a plugin.

Try a call and response pattern over two bars. Bar one, keep it neutral, like the macro around 40 to 50 percent. Bar two, go darker, like 20 to 30 percent, but only on the last couple hits. That makes it feel like the vocal is answering itself.

Or do a four-bar evolution. Bar one steady. Bar two a slight rise on offbeats. Bar three deeper dips for tension. Bar four ramp into a fill, then hard reset when the phrase repeats.

And here’s a classic switch cue trick: in the last half bar before a drop switch, push resonance up slightly, sweep the band-pass down quickly, and do a tiny reverb bloom. Like automating reverb dry/wet from 8% to 18% just for that fill, then back down. The audience doesn’t think “automation.” They think “something is about to happen.”

Advanced idea you can steal immediately: two-lane automation. One lane is your slow phrase drift over four or eight bars, setting the overall color. The second lane is tiny accents: quick nudges that last 30 to 80 milliseconds right before fills or on the last hit of a bar. That’s punctuation. It makes the hook feel performed, not looped.

Another expressive trick: micro-timing. Take the answer chops and nudge them 5 to 15 milliseconds late. Then give them a slightly brighter formant setting. That tiny drag plus brightness reads like a vocalist reacting. It’s subtle, but it’s the kind of subtle that makes DnB hooks feel intentional.

Now Step seven: the parallel dark layer for heavy rollers.

Duplicate the vocal track, or build parallel chains inside an Audio Effect Rack.

Chain one is clean: mild filter movement, light saturation.

Chain two is dark: add Redux, with downsample around 2 to 6, and bit reduction around 0 to 2, keep it subtle. Add Overdrive, with frequency around 700 to 1.2k and drive around 20 to 45 percent. Then Auto Filter in low-pass 24 mode, cutoff around 2 to 6k, resonance 0.3 to 0.7. Optional Grain Delay at a tiny mix, like 3 to 8 percent, just to add haunted metallic air.

Blend the dark chain quietly, like minus 10 to minus 18 dB underneath. The goal isn’t “now it’s distorted.” The goal is “the hook feels heavier and more aggressive when the drop hits.”

Also, watch stereo. Formant tricks plus reverb can smear. If you want the hook to punch, put a Utility on the main vocal chain and reduce width to somewhere like 0 to 40 percent. Keep it centered. Then send it to a wide reverb return for space. Center stays strong, ambience stays wide.

Step eight: put it into a simple 16-bar drop plan so the automation is musical, not random.

Bars one to four: introduce the hook with minimal automation. Establish identity.
Bars five to eight: increase formant movement every second phrase.
Bars nine to twelve: bring in the dark layer and maybe slightly higher resonance.
Bars thirteen to sixteen: a bigger automation ramp into a fill or switch, then reset.

And remember: judge your automation in context, not solo. The vocal needs to live with the snare and the bass. Snares often have body around 180 to 250 and crack in the 2 to 5k zone. Bass harmonics often sit from 200 hertz up through 2k depending on the patch. If your vocal is fighting either one, you’re not failing. You just need smarter pocketing: darker vowels during busy bass phrases, brighter vowels in the gaps, or vice versa.

Common mistakes to avoid while you build this:
Over-automating every hit, so it becomes a demo instead of a hook.
Too much resonance without EQ control, so it pierces around 2 to 4k and battles the snare and cymbals.
Leaving low end in the vocal and muddying the sub zone.
Ignoring timing and phrasing, which makes even cool sounds feel wrong.
And not gain-staging, because saturation plus resonance can jump in volume.

Let’s end with a quick 15-minute practice recipe you can actually do right now.

Grab a one-word vocal. “Yeah” is perfect.
Warp it in Complex Pro with Formants on and Envelope around 100.
Slice to Drum Rack by transients.
On the rack track, add Auto Filter set to BP24 with resonance around 0.9.
Add Saturator, Analog Clip, drive around 6 dB, Soft Clip on.
Add EQ Eight, high-pass at 140.
Map Auto Filter frequency to a macro called Formant, and constrain the range to something like 450 hertz to 2.2k.

Program a two-bar MIDI loop at 174 BPM with six to ten hits.
Automate Formant: bar one, a gentle rise from about 900 up to 1.4k. Bar two, dip to about 500 to 700 on the last two hits.

Then print it. Resample or freeze and flatten. Chop the best two hits out of the resample and use them as a fill. That’s how you turn a sound design moment into a repeatable DnB hook.

Homework challenge if you want the real intermediate upgrade: design three distinct vowel states. Neutral, dark and throaty, bright and nasal. Save them as macro variations or at least write down the macro values. Build an eight-bar drop loop where bars one and two are only neutral, bars three and four alternate neutral and dark, bars five and six introduce bright only at phrase ends, and bars seven and eight have one special moment with a resonance spike and a quick FX throw, then reset. Print it, then re-slice the printed hits into a new Drum Rack and rebuild the hook using only those printed states.

That’s the goal: fewer automation lanes, more designed, repeatable character.

If you tell me your DnB subgenre and what kind of vocal you’re using, I can suggest a tight macro range and a specific 16-bar automation map that will fit your drums and bass instead of fighting them.

mickeybeam

Go to drumbasscd.com for +100 drum and bass YouTube channels all in one place - tune in!

Generating PDF preview…