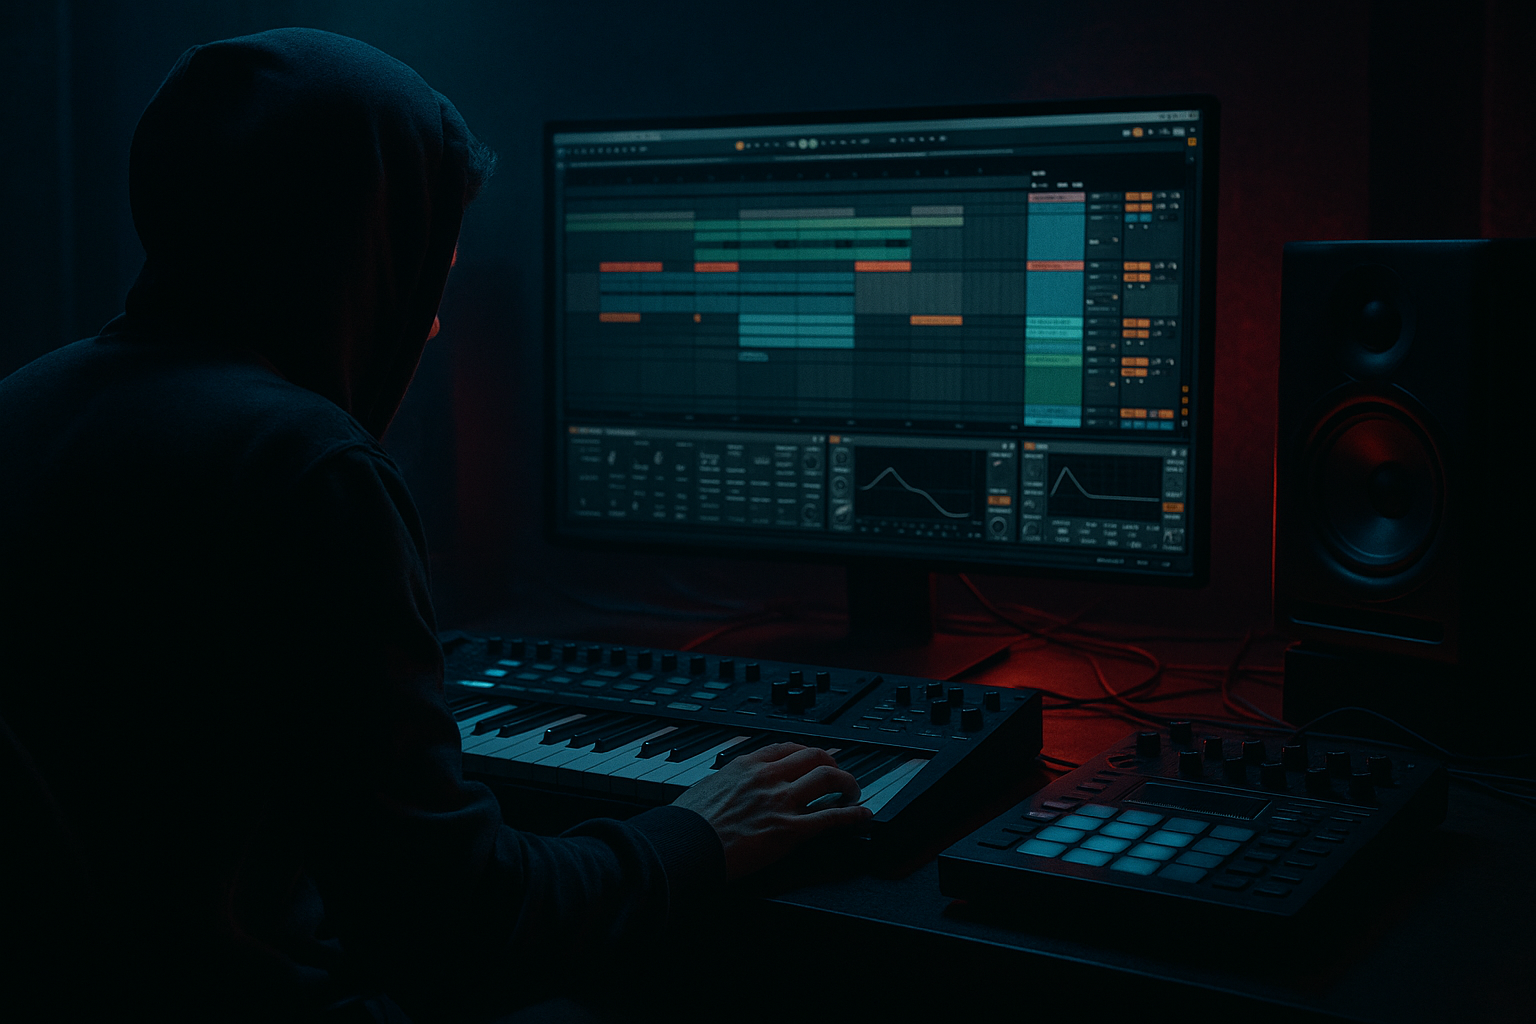
DNB COLLEGE

Drum & Bass Ableton Live 12 Tutorials

LESSON DETAIL

Humanising one-shots for club mixes (Beginner)

An AI-generated beginner Ableton lesson focused on Humanising one-shots for club mixes in the Groove area of drum and bass production.

Back to lessons
Humanising one-shots for club mixes (Beginner) cover image

Narrated lesson audio

The voice track includes the tutorial plus extra teacher commentary.

Open audio file

Main tutorial

Humanising One‑Shots for Club Mixes (DnB in Ableton Live) 🥁🔊

1) Lesson overview

Humanising is the art of keeping programmed drums tight enough for a club system, but alive enough to roll. In drum & bass, even tiny timing, velocity, and tone variations can turn a stiff loop into something that breathes—without losing the punch you need on a big rig.

In this lesson you’ll learn beginner-friendly, repeatable workflows in Ableton Live to humanise one-shot drums (kick, snare, hats, rides, ghost notes) using Groove Pool, velocity shaping, micro-timing, round-robin style variation, and subtle tonal movement—all with stock devices.

---

2) What you will build

You’ll create a 16-bar rolling DnB drum groove (think jungle/DnB hybrid) that includes:

  • A tight kick + snare backbone
  • Ghost snares and hat chatter that feels played
  • Controlled swing and push/pull using Groove Pool
  • Subtle one-shot variation (velocity, filter, pitch) so repeats don’t sound copy‑pasted
  • A club-ready approach: groove in the highs and mids, stability in the lows
  • ---

    3) Step-by-step walkthrough

    Step 0 — Session setup (club-safe defaults)

    1. Tempo: 172–176 BPM (start at 174 BPM).

    2. Create one MIDI track called `DRUMS`.

    3. Drop a Drum Rack on it.

    4. Load one-shots into pads:

    - Kick (clean, punchy)

    - Snare (DnB snare with body at ~200 Hz + crack 2–6 kHz)

    - Closed hat

    - Open hat / ride

    - Perc hit (rim/clave/shaker)

    - Ghost snare (or duplicate snare but processed differently)

    Tip: For club mixes, choose samples that already sound close. Humanising should enhance, not rescue weak samples. 🙂

    ---

    Step 1 — Program a solid “don’t move” backbone 🎯

    In DnB, the main snare and kick are your anchor. Humanise around them—not through them.

    Basic 1-bar pattern to start (grid 1/16):

  • Snare: on beat 2 and 4 (standard DnB backbeat)
  • Kick: typical rolling placement (example)
  • - Beat 1 (1.1)

    - Just before beat 3 or around 2.3/2.4 depending on vibe

    - Beat 3 (3.1) optional—DnB varies

    In the MIDI clip:

    1. Set Launch/Loop to 1 bar for now.

    2. Put your snare on 2 and 4.

    3. Add a kick pattern you like (keep it simple).

    Rule: Keep these at consistent velocity for now:

  • Kick velocity: ~110–127
  • Main snare velocity: ~115–127
  • We’ll humanise everything else first.

    ---

    Step 2 — Add hats with purposeful velocity (the “rolling engine”) 🚂

    DnB feels alive when hats have a velocity contour, not random chaos.

    1. Add closed hats on every 1/8 (or 1/16 if you want it busy).

    2. Open hat/ride: add on the “and” of beats (e.g., 1.2, 2.2, 3.2, 4.2) or sparingly.

    Velocity shaping (practical values):

  • If using 1/16 closed hats:
  • - Downbeats (1, 2, 3, 4): 70–85

    - Off-16ths: 45–65

  • Open hat:
  • - 75–95 (depends how bright your sample is)

    In Ableton:

  • Select hat notes → press `V` (if velocity lane hidden) → draw a repeating accent pattern.
  • Aim for a “1 strong, 1 weak, 1 medium, 1 weak” feel across each beat.
  • This alone removes the “machine gun” feel.

    ---

    Step 3 — Add ghost snares (the secret sauce) 👻

    Ghosts make DnB grooves feel played, especially in rolling and jungle-influenced patterns.

    1. Duplicate your snare to a new pad for ghosts or keep same snare but plan lower velocity.

    2. Place ghost notes:

    - Common spots: just before the main snare (e.g., 1.4.3 → before 2.1) and after (2.1.3-ish), depending on grid.

    Ghost snare velocity target: 25–55

    Make ghosts sound different (very important):

  • On the ghost snare pad in Drum Rack:
  • - Add Auto Filter

    - HP mode, Freq: 250–600 Hz (cut low body)

    - Slight resonance (optional): 0.5–1.5

    - Optional: Redux very lightly (for grit)

    - Bit Reduction: 10–12

    - Downsample: minimal (or off if too crunchy)

    Now your ghosts add movement without muddying the mix.

    ---

    Step 4 — Humanise timing (micro-shifts, not sloppy) ⏱️

    You want tiny timing variation in hats/ghosts, while kicks/snares stay confident.

    #### Option A: Manual micro-nudges (best for control)

    1. Turn Grid to 1/16 (or 1/32 for precision).

    2. Nudge ONLY hats, shakers, ghost snares:

    - Push some hats later by 3–8 ms

    - Pull a couple earlier by 2–5 ms

    3. Leave:

    - Main snare: on-grid

    - Main kick(s): mostly on-grid (you can move one kick slightly for groove, but keep it subtle)

    Ableton tip: Use the MIDI note nudge (drag while zoomed in), or adjust by turning off grid temporarily (hold Cmd/Ctrl while dragging).

    #### Option B: Groove Pool (fast + musical)

    1. Open Groove Pool (left browser).

    2. Drag in a groove like:

    - Swing 16-XX (start with Swing 16-55 or Swing 16-60)

    - Or a MPC-ish groove if available

    3. Drag the groove onto your MIDI clip.

    Now tweak in Groove Pool:

  • Timing: 10–25% (DnB usually subtle)
  • Velocity: 5–15%
  • Random: 0–10% (careful)
  • Base: keep at 16 for 16th-based hats
  • DnB club rule: If the low end starts to feel late or “drunk,” your groove amount is too high or applied to the wrong notes.

    ---

    Step 5 — Make one-shots “not identical” (round-robin feel) 🔁

    Repeated hats/snare layers can “machine gun.” We’ll fake round-robin with small tonal changes.

    #### Method 1: Random pitch on hats (tiny!)

    On the hat pad in Drum Rack:

    1. Open Simpler (one-shot mode).

    2. Find Controls → Pitch/Osc (or Pitch section).

    3. Add subtle variation:

    - Transpose: keep at 0

    - Add an LFO? (Ableton Live Suite has LFO as Max for Live; if you don’t have it, use Velocity-to-Filter instead)

    Beginner-friendly stock method (no LFO):

  • Use Velocity MIDI effect (before Drum Rack) for hat notes:
  • - Set Random to 3–8

  • Then map dynamics into tone using Auto Filter on the hat pad:
  • - Auto Filter: low-pass or high-pass subtly

    - Turn on Envelope:

    - Env Amount: small positive amount (so louder hits are a bit brighter)

    - Attack: 0–5 ms

    - Decay: 50–150 ms

    Now louder hits are brighter—instant realism.

    #### Method 2: Layer two hat samples and alternate

    1. Put Hat A on one pad and Hat B on another.

    2. Alternate notes (A B A B) or use B only for offbeats.

    3. Keep Hat B slightly quieter and/or filtered.

    This is extremely “jungle proven.” ✅

    ---

    Step 6 — Control dynamics with a simple bus chain (club-ready) 🧱

    Humanised drums still need to hit consistently in a mix.

    On the `DRUMS` track (after Drum Rack), try this stock chain:

    1. EQ Eight

    - High-pass everything gently if needed (careful—don’t kill punch)

    - Notch harshness if hats are spiky (often 7–10 kHz)

    2. Glue Compressor

    - Attack: 3 ms

    - Release: Auto

    - Ratio: 2:1

    - Aim for 1–3 dB gain reduction on peaks

    3. Saturator

    - Drive: 1–3 dB

    - Soft Clip: On

    4. Optional: Drum Buss

    - Drive: 2–6

    - Crunch: 0–10 (small)

    - Boom: 0–20 (careful in DnB—sub is sacred)

    Important: If you’re producing DnB with a heavy sub-bassline, don’t add “Boom” casually. You’ll fight the bass.

    ---

    Step 7 — Arrangement: humanise across 16 bars (not just one loop) 🧩

    A club mix needs evolution without losing the groove.

    Create a 16-bar section:

  • Bars 1–4: core beat (less busy)
  • Bars 5–8: add extra hat 1/16s or a ride
  • Bars 9–12: introduce an extra ghost snare or small perk
  • Bars 13–16: tiny fill into the next phrase
  • Easy arrangement moves:

  • Remove the open hat on bar 4/8/16 to create breath
  • Add a single snare flam (two hits close together) at the end of bar 8 or 16
  • Add one bar of busier hats before a drop, then snap back
  • Pro workflow: Duplicate your 1-bar clip into 16 bars, then make micro-edits every 2–4 bars. DnB listeners feel repetition fast—tiny changes go a long way.

    ---

    4) Common mistakes

  • Humanising the kick/sub region too much
  • Your kick timing should stay stable or the whole track feels weak on a big system.

  • Using “Random” like a chaos button
  • Random velocity at 40% isn’t “human,” it’s inconsistent. Keep it subtle.

  • Everything swings equally
  • If snares swing hard, your backbeat loses authority. Swing hats/percs more than snares.

  • Ghost notes too loud
  • If you hear ghosts as main hits, they stop being ghosts. Keep them felt, not featured.

  • No tonal variation
  • Velocity changes alone sometimes still sound copy-pasted—tie velocity to filter/brightness.

    ---

    5) Pro tips for darker/heavier DnB 🖤

  • Make hats darker but more detailed
  • - Use Auto Filter low-pass around 10–14 kHz (depending on sample)

    - Add Saturator lightly to bring out texture without harsh fizz

  • Ghosts + room = menace
  • - Put Reverb on a return (A):

    - Decay: 0.4–0.9 s

    - Pre-delay: 10–25 ms

    - HP filter in reverb: 300–700 Hz

    - Send only ghosts/percs a little (not the main snare unless you want that washed jungle vibe)

  • Heavier snare presence without killing headroom
  • - Use Drum Buss on the snare pad only (inside Drum Rack)

    - Or Saturator + EQ Eight to focus 2–5 kHz crack

  • Push/pull for aggression
  • - Nudge a few hats slightly late (5–10 ms) while keeping snare dead-on → creates a “leaning forward” impact when the snare hits.

    ---

    6) Mini practice exercise (15 minutes) ⏳

    1. Program a 1-bar DnB beat with kick + snare + 1/16 hats.

    2. Add 2 ghost snares (velocities 30–50).

    3. Apply a Swing 16-55 groove:

    - Timing 15%

    - Velocity 10%

    4. Manually nudge:

    - 4 random hat hits later by ~5 ms

    - 2 hat hits earlier by ~3 ms

    5. Add tonal movement:

    - Auto Filter on hats with Envelope Amount so louder = brighter

    6. Duplicate to 16 bars and make one small change every 4 bars.

    Check: Bounce/export a quick loop and listen quietly. If the groove still “walks,” you nailed it. If it feels messy, reduce timing/random and re-anchor the snare.

    ---

    7) Recap ✅

  • Keep kick + main snare stable for club impact.
  • Humanise mainly with:
  • - Velocity contours (especially hats)

    - Ghost notes at low velocity

    - Micro-timing (ms-level changes)

    - Groove Pool for controlled swing

    - Tonal variation tied to velocity (filter/brightness)

  • Arrange over 16 bars with tiny evolutions so it rolls like real DnB.

If you tell me your target subgenre (liquid, rollers, jump-up, jungle, neuro-ish) and your drum sample style (clean vs gritty), I can suggest specific groove settings and a starter 2-step pattern that fits.

Ask GPT about this lesson

Chat with the lesson tutor, get follow-up help, or use quick actions.

Bigup 👽 Ask me anything about this lesson and I’ll answer in context.

Narration script

Show spoken script
Welcome in. Today we’re going to humanise one-shots for club mixes in drum and bass, using Ableton Live. Beginner-friendly, stock tools only, and the goal is really specific: keep the drums tight enough to hit on a big system, but alive enough to roll.

Here’s the big idea before we touch anything. In DnB, some elements are the anchor, and some elements are the feel. The anchor is your kick weight and your main snare transient. Those are the things that make the dancefloor trust your beat. The feel is mostly hats, rides, shakers, ghost snares, and little percussion. That’s where we can add movement without making the groove sloppy.

By the end, you’ll have a 16-bar drum section that evolves like a real phrase, not just a one-bar loop copy-pasted sixteen times.

Alright, let’s set up.

Set your tempo to something club-standard for DnB. 174 BPM is a great start. Create one MIDI track, name it DRUMS, and drop a Drum Rack on it.

Now load in a few one-shots. Keep it simple: a clean punchy kick, a DnB snare that has some body around the low mids and some crack in the highs, a closed hat, an open hat or ride, a small percussion hit like a rim or shaker, and then either a separate ghost snare sample, or a duplicate of your main snare that we’ll process differently.

Quick teacher note: humanising isn’t a magic trick that fixes bad samples. It’s more like seasoning. Start with sounds that are already close to what you want.

Now we build the backbone first.

Create a MIDI clip, one bar long for now, looping. Put your main snare on beats 2 and 4. Classic DnB backbeat. Then add a kick pattern you like. If you’re new, keep it minimal: one on the one, and then one or two more placements that create forward motion. Don’t overthink the exact kick pattern yet.

Important rule: for now, keep the kick and main snare velocities consistent. Kick around 110 up to 127, main snare around 115 up to 127. We’re not trying to make the anchor “human.” We’re trying to make it reliable.

Now we add the rolling engine: hats.

Add closed hats at 1/8 notes if you want it clean, or 1/16 if you want that constant DnB chatter. Let’s go 1/16 for this lesson, because it really reveals the machine-gun problem.

Open your velocity lane in the MIDI editor. And instead of random velocities, do a repeating accent pattern. Think like a drummer’s hand. For 1/16 hats, try this mindset: accents, mediums, and ticks.

Set downbeats a bit stronger, somewhere around 70 to 85. Off-16ths lower, maybe 45 to 65. If you add an open hat or ride, keep it controlled, around 75 to 95 depending on how bright the sample is.

And here’s what you listen for: you want the hats to feel like they’re pulling the groove forward, not like they’re all shouting equally. If every hat is the same velocity, it will sound like a loop. If the velocities are totally chaotic, it’ll sound messy. We’re aiming for intentional.

Now, ghost snares. This is the secret sauce in a lot of rolling and jungle-influenced DnB.

Add two ghost notes in the bar. A common move is to place one just before the main snare, and maybe one just after, depending on the vibe. Keep them quiet. Ghost snare velocities around 25 to 55.

Now here’s the most important part: the ghost snare can’t sound like a quieter copy of the main snare. It should feel tucked back, like a hint of movement.

So go into your Drum Rack, find the ghost snare pad, and add an Auto Filter on that pad. Set it to high-pass. Bring the frequency up somewhere around 250 to 600 Hz so you’re cutting out the low body. You can add a tiny bit of resonance if you want it to poke a little, but keep it subtle.

Optional: add a touch of Redux for grit, very lightly. If it gets crunchy in an ugly way, back off. Ghosts should add texture, not steal attention.

At this point, you should already hear a groove starting to breathe: anchor is solid, hats are shaped, ghosts are whispering.

Now we humanise timing. And timing is where beginners usually go too far, so we’re going to use a timing budget.

For hats and small percussion, aim for roughly plus or minus 5 milliseconds. For ghost snares, you can go a little wider, maybe plus or minus 8 milliseconds, because they’re quieter and they read as feel instead of sloppiness.

Two ways to do this: manual micro-nudges, or Groove Pool. We’ll do both, starting with Groove Pool because it’s fast.

Open the Groove Pool in Ableton. Grab a groove like Swing 16-55 or Swing 16-60. Drag it onto your MIDI clip.

Now, in the Groove settings, keep it subtle. Timing around 10 to 25 percent. Velocity 5 to 15 percent. Random: start at zero, and if you use it at all, keep it under 10 percent. Base should match your rhythm, so keep it at 16 for 16th-based hats.

Now listen carefully to the kick and the snare. If the low end starts to feel late, or the snare starts losing authority, that means you’re grooving the wrong things or you’re pushing the groove too hard.

A really clean approach is selective groove application. Put your hats and ghosts in a separate MIDI clip, or even a separate track, and apply groove only there. That way your anchor stays locked.

Alright, now we add a little manual micro-timing on top, because that’s what creates the “played” illusion.

Zoom in. And only nudge hats, shakers, ghost snares, small percussion. Push a few hat hits slightly late, like 3 to 8 milliseconds. Pull a couple slightly early, maybe 2 to 5 milliseconds. You’re creating tiny imperfections, not flam city.

And here’s a cool trick for DnB specifically: if you have a ghost snare right before the main snare, try pushing that ghost a hair late instead of early, like 2 to 5 milliseconds late. It can create this pull into the backbeat, without weakening the snare itself. The main snare stays dead on. The ghost leans into it.

Now let’s fix the machine-gun tone problem. Even if timing and velocity are good, one-shots can still sound copy-pasted because the tone repeats exactly.

We’re going to fake round-robin variation using stock tools.

First, add tiny velocity randomness. Place a Velocity MIDI effect before the Drum Rack, but make sure it’s only affecting hats if you can. If it’s affecting the whole rack, keep it super subtle. Set the Random to something like 3 to 8. Tiny.

Then we translate velocity into tone. Go to the hat pad, add Auto Filter. Choose a subtle filter mode, and turn on the envelope. Set a small envelope amount so louder hat hits get a little brighter. Keep the attack very fast, 0 to 5 milliseconds, and decay around 50 to 150 milliseconds.

Now you’ve got a natural relationship: soft hits are duller, loud hits are brighter. That’s how real playing behaves.

If you want an even more believable result, do the classic jungle technique: two hat samples.

Create Hat A and Hat B on separate pads. Make Hat A tighter, shorter release. Make Hat B slightly darker with a tiny bit more release, so it has a little tail. Then alternate them in the MIDI clip: A B A B, or use Hat B mostly on offbeats. Keep Hat B a bit quieter. This instantly breaks repetition, even if the timing is tight.

And here’s an advanced-feeling trick that’s actually simple: micro-doubles that don’t sound like flams. Duplicate one hat hit and place the duplicate 10 to 20 milliseconds after the original, but much quieter, like 20 to 30 velocity lower. It mimics two-stick articulation and adds energy without needing reverb.

Now let’s make this club-ready, because humanised drums can get spiky or inconsistent if we don’t control them.

On the DRUMS track after the Drum Rack, add EQ Eight first. If you need a gentle high-pass, do it carefully. Don’t gut your punch. If hats are harsh, look around 7 to 10 kHz for spiky resonances and tame them gently.

Next add Glue Compressor. Try attack around 3 milliseconds, release on Auto, ratio 2 to 1. You’re not trying to squash. You’re trying to glue. Aim for 1 to 3 dB of gain reduction on peaks.

Then add Saturator. Drive around 1 to 3 dB, Soft Clip on. This helps the drums feel louder and denser without just turning them up.

Optional: Drum Buss. A little drive can be great. Be careful with Boom in DnB. Your sub is sacred, and you don’t want your drum bus inventing low end that fights the bassline.

Now arrangement. This is where your beat stops being a loop and starts being a section.

Duplicate your one-bar clip out to 16 bars. Then think in phrases, not individual hits. Every 2 to 4 bars, make one micro-edit. Not ten. One.

Here’s an easy energy ladder:
Bars 1 to 4: simpler, maybe 1/8 hats or fewer ghosts
Bars 5 to 8: switch to 1/16 hats, but keep velocities restrained
Bars 9 to 12: add a quiet ride layer or small texture
Bars 13 to 16: one bar gets a little busier, then the last bar pulls back to create space into the next section

Some super practical moves:
Remove the open hat on bar 4, 8, or 16 to create a breath
Add a tiny snare flam at the end of bar 8 or 16, but keep it controlled
Remove one hat hit in the exact same spot every two bars. That “missing tooth” can feel weirdly human and very danceable
Add a rim or clave as call-and-response after the snare every other bar, slightly late, very quiet

And one more pro habit: audition your humanisation at low volume. Quiet playback reveals whether the groove still drives. If it only feels good loud, sometimes that’s just high-frequency chaos tricking you into thinking it’s exciting.

Before we wrap, let’s cover the common mistakes so you can dodge them fast.

Mistake one: humanising the kick and the sub region too much. If your kick timing wanders, the whole track feels weak on a big system. Keep it stable.

Mistake two: using Random like a chaos button. If your random velocity is huge, it’s not human, it’s inconsistent. Subtle wins.

Mistake three: everything swings equally. If your main snare swings hard, the backbeat loses authority. Swing hats and percussion more than the main snare.

Mistake four: ghost notes too loud. If you clearly hear them as main hits, they stop being ghosts. You want to feel them more than you hear them.

Mistake five: no tonal variation. Velocity alone sometimes still sounds copy-pasted. Tie velocity to brightness using filter envelope, or alternate two samples.

Alright, quick 15-minute practice you can do right after this:
Program a one-bar DnB beat with kick, snare, and 1/16 hats
Add two ghost snares with velocities around 30 to 50
Apply Swing 16-55 with timing around 15 percent and velocity around 10 percent
Manually nudge four random hat hits later by about 5 milliseconds, and two hats earlier by about 3 milliseconds
Add Auto Filter to hats so louder hits get brighter
Duplicate to 16 bars and make one small change every 4 bars

Then do the test: export a quick loop and listen very quietly, then loud. If it feels exciting loud but messy quiet, reduce the timing range and simplify the hat variations. If it still walks quietly, you nailed it.

Recap to lock it in.
Keep kick and main snare stable. Humanise hats, ghosts, and small percussion with velocity contours, tiny micro-timing, Groove Pool used subtly, and tonal movement tied to velocity. Then arrange over 16 bars with micro-evolution so it rolls like real DnB, but still hits like a club record.

When you’re ready, tell me what subgenre you’re aiming for—liquid, rollers, jump-up, jungle, neuro-ish—and whether your drum samples are clean or gritty, and I’ll suggest groove settings and an accent map that fits that style without losing the floor-lock.

mickeybeam

Go to drumbasscd.com for +100 drum and bass YouTube channels all in one place - tune in!

Generating PDF preview…