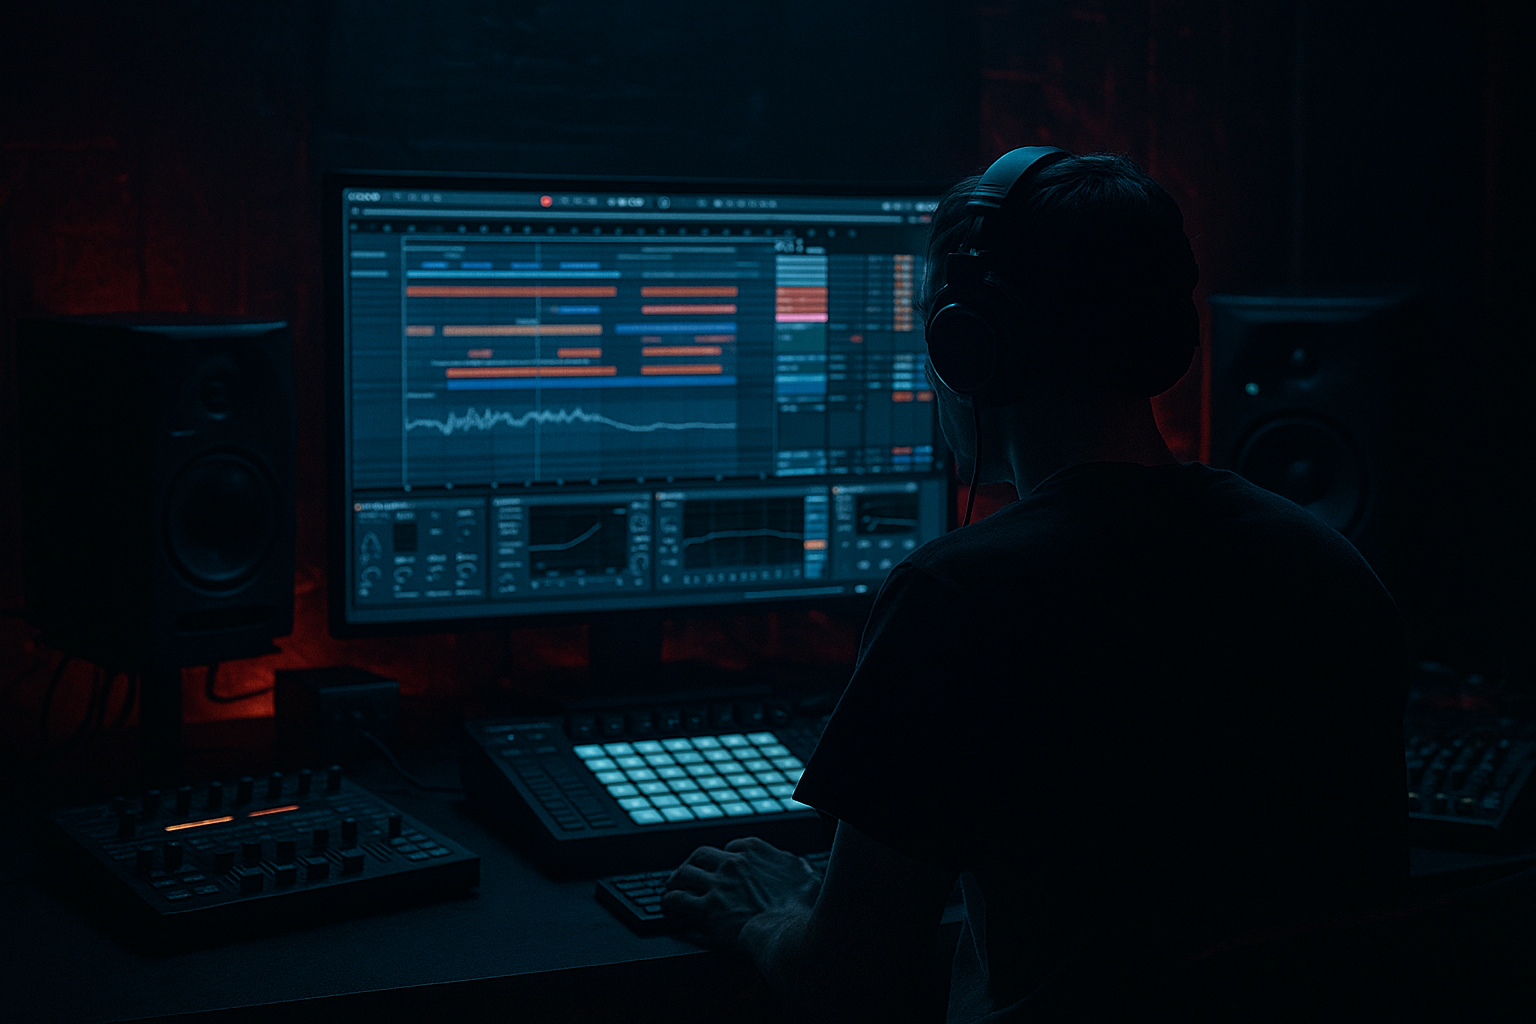
DNB COLLEGE

AI Drum & Bass Ableton Tutorials

LESSON DETAIL

Junglist jungle ghost note: route and arrange in Ableton Live 12 (Intermediate)

An AI-generated intermediate Ableton lesson focused on Junglist jungle ghost note: route and arrange in Ableton Live 12 in the FX area of drum and bass production.

Free plan: 0 of 1 lesson views left today. Premium unlocks unlimited access.

Junglist jungle ghost note: route and arrange in Ableton Live 12 (Intermediate) cover image

Narrated lesson audio

The voice track includes the tutorial plus extra teacher commentary.

Open audio file

Main tutorial

Junglist Jungle Ghost Note: Route & Arrange in Ableton Live 12 (FX)

1. Lesson overview

Ghost notes in jungle/DnB aren’t just “quiet hits” — they’re micro-rhythmic glue that makes breaks feel alive and rolling. In this lesson you’ll build a dedicated ghost-note FX lane, route it cleanly, and arrange it so it drives energy without cluttering your main drums. 🎛️🥁

We’ll focus on Ableton Live 12 stock tools, solid routing practice, and arrangement moves that work in rolling/junglist contexts.

---

2. What you will build

A practical Live 12 setup with:

  • A Breaks Group containing:
  • - Main break track (your core loop)

    - Ghost Note track (a duplicate lane, filtered + transient-shaped + tucked)

    - Optional Ghost Return FX (reverb/delay for controlled space)

  • A ghost pattern approach that:
  • - Accents off-beats, pushes shuffle, and adds forward motion

    - Stays out of the way using EQ, sidechain, and transient shaping

  • Arrangement tactics:
  • - Ghost notes fade in during builds

    - Drop tightening (pull them back for impact)

    - Switch ghost “density” between sections for movement

    ---

    3. Step-by-step walkthrough

    Step 0 — Session prep (DnB context)

  • Tempo: 165–175 BPM (try 170 BPM).
  • Grab a break that has character (Amen-style, Think break, hot loop, etc.).
  • Put it on an audio track: `Break Main`.
  • Tip: Warp mode for breaks usually behaves well in Beats mode.

  • Clip View → Warp: On
  • Mode: Beats
  • Preserve: Transients
  • Transient loop: try 1/16 or 1/32 depending on the break
  • ---

    Step 1 — Create a dedicated ghost-note lane (clean routing)

    1. Duplicate your break track:

    - Right-click `Break Main` → Duplicate

    - Rename duplicate to `Break Ghost`

    2. Group them:

    - Select both → Cmd/Ctrl + G

    - Name group: `BREAKS`

    3. Create a “drum bus” inside the group:

    - Create a new Audio Track inside the group named `Break Bus`

    4. Routing:

    - On `Break Main` set Audio To → Break Bus

    - On `Break Ghost` set Audio To → Break Bus

    - On `Break Bus` set Audio To → Master

    This gives you:

  • Independent processing for ghost notes
  • Unified control on the bus for glue/compression
  • ---

    Step 2 — Make the ghost lane actually “ghost” (filter + transient + level)

    On `Break Ghost`, add this stock chain:

    #### Device chain (recommended order)

    1. EQ Eight

    2. Drum Buss

    3. Compressor (sidechain optional)

    4. Utility

    #### Suggested starting settings

    1) EQ Eight

    Goal: remove weight + focus mid/high tick/click.

  • High-pass: 24 dB/oct at 180–300 Hz
  • Optional dip for harshness: bell at 3–6 kHz, -2 to -5 dB if needed
  • Optional air control: low-pass around 10–14 kHz if the break is fizzy
  • 2) Drum Buss

    Goal: emphasize transient “tck” without adding boom.

  • Drive: 0 to 5% (keep subtle)
  • Crunch: 5–20% (depends on taste)
  • Transients: +5 to +25
  • Boom: Off (or very low, like 0–5%, but usually off for ghosts)
  • 3) Compressor

    Goal: level the ghosts so they’re consistent.

  • Ratio: 2:1 to 4:1
  • Attack: 10–30 ms (let transient through)
  • Release: 50–120 ms
  • Aim: 2–5 dB gain reduction on peaks
  • 4) Utility

  • Gain: pull it down so it sits behind the main break.
  • Start around -12 dB to -20 dB relative to your main break, then adjust by ear.
  • 🎯 Listening target: You should notice more roll and shimmer when muted/unmuted, not a new “layer” screaming for attention.

    ---

    Step 3 — Turn the ghost lane into a controlled rhythm tool (clip + edits)

    Now shape where the ghost notes hit. You can do this two main ways:

    #### Option A: Audio clip “ghost gating” (fast + classic)

    1. On `Break Ghost`, Consolidate the loop to a clean region:

    - Select the loop region → Cmd/Ctrl + J

    2. Enter clip view and use clip gain envelopes:

    - Show Envelopes → ClipGain

    - Draw dips to remove main hits and keep the little in-between details

    3. Alternatively (often quicker): slice away main hits

    - Zoom in

    - Cut around big kick/snare transients and delete those chunks

    - Add tiny fade-ins/outs to prevent clicks

    DnB placement idea: Keep ghosts that happen:

  • Between kick and snare (the “skank space”)
  • Just before snares (tiny pickups)
  • On 1/16ths leading into the 2 and 4
  • #### Option B: Create a “ghost pattern” with Gate (more surgical)

    1. Add Gate after EQ Eight on `Break Ghost`.

    2. Trigger it rhythmically using sidechain input (Live 12 Gate supports sidechain):

    - Gate → Sidechain On

    - Audio From: a MIDI “trigger track” (next step)

    Now create a MIDI track:

  • Add Drum Rack with a short click sample (or a closed hat)
  • Program a pattern of 1/16 ghost triggers (but not constant — use syncopation)
  • Gate starter settings:

  • Threshold: adjust until it opens only on triggers
  • Attack: 0.1–1 ms
  • Hold: 10–30 ms
  • Release: 30–80 ms
  • This gives you tight, programmable ghosts while still using the break’s texture.

    ---

    Step 4 — Add controlled space: Return track for ghost-only reverb/delay

    Ghost notes shine when they create depth without washing the whole break.

    1. Create a Return track: `R: Ghost Space`

    2. Put this chain on the return:

    Hybrid Reverb (stock)

  • Algorithm: try Plate or Room
  • Decay: 0.6–1.4 s
  • Pre-delay: 10–25 ms
  • HP filter: 250–500 Hz
  • Wet: 100% (because it’s a return)
  • Optional: Echo

  • Time: 1/8 or 3/16 (jungle bounce)
  • Feedback: 10–25%
  • Filter: cut lows below 300 Hz
  • 3. Send only the ghost lane:

  • `Break Ghost` → Send to R: Ghost Space: start at -18 to -10 dB
  • 🎧 If you mute the return and the groove collapses a little, you’re in the sweet spot.

    ---

    Step 5 — Keep it clean: sidechain ghost under the main snare/kick

    Ghosts can mask your punch if you’re not careful.

    On `Break Ghost` (or on Ghost Space return), add Compressor with sidechain:

  • Sidechain: On
  • Audio From: `Break Main` (or your snare track if separate)
  • Ratio: 4:1
  • Attack: 1–10 ms
  • Release: 60–140 ms
  • Threshold: aim for 2–6 dB GR when main hits land
  • This keeps ghost energy in the gaps, not on top of the smack. ✅

    ---

    Step 6 — Arrange it like a junglist: density, automation, and drop impact

    Now the fun part: make it move across your track.

    #### Arrangement blueprint (very usable)

  • Intro (16–32 bars):
  • - Ghost lane filtered (EQ Eight low-pass at ~8–10 kHz)

    - More send to Ghost Space

  • Build (8–16 bars):
  • - Automate Utility Gain up +2 to +4 dB gradually

    - Slightly raise Gate density or unmute more chopped bits

  • Drop (first 16):
  • - Pull ghost level down by -2 to -6 dB for punch

    - Reduce reverb send (keep it tight)

  • Second phrase (next 16):
  • - Bring ghosts back up slightly, maybe add Echo send

    - Add a small Drum Buss transient boost (+5–10 more)

    #### Easy automation targets

  • `Break Ghost` → Utility Gain
  • `Break Ghost` → EQ Eight HP frequency (tighten/loosen)
  • Return send amount to `R: Ghost Space`
  • Gate Threshold / pattern density (if using the Gate method)
  • ---

    Step 7 — Final glue on the Break Bus (don’t overcook)

    On `Break Bus`, add light glue:

    Glue Compressor (stock)

  • Attack: 10 ms
  • Release: Auto
  • Ratio: 2:1
  • Aim for 1–3 dB gain reduction
  • Optional: Saturator

  • Mode: Soft Sine or Analog Clip
  • Drive: 1–3 dB
  • Keep output matched
  • This makes the main + ghost feel like one break again.

    ---

    4. Common mistakes

  • Ghosts too loud: if you hear a separate break, it’s not ghosting anymore.
  • Leaving low-end in: ghost lows fight kick/bass and blur the groove. High-pass is non-negotiable.
  • Too much reverb: jungle needs space, but the break still has to punch. Keep ghost verb short and filtered.
  • No sidechain control: the main snare/kick should win every time.
  • Over-quantizing: a tiny bit of natural swing/imperfection is the whole vibe.
  • ---

    5. Pro tips for darker/heavier DnB

  • Make ghosts gritty but thin:
  • Add Roar (stock in Live 12) on `Break Ghost` very subtly:

    - Pick a gentle saturation type, keep Mix low (10–25%)

    - Filter inside Roar to keep lows out

  • Stereo discipline:
  • Use Utility on `Break Ghost`:

    - Width: 70–100% (don’t go ultra-wide; keep center clear for snare/bass)

  • Make ghosts “pull” into the snare:
  • Use Auto Filter with envelope:

    - High-pass filter

    - Envelope Amount small, so each ghost gets a tiny “flick”

  • Darkness without mud:
  • On the ghost return, cut more highs:

    - Hybrid Reverb filter: low-pass to 6–9 kHz

    This gives shadowy space instead of fizzy wash. 🌑

    ---

    6. Mini practice exercise

    1. Pick a 2-bar break loop and create `Break Main` + `Break Ghost` with the routing above.

    2. On `Break Ghost`, do two versions:

    - Version A (Chop method): remove main hits, keep in-between ticks

    - Version B (Gate method): trigger with a syncopated 1/16 MIDI pattern

    3. Arrange 32 bars:

    - Bars 1–16: ghost filtered + higher reverb send

    - Bars 17–32: reduce reverb, increase transient, but lower overall ghost level slightly

    4. Bounce/export a quick test and listen on low volume:

    - If the groove still “rolls” quietly, you nailed it.

    ---

    7. Recap

  • You built a dedicated ghost-note lane routed into a Break Bus for clean control.
  • You shaped ghost notes with EQ Eight + Drum Buss + compression + Utility.
  • You added depth via a ghost-only return (Hybrid Reverb/Echo) and kept punch via sidechain.
  • You arranged ghost density and space over sections to create real junglist movement. 🥁✨

If you want, tell me what kind of break you’re using (Amen/Think/modern chop) and whether your tune is more rollers or dark minimal, and I’ll suggest an exact ghost pattern + device settings to match.

Ask GPT about this lesson

Chat with the lesson tutor, get follow-up help, or use quick actions.

Bigup 👽 Ask me anything about this lesson and I’ll answer in context.

Narration script

Show spoken script
Welcome in. Today we’re doing a very specific, very junglist move in Ableton Live 12: building a dedicated ghost-note FX lane, routing it cleanly, and then arranging it so it adds roll and life without stealing punch from your main break.

And just to lock in the mindset: in jungle and drum and bass, ghost notes aren’t “a quieter drum loop.” They’re the micro-rhythmic glue. They’re the little ticks, paper, shuffle, and pre-snare pickups that make a break feel like it’s pulling you forward.

By the end, you’ll have a BREAKS group with a main break, a ghost break, a break bus, and an optional ghost-only space return. Stock devices only, but pro-level control.

Alright, let’s set the session up.

Start with tempo. Put yourself in the real zone: 165 to 175 BPM. I’m going to sit at 170 BPM.

Now grab a break with character. Amen-style, Think break, a modern break chop… whatever you like, as long as it has texture. Drop it on an audio track and name that track Break Main.

Quick warping note, because it matters a lot for ghosts: in Clip View, turn Warp on. Set Warp mode to Beats. Preserve set to Transients. And then try the transient loop setting at 1/16, and also audition 1/32. Here’s why: ghost notes are mostly transient texture, and sometimes 1/32 preserves those tiny ticks a bit cleaner, especially once we high-pass and thin things out. Do not just set it and forget it. Listen.

Now we’re going to create the ghost lane and route it properly, so this stays organized and mixable.

Duplicate Break Main. Rename the duplicate to Break Ghost.

Select both tracks and group them. Name the group BREAKS.

Inside that group, create one more audio track called Break Bus. This is basically your internal drum bus for these two lanes.

Now the routing. On Break Main, set Audio To: Break Bus. On Break Ghost, also set Audio To: Break Bus. And on Break Bus, set Audio To: Master.

Teacher note: this is the kind of routing that keeps you sane later. You can process the ghost lane independently, but you can still glue everything together on the bus, and automate the ghost without messing up your main break.

Before we start adding bus processing, do a quick gain stage check. Get Break Main and Break Ghost set so Break Bus is peaking around minus 10 to minus 6 dBFS. Not because you can’t go louder, but because your compression behavior becomes predictable, and you won’t be chasing thresholds all day.

Now let’s make the ghost lane actually ghost.

Go to Break Ghost and add a simple stock chain in this order: EQ Eight, then Drum Buss, then Compressor, then Utility.

First, EQ Eight. The rule is simple: ghost lows have to go. High-pass it, 24 dB slope, somewhere around 180 to 300 Hz. If your break is thick, go higher. If your break is already thin, go lower. But you’re aiming to remove weight and keep tick.

If it’s harsh, do a gentle bell dip around 3 to 6 kHz, like minus 2 to minus 5 dB. If it’s too fizzy, you can low-pass around 10 to 14 kHz. Ghost notes are about motion, not pain.

Now Drum Buss. The goal here is transient emphasis without adding boom.
Set Drive subtle, zero to five percent. Crunch five to twenty percent depending on taste. Transients somewhere between plus five and plus twenty-five. And keep Boom off, or extremely low. Boom on a ghost lane is usually a fast route to muddy, flabby breaks.

Then Compressor. This is not to smash it, it’s to make the little details consistent so the groove doesn’t randomly disappear.
Try a ratio of two to one up to four to one. Attack ten to thirty milliseconds so the transient still pokes through. Release fifty to one-twenty milliseconds. Aim for maybe two to five dB of gain reduction on the peaks.

Then Utility. This is where you set the truth. Pull the gain down so it sits behind the main break. Start somewhere like minus 12 to minus 20 dB relative to Break Main, then adjust by ear.

Here’s your listening target: when you mute and unmute Break Ghost, you should feel more roll and shimmer. You should not feel like a second break showed up. A good test: solo Break Ghost. It should sound interesting but incomplete. If it sounds like a full break that could carry the track, you didn’t remove enough core hits, or you left too much low-mid.

Now we shape the actual rhythm content, because ghost notes aren’t just a filter preset. They’re placement.

You have two main approaches.

Option A is classic and fast: audio clip “ghost gating” by editing the loop.

On Break Ghost, consolidate the loop region. Command or Control J.

Now you can do it with clip gain envelopes, drawing dips to remove the main hits and keep the in-between details.

But honestly, a lot of the time the quickest way is to chop. Zoom in and cut around the big kick and snare transients, delete those chunks, and then add tiny fades to prevent clicks.

And here’s a detail that makes a big difference: those micro-fades, like one to five milliseconds, aren’t just click prevention. They slightly round the edges so the ghost lane reads as motion instead of edits.

Placement idea for junglist roll: pre-snares are sacred, post-snares are optional. Tiny pickups into the 2 and the 4 almost always feel better than extra chatter after the snare. If it’s getting busy, remove after-snare ghosts first.

Option B is more surgical and super fun: create a programmable ghost pattern using Gate.

Add Gate after EQ Eight on Break Ghost. Turn on Sidechain in the Gate.

Now we need a trigger source. Create a new MIDI track. Load a Drum Rack with a very short click sample or a tight closed hat. Program a syncopated 1/16-ish pattern, but don’t make it constant. Leave holes. Those holes are the groove.

Back on Gate, set Audio From to that trigger track. Now set your Gate basics: attack super fast, around 0.1 to 1 millisecond. Hold ten to thirty milliseconds. Release thirty to eighty milliseconds. And set the threshold so it opens only when the trigger hits.

This method is huge because you’re using the break’s texture, but you’re playing it like an instrument.

Advanced coaching trick if you want real swing: once you like your MIDI trigger pattern, print it to audio, then nudge some hits slightly late, like five to fifteen milliseconds, and some slightly early, like three to eight. The Gate will open with human push-pull, but the original break timing stays intact. It’s that “alive” feeling without warping the break into mush.

Now let’s add controlled space, but only for the ghosts.

Create a return track and name it R: Ghost Space.

On this return, load Hybrid Reverb. Try Plate or Room. Set decay around 0.6 to 1.4 seconds. Pre-delay ten to twenty-five milliseconds. High-pass inside the reverb around 250 to 500 Hz. And set it fully wet, because it’s a return.

Optionally add Echo after the reverb. Set time to one-eighth or three-sixteenths for that jungle bounce. Feedback ten to twenty-five percent. Filter out lows below 300 Hz.

Now only send Break Ghost to this return. Start the send around minus 18 to minus 10 dB and tune by ear.

A really solid test: mute the return. If the groove collapses a little, like it loses depth and forward motion, you’re in the sweet spot. If muting it changes nothing, you’re not sending enough. If unmuting it turns your break into a wash, you’re sending too much or your decay is too long.

Now we protect the punch.

Ghost notes can mask the kick and snare, especially once you add space. So we’re going to duck them.

On Break Ghost, add a Compressor with Sidechain enabled. Set Audio From to Break Main, or to your snare track if you’ve separated it.

Try ratio four to one. Attack one to ten milliseconds. Release sixty to one-forty milliseconds. Lower the threshold until you see two to six dB of gain reduction when the main hits land.

Now the ghost energy lives in the gaps, where it belongs, and the main snare still wins every time.

If you want to get extra clean, you can do frequency-dependent ducking instead of full-band. Put Multiband Dynamics on Break Ghost, and focus the low-mid band, roughly 200 to 800 Hz. Compress that band harder during snare hits, while leaving the high fizz mostly alone. You keep the shimmer but stop the “snare got smaller” problem.

Cool. Now we arrange it like a junglist.

Think of the ghost lane like a contrast knob. You’re going to use it to map energy across the track, not to permanently add density.

Here’s a simple blueprint.

In the intro, sixteen to thirty-two bars, keep the ghost lane more filtered, like an EQ Eight low-pass around eight to ten kHz. Give it more send to Ghost Space. This creates depth and tease without making the drums feel “done” too early.

In the build, eight to sixteen bars, automate Utility gain up by two to four dB gradually. If you’re using the Gate method, increase density a little, or open up a few more chopped bits. The feeling should be: things are accelerating, but the main break still feels like the leader.

At the drop, first sixteen bars: do the opposite. Pull ghost level down by two to six dB. Reduce the reverb send so it’s tight.

And here’s a drop impact trick that works ridiculously well: instead of just dipping the level, mute the ghost lane for the first one to two beats, then fade it in quickly over the next bar. That contrast hits harder than a simple minus three dB change.

Second phrase, next sixteen: bring ghosts back a touch. Maybe increase Echo send slightly. Add a small extra transient boost in Drum Buss, like plus five to ten, but keep an eye on harshness.

Easy automation targets that give you the most movement with the least mess are Utility gain on Break Ghost, the EQ Eight high-pass frequency to tighten or loosen, the return send amount to Ghost Space, and if you’re doing Gate, the pattern density or threshold.

Want an arrangement upgrade? Think in three states.
State one is Tease: ghosts audible, more space, less transient bite.
State two is Drive: ghosts slightly quieter, more transient, less reverb.
State three is Restraint: ghosts nearly off right before a drop or fill.
You can switch those states by automating just two or three parameters: Utility gain, Drum Buss transients, and the return send.

Now, final glue.

On Break Bus, add Glue Compressor, light touch. Attack ten milliseconds, release on Auto, ratio two to one, and aim for one to three dB of gain reduction. Optional Saturator after it, Soft Sine or Analog Clip, drive one to three dB, and match output so you’re not tricking yourself with loudness.

Do not overcook the bus. The ghost lane is already a detail layer; you’re gluing, not flattening.

Let’s do a quick checklist of common mistakes so you can catch them fast.

If ghosts are too loud, you’ll hear a separate break. Pull them down.
If you left low end in the ghost lane, your kick and bass will feel blurry. High-pass is non-negotiable.
If you used too much reverb, the break stops punching. Keep it short and filtered.
If you skipped sidechain control, the snare will lose authority.
And if you over-quantize your triggers or edits, you kill the vibe. Slight imperfection is the point.

Before we wrap, here’s a mini practice run you can do in like twenty minutes.

Pick a two-bar break loop. Build Break Main, Break Ghost, and the Break Bus routing.

Then make two ghost versions.
Version A: the chop method. Remove kicks and snares, keep in-between ticks and pre-snare pickups.
Version B: the Gate method. Trigger it with a syncopated 1/16 pattern with holes.

Arrange thirty-two bars.
Bars one to sixteen: filtered ghost and higher reverb send.
Bars seventeen to thirty-two: less reverb, more transient bite, but slightly lower ghost overall level.

Then bounce a quick test and listen at low volume. If the groove still feels like it rolls and pulls forward quietly, you nailed it.

Recap.
You built a dedicated ghost-note lane routed into a Break Bus.
You shaped it with EQ Eight, Drum Buss, compression, and Utility so it stays behind the main break.
You added depth with a ghost-only return and kept punch with sidechain ducking.
And you arranged density and space across sections so the track moves like a real junglist tune.

If you tell me what break you’re using, like Amen, Think, or a modern chop, and whether you’re going for a roller or a dark stepper vibe, I’ll give you two concrete ghost trigger patterns: one sparse, one driving, plus starting settings tailored to that style.

Background music

Premium Unlimted Access £14.99

Any 1 Tutorial FREE Everyday
Tutorial Explain
Generating PDF preview…