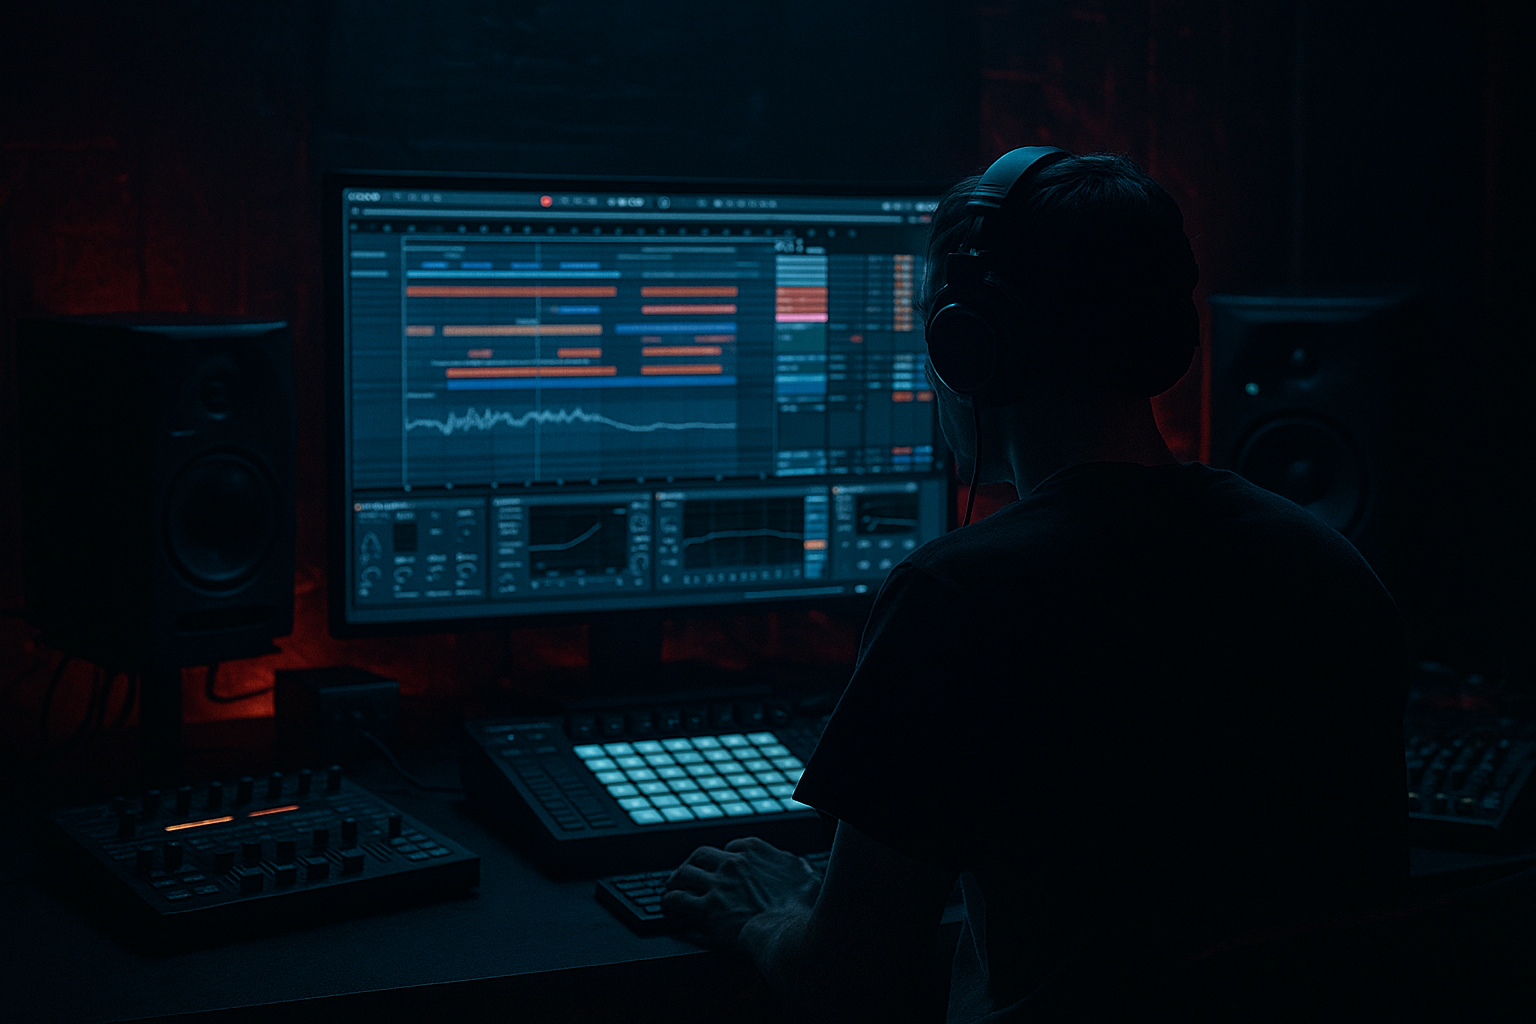
DNB COLLEGE

Drum & Bass Ableton Live 12 Tutorials

LESSON DETAIL

Late-night emotional jungle writing masterclass without third-party plugins (Advanced)

An AI-generated advanced Ableton lesson focused on Late-night emotional jungle writing masterclass without third-party plugins in the Composition area of drum and bass production.

Back to lessons
Late-night emotional jungle writing masterclass without third-party plugins (Advanced) cover image

Narrated lesson audio

The voice track includes the tutorial plus extra teacher commentary.

Open audio file

Main tutorial

```markdown

Late-night Emotional Jungle Writing Masterclass (Ableton Live, Stock Devices Only) 🌙🔥

1. Lesson overview

This masterclass is about writing late-night emotional jungle that still rolls hard—think dusty break edits, minor-key chords, haunting pads, restrained but powerful subs, and an arrangement that tells a story.

You’ll do this entirely with Ableton Live stock devices: no third‑party synths, no sample packs required (but you can use Ableton’s core library if you want).

Skill focus (advanced composition):

  • Write an emotive harmonic world that supports jungle energy
  • Build tension/release through arrangement (not just FX)
  • Make breaks feel alive using micro-edits, ghost notes, and swing
  • Keep bass minimal but devastatingly effective
  • ---

    2. What you will build

    A 2:30–3:30 jungle/DnB sketch with:

  • A/B sections: intro → drop → mid variation → outro
  • One emotional chord/pad motif
  • One main break + one supporting break layer
  • A sub + reese/rumble layer (stock synths)
  • Classic jungle transitions: tape-stop vibes, filtered drops, impact tails, and little “late-night” ear candy ✨
  • Target vibe references (in spirit):

  • Emotional: deep minor chords, nostalgic atmosphere, melancholic lead fragments
  • Jungle: chopped Amen-style energy, rolling hats, warm subs, dubby space
  • ---

    3. Step-by-step walkthrough

    Session prep (10 minutes)

    1. Tempo: set 172 BPM (168–176 is the zone).

    2. Project structure: create groups:

    - `DRUMS (BREAKS)`

    - `DRUMS (TOPS)`

    - `BASS`

    - `MUSIC (CHORDS/PADS)`

    - `FX / ATMOS`

    3. Return tracks (simple, powerful):

    - A – “ShortVerb”: `Reverb`

    - Decay: 0.8–1.2s

    - Pre-Delay: 10–20ms

    - Low Cut: 250–400 Hz

    - High Cut: 7–10 kHz

    - B – “DubVerb”: `Hybrid Reverb` (Convolution or Algorithm)

    - Decay: 2.5–4.5s

    - Size: medium-large

    - Low Cut: 300–600 Hz

    - Modulation: subtle (keep it late-night, not trancey)

    - C – “DubDelay”: `Echo`

    - Time: 1/8 Dotted or 1/4

    - Feedback: 25–45%

    - Filter: HP 250 Hz, LP 6–9 kHz

    - Wobble: 2–5% for character

    4. Master channel (temporary writing chain): keep it light so you don’t “compose into a lie”

    - `Utility` (for quick gain trims)

    - `Limiter` (Ceiling -1 dB, just catching peaks)

    ---

    Step 1 — Write the emotional harmonic bed (the “night light”) 🌌

    You want simple harmony that can loop for 16–32 bars without getting annoying.

    #### Option A: Pad with Wavetable (stock)

    1. Create MIDI track: `PAD`.

    2. Add `Wavetable`:

    - Osc 1: Sine or Triangle (soft)

    - Osc 2: Muted saw (very low level, -18 to -24 dB)

    - Unison: 2–4 voices, Amount 10–25%

    - Filter: LP24, cutoff 400–2k (map cutoff to Macro)

    - Amp envelope: Attack 40–150 ms, Release 2–6 s

    3. Add chain:

    - `Chorus-Ensemble` (very subtle)

    - Amount: 10–20%

    - Rate: 0.2–0.6 Hz

    - `EQ Eight`

    - HP at 120–180 Hz

    - Gentle dip around 250–450 Hz if muddy

    - Send to DubVerb + a touch of DubDelay

    #### Harmony writing (practical approach)

  • Pick a key like F minor / G minor / D# minor (classic emotional weight).
  • Write a 2-chord or 4-chord loop using extended chords:
  • - Example in F minor:

    - `Fm9` → `Dbmaj7(#11)` → `Ab(add9)` → `Eb6/9`

  • Keep voicings close in the midrange (around C3–C5), and let the pad sit behind the drums.
  • Ableton trick:

    Use `MIDI Effects → Scale` to lock the vibe (e.g., Natural Minor), then break the rules later intentionally.

    ---

    Step 2 — Build the sub (simple, stable, emotional)

    Jungle subs are often clean and consistent, especially under busy breaks.

    1. Create MIDI track: `SUB`.

    2. Add `Operator`:

    - Algorithm: A only

    - Wave: Sine

    - Envelope: Attack 0–10 ms, Release 120–250 ms

    3. Add `Saturator`:

    - Drive 2–6 dB

    - Soft Clip On

    4. Add `EQ Eight`:

    - Lowpass around 120–180 Hz (keep it pure)

    5. Optional `Compressor` (not sidechain yet) for control:

    - Ratio 2:1, slow-ish attack (10–30 ms), release (80–150 ms)

    Composition note:

    Write sub notes that answer the chord movement, but don’t mirror it constantly. Use space: long notes, occasional pickup notes into chord changes.

    ---

    Step 3 — Make a reese/weight layer (dark but controlled) 😈

    This is your “late-night pressure” under the emotional music.

    1. Create MIDI track: `REESE`.

    2. Add `Wavetable`:

    - Osc 1: Saw

    - Osc 2: Saw (detune slightly)

    - Unison: Classic, 4–7 voices, Amount 30–60%

    - Filter: LP24

    3. Add chain:

    - `Saturator` (Drive 3–8 dB)

    - `Auto Filter` (for movement)

    - Rate: 1/8 or 1/4 (sync)

    - Amount: subtle, just a slow chew

    - `EQ Eight`

    - HP at 80–110 Hz (leave space for sub)

    - Notch any harshness around 2–4 kHz

    - `Glue Compressor`

    - Ratio 2:1

    - Attack 10 ms

    - Release Auto

    - GR 1–3 dB

    Key move:

    Keep reese notes simpler than the sub. Often: root + occasional 5th or one-note drones that shift per section.

    ---

    Step 4 — Breaks: the heart of jungle (chop, swing, ghost) 🥁

    You can do this with any break sample you have, but to stay “stock only,” use Ableton’s library:

  • Packs like Breakbeats, Drum Booth, etc. (depending on your installation)
  • #### Main break workflow (fast + surgical)

    1. Drag a break loop onto an audio track: `BREAK A`.

    2. Right-click → Warp:

    - Warp mode: Complex Pro for full loops (or Beats for tighter transient feel)

    - If using Beats: set Preserve to Transients, Envelope 50–80

    3. Right-click → Slice to New MIDI Track

    - Slicing preset: Transient

    - This creates a Drum Rack with slices.

    #### Programming the “rolling emotional” pattern

  • Start with a classic 2-step skeleton:
  • - Kick-ish hits on 1 and (often) 11

    - Snare on 5 and 13 (DnB grid)

  • Then add jungle personality:
  • - Ghost snares slightly before/after main snare

    - Little kick pickups into bar transitions

    - Re-trigger 1/16 stutters at the end of 4 or 8 bars

    Groove (mandatory):

  • Use Groove Pool: try MPC 16 Swing 54–58 or any subtle shuffle.
  • Apply at 20–40%.
  • Too much swing = drunk breaks (unless that’s the point).

    #### Layer a secondary break for texture

    1. Add audio track: `BREAK B` (a dustier/airier loop).

    2. Highpass it:

    - `EQ Eight` HP at 200–400 Hz

    3. Compress it into the main break:

    - `Compressor` sidechain from `BREAK A` (or use Glue)

    - Light GR 1–3 dB so it breathes together.

    ---

    Step 5 — Tops & cymbals: controlled sparkle (not EDM) ✨

    1. Create `TOPS` group.

    2. Use `Drum Rack` with:

    - Closed hat (tight)

    - Ride/shuffle hat (grainy)

    - Crash/air hit (rare)

    3. Pattern tips:

    - Hats often run 1/8 with velocity variation, plus a 1/16 fill every 8 bars.

    - Keep crashes for section markers only (drop, mid variation, outro).

    Stock shaping chain on TOPS group:

  • `EQ Eight` HP 250–500 Hz
  • `Saturator` Drive 1–3 dB
  • `Utility` Width 120–150% (keep kicks/snares mono)
  • ---

    Step 6 — Sidechain relationships (subtle, musical, not pumping)

    Instead of huge pumping, aim for micro-ducking so breaks stay dominant.

    1. On `SUB`: `Compressor` with Sidechain from `BREAK A` (or a dedicated “kick/snare trigger” track).

    - Ratio 2:1

    - Attack 1–5 ms

    - Release 60–120 ms

    - GR: 1–2 dB

    2. On `PAD` and `REESE`: slightly more GR (2–4 dB) so drums lead.

    ---

    Step 7 — Arrangement: tell a night-time story 🕯️

    Here’s a proven emotional jungle arrangement that stays engaging:

    #### Bars 1–16: Intro (atmos + foreshadowing)

  • Pad + filtered chord loop
  • Distant break crumbs:
  • - Use `Auto Filter` on breaks, cutoff low (300–800 Hz), slowly open

  • Add tiny ear candy:
  • - One-shot vocal-ish hit (you can resample your pad, reverse it)

    - `Grain Delay` very low mix (5–12%) for dream blur

    #### Bars 17–48: Drop A (full breaks + sub)

  • Bring in `BREAK A` full bandwidth
  • Sub enters simple
  • Reese enters low in the mix, mostly midrange weight
  • Remove some pad lows to keep space
  • 8-bar movement idea:

    Every 8 bars, do one of:

  • quick break mute for 1/4 bar
  • snare fill (slice retrigger)
  • chord inversion change
  • tiny bass pickup note
  • #### Bars 49–64: Mid variation (emotional focus)

  • Pull the sub for 4 bars (or halve-time it)
  • Let chords/pad take the lead
  • Use `Echo` throws on snare ghosts (automate Send C)
  • #### Bars 65–96: Drop B (darker, heavier)

  • Same harmony, but:
  • - Reese gets more bite (open filter a bit)

    - Add a second hat line or ride

    - Add a new break edit every 4 bars (micro-chops)

    #### Bars 97–end: Outro

  • Strip layers in reverse order
  • Leave one atmospheric motif so the track feels “finished,” not just muted.
  • ---

    Step 8 — Stock FX that scream “jungle at 3am” 🌙

    Use these sparingly; emotional jungle is about taste.

  • Vinyl-like movement without plugins:
  • - `Redux` (very subtle)

    - Downsample: tiny amount

    - Bit reduction: minimal

    - `Auto Filter` with slow random LFO

  • Tape-stop illusion:
  • - Automate `Transpose` down on the break clip (complex pro helps)

    - Or automate `Frequency Shifter` very gently for Doppler-ish pulls

  • Risers without synths:
  • - Resample pad → reverse → `Auto Filter` sweep + reverb tail

  • Impact tails:
  • - `Reverb` 100% wet on a return, print it, then gate/trim

    ---

    4. Common mistakes

    1. Too many notes in the bass.

    Breaks are busy—let the bass be authoritative and simple.

    2. Pads fighting the snare.

    If your snare loses “crack,” carve 200–500 Hz in the music bus and keep pad transient softness.

    3. Over-swinging everything.

    Apply groove mainly to hats/ghosts, not necessarily to the entire break rack.

    4. Endless 16-bar loop syndrome.

    You need arrangement markers: fills, mutes, automation, chord inversions.

    5. Reverb in the low end.

    Highpass your reverbs/returns or you’ll smear the roll.

    ---

    5. Pro tips for darker/heavier DnB (while staying emotional) 😤

  • Parallel distortion on reese only:
  • - Create an Audio Effect Rack:

    - Chain 1: Clean

    - Chain 2: `Saturator` (Drive 8–12 dB) → `EQ Eight` (bandpass 200 Hz–3 kHz)

    - Blend chain 2 quietly for bite without wrecking the mix.

  • Make the snare feel “taller” not “louder”:
  • - Add a short room verb on snare hits only (send automation)

    - Use `Drum Buss` on break group:

    - Drive 5–15%

    - Crunch 0–10%

    - Boom: very careful or off (breaks can get tubby fast)

  • Heavy section contrast:
  • - Keep Drop A warmer and wider

    - Make Drop B slightly narrower + more mid-forward (Utility width automation)

  • Use silence as an impact:
  • - 1/8 or 1/4 beat mute right before a snare can feel bigger than any riser.

    ---

    6. Mini practice exercise (20–30 minutes) 🧠

    Goal: Write a complete 32-bar emotional jungle “A section” with tension and release.

    1. Bars 1–8: pad only + filtered break crumbs

    - Filter cutoff automation rising

    2. Bars 9–16: add tops + sub (simple root notes)

    - One chord inversion change at bar 13

    3. Bars 17–24: full break drop + sub + reese (quiet)

    - One 1/16 slice stutter at bar 24

    4. Bars 25–32: variation

    - Remove pad for 2 bars, then bring it back with a different voicing

    - Add an Echo throw on a ghost snare hit

    Export a quick bounce and listen on low volume. If it still feels emotional and rolling, you nailed it.

    ---

    7. Recap ✅

  • Build the vibe first: minor/extended chords + pad space
  • Keep bass simple: sub carries weight, reese adds pressure
  • Make breaks talk: slices, ghost notes, groove pool, micro-edits
  • Arrange like a story: foreshadow → drop → variation → darker return
  • Use stock tools like Wavetable, Operator, Drum Rack, EQ Eight, Saturator, Echo, Hybrid Reverb, Glue Compressor to get pro results without third-party plugins.

If you want, tell me your preferred substyle (atmo jungle, deep rollers, or darker techy jungle), and I’ll give you a specific 16-bar chord + bass MIDI blueprint in a key of your choice.

```

Ask GPT about this lesson

Chat with the lesson tutor, get follow-up help, or use quick actions.

Bigup 👽 Ask me anything about this lesson and I’ll answer in context.

Narration script

Show spoken script
Late-night emotional jungle writing masterclass without third-party plugins. Advanced. Ableton Live, stock devices only.

Alright. Set the scene: it’s 3 AM, the room is dim, and you want jungle that hits hard but still feels like something. Not just break chaos. Not just pretty chords. A proper late-night roller with emotional weight.

In this lesson we’re building a two-and-a-half to three-and-a-half minute sketch with a clear story: intro, Drop A, a mid variation, Drop B, and an outro that actually feels like an ending. You’ll write one emotional chord or pad motif, one main break plus a supporting layer, and a bass system that’s minimal but devastating: sub plus a controlled reese layer.

Before we touch anything, here’s the mindset that makes this genre work: pick a mood anchor and do not lose it. One emotional detail that stays constant even when the drums get wild. It could be a two-note top voice that repeats, a specific chord color like a maj7 sharp eleven, or a recurring pad rhythm. When everything else is chopped up, that anchor is what makes it feel late-night instead of just “jungle stuff happening.”

Let’s set up the project.

Set tempo to 172 BPM. Anywhere from 168 to 176 works, but 172 is a sweet spot.

Make some groups so you can think like a producer, not like a messy scientist. Create: DRUMS for breaks, DRUMS for tops, BASS, MUSIC for chords and pads, and FX or atmos.

Now set up three return tracks. This is going to save you from stacking random reverbs later.

Return A: ShortVerb. Use Ableton Reverb. Decay around one second, pre-delay 10 to 20 milliseconds. High-pass it so it’s not polluting the low end, somewhere around 250 to 400 Hz. And roll off the top a little too, around 7 to 10 k.

Return B: DubVerb. Use Hybrid Reverb. Aim for a bigger space: decay 2.5 to 4.5 seconds, medium-large size. High-pass even harder, like 300 to 600 Hz. Add only subtle modulation. Late-night, not trance.

Return C: DubDelay. Use Echo. Set timing to one-eighth dotted or one-quarter, feedback 25 to 45 percent. Filter it: high-pass around 250, low-pass around 6 to 9k. And add a tiny bit of wobble, 2 to 5 percent, just to make it feel like old hardware without turning it into a gimmick.

On the master, keep it honest. Put Utility for quick gain trims and a Limiter just catching peaks, ceiling at minus one. This is temporary. The goal is not to “compose into a lie” where everything sounds finished because you crushed it.

Now we write the emotional harmonic bed. This is the night light. It has to loop for 16 to 32 bars without getting annoying, and it has to leave room for the breaks.

Create a MIDI track called PAD and load Wavetable.

For the pad, keep it soft. Oscillator one: sine or triangle. Oscillator two: a muted saw, but very low, like minus 18 to minus 24 dB. Add unison: two to four voices, amount 10 to 25 percent. Filter it with a low-pass 24. Set cutoff somewhere between 400 and 2k depending on brightness, and map that cutoff to a macro so you can automate it easily later.

Envelope: attack 40 to 150 milliseconds so it blooms rather than clicks, and release two to six seconds so it trails into the room.

Then add a subtle Chorus-Ensemble. Keep it gentle: amount 10 to 20 percent, rate 0.2 to 0.6 Hz. You want motion, not seasickness.

EQ Eight: high-pass at 120 to 180 Hz. If it’s muddy, take a gentle dip around 250 to 450. This matters because that muddy band is exactly where your snare body wants to live.

Now send the pad to DubVerb and a touch of DubDelay. This is where the “late-night” comes from: not from huge chords, but from controlled space.

Harmony. Pick a key with emotional weight. F minor, G minor, D sharp minor, those classic zones.

And here’s the advanced approach: write harmony as voice-leading, not chord names. Start with a two-chord or four-chord loop, but make sure at least two notes stay common between each chord change. Then move only one or two voices by a semitone or whole tone. That creates the feeling of sadness and continuity even when the rhythm is aggressive.

If you want a concrete example in F minor, you can try Fm9 to Dbmaj7 sharp eleven to Ab add nine to Eb six nine. But remember: the names don’t matter as much as the movement. Keep voicings close, around C3 to C5, and let the pad sit behind drums, not on top of them.

Optional Ableton trick: throw the Scale MIDI effect on the pad to lock yourself into natural minor at first, then later, intentionally break it. That’s how you get that “one wrong note that hurts in a good way” without falling into random mistakes.

Now build the sub. Jungle subs are clean and consistent, because the breaks are already busy.

Create a MIDI track called SUB. Load Operator. Algorithm A only. Sine wave. Attack basically instant, zero to ten milliseconds. Release 120 to 250 milliseconds so notes end cleanly and don’t smear the groove.

Add Saturator. Drive two to six dB, soft clip on. You’re not trying to distort it, you’re trying to give it a spine so it translates on smaller speakers.

EQ Eight: low-pass around 120 to 180 Hz to keep it pure. If you want, add a gentle Compressor, ratio two to one, attack 10 to 30 ms, release 80 to 150 ms. Just control, not pumping.

Composition note: don’t mirror the chords nonstop with your sub. The sub should answer the chord movement, not narrate it. Think long notes, and occasional pickup notes into changes. Space is what makes the drop feel heavy.

Next: the reese or weight layer. This is your late-night pressure, mostly midrange.

Create a MIDI track called REESE. Load Wavetable. Two saws, detune slightly. Unison on classic, four to seven voices, amount 30 to 60 percent.

Filter with LP24 again.

Then build the chain: Saturator, drive three to eight dB. Auto Filter for movement: sync it to one-eighth or one-quarter, but keep the amount subtle. It’s just a slow chew, not a wobble bass.

EQ Eight: high-pass at 80 to 110 so it doesn’t fight the sub. If it bites your ears, notch somewhere around 2 to 4k.

Glue Compressor: ratio two to one, attack 10 ms, release auto, and only one to three dB of gain reduction.

Key move: keep the reese simpler than the sub. That sounds backwards, but it’s real. Often it’s root notes, occasional fifths, or drones that shift per section. The reese is atmosphere and pressure, not melody.

Quick teacher tip: keep your low end disciplined. Put Utility on the SUB and set width to zero percent. Mono. Always. And if you want stereo movement in the reese, do it above the low band. You can split it with an Audio Effect Rack so the low part stays mono and the high part moves.

Now the heart: breaks. This is where jungle becomes jungle.

If you’re staying stock-only, pull a break from Ableton’s core library or packs like Breakbeats or whatever you have installed.

Drag a break loop onto an audio track called BREAK A. Warp it. If you want the loop to breathe naturally, Complex Pro works. If you want tighter transients, use Beats mode, preserve transients, envelope around 50 to 80.

Now right-click and Slice to New MIDI Track, slicing by transients. Ableton builds you a Drum Rack with each hit as a slice. This is your playground.

Start with the classic DnB skeleton: kick-ish hits on one and often around eleven, snare on five and thirteen. That’s your grid. Then add jungle personality.

Add ghost snares, slightly before or after the main snare. Add little kick pickups into transitions. And every four or eight bars, do one tiny stutter at the end, like a one-sixteenth retrigger. Small. Controlled. Identity.

Groove is mandatory. Open the Groove Pool, grab an MPC 16 swing, something like 54 to 58. Apply it at 20 to 40 percent. If you swing everything too hard, the breaks get drunk. Sometimes that’s cool, but for emotional late-night rollers, you usually want forward motion with a little shuffle, not a stumble.

Now layer a secondary break for texture.

Create BREAK B, a dustier loop. High-pass it with EQ Eight at 200 to 400 Hz so it’s mostly air and grit. Then compress it into the main break so it breathes together. Use Compressor with sidechain input from BREAK A, and just one to three dB of gain reduction.

This is a big one: once your break pattern feels right, commit to audio early. Resample the break group to a new audio track and start doing edits there: reverses, repeats, fades, quick mutes. You’ll stop tweaking MIDI forever and you’ll make bolder, more musical decisions.

Now tops and cymbals: controlled sparkle, not EDM sheen.

Create a TOPS group. Use a Drum Rack with a tight closed hat, a grainy ride or shuffle hat, and maybe a crash or air hit that you only use as a section marker.

Program hats mostly in eighth notes with velocity variation. Add a one-sixteenth fill every eight bars. Use crashes only for the drop, mid change, or outro. If you crash every eight bars out of habit, it stops feeling like a moment.

On the TOPS group, EQ Eight high-pass 250 to 500 Hz. Saturator with one to three dB drive. Utility width 120 to 150 percent, but keep your kick and snare mono. If anything starts smearing, bring width down.

Now sidechain, but musical sidechain. No huge pumping.

On the SUB, put Compressor, sidechain from BREAK A or from a dedicated trigger track. Ratio two to one. Attack one to five ms. Release 60 to 120 ms. And only one to two dB of gain reduction. You want micro-ducking so the break stays dominant.

On PAD and REESE, duck a little more, like two to four dB. Let drums lead the story.

Now arrangement. This is where advanced composition shows up. Anyone can make a loop. You’re going to tell a night-time story.

Bars 1 to 16: intro. Atmos and foreshadowing. Pad plays, but keep it filtered. Bring in distant break crumbs: put an Auto Filter on the break and keep cutoff low, 300 to 800 Hz, and slowly open it. Add tiny ear candy: resample the pad, reverse it, let it swell into reverb. If you want dream blur, put Grain Delay at a very low mix, like five to twelve percent. It should feel like air moving, not like an obvious effect.

Advanced intro upgrade: make it feel like you’re entering the room. Start with only the returns audible. Print a reverb tail from your pad, fade that in first, and only later bring in the dry pad. Memory first, source second. Instant cinema.

Bars 17 to 48: Drop A. Full breaks and sub. Reese comes in low in the mix, mostly midrange. Pad should get out of the way down low; keep it emotional but not crowded.

Here’s your eight-bar movement rule. Every eight bars, pick just one move:
a quick break mute for a quarter bar,
a snare fill from a slice retrigger,
a chord inversion change,
or a tiny bass pickup note.
One move. Not five. If everything changes all the time, nothing feels like an event.

And start using negative space bars. Every eight or sixteen, plan one bar where something meaningful disappears. Sub for a bar, hats for half a bar, pad drops out and you only hear its tail. Silence is an impact tool.

Bars 49 to 64: mid variation. Emotional focus. Pull the sub for four bars, or go halftime with it. Let chords breathe. Use Echo throws on ghost snares by automating the send to the delay return. One throw can feel more emotional than adding a whole new lead.

Advanced variation idea: change register, not chords. Keep the same progression, but move the pad voicing up an octave for part of the mid. Then add a single very quiet low drone note underneath. Same harmony, new emotional angle.

Bars 65 to 96: Drop B. Darker, heavier, but not louder.

Same harmony, but make the soundstage change. Open the reese filter a little for bite, add a second hat line or ride, and commit to a new micro-chop every four bars. And here’s a pro contrast trick: make Drop B darker by removing highs, not adding layers. Automate a gentle high shelf down on the music bus, and narrow the stereo image slightly. The breaks feel more in-your-face, and the section reads as heavier without you cranking levels.

Bars 97 to end: outro. Strip layers in reverse order. But leave one atmospheric motif, your anchor, so it feels finished rather than just muted. You can end on a related but unresolved chord color: leave out the third, or end suspended. It hints the story continues off-record.

Now let’s talk stock FX that scream jungle at 3 AM, but with taste.

For vinyl-like movement, don’t go crazy. Use Redux very subtly: tiny downsample, minimal bit reduction. Add Auto Filter with a slow random LFO for drift.

Tape-stop illusion: automate transpose down on the break clip. Complex Pro helps it smear in a pleasing way. Or use Frequency Shifter very gently to get a Doppler-ish pull.

Risers without synths: resample your pad, reverse it, sweep an Auto Filter, and let it hit a reverb tail.

Impact tails: put Reverb 100 percent wet on a return, print it, then trim or gate it. Classic jungle transition energy.

Now some quick sound design extras if you want to go deeper, still stock only.

Haunted air pad layer: resample your pad to audio, warp it in Texture mode, grain size around 80 to 200, flux 10 to 30. High-pass hard at 600 to 1k, then Hybrid Reverb with a long decay. Keep it super low. It’s fog above the mix, and it sounds expensive.

Wider snare without widening the low end: on the break group, make an Audio Effect Rack. Chain A dry. Chain B: EQ Eight high-pass around one to two k, then a short reverb, then Utility width 160 to 200 percent. Blend it quietly. You’re widening only the sheen, not the punch.

Tape bruising on breaks: Saturator with soft clip, modest drive. EQ dip 3 to 6k if it gets brittle. Glue Compressor with a slower attack so transients still punch. The goal is density, not fuzz.

And a cute one: rain-on-window percussion from noise. Use Operator noise or Wavetable noise, short decay, random velocities. Band-pass around 4 to 9k, tiny room reverb, and place it very quietly. It adds intimacy without sounding like a shaker loop.

Common mistakes to avoid while you build.

Too many bass notes. If the breaks feel smaller when you add bass, your bass is talking too much.

Pads fighting the snare. If your snare loses crack, carve 200 to 500 in the music bus and keep pad transients soft.

Over-swinging everything. Groove mainly hats and ghosts, not necessarily the entire break rack.

Endless 16-bar loop syndrome. You need markers: fills, mutes, automation, chord inversions.

Reverb in the low end. High-pass returns or your roll will smear and you’ll chase mud forever.

Now a quick mini practice exercise you can do in half an hour.

Write a full 32-bar A section.

Bars 1 to 8: pad only, filtered break crumbs, cutoff rising.

Bars 9 to 16: add tops and sub with simple root notes. At bar 13, do one chord inversion change.

Bars 17 to 24: full break drop with sub and quiet reese. At bar 24, do one little one-sixteenth stutter.

Bars 25 to 32: variation. Remove pad for two bars, bring it back with a different voicing. Add one Echo throw on a ghost snare hit.

Then export a quick bounce and listen at low volume. If it still feels emotional and it still rolls, you nailed the core.

Homework challenge if you want to push into advanced territory.

Deliver a 64-bar sketch with two drops that feel emotionally different while using the same chord progression.

Rules: one chord loop only. Only one main break sample allowed; all variation must come from slicing, edits, and resampling. Sub part: maximum six note changes across the whole 64 bars. And you must use two different space states: one dry and contained, one deep and washed. Achieve that mainly by automating send levels and return EQ, not by stacking new effects.

Before you export, check: can you hum the anchor after one listen? Does Drop B feel darker without being louder? Do the breaks talk, meaning micro-answers instead of constant fills? And does the low end stay stable when you listen quietly?

That’s the masterclass: vibe first, then weight, then talking breaks, then story.

If you tell me your key and what you chose as your mood anchor, I can help you map a tight 64-bar roadmap with specific bar-by-bar variation cues using only stock Ableton devices.

mickeybeam

Go to drumbasscd.com for +100 drum and bass YouTube channels all in one place - tune in!

Generating PDF preview…