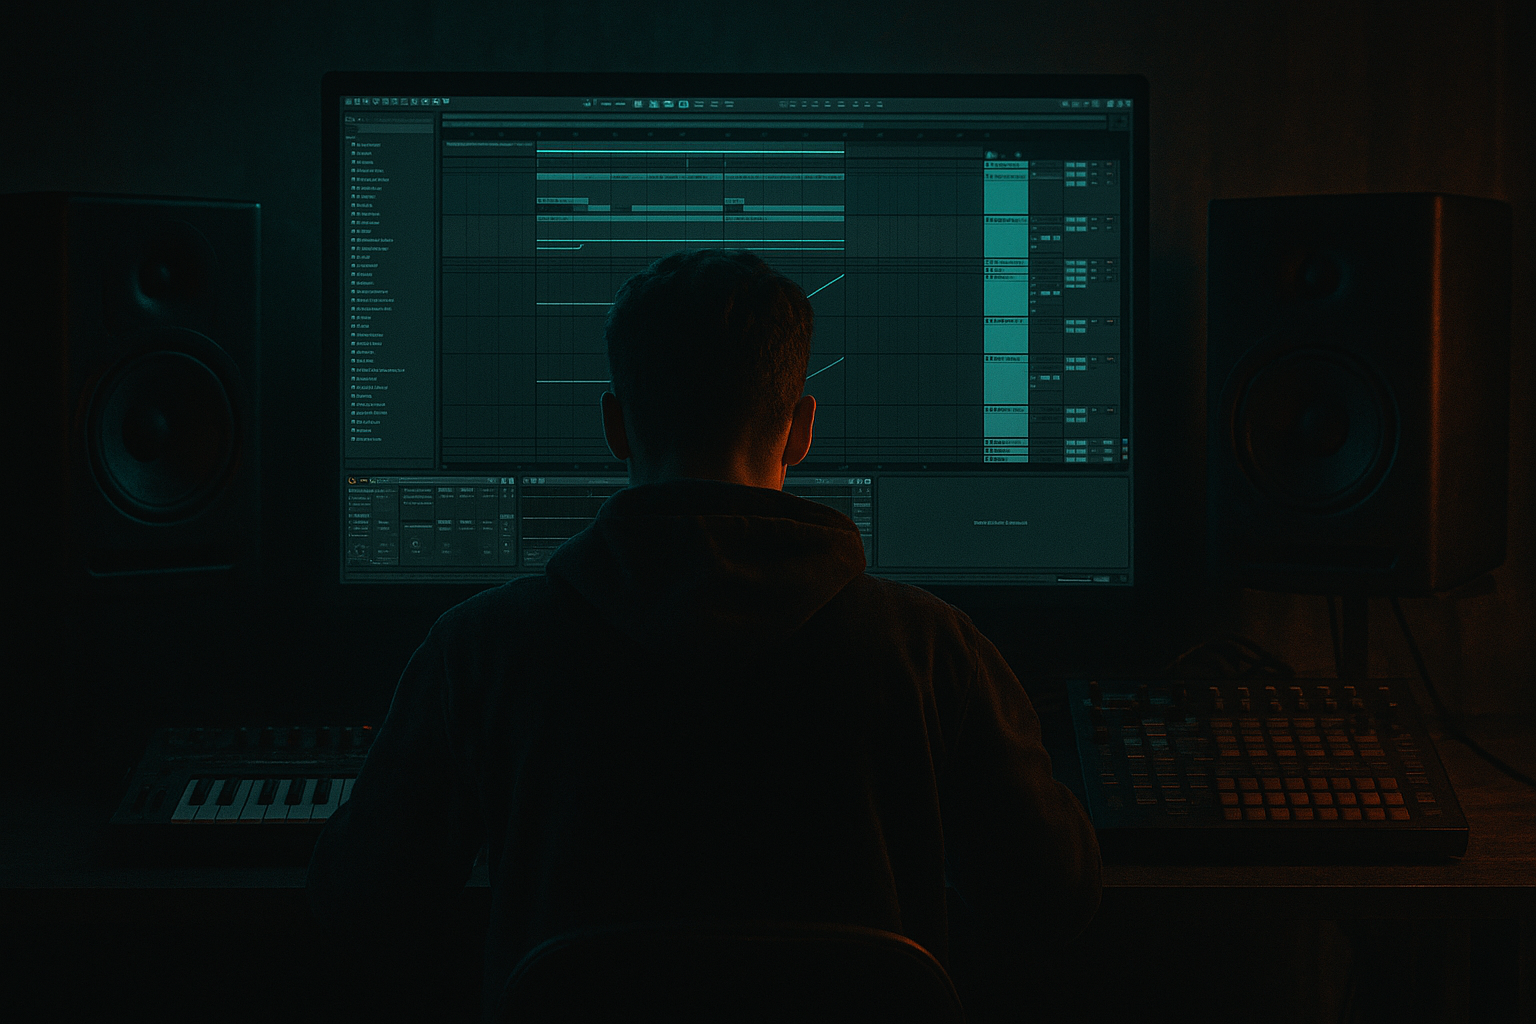
DNB COLLEGE

Drum & Bass Ableton Live 12 Tutorials

LESSON DETAIL

Late-night jungle journey arranging for oldskool DnB vibes (Advanced)

An AI-generated advanced Ableton lesson focused on Late-night jungle journey arranging for oldskool DnB vibes in the Arrangement area of drum and bass production.

Back to lessons
Late-night jungle journey arranging for oldskool DnB vibes (Advanced) cover image

Narrated lesson audio

The voice track includes the tutorial plus extra teacher commentary.

Open audio file

Main tutorial

Late‑Night Jungle Journey: Arranging for Oldskool DnB Vibes (Ableton Live) 🌙🔥

1) Lesson overview

This lesson is all about arrangement—specifically how to build that late‑night, head‑nodding jungle journey: rolling breaks, teased bass, dubby atmos, and those classic “one more bar” tension moves that keep a floor locked.

You’ll learn how to:

  • Structure an oldskool‑leaning DnB track without it feeling repetitive
  • Create tension + payoff using break edits, bass mutes, FX throws, and “DJ‑friendly” phrasing
  • Use Ableton Live stock devices to automate energy and space like a pro
  • Arrange with a “journey” mindset: intro → tease → impact → deeper → final push → outro
  • Assumed: you already know how to program drums, resample, and mix at a decent level.

    ---

    2) What you will build

    A ~5:30–6:30 jungle/DnB arrangement at 165–174 BPM with:

  • DJ‑friendly intro/outro (clean drums + atmos, minimal melodic clutter)
  • Two main drops with variation (A/B drop energy)
  • A proper breakdown / deep bridge (late‑night tunnel moment)
  • Classic jungle arrangement moves:
  • - break “call/response” edits

    - 8‑bar tension ramps

    - bass “fakeouts” + “all‑in” returns

    - dubby sends + tape‑ish transitions

    ---

    3) Step-by-step walkthrough

    Step 0 — Set the grid like a DJ (foundation first)

    Tempo: 170 BPM (good jungle sweet spot)

    Arrangement grid: think in 16‑bar sentences with 8‑bar punctuation.

    In Ableton:

  • Turn on Fixed Grid: 1 Bar for macro arranging.
  • Use Locators aggressively. Create these right away:
  • - `Intro 1–17`

    - `Tease 17–33`

    - `Drop 1 33–97`

    - `Bridge 97–129`

    - `Drop 2 129–193`

    - `Outro 193–225`

    > You can change lengths later, but start with a map. Jungle lives on phrasing.

    ---

    Step 1 — Build a “Journey Group” layout (clean session = fast decisions)

    Create Groups in Arrangement View:

  • DRUMS (Break A, Break B, Tops, Perc, Fills)
  • BASS (Sub, Reese/Mid, Bass FX)
  • MUSIC (Pads, Stabs, Rave hit, Chords)
  • ATMOS/FX (Noise, sweeps, impacts, vinyl, drones)
  • RETURNS (Dub delay, plate, verb, special)
  • Return tracks (stock setup):

  • A – Dub Delay: Echo
  • - Time: 1/8 Dotted (or 3/16)

    - Feedback: 35–55%

    - Filter: HP around 250–500 Hz, LP around 6–10 kHz

    - Mod: small 3–8%

  • B – Plate/Room: Hybrid Reverb (Plate)
  • - Decay: 1.2–2.2s

    - Pre‑delay: 15–30 ms

    - HP in reverb: 250–400 Hz

  • C – Dark Space: Reverb (classic) or Hybrid Reverb (Convolution room)
  • - Longer decay 3–6s, darker LP 4–7 kHz for tunnel vibes

  • D – “Smash Bus” FX (optional): Drum Buss + Saturator (for sends on fills)
  • Workflow tip: automate send amounts to create movement without adding new elements.

    ---

    Step 2 — Intro: “late‑night loading screen” (bars 1–17) 🌃

    Goal: DJ‑mixable, atmospheric, and hints at what’s coming.

    Elements:

  • Atmos drone/pad (low energy, wide)
  • Minimal tops/hat loop
  • Tease the break filtered and low‑passed
  • No full sub yet (or very subtle sine ghost)
  • Practical Ableton moves:

  • On Break track, add Auto Filter:
  • - Type: Lowpass 24 dB

    - Frequency start: 400–800 Hz

    - Res: 0.7–1.2

    - Automate frequency up slightly every 8 bars, then back down (bait & switch)

  • Add Vinyl noise or room tone (your sample) → Utility:
  • - Width: 140–170% (keep it airy)

    - Gain: ride it down when drums hit

    Classic oldskool trick:

    At bar 15, drop a 1‑beat break stab (full range) then cut to silence for 1/2 beat → straight back. Tiny moment, huge anticipation.

    ---

    Step 3 — Tease section: “break science” (bars 17–33) 🥁

    Here you introduce the main break, but still hold back the full weight.

    Drums:

  • Bring in your main break unfiltered but high‑passed a touch:
  • - EQ Eight on Break:

    - HP @ 30–45 Hz (12 dB slope)

    - Small dip if boxy: 250–400 Hz -2 dB

  • Add a clean kick/sub hit only on key hits (don’t fully 4/4 it)
  • Tension trick: 8‑bar “subtract then add”

  • Bars 17–25: full break
  • Bars 25–29: remove snare layers (or mute snare transient)
  • Bars 29–33: bring snare back + add ride or shaker
  • Ableton method:

  • Duplicate break to Break B and on Break B add Transient shaping using Drum Buss:
  • - Transients: +10 to +25

    - Boom: 0–10 (watch low end)

  • Automate Break A volume down while Break B fades in for a “DJ swap” feel.
  • Pre-drop marker:

    At bar 32, do a 1‑bar fill:

  • Take the break, Consolidate, then in Clip:
  • - Warp Mode: Beats

    - Preserve: 1/16

    - Transient loop: make a 1/2 bar repeat into the drop

  • Add Reverb send spike on the last snare only.
  • ---

    Step 4 — Drop 1: establish the loop, then evolve it (bars 33–97) 🚀

    Drop 1 is where you lock the groove—but the arrangement must breathe.

    Core idea:

    Think of Drop 1 as four 16‑bar blocks (A1, A2, A3, A4). Each block changes one main thing.

    #### Block A1 (33–49): “statement”

  • Full break + bass + main stab motif
  • Keep musical parts simple; let drums speak
  • Bass entry:

  • Sub (sine/clean) + mid layer (reese/hooverish)
  • On Sub track:
  • - Saturator (Soft Clip on, Drive 2–5 dB)

    - EQ Eight: lowpass around 120–200 Hz if needed

  • Sidechain (clean, consistent):
  • - Compressor on bass, sidechain from a ghost kick (MIDI track with short click)

    - Ratio 4:1, Attack 5–15 ms, Release 60–120 ms

    - Aim for 2–5 dB gain reduction

    #### Block A2 (49–65): “variation via drums”

  • Add Break B for call/response (every 2 bars swap)
  • Add a tambourine/shaker loop but high‑passed
  • Ableton tactic:

  • Create a Drum Rack for tops; map macros:
  • - Macro 1: HP filter (Auto Filter)

    - Macro 2: Saturation (Saturator drive)

    - Macro 3: Send A (Echo) amount (via Rack mapping)

    #### Block A3 (65–81): “space and menace”

  • Pull music back, push FX and room
  • Add dub echoes to stabs/snare tails
  • Automation moves:

  • Echo return: increase Feedback + 5–10% for 4 bars, then snap back.
  • Auto Filter on music bus: tiny sweep from 12 kHz → 7 kHz to darken.
  • #### Block A4 (81–97): “pre-bridge energy”

  • Add a new percussion layer or ride
  • Introduce a rave hit one-shot every 8 bars (don’t spam it)
  • End-of-drop exit:

  • Last 2 bars: mute sub for 1 bar, then bring it back for the final bar (fakeout)
  • Final bar: crash + long verb tail → into bridge
  • ---

    Step 5 — Bridge: the tunnel moment (bars 97–129) 🕳️

    This is where late‑night jungle becomes a journey. Contrast is everything.

    Blueprint (32 bars):

  • 97–105: drums thin out (tops + ghost break)
  • 105–113: bass disappears, atmos widen
  • 113–121: tease a new bass phrase / chord
  • 121–129: build into Drop 2
  • Practical devices:

  • On DRUMS group, add Auto Filter and automate a HP sweep up to 250–400 Hz over 8 bars (energy drop).
  • On ATMOS, use Hybrid Reverb (long decay) + Utility width automation:
  • - Width: 120% → 180% during breakdown

    - Then snap back to 100–120% at the drop for punch

    Oldskool signature move:

    Bring in a reggae/dub vocal one-shot or a tiny phrase only once in the bridge, drenched in Echo (1/4) and filtered. It’s a “memory flash” moment.

    ---

    Step 6 — Drop 2: darker, heavier, but still jungle (bars 129–193) 🌑

    Drop 2 should feel like the same world—just deeper and more dangerous.

    Approach: change 2–3 anchors

  • Switch to a different break or re-edit the same break (new slice pattern)
  • New bass rhythm (same sound family)
  • Slightly different drum processing (more crunch / less top)
  • Drum processing upgrade (stock chain suggestion):

    On DRUMS group:

    1. EQ Eight

    - Tighten low mud: dip 200–350 Hz if needed

    2. Drum Buss

    - Drive 5–15%

    - Crunch 5–20%

    - Boom: 0–10 (careful; jungle already has low content)

    3. Glue Compressor

    - Attack 3–10 ms, Release Auto

    - Ratio 2:1

    - 1–2 dB GR (just cohesion)

    4. Limiter (safety, not loudness)

    Arrangement: “B blocks”

  • B1 (129–145): impact + new bass rhythm
  • B2 (145–161): introduce sinister pad or minor chord stab
  • B3 (161–177): remove kick layer, emphasize break edits (more syncopation)
  • B4 (177–193): final push—add ride, add distortion moment, then strip for outro
  • Impact technique:

  • At bar 129, add sub drop (sample) + short silence right before the first hit (even 1/8th) to make the drop feel louder.
  • ---

    Step 7 — Outro: DJ‑friendly exit (bars 193–225) 🎚️

  • Reduce musical elements first, keep drums rolling
  • Then remove bass, leave breaks/tops + atmos
  • Final 8 bars: just hats/noise/room tone
  • Ableton tip:

  • Use Utility on MUSIC and BASS groups:
  • - Automate Gain down smoothly over 16 bars (clean fade without messing limiter thresholds).

  • Put a gentle Auto Filter LP on the master only for the final 4 bars if you want that “tape powering down” vibe—don’t do it earlier.
  • ---

    4) Common mistakes

  • No phrasing discipline: adding/removing things at random bars. Jungle needs 8/16/32 bar logic.
  • Same 2‑bar loop for 64 bars: even if the groove is good, you need micro‑edits, mutes, and FX punctuation.
  • Overcrowding the drop: too many stabs, pads, vocals and complex breaks—leave air for the break.
  • Bass never “tells a story”: if the sub is constant for 3 minutes, the track feels flat. Use planned bass dropouts.
  • Too much reverb on breaks: reverb smears transients and kills the snap. Use sends surgically (often on snare only or selected hits).
  • ---

    5) Pro tips for darker/heavier DnB (without losing jungle swing) 😈

  • Make Drop 2 darker via harmony, not just distortion: shift stabs to a more minor/dissonant voicing, or pitch a pad down -2 to -5 semitones with Complex Pro warp.
  • Parallel grime on breaks:
  • Create a return with Saturator (Drive 8–12 dB)EQ Eight (band-limit 200 Hz–6 kHz)Compressor. Send only snare + ghost notes for controlled filth.

  • Sub discipline = bigger track: keep sub mostly mono:
  • - Utility on Sub: Width 0%

  • Use “silence edits” more than risers: jungle tension often comes from removal (half‑bar gaps, snare-only bars).
  • Resample your best 8 bars and re-edit them:
  • Print DRUMS group to audio, then do micro-cuts (1/16, 1/8) and reverse tails for “handmade” movement.

    ---

    6) Mini practice exercise (20–30 minutes)

    Goal: Make a convincing 64‑bar “journey slice” (tease → drop → mini-bridge → drop) using only:

  • 2 breaks (or 1 break + 1 edited version)
  • sub + mid bass
  • 1 stab sound
  • 1 atmos layer
  • Echo + Reverb returns
  • Instructions:

    1. Set 170 BPM.

    2. Arrange:

    - Bars 1–9: filtered break + atmos (LP filter automation)

    - Bars 9–17: full break + bass tease (bass lowpassed)

    - Bars 17–33: Drop 1

    - Bars 33–41: bridge (HP drums, remove bass)

    - Bars 41–65: Drop 2 (switch break pattern and add darker stab)

    3. Add one signature moment:

    - either a 1‑bar silence fakeout

    - or a dub echo throw on a vocal/stab

    Export and listen away from the DAW—does it feel like it moves, or just loops?

    ---

    7) Recap

  • Arrange jungle like a DJ: clean intro/outro, 16‑bar logic, 8‑bar tension moves.
  • Drop 1 establishes the world; Drop 2 deepens it with contrast (break edits, darker harmony, heavier drum bus).
  • Use Ableton stock tools to animate energy:
  • - Auto Filter (tension sweeps)

    - Echo (dub throws)

    - Hybrid Reverb (space control)

    - Drum Buss + Glue (weight + cohesion)

    - Utility (width + clean fades)

  • The “late‑night journey” feeling comes from planned subtraction, not constant layering.

If you want, tell me your BPM + what breaks/bass style you’re using (amen-heavy, thinkbreak, or more modern chopped), and I’ll suggest a tight locator map + specific edit points for your exact loop.

Ask GPT about this lesson

Chat with the lesson tutor, get follow-up help, or use quick actions.

Bigup 👽 Ask me anything about this lesson and I’ll answer in context.

Narration script

Show spoken script
Title: Late-night jungle journey arranging for oldskool DnB vibes (Advanced)

Alright, welcome in. This lesson is all about arrangement in Ableton Live, and we’re going for that late-night jungle journey vibe: rolling breaks, teased bass, dubby atmospheres, and those classic “just one more bar” tension moves that keep a dancefloor locked.

I’m assuming you already know how to program and chop drums, resample, and get a solid mix happening. What we’re doing now is the advanced part: making the track move like a story, not like a loop.

By the end, you’ll have a roughly five-and-a-half to six-and-a-half minute oldskool-leaning DnB arrangement around 165 to 174 BPM, with a DJ-friendly intro and outro, two main drops that feel related but not copy-pasted, and a proper tunnel bridge where the energy changes shape.

Let’s build it like a DJ would.

First, set the foundation. Put your tempo at 170 BPM. That’s a sweet spot where jungle swings naturally and edits land with authority.

Now, mentally, I want you thinking in 16-bar sentences, with 8-bar punctuation. Jungle is basically phrasing discipline plus attitude. If you get the phrasing right, everything else becomes easier.

In Ableton, go to Arrangement View and set your grid to Fixed Grid, one bar. We’re doing big moves first. And now: locators. Use them aggressively. Don’t “wait until later.” The map is what keeps you from wandering.

Create locators like this:
Intro from bar 1 to 17.
Tease from 17 to 33.
Drop 1 from 33 to 97.
Bridge from 97 to 129.
Drop 2 from 129 to 193.
Outro from 193 to 225.

You can change lengths later, but this gives you a working skeleton that already feels like a real DnB tune.

Next, set up your session so it’s fast to make decisions. Create track groups in the arrangement: a DRUMS group, a BASS group, a MUSIC group, and an ATMOS and FX group. The point is not just organization. It’s the ability to automate whole worlds at once. You’ll thank yourself later.

Now set up return tracks, because in this style, movement comes from sends as much as it comes from adding new parts.

On Return A, build a dub delay using Echo. Try a dotted eighth or three-sixteenths timing. Feedback around 35 to 55 percent. Filter it so it’s not dumping low end into the mix: high-pass around 250 to 500 Hz, low-pass around 6 to 10 kHz. Add just a tiny bit of modulation, like 3 to 8 percent, so it feels alive.

On Return B, make a plate or room using Hybrid Reverb. Decay around 1.2 to 2.2 seconds. Pre-delay 15 to 30 milliseconds. High-pass inside the reverb around 250 to 400 Hz. This is your “space without mud” reverb.

On Return C, make a darker, longer space. Another Reverb or Hybrid Reverb room, with a 3 to 6 second decay, and darker top end, low-pass around 4 to 7 kHz. This is the tunnel.

And optionally, Return D can be a smash bus for fills: Drum Buss into Saturator. The trick here is you can send only certain hits into chaos, without destroying your main drum transients.

Here’s a core mindset for this entire lesson: automate send amounts to create motion without adding new elements. That’s how you get the “journey” feeling while keeping the track minimal and DJ-friendly.

Now we start arranging.

Intro: bars 1 to 17. This is your late-night loading screen. DJ-mixable, atmospheric, and hinting at what’s coming, but not giving it away.

Start with a drone or pad. Keep it low-energy and wide. Add minimal tops, like a hat loop. Then tease the break, but keep it filtered and low-passed. And for the sub: either none, or a barely-there sine ghost that’s more felt than heard.

On your break track, add Auto Filter. Set it to Lowpass, 24 dB slope. Start the cutoff somewhere around 400 to 800 Hz. Resonance around 0.7 to 1.2, nothing too whistle-y. Now automate that filter over the intro. A nice move is: every 8 bars, bring it up slightly, then pull it back down. That bait-and-switch tells the listener “the drums are coming,” but you’re still holding them back.

Add vinyl noise or room tone if you want that streetlight haze. Put Utility on it, widen it—something like 140 to 170 percent width. But then ride its gain down as the drums start to take over, because noise is seasoning, not the meal.

And here’s a classic oldskool anticipation trick: around bar 15, drop a one-beat full-range break stab, then cut to silence for half a beat, then straight back. Tiny moment, massive tension. That’s jungle psychology right there.

Now the Tease section, bars 17 to 33. This is break science. You introduce the main break properly, but you still hold back the full weight.

Bring in the main break unfiltered, but high-pass it just a touch. EQ Eight: high-pass around 30 to 45 Hz, 12 dB slope. If it’s boxy, do a small dip around 250 to 400 Hz, maybe two dB. The goal is to clear space without making it thin.

Now, you can add a clean kick or sub hit only on key accents. Don’t turn it into a four-on-the-floor thing. We’re going for jungle logic: the break is the groove, the kick is support.

Here’s your tension move for this section: an 8-bar subtract-then-add.
From 17 to 25, full break feel.
From 25 to 29, remove snare layers, or mute the snare transient.
From 29 to 33, bring the snare back and add a ride or shaker to lift intensity.

In Ableton, a great method is to duplicate the break to a second track, call it Break B. Put Drum Buss on Break B and push Transients up, like plus 10 to plus 25. Keep Boom low, like 0 to 10, because we’re not trying to inflate the low end. Then automate the volumes: Break A fades down as Break B fades in. It feels like a DJ swapping breaks, even though it’s your own track.

Now, the pre-drop marker: at bar 32, do a one-bar fill. Consolidate a piece of the break, set Warp Mode to Beats, preserve one-sixteenth, and make a half-bar repeat that ramps into the downbeat. And then: pick the last snare, and spike the reverb send just on that hit. Not on the whole bar. One hit. Surgical.

Okay. Drop 1. Bars 33 to 97. This is where you establish the loop, then evolve it so it doesn’t go stale.

Think of Drop 1 as four 16-bar blocks: A1, A2, A3, A4. In each block, change one main thing. That’s a big rule. You want evolution, not chaos.

A1, bars 33 to 49: the statement.
Full break, bass, main stab motif. Keep musical parts simple. Let the drums speak. Oldskool tracks often feel huge because there’s space.

Bass entry: sub plus mid layer. On the sub, put Saturator, Soft Clip on, drive maybe 2 to 5 dB. Keep the sub controlled and mono: Utility width at 0 percent on the sub track. If you need to low-pass the sub around 120 to 200 Hz, do it. Don’t let mid bass energy leak into the true sub channel.

Sidechain the bass consistently. Use Compressor on the bass with sidechain from a ghost kick. Ratio around 4:1. Attack 5 to 15 milliseconds. Release 60 to 120 milliseconds. Aim for 2 to 5 dB of gain reduction. The goal isn’t pumping for style, it’s giving the break and the low end room to breathe together.

Now A2, bars 49 to 65: variation via drums.
This is where you do call-and-response with Break A and Break B. A simple approach: every two bars, swap which break is dominant. It keeps the listener engaged without introducing new musical content.

Add a tambourine or shaker loop, but high-pass it. If the tops are too heavy, the break loses its authority.

If you want a super efficient workflow, put your tops in a Drum Rack and map a few macros: a high-pass filter, a saturation drive, and a send amount to Echo. That way you can “perform” the arrangement with a couple of automation lanes instead of micro-editing every track.

A3, bars 65 to 81: space and menace.
Pull back some of the music. Push FX and room. This is where your dub delays and dark reverb create depth.

Automation moves that work every time: for four bars, increase Echo feedback by 5 to 10 percent, then snap it back. That snap-back is important. If everything is constantly rising, nothing feels like an event.

Also, slightly darken the music bus with Auto Filter. Something subtle like sweeping the low-pass from 12 kHz down to 7 kHz across a few bars. It’s like dimming the lights.

A4, bars 81 to 97: pre-bridge energy.
Add a new percussion layer, or a ride, or a tiny accent grid shift. Introduce a rave hit as a one-shot every 8 bars, but don’t spam it. One-shot motif discipline is very oldskool: schedule it like story beats, not like decoration.

Now, end-of-drop exit: last two bars, mute the sub for one bar, then bring it back for the final bar. That fakeout creates a physical reaction. Then in the final bar, crash into a long reverb tail and let that tail carry you into the bridge.

Bridge time. Bars 97 to 129. This is the tunnel moment. Contrast is everything.

Think of this as a 32-bar shape.
97 to 105: drums thin out. Maybe just tops plus a ghosted break.
105 to 113: bass disappears. Atmos widens.
113 to 121: tease a new bass phrase or chord.
121 to 129: build into Drop 2.

On the DRUMS group, put Auto Filter and automate a high-pass sweep up to about 250 to 400 Hz over 8 bars. That’s a controlled energy drop that still keeps motion. In jungle, removing low end is like pulling the floor out for a second. The return feels massive.

On ATMOS, use Hybrid Reverb with a longer decay, and automate Utility width wider during the breakdown, like 120 percent up to 180 percent. Then snap back closer to 100 to 120 at the drop so impact feels punchy and centered. Wider does not mean bigger at the drop. Often, narrower at impact feels heavier.

Now, an oldskool signature move: a reggae or dub vocal one-shot, or a tiny phrase, only once in the bridge. Drench it in Echo, maybe quarter notes, then filter it. It’s like a memory flash in the tunnel. If you do it more than once, it becomes a hook. If you do it once, it becomes a moment.

Quick coaching note: treat your arrangement like a DJ set with mix points, not just sections. Even inside drops, reserve four to eight bars that are blend-safe. Stable drums, no huge vocal, no wild fill. The tune feels playable, and it also gives the listener’s ear a reset.

Also, build a tension budget per 16 bars. Pick two tension moves max per block. For example, bass dropout plus a snare echo throw. If you do five tricks every block, the listener stops registering any of them as special.

Okay. Drop 2. Bars 129 to 193. Same world, deeper and more dangerous.

Change two or three anchors, not everything.
Switch to a different break, or re-edit the same break with a new slice pattern.
Change the bass rhythm while keeping the bass sound family consistent.
And tweak drum processing slightly: more crunch, less top, darker mood.

On the DRUMS group, try a stock chain like this.
EQ Eight to tighten mud, maybe a dip around 200 to 350 Hz if needed.
Then Drum Buss: drive 5 to 15 percent, crunch 5 to 20 percent, boom low or off.
Then Glue Compressor: attack 3 to 10 ms, release on Auto, ratio 2:1, just one to two dB of gain reduction. This is cohesion, not squashing.
Then a Limiter for safety.

Now arrange Drop 2 in four 16-bar blocks again.
B1, 129 to 145: impact and the new bass rhythm.
B2, 145 to 161: introduce a sinister pad or minor chord stab.
B3, 161 to 177: remove the kick layer and emphasize break edits, more syncopation.
B4, 177 to 193: final push. Add a ride, add a distortion moment, then strip down to set up the outro.

Here’s an impact technique that always works: right before bar 129, create a tiny silence. Even one eighth note. Then hit the downbeat with a sub drop and the full groove. Loudness is relative. Silence is a weapon.

Now, advanced variation ideas you can use to make Drop 2 feel new without new parts.

One: the same loop, different accent grid trick. Keep the break pattern identical, but change what wins the transients. For example, in one section layer a super quiet noise tick on every offbeat hat. In the next section remove it and layer a rim or clave on a different subdivision. The groove feels re-aimed.

Two: swing migration. Use two related grooves in the Groove Pool: tighter in tease and bridge, looser in drops. Even changing groove amount from 15 percent to 35 percent can make sections feel like they breathe differently. For extra authenticity, resample and commit groove on the audio.

Three: break character swap. Duplicate the break. One copy is band-limited from about 200 Hz to 5 kHz with more saturation, the other stays more full-range and cleaner. Alternate which one is louder every four or eight bars. The listener hears evolution, but the drummer is “the same drummer.”

Now let’s talk about committing, because this is where advanced arrangers separate themselves.

Once Drop 1 feels good, print arrangement stems early. Resample your DRUMS bus to audio for 8 to 16 bars. Same for your BASS bus. Then do arrangement moves with audio: hard mutes, reverses, fades, tiny offsets. This is how you get that hand-built momentum quickly. Editing audio forces decisions, and decisions create identity.

Also, think in terms of foreground versus background automation lanes. Not just adding and removing clips. Sometimes your stab doesn’t need to change notes; it needs to change priority.
Foreground means a little louder, a little drier, a bit narrower.
Background means a bit quieter, more send, wider, darker.
That alone can make a repeating motif feel like it’s moving through space.

Alright, Outro. Bars 193 to 225. This needs to be functional. DJs should be able to mix out, and the track should feel intentionally deconstructed.

Reduce musical elements first, keep drums rolling. Then remove bass, leave breaks and tops with atmos. Final eight bars: just hats, noise, room tone, and maybe a filtered break hint.

Use Utility on the MUSIC and BASS groups to automate gain down smoothly over 16 bars. This gives you a clean fade without messing with master limiter behavior.

And if you want that tape power-down vibe, do it locally, not globally. Put the filtering on the MUSIC group and the ATMOS group, and leave the DRUMS mostly unfiltered until the last moment. That way the groove stays usable for mixing, and you don’t dull the whole track too early.

Let’s quickly cover common mistakes to avoid.

First: no phrasing discipline. If you’re adding and removing things at random bar counts, jungle won’t feel right. Commit to 8, 16, and 32-bar logic.

Second: the same two-bar loop running for 64 bars. Even if it’s a sick loop, you need micro-edits, mutes, and FX punctuation.

Third: overcrowding the drop. If you have complex breaks, don’t stack five stabs, three pads, vocals, and fills on top. Leave air for the break. The break is the lead instrument.

Fourth: bass that never tells a story. Plan bass dropouts. Make the sub disappear at moments on purpose, then return like a punchline.

Fifth: too much reverb on breaks. Reverb smears transients and kills snap. Use sends surgically, often on snare only or selected hits.

Now, a quick mini practice exercise you can do in 20 to 30 minutes.

Make a convincing 64-bar journey slice using only two breaks, or one break plus one edited version, sub and mid bass, one stab sound, one atmos layer, and your Echo and Reverb returns.

Set 170 BPM.
Bars 1 to 9: filtered break plus atmos, automate low-pass.
Bars 9 to 17: full break plus bass tease, but low-pass the bass.
Bars 17 to 33: Drop 1.
Bars 33 to 41: bridge, high-pass the drums and remove bass.
Bars 41 to 65: Drop 2, switch break pattern and add a darker stab.

Add exactly one signature moment: either a one-bar silence fakeout, or a dub echo throw on a vocal or stab.

Export it and listen away from the DAW. That’s the real test. Does it feel like it moves, like scenes changing? Or does it feel like a loop wearing different hats?

And if you want a serious homework challenge: make a 96-bar late-night journey arrangement using only one break sample, but create three distinct-feeling states: clean, dark, and frenzied. Include exactly two silence moments: one tiny gap right before a downbeat, and one full beat gap somewhere inside Drop 2, not at a section boundary. And make one eight-bar bridge with no sub, but it still feels heavy.

If you do that successfully, you’re not just arranging. You’re directing.

That’s it for this lesson. If you tell me your BPM and what break you’re using—amen-heavy, thinkbreak, or a more modern chopped break—and whether you’re aiming for 5:30 or 6:30, I can suggest a tighter locator plan with exact event bars for your silence edits, bridge, and your best mix points.

mickeybeam

Go to drumbasscd.com for +100 drum and bass YouTube channels all in one place - tune in!

Generating PDF preview…