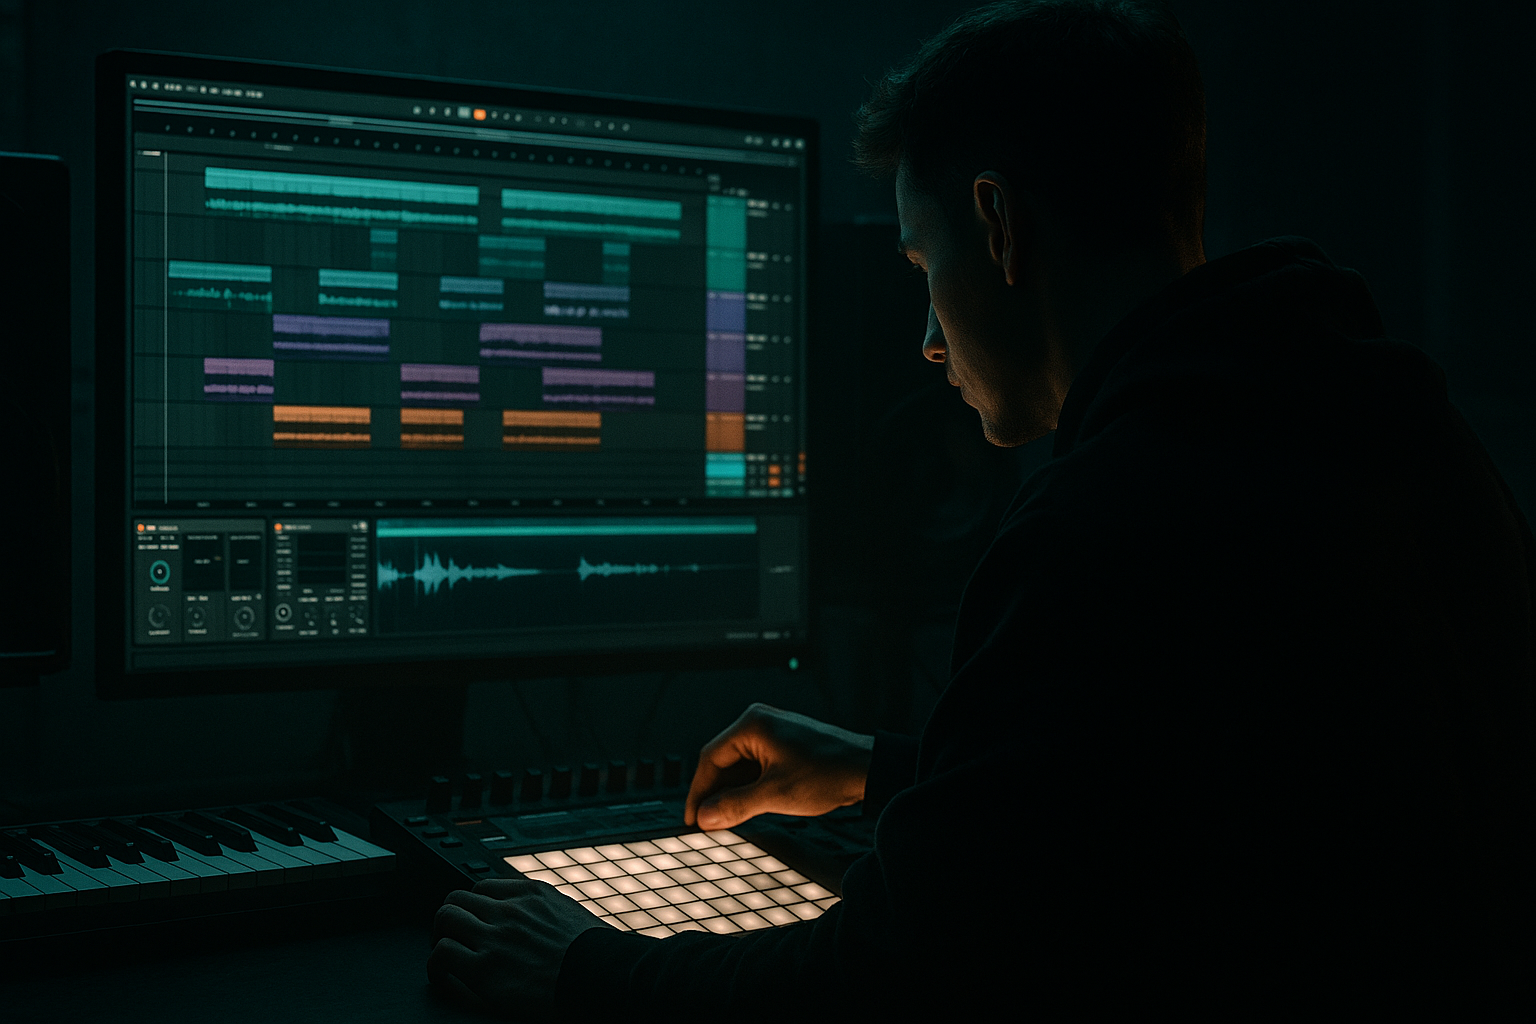
DNB COLLEGE

Drum & Bass Ableton Live 12 Tutorials

LESSON DETAIL

Masterclass for bassline with jungle swing in Ableton Live 12 (Intermediate)

An AI-generated intermediate Ableton lesson focused on Masterclass for bassline with jungle swing in Ableton Live 12 in the Basslines area of drum and bass production.

Back to lessons
Masterclass for bassline with jungle swing in Ableton Live 12 (Intermediate) cover image

Narrated lesson audio

The voice track includes the tutorial plus extra teacher commentary.

Open audio file

Main tutorial

```markdown

Masterclass: Bassline with Jungle Swing in Ableton Live 12 🥁🔊

Skill level: Intermediate

Category: Basslines (DnB / Jungle / Rolling)

---

1) Lesson overview 🎛️

In this lesson, you’ll build a rolling DnB/jungle bassline that locks to swingy breakbeats without sounding late, sloppy, or off-grid. We’ll focus on:

  • A classic two-layer bass approach (sub + mid/reese)
  • Jungle swing timing (micro-shifts, groove pools, and note lengths)
  • Sidechain + envelope control so the bass breathes with breaks
  • A clean, mix-ready Ableton stock device chain (Saturator, EQ Eight, Glue Compressor, Auto Filter, Utility, etc.)
  • Arrangement moves to keep it evolving across an 8–16 bar loop
  • Goal: A bassline that rolls, bounces, and drives like proper jungle/DnB.

    ---

    2) What you will build ✅

    By the end you’ll have:

  • A Sub Bass track (tight, mono, controlled)
  • A Mid Bass track (movement + grit, stereo managed)
  • A Bass Bus (glue, saturation, and final control)
  • A 16-bar loop with:
  • - Jungle swing feel

    - Call/response bass phrases

    - Variation every 4 bars

    - Automated filter/resonance moments for energy

    ---

    3) Step-by-step walkthrough 🧠

    Step 0 — Session setup (tempo, grid, groove) ⚙️

    1. Set tempo:

    - Jungle/DnB sweet spot: 165–175 BPM

    - Start at 174 BPM (classic rolling pace)

    2. Warp settings for drums (if using breaks):

    - On break sample: try Beats warp mode

    - Preserve: Transients

    - If it gets clicky: raise Transient Loop Mode or soften with a tiny fade in clip

    3. Create a Groove Pool baseline:

    - Open Groove Pool

    - Load a groove like: MPC 16 Swing 57–62 (or similar)

    - Start at 55–60% swing for jungle (you’ll refine later)

    > Important: We’re not just applying swing to everything. We’ll apply it intelligently, mainly to bass mids and selected notes.

    ---

    Step 1 — Build the Sub Bass (clean + consistent) 🧱

    Create a MIDI track: “SUB”.

    #### Instrument choice (stock)

  • Operator (fast, clean sub)
  • - Algorithm: A only

    - Oscillator A: Sine

    - Level: 0 dB (adjust later)

    #### Sub envelope settings (Operator)

  • Amp Envelope (A Env):
  • - Attack: 0–5 ms

    - Decay: 200–400 ms

    - Sustain: -inf or very low (if you want plucky subs)

    - Release: 60–120 ms

    For a more “held” sub (common in rollers):

  • Sustain: -6 to -12 dB
  • Release: 80–150 ms
  • #### Sub processing chain (stock)

    1. EQ Eight

    - HP filter at 20–30 Hz (gentle) to remove rumble

    - Optional tiny dip if it’s boxy: 200–300 Hz -2 dB

    2. Saturator

    - Mode: Soft Sine or Analog Clip

    - Drive: 1–4 dB

    - Output: compensate so level matches on/off

    - Goal: add harmonics so the sub translates on smaller systems

    3. Utility

    - Bass Mono: On

    - Width: 0% (keep the sub centered)

    > Sub rule: stable pitch, stable timing, stable level. Let the mid layer do the talking.

    ---

    Step 2 — Build the Mid Bass (movement + attitude) 🐍

    Create MIDI track: “MID”.

    #### Instrument (stock): Wavetable (or Operator if you prefer)

    Wavetable settings (starting point):

  • Osc 1: Basic Shapes → square-ish or saw-ish
  • Osc 2: off (or a subtle detune layer)
  • Unison: 2 voices, Amount 15–25%
  • Filter: LP24
  • - Cutoff: 200–600 Hz (we’ll automate)

    - Drive: 2–6

    - Resonance: low (0.10–0.25)

    #### Mid processing chain (stock)

    1. Auto Filter

    - Type: Lowpass 24

    - Envelope: small amount (for note-to-note movement)

    - Rate: off (we’ll keep it controlled)

    2. Saturator

    - Mode: Analog Clip

    - Drive: 4–10 dB (depends how aggressive you want)

    - Soft Clip: On

    3. EQ Eight

    - High-pass at 90–140 Hz (make room for sub)

    - Tame harshness: 2–5 kHz if needed

    - Optional presence: tiny boost 700–1.5k if it needs “speak”

    4. Glue Compressor

    - Attack: 10 ms

    - Release: Auto

    - Ratio: 2:1

    - Aim for 1–3 dB gain reduction on peaks

    5. Utility

    - Width: 80–110%

    - If it gets messy: keep it closer to 80–90%

    ---

    Step 3 — Write the bassline (rolling + jungle swing) ✍️

    We’ll write in D minor (classic vibe), but any key works.

    #### Pattern concept: “Anchor + Answer”

  • Anchor notes: sit on root (D) and fifth (A) for drive
  • Answer notes: small steps (C, F, G) for funk
  • #### MIDI clip setup

  • Length: 16 bars
  • Start with a 2-bar loop, then expand.
  • #### A practical 2-bar bass idea (notes + rhythm)

    Use 1/8 grid initially, then add swing and micro-shifts.

    Bar 1 (example):

  • D1 (short) on 1.1
  • D1 (short) on 1.2
  • A0 (short) on 1.3
  • D1 (short) on 1.3.3 (a little “pickup”)
  • F1 (short) on 1.4
  • Bar 2 (variation):

  • D1 on 2.1
  • C1 on 2.2
  • D1 on 2.3
  • G0 on 2.3.3
  • A0 on 2.4
  • > Keep notes shorter than you think at first. In jungle, note length = groove.

    #### Note length targets (great starting point)

  • Sub: 80–160 ms for tight rollers, 160–280 ms for more legato
  • Mid: can be slightly longer than sub, but avoid constant overlap
  • Tip: In the MIDI editor, set Legato off for sub, then manually choose lengths.

    ---

    Step 4 — Add swing the right way (Groove + micro-timing) 🕺

    Now we make it jungle.

    #### 4A) Groove Pool on MID (not SUB first)

    1. Drag your chosen groove (e.g., MPC 16 Swing 59) onto the MID clip

    2. In the clip Groove settings:

    - Timing: 50–80 (start 60)

    - Random: 2–6 (tiny humanization)

    - Velocity: 0–15 (optional, if your patch responds nicely)

    Why MID first?

    If you swing the sub too much, your low-end can feel late and smear with the kick. Jungle swing tends to feel better when the character layer dances, while the sub stays solid.

    #### 4B) Manual micro-shifts (the secret sauce)

    In the MIDI editor:

  • Identify off-beat notes (the “and” of the beat)
  • Nudge some notes late by 5–15 ms
  • Nudge occasional pickup notes early by 3–8 ms (creates urgency)
  • Ableton workflow tip:

  • Turn off grid temporarily (`Cmd/Ctrl + 4`)
  • Use the Delay field in the track (in ms) for global feel tweaks:
  • - MID Delay: +5 to +15 ms

    - SUB Delay: 0 to +5 ms (rarely more)

    ---

    Step 5 — Sidechain to the drums (so it breathes) 🌬️

    You’ve got breaks + kick. The bass needs to tuck under them.

    #### Sidechain method (stock): Compressor

    On SUB and MID tracks, add Compressor (or Glue Compressor).

  • Enable Sidechain
  • Input: your Drum Bus (or Kick channel if separate)
  • Start settings:
  • - Ratio: 4:1

    - Attack: 1–3 ms

    - Release: 60–120 ms (time it to the groove)

    - Threshold: adjust for 2–5 dB GR on sub, 1–3 dB on mid

    DnB timing trick:

    Set release so the bass returns just before the next important drum hit. If your break has ghost notes, you may want a slightly faster release to avoid pumping.

    ---

    Step 6 — Bass Bus glue + safety (clean low end, loud mids) 🧼

    Group SUB + MID into “BASS BUS”.

    #### Bass Bus chain (stock)

    1. EQ Eight

    - Check build-up around 120–250 Hz

    - If mud: dip 180 Hz -1 to -3 dB

    2. Saturator

    - Drive 1–3 dB (glue harmonics)

    3. Glue Compressor

    - Attack 10 ms, Release Auto

    - Ratio 2:1

    - GR: 1–2 dB (just kissing)

    4. Limiter (optional safety)

    - Ceiling: -0.3 dB

    - Don’t smash—this is just protection

    ---

    Step 7 — Make it roll for 16 bars (arrangement + automation) 🔁

    A great loop becomes a track when it evolves.

    #### 16-bar arrangement blueprint (fast + effective)

  • Bars 1–4: simple pattern (root-heavy)
  • Bars 5–8: introduce one extra pickup note + slightly more mid filter open
  • Bars 9–12: call/response variation (swap one note to C or F)
  • Bars 13–16: strongest version (open filter + add one reso movement)
  • #### Automation ideas (stock devices)

  • Wavetable Filter Cutoff: open gradually across 8 bars
  • Auto Filter Resonance: tiny rise in last 2 bars before drop
  • Saturator Drive: +1–2 dB in the “peak” phrase
  • Utility Gain: automate -1 dB on mid if chorus gets crowded
  • Jungle authenticity move:

    Make one bar slightly “wrong” in a cool way—an extra ghost note or a surprise rest. Jungle thrives on controlled chaos.

    ---

    4) Common mistakes 🚫

    1. Swinging the sub too much

    - Result: weak, late low-end. Keep sub mostly tight.

    2. Overlapping notes (especially in sub)

    - Result: phase/level inconsistencies. Shorten notes and avoid constant legato.

    3. Too much stereo in low frequencies

    - Result: unstable mono compatibility. Mono your sub with Utility.

    4. Sidechain set and forget

    - Pumping or not enough pocket. Tune release to the break’s rhythm.

    5. Mid bass too loud vs drums

    - If the break loses snap, pull mid down 1–3 dB and re-check.

    ---

    5) Pro tips for darker/heavier DnB 🕳️⚡

  • Parallel distortion on MID:
  • - Create a return track with Saturator (heavy) + EQ Eight (band-limit 200–4k)

    - Send MID into it for controlled aggression.

  • Reese “push/pull” with subtle detune:
  • - In Wavetable: Unison 2 voices, tiny detune.

    - Add Chorus-Ensemble very lightly but keep lows filtered out afterward.

  • Add controlled movement with LFO (but tempo-safe):
  • - Use Auto Filter with a slow LFO rate (like 1/2 or 1 bar)

    - Keep depth small so it doesn’t wobble like dubstep.

  • Tighten transient perception (without killing dynamics):
  • - Add Drum Buss on MID very subtly:

    - Drive: 2–5

    - Boom: 0

    - Crunch: 5–15%

  • Darker tone shaping:
  • - Use EQ Eight: gentle shelf down around 6–10 kHz on the bass bus

    - Let drums own the air; let bass own the menace.

    ---

    6) Mini practice exercise 📝

    Do this in 20–30 minutes:

    1. Build SUB (Operator sine) + MID (Wavetable) like above.

    2. Write a 2-bar bassline using only: D, A, C, F.

    3. Apply groove to MID only:

    - Timing 60, Random 3.

    4. Manually nudge two notes late by ~10 ms.

    5. Sidechain SUB + MID to drums:

    - Aim for 3 dB GR on SUB, 2 dB on MID.

    6. Expand to 8 bars and add:

    - One bar with a rest (space is swing!)

    - One bar with an extra pickup note before beat 1

    Export a quick bounce and listen on low volume: if it still feels like it rolls, you nailed it.

    ---

    7) Recap 🔁

  • You built a two-layer DnB bass: sub stays stable, mid carries groove and character.
  • You applied jungle swing using Groove Pool + targeted micro-timing (not random).
  • You controlled pocket with sidechain compression tuned to the break.
  • You made it track-ready with a Bass Bus and simple 16-bar arrangement evolution.

If you want, tell me your target style (e.g., 94 jungle, modern rollers, techstep, halftime DnB) and I’ll give you a bass MIDI rhythm template + device rack settings tailored to that sound.

```

Ask GPT about this lesson

Chat with the lesson tutor, get follow-up help, or use quick actions.

Bigup 👽 Ask me anything about this lesson and I’ll answer in context.

Narration script

Show spoken script
Welcome back. This is an intermediate masterclass on building a bassline with proper jungle swing in Ableton Live 12. We’re going for that rolling drum and bass feel that locks to breakbeats, but doesn’t sound late, floppy, or off-grid. You’re going to end up with a clean two-layer bass: a stable sub that stays disciplined, and a mid layer that does the dancing. Then we’ll glue it together on a bass bus, add sidechain that breathes with the drums, and arrange it into a 16-bar phrase that evolves like a real track.

Before we touch any synths, let’s set the context. Jungle swing isn’t just “turn on swing and pray.” The best swing is controlled. It’s about micro-timing, yes, but honestly, it’s also about where the bass stops. Negative space. Note lengths. Releases. The spaces between hits are what create that forward lean.

Alright, set your tempo. Put Ableton at 174 BPM. That’s a classic rolling pace, and it makes timing decisions pretty obvious.

If you’re using a break sample, click the clip and set Warp to Beats. Preserve Transients. If you hear clicks or the break gets too spitty, don’t panic and start warping random markers—try a tiny fade in on the clip, or adjust the transient loop behavior so it’s less sharp. We want the break to feel punchy, but not like it’s tearing.

Now open the Groove Pool. Load a groove like MPC 16 Swing, somewhere around 57 to 62. Start with an amount that feels jungle-ish but not ridiculous—around 55 to 60 percent as a starting point. And here’s the big promise of this lesson: we are not going to slap that groove on everything. We’ll apply it intelligently.

Let’s build the sub first.

Create a new MIDI track and name it SUB. Drop Operator on it. Keep it simple: Algorithm set to A only, oscillator A is a sine wave.

Now the amp envelope. If you want a tight roller sub, set the attack basically instant—zero to five milliseconds. Set decay around 200 to 400 milliseconds. For sustain, you have two valid directions. If you like a plucky sub that gets out of the way, keep sustain super low, basically down. If you want a more held roller sub, set sustain somewhere like minus six to minus twelve dB so it carries a bit, and then release around 80 to 150 milliseconds. The release matters a lot. Too long and your groove goes lazy. Too short and it sounds like it’s stuttering.

Here’s a quick pocket check you should get used to. Solo your breaks and the SUB only. Mute everything else. If it already feels like it’s leaning forward and rolling, your sub note lengths and releases are in the right universe. If it feels laggy, don’t immediately start shifting notes. First shorten note lengths or shorten the synth release. Swing is often fixed by editing the end of the note, not the start.

Now process the sub with stock devices.

Put EQ Eight first. High-pass around 20 to 30 Hz, gentle, just to kill rumble you can’t hear but will definitely feel in your headroom. If the sub has a little cardboard vibe, dip around 200 to 300 Hz by maybe two dB. Don’t go hunting for problems you don’t have, though.

Next add Saturator. Use Soft Sine or Analog Clip. Drive one to four dB, and match the output so when you bypass it the level stays basically the same. This isn’t “make it louder,” this is “give it harmonics so it translates on small speakers.”

Then Utility. Turn Bass Mono on and set width to zero percent. Sub stays centered. Stable pitch, stable timing, stable level. That’s your rule.

Cool. Now the mid layer.

Create a second MIDI track and name it MID. Load Wavetable. Start with Basic Shapes and go square-ish or saw-ish. You can leave oscillator two off for now, or add a subtle layer later if you want more thickness.

Set unison to two voices. Keep the amount modest, like 15 to 25 percent. You’re building movement, not a detuned trance supersaw.

Turn on the filter. LP24. Put cutoff somewhere in the 200 to 600 Hz zone to start—we’ll automate later. Add a bit of filter drive, like two to six. Keep resonance low, around 0.10 to 0.25. We want weight and character, not a whistling peak.

Now build the mid processing chain.

Start with Auto Filter. Lowpass 24. Don’t set an LFO rate yet—keep rate off so it’s not wobbling on its own. Use just a little envelope amount so each note has a tiny bit of movement, like it’s speaking.

Then Saturator. Analog Clip. Drive four to ten dB depending on how rude you want it. Turn soft clip on. If it gets too fizzy, back off drive and let EQ do less work.

Next EQ Eight. High-pass around 90 to 140 Hz so the mid doesn’t fight the sub. If you hear harshness, look around 2 to 5 kHz and tame it. If it needs to speak on smaller systems, a tiny boost around 700 Hz to 1.5 kHz can help, but keep it tasteful.

Then Glue Compressor. Attack 10 ms, release Auto, ratio two to one, and aim for one to three dB of gain reduction on peaks. This is about control, not flattening the life out of it.

Finally Utility for stereo management. Set width around 80 to 110 percent. If things get blurry, pull it down to 80 or 90. The rule is: the lower the frequency content, the less width you want. If your mid patch still has too much low energy, fix it at the source with EQ before you widen.

Now we write the bassline.

We’ll use D minor as a vibe. You can choose any key, but D minor is a classic jungle and DnB home base.

We’re going to think in “anchor and answer.” Anchor notes are root and fifth—D and A—because that gives drive and stability. Answer notes are nearby tones like C, F, and G that add funk without turning the bassline into a melody that competes with the track.

Create a MIDI clip on the SUB and the MID. Make it 16 bars long, but start working in a two-bar loop so you can get the feel right quickly, then expand.

Set your grid to eighth notes at first. Don’t overcomplicate right away.

Here’s a practical two-bar idea you can copy as a starting point.

In bar one:
Start with D1, short, right on the downbeat at 1.1.
Then another D1 on 1.2.
Then A0 on 1.3.
Then a little pickup: D1 around 1.3.3.
Then F1 on 1.4.

In bar two:
D1 on 2.1.
C1 on 2.2.
D1 on 2.3.
A pickup G0 on 2.3.3.
Then A0 on 2.4.

Keep notes shorter than you think. In jungle, note length equals groove.

As a target, try sub note lengths around 80 to 160 milliseconds for tight rollers. If you want more legato, 160 to 280 milliseconds, but be careful—legato low end can smear the kick and make the whole track feel slow. For the mid layer, you can go slightly longer than the sub, but avoid constant overlap. Overlap is where you get level inconsistencies and phase weirdness.

Now, the swing. This is the main event.

First: apply groove to the MID clip, not the SUB. Drag your chosen groove—say MPC 16 Swing 59—onto the MID clip. In the clip’s groove settings, start timing around 60. You can go anywhere from 50 to 80 depending on the break, but 60 is a great center. Add a touch of random, like two to six, just enough to humanize. Velocity swing is optional—keep it low, maybe zero to 15, and only if your patch responds musically to velocity.

Why not swing the sub first? Because if the sub gets too lazy, your low end sounds late. The character layer can dance; the foundation should stay dependable.

Now manual micro-timing. This is where it starts sounding real.

Open the MIDI editor. Find the off-beat notes, the “ands.” Choose a couple and nudge them late by five to fifteen milliseconds. Don’t do it to every offbeat. Two or three well-chosen nudges can sound more intentional than a whole clip dragged around.

Then pick an occasional pickup note—something right before a downbeat—and nudge it early by three to eight milliseconds. That creates urgency. It’s the push-pull that makes jungle feel both relaxed and fast at the same time.

In Ableton, you can do this cleanly by turning off the grid temporarily so you can slide notes freely. And here’s a power move: use track delay for broad feel, and manual nudges for accents.

Try setting MID track delay to plus five to plus fifteen milliseconds. Keep SUB at zero. Sometimes SUB can go plus a couple milliseconds, but rarely more. If the whole bass feels behind the drums, you’ve gone too far.

And one more advanced coaching trick: delay isn’t just “late or early.” It’s phase alignment with the kick. Sweep MID track delay from about minus eight milliseconds to plus twelve while listening with kick and snare. Stop where the kick feels punchiest and the bass feels like it’s sitting behind the break in a good way. That sweet spot is real, and it changes depending on your samples.

Now sidechain. Because even a perfect groove will fall apart if the bass is stepping on the drums.

On SUB, add Compressor. Turn on sidechain. Choose your Drum Bus as the input, or your kick track if you have a separate kick. Ratio four to one. Attack one to three milliseconds. Release 60 to 120 milliseconds. Then lower the threshold until you see about two to five dB of gain reduction on the sub.

On MID, do the same, but aim a little lighter, like one to three dB of reduction.

Here’s what you listen for: the bass should tuck under the drum transient and come back just before the next important hit. If the break has tons of ghost notes and the compressor is chattering, you’ve got two fixes. One, use the sidechain EQ filter inside the compressor and emphasize around 60 to 120 Hz so it mostly reacts to kick weight, not snare crack. Two, sidechain from a ghost kick: a muted simple pattern that controls the bass movement intentionally. That’s super common in DnB because breakbeats can be too busy for a clean detector signal.

Now group your SUB and MID tracks into a group called BASS BUS.

On the bass bus, add EQ Eight and scan for mud around 120 to 250 Hz. If it feels thick in a bad way, a small dip around 180 Hz, like one to three dB, can clear the pocket.

Then add a Saturator with just one to three dB drive. This is glue, not destruction.

Then Glue Compressor. Attack 10 ms, release Auto, ratio two to one, and let it kiss the signal—one to two dB of reduction.

Optionally add a Limiter at the end as a safety ceiling at minus 0.3 dB. Don’t smash it. It’s only there to catch accidental peaks while you experiment.

At this point, you should have a two-bar loop that already rolls. Now we turn it into 16 bars that feel alive.

Here’s a simple blueprint.

Bars one through four: keep it simple and root-heavy. Let people understand the groove.

Bars five through eight: add one extra pickup note somewhere, and open the mid filter cutoff slightly so energy lifts.

Bars nine through twelve: introduce call and response by swapping one note—maybe change an anchor answer from D to C or F for a bar.

Bars 13 through 16: strongest version. Open the filter a bit more, and add a tiny resonance movement for tension.

Automation is your best friend here. Automate Wavetable filter cutoff to open gradually across eight bars. Automate Auto Filter resonance just a little in the last couple bars before a drop. Automate Saturator drive up one or two dB in the peak phrase. And if the mid starts bullying the drums in the loud section, automate Utility gain down one dB. That tiny move can save the whole groove.

One authenticity move: make one bar slightly wrong in a cool way. An extra ghost note, a surprise rest, or a half-beat of silence. Jungle thrives on controlled chaos.

And speaking of ghost notes, here’s an advanced variation if you want extra chatter without muddying the low end. Duplicate the MID track to a new one called MID-GHOST. Transpose it up 12 or 19 semitones. High-pass it hard at 250 to 350 Hz. Make the notes very short, like 30 to 80 milliseconds, and place them on offbeats. It adds momentum and texture while leaving your sub clean.

Now let’s talk common mistakes so you can self-correct fast.

If you swing the sub too much, your low end feels late and weak. Keep the sub mostly tight.

If your notes overlap, especially in the sub, you get weird level and phase behavior. Shorten notes. Avoid constant legato.

If you have too much stereo in the low frequencies, mono compatibility suffers and the bass feels unstable. Utility width at zero on the sub, always.

If you set sidechain and never revisit it, you’ll either pump or you’ll never actually make space. Tune that release to the rhythm of your break.

And if the mid bass is too loud relative to the drums, the break loses snap. Pull the mid down one to three dB and re-check. In drum and bass, drums are not optional. The bass supports the drums, even when it’s aggressive.

Now a quick Live 12 workflow boost: put the Scale MIDI effect on both SUB and MID. That way you can experiment without accidentally leaving the key. And in the MIDI clip’s transformations, you can lightly humanize the MID only. Go gentle, and undo-redo until it hits. You can also use Add Interval on the MID for quick fifths or octaves, then delete anything that clutters. Fast experimentation, still controlled.

Let’s wrap with a timed mini exercise you can do in 20 to 30 minutes.

Build SUB with Operator sine and the basic chain. Build MID with Wavetable and the chain. Write a two-bar bassline using only D, A, C, and F. Apply groove to MID only with timing 60 and random 3. Manually nudge two notes late by about 10 milliseconds. Sidechain SUB and MID to drums, aiming for around three dB reduction on SUB and two on MID. Then expand to eight bars. Add one bar with a rest—space is swing—and one bar with an extra pickup note right before beat one.

Then export a quick bounce and listen at low volume. If it still rolls quietly, you nailed the feel. Loud playback can hide timing problems. Quiet playback exposes them.

Recap: you built a two-layer bass where the sub stays stable and mono, and the mid carries groove and attitude. You applied jungle swing with groove plus targeted micro-timing, not random chaos. You shaped pocket using sidechain tuned to the break. And you arranged it into a 16-bar evolution using subtle automation so it feels like a track, not a loop.

If you tell me what style you’re aiming for—old-school 94 jungle, modern rollers, techstep, halftime—and what kind of break you’re using, I can suggest a swing amount, a sidechain release range, and a starting MIDI rhythm template that usually locks instantly for that lane.

mickeybeam

Go to drumbasscd.com for +100 drum and bass YouTube channels all in one place - tune in!

Generating PDF preview…