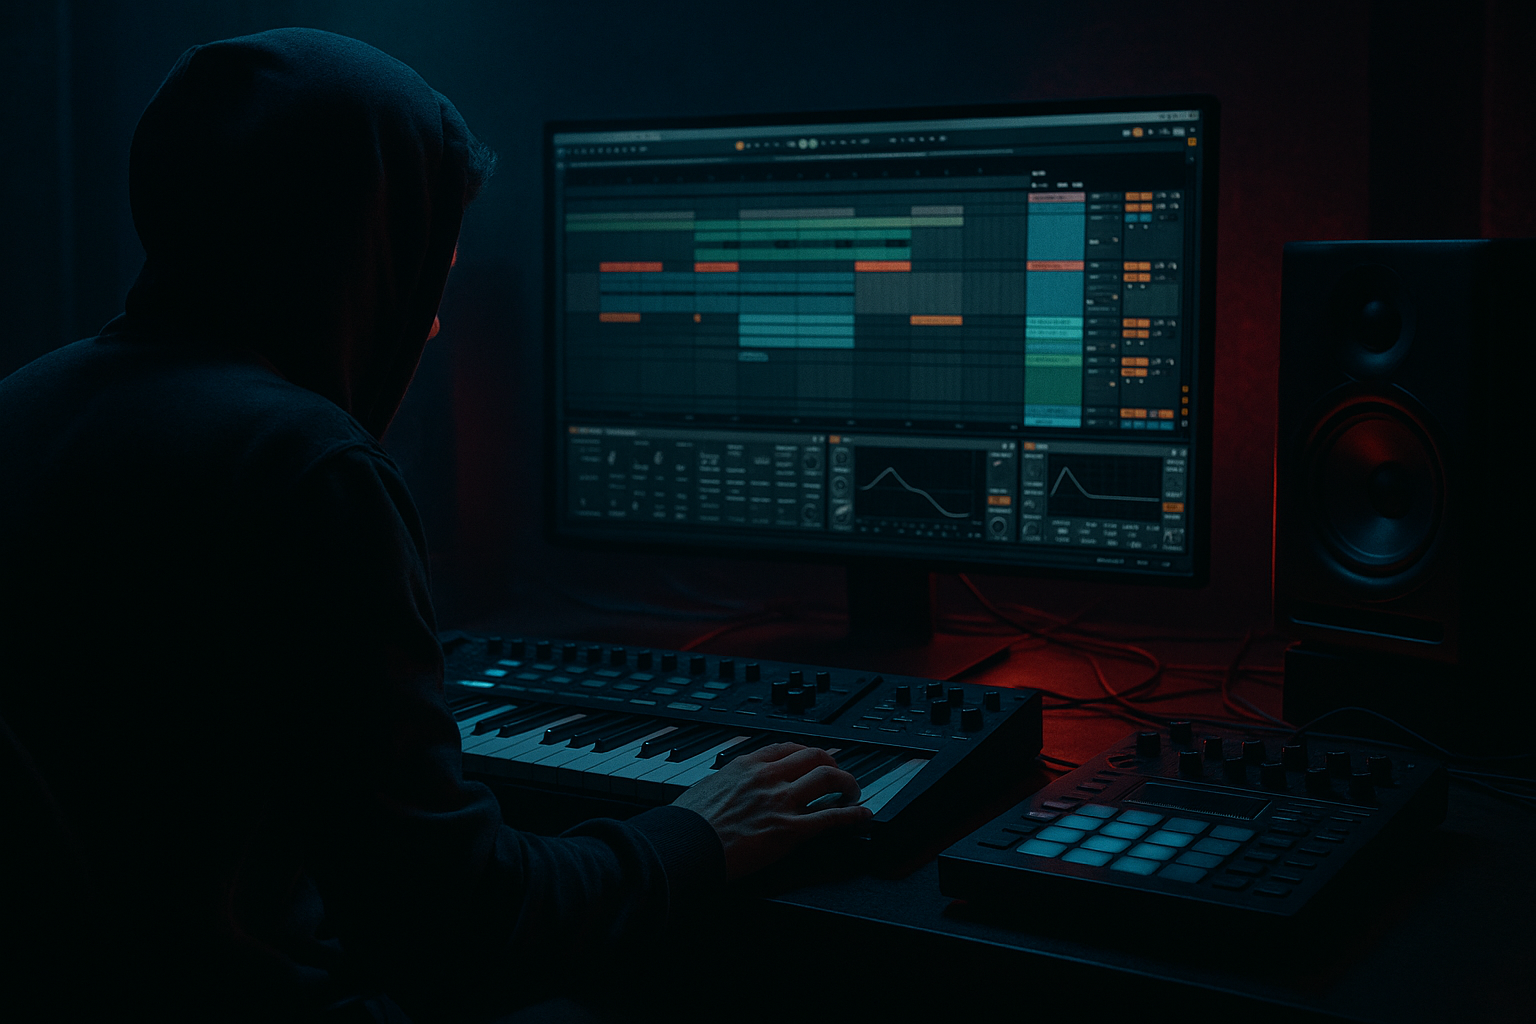
DNB COLLEGE

Drum & Bass Ableton Live 12 Tutorials

LESSON DETAIL

Midnight Amen jungle riser: saturate and arrange in Ableton Live 12 (Advanced)

An AI-generated advanced Ableton lesson focused on Midnight Amen jungle riser: saturate and arrange in Ableton Live 12 in the Drums area of drum and bass production.

Back to lessons
Midnight Amen jungle riser: saturate and arrange in Ableton Live 12 (Advanced) cover image

Narrated lesson audio

The voice track includes the tutorial plus extra teacher commentary.

Open audio file

Main tutorial

Midnight Amen Jungle Riser: Saturate + Arrange in Ableton Live 12 (Advanced Drums) 🌙🥁

1) Lesson overview

You’re going to turn a classic Amen break fragment into a midnight jungle riser: tight, gritty, and unmistakably DnB. The focus is controlled saturation, frequency staging, and arrangement automation so the riser pulls tension without wrecking your headroom.

This is not “throw a filter on it and pray” — we’ll build a repeatable Ableton workflow that hits hard in a modern rolling/jungle context.

---

2) What you will build

A 4–8 bar riser made from an Amen slice that:

  • Speeds up in perceived intensity using gated repeats + transient shaping
  • Gets darker, dirtier, and more urgent via multi-stage saturation
  • Uses automation lanes (filter, drive, send FX, width, pitch) to lift energy
  • Drops cleanly into your next section (no smeared transients, no blown low end)
  • Final deliverable: A single consolidated audio riser you can drag into any project.

    ---

    3) Step-by-step walkthrough

    A) Prep the Amen for “riser duty”

    1. Choose a strong Amen hit/phrase

    - Grab a clean Amen loop (or your own break recording).

    - Ideal: a 1-bar Amen at ~160–174 BPM, or warp it.

    2. Warp settings

    - Drop the loop into an audio track.

    - Set Warp = ON

    - For break manipulation, start with:

    - Beats mode

    - Preserve: Transients

    - Transient Loop Mode: Forward

    - Envelope: 60–80%

    - If it gets too clicky, reduce Envelope; if it smears, increase.

    3. Slice to MIDI for control (optional but powerful)

    - Right-click clip → Slice to New MIDI Track

    - Slicing preset: Transient

    - Now you have a Drum Rack with Amen slices. Great for building rising patterns.

    Why this matters: a riser wants tight articulation, not flabby warp artifacts.

    ---

    B) Build the rhythmic “riser engine” (repeat + density)

    You’ve got two solid approaches. Use either depending on your vibe.

    #### Option 1: Audio clip + Beat Repeat (fast and nasty)

    1. Keep Amen on an Audio Track.

    2. Add Beat Repeat (stock device) after the clip.

    3. Suggested starting settings:

    - Interval: 1 Bar (or 1/2 for faster “panic”)

    - Grid: start at 1/8, automate down to 1/32

    - Chance: 0% (then automate up to 30–60% as it rises)

    - Gate: 25–45%

    - Variation: 0–15% (keep it controlled)

    - Pitch: Off for now (we’ll do pitch later more intentionally)

    4. Automation idea across 4 bars:

    - Bar 1: Grid 1/8, Chance 0–10%

    - Bar 2: Grid 1/16, Chance 15–25%

    - Bar 3: Grid 1/24 or 1/32, Chance 30–45%

    - Bar 4: Grid 1/32, Chance 50–60%, Gate shorter for “machine-gun”

    #### Option 2: Drum Rack pattern (surgical jungle)

    1. Use your sliced Drum Rack.

    2. Program a 1–2 bar pattern, then duplicate and increase density:

    - Bar 1: core hits (kick/snare accents)

    - Bar 2: add ghost notes (light velocities)

    - Bar 3: add rapid hats/slices (1/16 → 1/32 bursts)

    - Bar 4: controlled chaos (fills, stutters, reversed slice)

    Pro move: Use velocity as your “human grit” dial—keep ghosts around 30–60 velocity, accents 90–120.

    ---

    C) Create the “Midnight Saturation Stack” (clean → dirty → controlled)

    We’ll build a chain that adds aggression without losing punch. Put this chain after Beat Repeat (or after Drum Rack output).

    #### Device Chain (in order)

    1. EQ Eight (pre-shape)

    - HP filter: 24 dB/oct @ 90–140 Hz (depending on how much low you want in the riser)

    - Small cut: -2 to -4 dB @ 250–400 Hz (mud control)

    - Optional presence: +1 to +3 dB @ 3–6 kHz if it gets too dull

    2. Roar (main character saturation) 🔥

    Roar is perfect for “jungle grime” because it can do multiband drive + movement.

    - Mode: start with Tube or Dirt

    - Drive: 10–25% (automate upward)

    - Tone: slightly dark (don’t over-brighten yet)

    - If using multiband:

    - Low band: mild drive, keep tight

    - Mid band: most drive (this is where Amen attitude lives)

    - High band: lighter drive to avoid brittle fizz

    - Add a touch of Dynamics inside Roar if transients get too spiky.

    3. Drum Buss (punch + crunch)

    - Drive: 5–15%

    - Crunch: 5–20% (be careful: it can hiss)

    - Boom: Off (usually) for risers; or very subtle if you want a low throb

    - Damp: adjust to prevent harshness

    - Transient: +5 to +20 if saturation softened attacks too much

    4. Saturator (final glue)

    - Mode: Soft Sine (smooth) or Analog Clip (harder)

    - Drive: 2–8 dB

    - Soft Clip: ON

    - This is your “don’t let peaks explode as we automate intensity” safety net.

    5. Glue Compressor (optional, but great for tension)

    - Attack: 3–10 ms (let transients through)

    - Release: Auto or 0.1–0.3 s

    - Ratio: 2:1 to 4:1

    - Aim for 1–3 dB GR until final bar (maybe 4 dB tops)

    6. Limiter (only if needed for control during sound design)

    - Don’t mix into it permanently unless you know why.

    - Use it to prevent ear-shredding surprises while you automate.

    ---

    D) “Midnight Movement”: automate filter, pitch, width, reverb sends

    Here’s how you make it rise without sounding like a generic EDM sweep.

    #### 1) Filter automation (dark → open)

  • Add Auto Filter after EQ (or use EQ Eight’s filter).
  • Settings:
  • - Filter type: LP24

    - Start cutoff: 600–1.2 kHz

    - End cutoff (last bar): 8–14 kHz

    - Resonance: 10–25% (don’t whistle)

  • Optional: automate resonance slightly up near the end for tension.
  • #### 2) Pitch creep (subtle menace)

  • If using audio: add Shifter or automate Clip Transpose carefully.
  • Try:
  • - Start: 0 st

    - End: +2 to +5 st over 4–8 bars

  • Jungle trick: do the opposite for dread—downward pitch (-2 st) while filter opens, creates a “falling into the drop” illusion.
  • #### 3) Stereo width (mono → wider)

  • Use Utility:
  • - Start Width 0–30% (mono-ish)

    - End Width 90–120%

  • Keep the riser’s low mids tight; if it gets phasey, widen only the highs:
  • - Use Audio Effect Rack → split bands with EQ Eight filters, widen the high band only.

    #### 4) Send FX for atmosphere (the “midnight space”) 🌫️

    Create two return tracks:

  • Return A: Reverb (short, dark room)
  • - Hybrid Reverb (Convolution or Algorithm)

    - Decay: 0.6–1.2s

    - Pre-delay: 10–25 ms

    - Low cut: 250–400 Hz

    - High cut: 6–10 kHz

  • Return B: Delay (dubby tension)
  • - Echo

    - Time: 1/8 dotted or 1/4

    - Feedback: 15–35%

    - Mod: subtle

    - Filter: roll lows + tame highs

    Automation:

  • Gradually increase send to Reverb through bars 1–3.
  • Pull reverb down sharply right before the drop (last 1/8–1/4 bar) for a clean impact.
  • Increase Echo send near the end for that jungle “spiral” effect.
  • ---

    E) Arrange it like a DnB record (not a sound demo)

    Let’s place this in a typical rolling/jungle structure.

    #### 4-bar riser into a drop (classic)

  • Bar 1: recognizable Amen groove, dark filter, low drive
  • Bar 2: Beat Repeat starts to show up, slightly brighter, more send FX
  • Bar 3: more density, more saturation, slight pitch creep
  • Bar 4: fastest grid stutters, widest stereo, peak drive
  • - Last 1/2 bar: cut lows, reduce reverb, tighten stereo

    - Last 1/8 bar: hard mute or tape stop-style drop-out for impact

    #### Transition trick: “pre-drop vacuum”

  • In the final beat:
  • - Utility gain dip: -3 to -6 dB very briefly

    - HP filter sweeps up quickly (removes body)

    - Then drop hits with full low-end restored

    ---

    F) Print + cleanup (important for pro sessions)

    1. Resample the riser to audio (new track → set input to “Resampling”).

    2. Consolidate (Cmd/Ctrl+J).

    3. Cleanup pass:

    - EQ Eight: cut rumble < 80–120 Hz

    - Fade in/out tiny clip fades to prevent clicks

    4. Now you can treat it like a single “riser asset” in your arrangement.

    ---

    4) Common mistakes

  • Over-saturating the highs → harsh hiss instead of grit. Fix: darken with EQ/filters, drive mids more than highs.
  • Letting low-end build up (especially with reverb) → the drop loses punch. Fix: HP your riser and HP your reverb returns.
  • Too random Beat Repeat settings → sounds like a glitch preset, not jungle. Fix: automate with intention; keep variation low.
  • No release strategy → riser ends with a wall of noise into the drop. Fix: last 1/4 bar = reduce reverb, tighten width, remove lows.
  • Warp artifacts → flamming and transient blur. Fix: Beats mode tuning, or render/slice to MIDI.
  • ---

    5) Pro tips for darker/heavier DnB 🖤

  • Parallel “filth bus”:
  • Duplicate the Amen riser track → on the duplicate, go extreme (Roar + Drum Buss + heavy EQ) → blend at -12 to -20 dB under the main.

  • Midrange focus = heavier perception:
  • A controlled push around 700 Hz – 2.5 kHz can feel meaner than adding more sub.

  • Use gating for aggression:
  • Try Gate after reverb return (sidechain from the dry Amen) for that chopped, tense jungle space.

  • Texture layer:
  • Layer a very quiet noise/hiss vinyl or jungle ambience, then automate it up into the last bar (keep it subtle).

  • Clip-to-drop contrast:
  • Make the riser slightly “boxy/dark” so the drop feels brighter and larger without needing extra loudness.

    ---

    6) Mini practice exercise (15–20 minutes) 🎯

    1. Make a 4-bar Amen riser using Beat Repeat.

    2. Automate:

    - Beat Repeat Grid: 1/8 → 1/32

    - Roar Drive: 10% → 25%

    - Auto Filter cutoff: 800 Hz → 12 kHz

    - Utility Width: 20% → 110%

    - Reverb send: rise until bar 3, then drop to near zero right before the downbeat

    3. Print to audio and check:

    - Does the last hit before the drop feel tight and intentional?

    - Is the riser exciting without being louder than the drop?

    Bonus: Do a second version where pitch goes down instead of up.

    ---

    7) Recap ✅

  • You built a jungle/DnB riser from an Amen by increasing density, drive, and space over time.
  • The “midnight” vibe came from dark filtering, mid-focused saturation, and controlled stereo growth.
  • The pro difference is the exit plan: pulling reverb/width/lows right before the drop so the impact lands clean.

If you want, tell me your project BPM and whether you’re going for 90s jungle rawness or modern rollers, and I’ll suggest a specific 8-bar automation map + exact Roar mode choices for that vibe.

Ask GPT about this lesson

Chat with the lesson tutor, get follow-up help, or use quick actions.

Bigup 👽 Ask me anything about this lesson and I’ll answer in context.

Narration script

Show spoken script
Midnight Amen jungle riser: saturate and arrange in Ableton Live 12. Advanced.

Alright, in this lesson we’re taking a small fragment of the Amen break and turning it into a proper midnight jungle riser: tight, grimy, and tense, without wrecking your headroom or smearing your transients right before the drop.

The goal isn’t “filter sweep plus reverb and hope.” The goal is a repeatable workflow you can drop into any drum and bass session: you’ll control density, then drive, then space, then you’ll do the most important part… the exit plan. Because the riser only works if the downbeat lands clean.

Let’s build it.

First, prep the Amen for riser duty.

Grab a clean Amen loop or a recording you trust. One bar is plenty. Two bars can be nice if you want more phrasing. Drop it onto an audio track and get the project tempo in the 160 to 174 zone, or whatever your track is running.

Turn Warp on. For break manipulation, start in Beats mode. Set Preserve to Transients. Transient Loop Mode: Forward. Then set Envelope somewhere around 60 to 80 percent.

Here’s what you’re listening for. If the break starts sounding clicky and brittle, the envelope is probably too high. Pull it down. If it’s smearing and flamming, raise it a touch. Don’t rush this. A riser wants articulation. If you start with warp artifacts, you’ll end with a riser that feels like it’s tripping over itself.

Optional, but extremely powerful: Slice to MIDI.

Right-click the clip and choose Slice to New MIDI Track. Use the Transient slicing preset. Now you’ve got a Drum Rack of slices, and that means you can treat this riser like a break performance, not an FX sweep. That concept matters: keep one or two recognizable accents consistent so the ear has something to latch onto while the density increases. Often that’s a snare fragment, maybe a hat bite, something that repeats each bar like a lighthouse in the chaos.

Now we build the rhythmic riser engine. You’ve got two main routes.

Option one is audio plus Beat Repeat. Fast and nasty.

Keep the Amen on the audio track. Add Beat Repeat after it. Start with Interval at one bar. Grid at one eighth. Chance at zero percent at the start. Gate somewhere around 25 to 45 percent. Variation low, like zero to fifteen, because we want jungle tension, not random glitch preset energy. Pitch stays off for now. We’ll do pitch intentionally later.

Then automate it across four bars.

Bar one: Grid one eighth, Chance maybe zero to ten. Let it feel like the Amen still exists.

Bar two: Grid one sixteenth, Chance fifteen to twenty-five. Now it starts to chatter.

Bar three: Grid one twenty-fourth or one thirty-second, Chance thirty to forty-five. This is where tension really ramps.

Bar four: Grid one thirty-second, Chance fifty to sixty, Gate shorter so it turns into that controlled machine-gun texture.

And teacher note: your automation is your composition here. If it feels like it’s doing too much too early, pull back. A riser that peaks in bar two leaves you nowhere to go.

Option two is the sliced Drum Rack approach. More surgical.

Program a simple one or two bar pattern using the slices. Duplicate it and increase density each pass. Bar one: core accents. Bar two: add ghost notes with lower velocities. Bar three: introduce rapid bursts, like short runs that flirt with one thirty-second. Bar four: controlled chaos: a fill, a stutter, maybe one reversed slice if you want that classic jungle whip.

Pro move: use velocity as the “human grit” dial. Ghost notes around 30 to 60 velocity, accents 90 to 120. That difference makes the riser feel performed, not pasted.

Cool. Now we build the midnight saturation stack. This is where a lot of people destroy their mix. So we’re going to do it cleanly, stage by stage, and we’re going to level-match as we go.

Before you add any drive at all, put a Utility at the very top of the chain. Trim your gain so that the loudest moment of the riser hits roughly minus 12 to minus 8 dBFS peak before distortion. That gives you room to add harmonics without instantly clipping everything.

And after each distortion or saturation stage, level-match the output. If you don’t, you’ll choose loud, not better. That’s not a vibe thing, that’s a physics thing.

Here’s the chain.

First, EQ Eight for pre-shape.

High-pass it. Usually 24 dB per octave at about 90 to 140 Hz. In a riser, the low end is usually the drop’s job. Cut mud around 250 to 400 Hz by two to four dB if it’s boxy. And if it’s too dull, add a gentle one to three dB somewhere in the 3 to 6 kHz range. Nothing crazy yet.

Next, Roar. This is your main character saturation.

Start with Tube or Dirt. Drive around ten to twenty-five percent, and plan to automate it upward. Keep the tone slightly dark at first. If you’re using multiband, drive the mids the most, keep the lows tighter, and go lighter on the highs so it doesn’t turn into fizzy sandpaper.

Listen for this: the Amen attitude is midrange. The perceived heaviness often lives around 700 Hz to 2.5 kHz. You don’t need more sub to feel heavier. You need the right mid bite.

If the transients get too pokey, use a touch of dynamics inside Roar, or just back the drive down and rely on later stages.

Then Drum Buss for punch and crunch.

Drive five to fifteen percent. Crunch five to twenty, carefully, because it can hiss. Boom usually off for risers, unless you want a subtle low throb, and even then keep it polite. Adjust Damp so it doesn’t get harsh. And use Transient plus five to plus twenty if the saturation softened the attacks too much.

Then a Saturator for final glue and peak safety.

Soft Sine for smoother, Analog Clip for harder. Drive two to eight dB. Soft Clip on. This is your “peaks don’t explode when the automation ramps” insurance.

Optional: Glue Compressor.

Attack three to ten milliseconds so you keep the transient edge. Release auto or 0.1 to 0.3 seconds. Ratio two to one up to four to one. Aim for one to three dB of gain reduction, maybe up to four at the peak. But don’t crush it into a flat brick. This is tension, not loudness.

And if you need a Limiter while sound designing, fine. Use it as a seatbelt, not as your mixing strategy. You can remove it later.

Now we make it rise. Midnight movement: filter, pitch, width, and send effects.

First, filter automation. Dark to open, but not generic EDM.

Add Auto Filter, LP24. Start cutoff around 600 Hz to 1.2 kHz, depending on how dark you want. End around 8 to 14 kHz in the final bar. Resonance ten to twenty-five percent, but don’t let it whistle. You can automate resonance slightly up near the end for tension, but subtle is more expensive here.

Second, pitch creep. Subtle menace.

If you’re on audio, you can automate clip transpose or use Shifter. Start at zero semitones, end plus two to plus five over four to eight bars. Or do the jungle dread trick: pitch goes slightly down, like minus two semitones, while the filter opens. That contradiction makes it feel like you’re falling into the drop while still lifting energy. It’s sick when it’s subtle.

Third, stereo width. Mono to wider, but check it.

Use Utility. Start width at zero to thirty percent, basically mono-ish. End at ninety to one hundred twenty.

Now, important coach habit: check mono compatibility early. Map a key to toggle width to zero percent. If your riser collapses and loses all bite, your excitement is phase, not energy. Fix it by widening only the highs and keeping the 1 to 4 kHz region more centered.

A quick way: use an Audio Effect Rack, split bands with EQ Eight filters. Keep low and mid mostly mono, widen the high band only.

Fourth, the midnight space with return tracks.

Make Return A a short, dark room. Hybrid Reverb works great. Decay around 0.6 to 1.2 seconds. Pre-delay 10 to 25 milliseconds. Low cut 250 to 400 Hz. High cut 6 to 10 kHz.

Return B: dubby delay. Echo. Set time to dotted eighth or quarter. Feedback 15 to 35 percent. Subtle modulation. Filter out lows and tame highs so it doesn’t get splashy.

Automation move: increase reverb send gradually through bars one to three. Then right before the drop, pull reverb down sharply in the last eighth note to quarter note. That dry snap is what makes the downbeat hit like a door slamming.

Increase Echo send near the end for that jungle spiral. But again, kill or reduce it right at the line so the drop doesn’t inherit a messy tail.

If you want to level up the reverb, sidechain-compress the reverb return from the dry Amen. Use an attack of 10 to 30 milliseconds so the reverb blooms after the transient. The hits stay readable, but the space still feels huge.

Now arrange it like a drum and bass record, not a sound demo.

Here’s a classic four-bar riser into a drop.

Bar one: recognizable Amen groove, dark filter, low drive, minimal space. This is identity.

Bar two: Beat Repeat starts showing up, slightly brighter, more send FX. Still controlled.

Bar three: more density, more saturation, slight pitch creep. This is urgency.

Bar four: fastest stutters, widest stereo, peak drive. Then the pro move: the last half-bar tightens, not explodes.

That’s the transient priority rule. Counterintuitive but true: the last half-bar is often more controlled in transient spikes than earlier, because it makes the downbeat feel larger. You can do that with slightly more clipping to cap peaks cleanly, or slightly less transient enhancement right at the end.

And the exit plan, specifically.

Last half-bar: cut lows. Pull the reverb down. Tighten stereo. You can even narrow width back toward mono-ish in the last beat, so the drop feels like it suddenly opens wider.

Last eighth note: consider a hard mute, or a tiny tape-stop style dropout if it fits, but don’t overdo it. Just enough negative space to create impact.

Try the “pre-drop vacuum” trick: in the final beat, dip Utility gain by three to six dB very briefly, sweep a high-pass up fast to remove body, then the drop hits with full low restored. The contrast is the punch.

If you want an advanced variation, add a triplet panic moment. Final bar only, one to two beats: a brief triplet-ish stutter, like a one-twelfth or one-twenty-fourth burst. Keep it short so it feels like a shove of tension, not a meter change.

Or do call and response across the riser. Two phrases: first two bars emphasize snare fragments, second two bars emphasize hat or ride fragments. You get motion without just turning the repeat knob up.

Now, printing and cleanup. This is where your sessions stay professional.

Resample the riser to a new audio track. You can set the track input to Resampling and record it, or freeze and flatten. Then consolidate so it becomes one clean riser asset you can drag anywhere.

Do a cleanup pass. EQ Eight: cut rumble below 80 to 120 Hz. Add tiny fades at clip edges to avoid clicks. And make sure your printed riser never peaks louder than your drop drum bus peak. The riser should feel more intense, not necessarily louder.

One more pro workflow tip: print in passes, not once. First print the rhythm engine dry-ish, like your Beat Repeat or slice performance. Then do a second pass printing the saturation and movement. That way if you later decide the distortion is too much, you haven’t lost the groove.

Quick common mistake check before you call it done.

If it’s harsh, you probably over-saturated the highs. Darken it and drive the mids instead.

If the drop loses punch, your riser has too much low end or your reverb return has low end. High-pass both.

If it sounds random, your Beat Repeat variation and chance are too wild. Automate with intention. Keep variation low.

If it smears into the drop, you didn’t reduce reverb, width, and lows right at the end. That last quarter bar is sacred.

Now your mini exercise.

Make a four-bar Amen riser using Beat Repeat. Automate grid from one eighth to one thirty-second. Automate Roar drive from ten to twenty-five percent. Automate Auto Filter cutoff from about 800 Hz to 12 kHz. Automate Utility width from 20 percent to 110 percent. Automate reverb send up until bar three, then snap it to near zero right before the downbeat.

Print it. Listen to the last hit before the drop. Does it feel tight and intentional? And does the riser feel exciting without being louder than the drop?

Then do a second version where pitch goes down instead of up. Compare which one feels more “midnight.”

Recap.

You built a jungle riser out of an Amen slice by increasing density, drive, and space over time. The midnight vibe came from dark filtering, mid-focused saturation, and controlled stereo growth. And the pro difference is the exit plan: you pull reverb, width, and lows right before the drop so the impact lands clean.

If you tell me your BPM and whether you’re aiming for 90s raw jungle or modern rollers, I can give you a specific bar-by-bar automation map, including where to reset energy in an eight-bar build for maximum impact.

mickeybeam

Go to drumbasscd.com for +100 drum and bass YouTube channels all in one place - tune in!

Generating PDF preview…