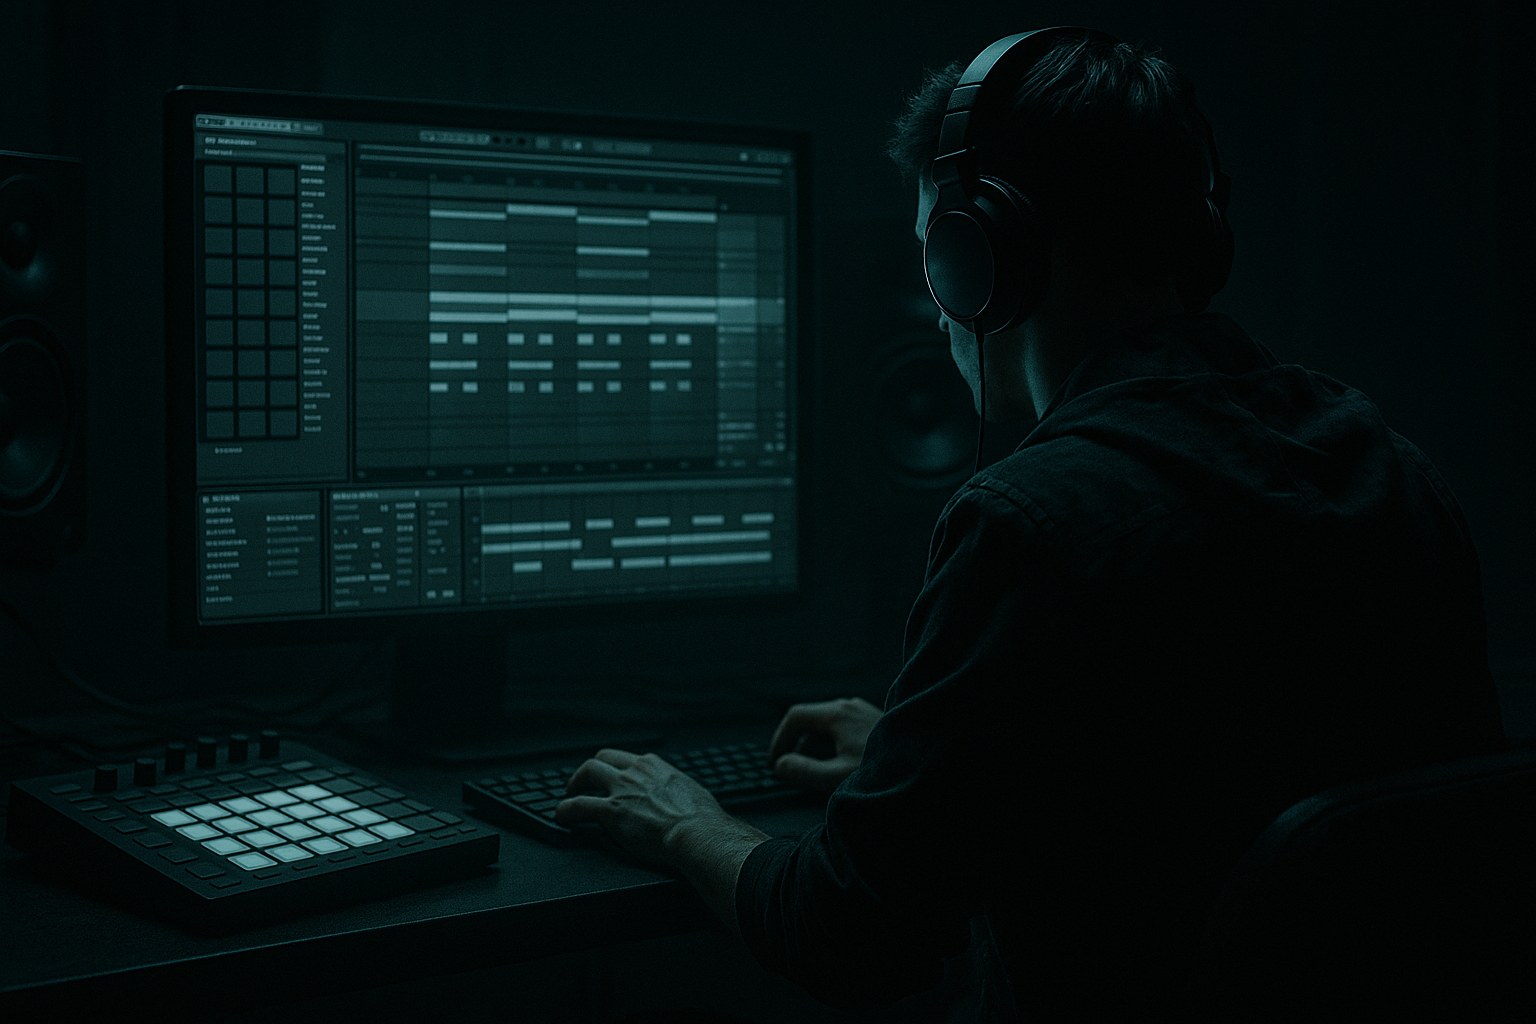
DNB COLLEGE

Drum & Bass Ableton Live 12 Tutorials

LESSON DETAIL

Motif variation across sections: for oldskool DnB vibes (Beginner)

An AI-generated beginner Ableton lesson focused on Motif variation across sections: for oldskool DnB vibes in the Composition area of drum and bass production.

Back to lessons
Motif variation across sections: for oldskool DnB vibes (Beginner) cover image

Narrated lesson audio

The voice track includes the tutorial plus extra teacher commentary.

Open audio file

Main tutorial

```markdown

Motif Variation Across Sections (Oldskool DnB Vibes) — Ableton Live Tutorial 🎛️🥁

1) Lesson overview

In oldskool jungle / early DnB, a tune often revolves around one memorable motif (a 1–2 bar idea: a bass riff, pad stab, vocal chop, or break edit) that stays recognizable while mutating across sections. This keeps energy moving without losing identity.

In this lesson you’ll learn how to:

  • Write a simple motif that feels authentically jungle/DnB
  • Create A/B/C variations that sound like “same tune, different intensity”
  • Use Ableton Live stock devices + workflow shortcuts to build section-based variation fast ⚡
  • ---

    2) What you will build

    A short arrangement (32–64 bars) that includes:

  • A section (Intro / Setup): motif teased + filtered
  • B section (Drop / Main): full motif + bass + drums
  • C section (Switch / Turnaround): motif “flipped” with rhythmic edits and tension
  • A simple return to B for payoff
  • Motif options (choose one):

  • Bass riff motif (classic rolling)
  • Chord stab motif (ravey / dark)
  • Vocal chop motif (oldskool hype)
  • We’ll focus on a bass riff motif (most DnB-relevant), and you can apply the same process to stabs/chops.

    ---

    3) Step-by-step walkthrough

    Step 0 — Set up your session (2 minutes)

    1. Tempo: set 165–172 BPM (try 170 BPM for classic DnB).

    2. Create tracks:

    - 1 MIDI: BASS

    - 1 MIDI: STAB (optional)

    - 1 Audio: BREAK

    - 1 MIDI: DRUM ONE-SHOTS (kick/snare layer, optional)

    - 1 Return: REVERB

    - 1 Return: DELAY

    Return settings (simple + useful):

  • Return A (Reverb): Hybrid Reverb
  • - Algorithm: Plate

    - Decay: 1.8–2.5s

    - Pre-delay: 10–25 ms

    - Hi Cut: 6–8 kHz

    - Wet: 100% (it’s a return)

  • Return B (Delay): Echo
  • - Time: 1/8 dotted or 1/4

    - Feedback: 20–35%

    - Filter: HP 200–400 Hz, LP 5–8 kHz

    - Wet: 100%

    ---

    Step 1 — Build a simple oldskool bass motif (the “DNA”) 🧬

    Goal: 1-bar motif that loops well and feels syncopated.

    1. On BASS track, load Wavetable (stock).

    2. Start with a simple patch:

    - Osc 1: Sine (or “Basic Shapes” → sine)

    - Osc 2: Off (for now)

    - Filter: LP24

    - Filter Freq: ~200 Hz (we’ll modulate later)

    - Amp Env:

    - Attack 0 ms

    - Decay 300–600 ms

    - Sustain -inf to -10 dB (short note feel)

    - Release 80–150 ms

    3. Create a MIDI clip (1 bar) with this rhythm (classic roller syncopation):

    - Notes on 1, 1.2, 1.3.4, 2.3, 3, 3.2, 4.2

    If that’s confusing, do this simpler:

    - Put notes on 1, 1.2, 2.3, 3, 3.2, 4.2

    4. Pitch choice (keep it simple): pick a root like F or G. Use mostly root + 5th:

    - Example in F: F1 and occasional C2

    Make it “speak”:

  • Add Auto Filter after Wavetable:
  • - Filter: LP24

    - Freq: 120–300 Hz

    - Resonance: 10–25%

  • Add Envelope movement by mapping:
  • - In Wavetable, assign Env 2 → Filter Cutoff (Amount +20 to +40)

    - Env 2 decay around 200–400 ms

    This gives that classic “bwoop” articulation.

    ---

    Step 2 — Lock drums first (because motif variation depends on groove) 🥁

    Oldskool vibe = breaks + simple reinforcement.

    1. On BREAK track, drop in a classic break (Amen, Think, Funky Drummer, etc.).

    2. Warp mode: Complex Pro (good general choice) or Beats if you want grit.

    3. Slice to MIDI:

    - Right-click the break → Slice to New MIDI Track

    - Slicing preset: Transient

    - Choose Built-in slicing

    4. In the new Drum Rack:

    - Tighten the main snare and kick levels

    - Use Drum Buss on the break group:

    - Drive: 5–15%

    - Crunch: 5–20

    - Boom: 0–20% (tune around 50–60 Hz if you use it)

    5. Optional: Add a clean snare layer on DRUM ONE-SHOTS:

    - Use Simpler or Drum Rack

    - Put snare on 2 and 4 (DnB backbeat)

    Now your motif will feel “right” when it changes—because the grid and swing are stable.

    ---

    Step 3 — Create 3 variations of the same motif (A/B/C)

    You’ll duplicate the same MIDI clip and change one axis at a time: rhythm, pitch, timbre, space.

    #### Variation A (Intro tease): “same motif, less obvious”

    1. Duplicate the bass clip to an Intro area (e.g., bars 1–9).

    2. Make it subtle:

    - Add EQ Eight after Auto Filter:

    - High-pass at 30 Hz

    - Low-pass with a gentle shelf or use Auto Filter to keep it dark

    - Put Auto Filter cutoff lower (e.g., 90–140 Hz)

    3. Reduce density:

    - Delete 1–2 notes per bar (keep the first note and one offbeat)

    4. Add space:

    - Send a tiny amount to Delay Return (3–8%) to create a ghost tail.

    Result: listener recognizes the motif later, but you’re not “giving it all away” yet.

    ---

    #### Variation B (Drop main): “full statement”

    Duplicate the original motif into the drop (e.g., bars 9–25).

    1. Turn on more harmonic content in Wavetable:

    - Osc 2: Saw very low level (or use “Basic Shapes” square)

    - Slight detune: 5–12 cents

    2. Add Saturator after EQ:

    - Drive: 2–6 dB

    - Soft Clip: On

    3. Tighten dynamics:

    - Add Glue Compressor (gentle):

    - Attack 10 ms

    - Release Auto

    - Ratio 2:1

    - Aim for 1–3 dB gain reduction

    4. Add sub discipline (important!):

    - Option A: Add a separate SUB track (Operator sine) following the root notes only.

    - Option B: Keep Wavetable mostly sine and add harmonics carefully.

    Result: same motif, now “earned” and powerful.

    ---

    #### Variation C (Switch / turnaround): “flip the rhythm, keep the identity”

    This is where oldskool tunes often do a little edit madness without changing the tune entirely.

    Duplicate motif into bars 25–33.

    Choose two of these “flip” methods:

    Method 1: Call-and-response rhythm

  • Keep the first half of the bar identical
  • Replace second half with a new syncopation:
  • - Move a note earlier (anticipation) or create a little 16th run (2–3 quick notes)

    Method 2: Pitch “shadow”

  • Keep same rhythm
  • Change one or two notes to a nearby tone:
  • - Root → b7 (dark feel)

    - Root → 4th (tension)

    Example in F: try Eb or Bb sparingly.

    Method 3: Timbre automation (easy but effective)

  • Automate Auto Filter cutoff per section:
  • - C section: raise cutoff slightly (200–400 Hz) and increase resonance for a “talking” effect

  • Add Phaser-Flanger subtly for movement:
  • - Rate: 0.10–0.30 Hz

    - Amount: 20–40%

    - Mix: 10–20%

    Method 4: “Tape stop” micro moment

  • At the end of bar 32, do a 1-beat mute + delay throw:
  • - Automate bass volume down for 1 beat

    - Send a single note hard into Echo (send up to 40–70% for that moment)

    Result: listener still hears the same motif, but it “turns the corner” and resets energy.

    ---

    Step 4 — Arrange it like a classic DnB structure 🧱

    Here’s a solid beginner-friendly roadmap:

  • Bars 1–9 (Intro): Variation A
  • - Break filtered (Auto Filter on break: cutoff 1–3 kHz gradually opening)

    - Bass motif teased (low + sparse)

  • Bars 9–25 (Drop 1): Variation B
  • - Full breaks + layers

    - Bass full

    - Add a stab every 2 bars (optional)

  • Bars 25–33 (Switch): Variation C
  • - Add drum edits (1-bar fill, or remove kick for 1 bar)

    - Add FX riser (Noise sweep via Operator/Analog + Auto Filter)

  • Bars 33–49 (Drop 2): Back to Variation B (or B’)
  • - Bring one new element: extra ghost note, extra hat, or a new stab

    Ableton workflow tip:

    Color-code clips: A (blue), B (red), C (purple). You’ll see variation instantly.

    ---

    Step 5 — Add one “rave DNA” element (optional but very oldskool) 🔊

    Add STAB track with Simpler (classic stab sample) or synth stab.

    Quick stab chain (stock-only):

  • Simpler (one-shot stab)
  • EQ Eight (HP at 150–250 Hz)
  • Saturator (Drive 2–5 dB)
  • Hybrid Reverb (send or insert, short plate)
  • Pattern idea:

  • Hit stab on bar 1 beat 1 every 4 bars
  • Add an extra stab in the switch section only (variation across sections!)
  • ---

    4) Common mistakes

  • Changing too many things at once: If rhythm + notes + sound + drums all change, it stops feeling like a motif.
  • No “A” tease: If you go full power immediately, the drop has less impact.
  • Over-busy bass rhythm: Rolling DnB needs space for breaks; let the snare breathe.
  • Sub getting messy: If you add harmonics, keep sub mono and controlled.
  • Switch section that feels random: A good switch is a variation, not a new song.
  • ---

    5) Pro tips for darker/heavier DnB 🕶️

  • Use minor keys + b7 movement: Tiny note changes (root ↔ b7) sound instantly darker.
  • Parallel distortion on bass (Return track):
  • - Return C: Amp (Clean/Blues) → SaturatorEQ Eight (HP at 150 Hz)

    Send just a bit from bass to add grit without ruining sub.

  • Mid/Side control with EQ Eight:
  • - On bass group, EQ Eight set to M/S:

    - Side: low-cut at 120–200 Hz

    - Mid: keep sub solid below 120 Hz

  • Drum weight:
  • - Drum Buss on drum group + Glue Compressor light squeeze

  • Tension automation: In switch section, automate:
  • - Reverb send up slightly

    - Filter resonance up

    - Then snap back to dry/punchy on the drop return

    ---

    6) Mini practice exercise (15–20 minutes) ✅

    1. Write a 1-bar bass motif (6–8 notes max).

    2. Duplicate it into three clips: A, B, C.

    3. Apply exactly:

    - A: delete 2 notes + lowpass filter

    - B: add Saturator + full rhythm

    - C: keep rhythm but change 2 pitches (try b7/4th) + add a 1-beat delay throw

    4. Arrange into 32 bars using the structure above.

    5. Export a quick bounce and listen on headphones:

    - Can you still “hum” the motif in every section?

    - Does B feel bigger than A, and does C create tension?

    ---

    7) Recap

  • A motif is your tune’s identity—oldskool DnB thrives on recognizable loops that evolve 🔁
  • Build A/B/C variations by changing one axis at a time (density, pitch, timbre, space)
  • Use Ableton stock tools like Wavetable, Auto Filter, Saturator, Glue Compressor, Drum Buss, Echo, Hybrid Reverb
  • Arrange with intention: tease → drop → switch → payoff

If you want, tell me what subgenre you’re aiming for (jungle, techstep-ish, liquid-roller, neuro-ish) and I’ll suggest a motif type + exact note/rhythm pattern that fits it.

```

Ask GPT about this lesson

Chat with the lesson tutor, get follow-up help, or use quick actions.

Bigup 👽 Ask me anything about this lesson and I’ll answer in context.

Narration script

Show spoken script
Title: Motif variation across sections: for oldskool DnB vibes (Beginner)

Alright, let’s build that real oldskool jungle and early DnB feeling: one main motif that’s so catchy you can recognize it instantly, but it keeps mutating as the track moves through sections.

That’s the secret sauce. Recognition first, surprise second.

By the end of this lesson, you’ll have a short 32 to 64 bar sketch with an A section that teases the motif, a B section that drops it in full power, a C section that flips it for tension, then a return to B for payoff. And we’re doing it with stock Ableton tools.

Let’s set up.

Set your tempo somewhere between 165 and 172 BPM. If you want the classic feel, park it at 170.

Now make a few tracks. Create a MIDI track called BASS. Create an audio track called BREAK. Optionally add a MIDI track for DRUM ONE-SHOTS if you want to layer a clean snare on top of the break. And if you want, add a STAB track too, but we’ll treat that as bonus.

Now create two return tracks. One for reverb, one for delay. On Return A, put Hybrid Reverb. Go for a Plate algorithm, decay around two seconds, pre-delay somewhere like 15 milliseconds, and roll off the highs a bit with a hi cut around 6 to 8k. Make sure the return is 100% wet.

On Return B, put Echo. Set the time to one eighth dotted if you want that classic dubby push, or a quarter note if you want it simpler. Feedback around 25%, and filter it so it doesn’t mess up your low end: high-pass around 200 to 400 Hz, low-pass around 5 to 8k. Also 100% wet because it’s a return.

Cool. Now the actual musical DNA: the motif.

We’re focusing on a bass riff motif because it’s the most straight-up DnB identity builder. But everything you’re about to do also applies to stabs or vocal chops.

On your BASS track, load Wavetable.

Start super simple. Oscillator 1 is a sine wave. Oscillator 2 off for now. Put the filter on LP24, and bring the cutoff down low, around 200 Hz. We’ll animate it in a second.

For the amp envelope, go for a tight plucky feel: attack at zero, decay around 300 to 600 milliseconds, sustain low or even basically off, and release around 80 to 150 milliseconds. We want notes to speak, then get out of the way for the break.

Now make a one bar MIDI clip. The goal is a riff that loops and feels syncopated. If you’re newer and the exact grid positions feel confusing, keep it simple: put notes on beat 1, then a note on the “and” of 1, then one on around beat 2 and a half, then beat 3, then the “and” of 3, then the “and” of 4. The exact pattern matters less than the idea: a downbeat anchor plus offbeats that roll.

For pitch, pick an easy root like F or G. Let’s say F. Use mostly F in the low octave, like F1, and occasionally jump to the fifth, C2. That root-plus-fifth thing is extremely authentic. It’s almost like: don’t over-compose it. Let the groove do the talking.

Now, here’s where it starts to sound like a record instead of a test tone.

Add Auto Filter after Wavetable. Set it to LP24 as well, cutoff somewhere like 120 to 300 Hz, and add a bit of resonance, maybe 10 to 25%. You’re listening for that “bwoop” articulation.

Then inside Wavetable, assign Env 2 to the filter cutoff. Amount around plus 20 to plus 40, and set Env 2’s decay around 200 to 400 milliseconds. Now each note has a little “opening” movement.

Teacher tip: this envelope shape becomes one of your anchors. Even if you change pitches or rhythm later, keeping that same contour makes the ear go, “yep, that’s the same tune.”

Before we start making variations, lock your drums. Because motif variation only works when the groove underneath feels consistent.

On the BREAK track, drop in a classic break. Amen, Think, Funky Drummer, whatever you have. Set warp to Complex Pro as a safe choice. If you want more grit and choppiness, try Beats mode later.

Now slice it to MIDI. Right-click the audio clip, choose Slice to New MIDI Track, and slice by transients using the built-in option. Great: now you’ve got a Drum Rack with the break chopped up.

Go into that rack and get basic balance first: make sure the main snare and kick slices are clearly the loudest anchors. Then put Drum Buss on the break group. Drive somewhere like 5 to 15%, Crunch around 5 to 20. If you use Boom, keep it subtle, and tune it around 50 to 60 Hz, but don’t let it fight the bass.

Optional but very useful: add a clean snare layer on the DRUM ONE-SHOTS track. Put it on 2 and 4. That gives you a stable backbeat even if the break gets wild.

Now you’ve got the context. This is important: even if your bass motif is simple, it feels “right” when the break is doing the classic language underneath.

Now we do the main concept: A, B, and C variations. Same motif identity, different intensity.

The rule is: change one axis at a time. Rhythm, pitch, timbre, space, density. If you change everything at once, it stops being a motif and starts being a new song.

Let’s build Variation A first: the intro tease.

Duplicate your bass clip into the intro area, like bars 1 to 9. In Variation A, we want the listener to clock the idea, but we’re not giving them the full drop yet.

So make it darker and sparser.

Put an EQ Eight after Auto Filter. High-pass around 30 Hz just to clean out rumble. Then keep things dark: you can either lower Auto Filter cutoff to around 90 to 140 Hz, or do gentle low-pass shaping with EQ. The main point is: it’s muffled compared to the drop.

Now delete one or two notes per bar. Keep the first note, and maybe keep one offbeat. This is important: you’re preserving an anchor. Often the anchor is “the first hit on beat 1” or the main accent rhythm.

Then add a tiny bit of space: send the bass a little into the delay return. Like 3 to 8%. You’re not making it echo like crazy, you just want a ghost tail.

Coach note: oldskool intros are often about suggestion. If you fully reveal the bass phrase immediately, the drop has less emotional impact. So treat Variation A like a trailer.

Now Variation B: the drop main. This is the full statement.

Duplicate your original motif clip into bars 9 to 25, or wherever your drop starts.

Now we make it wider and more aggressive without changing the core identity.

In Wavetable, turn on Oscillator 2. Choose a saw or a square, but keep it low in level. Add a tiny detune, like 5 to 12 cents. This adds harmonics so the riff reads on smaller speakers.

Then add Saturator after EQ. Drive it 2 to 6 dB, Soft Clip on. Now it’s louder in perception, not just in meters.

Then add Glue Compressor gently. Attack 10 milliseconds, release Auto, ratio 2 to 1. Aim for just 1 to 3 dB of gain reduction. This is just tightening, not crushing.

Now sub discipline. This is where a lot of beginners lose the vibe and just get mud.

Option A is the cleanest: create a separate SUB track with Operator on a sine wave, and follow only the root notes. Keep it simple, mono, and controlled.

Option B is keeping Wavetable mostly sine and being careful with added harmonics. Either way: the sub stays stable.

And here’s a super practical arrangement trick: range discipline.

In the intro, keep the motif mostly in the lower range, like F1 to C2. In the drop, add one higher octave hit, like an F2, maybe once every two bars. That tiny change screams “we’ve arrived” without rewriting the riff.

Now Variation C: the switch or turnaround. This is where you flip the energy, but you don’t abandon the tune.

Duplicate the motif into bars 25 to 33.

Pick two flip methods. Only two. You’re trying to create tension and motion, not a random second drop.

Method one: call-and-response rhythm. Keep the first half of the bar identical so it’s instantly recognizable. Then change the second half. Move one note earlier so it anticipates, or add a quick little 16th-note run: two or three fast notes, then back to space.

Method two: pitch shadow. Keep the rhythm the same, but change one or two notes to create darkness. In F, try sneaking in an Eb, that flat seven, or a Bb, the fourth. Use them sparingly, and ideally on weak beats like offbeats or quick notes. That’s a very authentic “tension note rule”: drop is mostly root and fifth, switch allows b7 and 4th, return removes them again for release.

Method three: timbre automation. In the switch, automate your Auto Filter cutoff higher, like 200 to 400 Hz, and increase resonance a bit for a talking edge. Add Phaser-Flanger subtly if you want motion: slow rate, low mix.

Method four: tape-stop micro moment, without needing an actual tape stop plugin. At the end of the switch, like the last beat of bar 32, automate the bass volume down for one beat, and do a delay throw. That means for one note, you crank the Echo send up dramatically, like 40 to 70%, then bring it right back down. That little moment creates a transition that feels like a DJ trick.

Now, one more thing that makes this feel like jungle rather than MIDI in a vacuum: micro-timing.

Try nudging only the offbeat bass notes later by 5 to 15 milliseconds. Leave the downbeat notes tight. This gives you that slightly shoved, rolling feel without sounding sloppy. In Ableton you can do this by turning the grid off and dragging, or using track delay controls in milliseconds.

Also remember: A, B, and C variation is not only about the bass. It’s about how the bass relates to the break.

When the snare hits, consider leaving a tiny gap right before or after it. Sometimes removing a bass note is more “pro” than adding one, because it makes the snare feel huge.

Now let’s arrange it.

Here’s a clean classic roadmap.

Bars 1 to 9: Intro with Variation A. Filter the break too. Put an Auto Filter on the break and open it gradually from maybe 1k up to 3k as you approach the drop. Keep bass dark and sparse.

Bars 9 to 25: Drop 1 with Variation B. Full breaks, full bass. If you want, add a simple stab every two or four bars, but keep it minimal.

Bars 25 to 33: Switch with Variation C. Add a small drum edit here. Maybe a one-bar fill, or remove the kick for one bar, or do a half-beat break cut. This is where the track “turns the corner.”

Bars 33 to 49: Drop 2 returns to Variation B, or a slightly bigger B prime. Add one new element so it feels like progression: an extra ghost note, a hat pattern, a tiny extra mid-layer on bass, or one extra stab hit. The key is: the motif stays recognizable instantly.

Workflow tip: color-code your clips. Make A one color, B another, C another. Seeing the structure makes it way easier to think like an arranger instead of a loop hoarder.

Optional: add one rave DNA element, the classic stab.

On the STAB track, load Simpler with a stab one-shot, or synth your own stab. EQ it with a high-pass around 150 to 250 Hz so it doesn’t fight your bass. Add a bit of saturation. Then either send it to your plate reverb, or insert a short plate. A classic pattern is one stab on the first beat every four bars. And then in the switch section only, add an extra stab hit. That’s motif variation across sections, but applied to ear candy.

Now let’s quickly hit common mistakes so you can avoid them.

First: changing too many things at once. If rhythm, notes, sound, and drums all change together, the listener loses the thread.

Second: no A tease. If you go full power immediately, your drop won’t feel like a drop.

Third: over-busy bass rhythm. Breakbeats need space. Let the snare breathe.

Fourth: messy sub. If you add harmonics, keep the sub controlled and mono-ish.

Fifth: switch sections that feel random. A switch is a variation, not a new track.

If you want a slightly more advanced move without writing a new riff, try motif rotation. Duplicate the MIDI clip and shift all notes forward by an eighth note or a quarter bar so a different hit lands on beat 1. Same notes, new emphasis. That’s a classic producer trick.

Or make it a two-bar call-and-response: bar one is your normal motif, bar two starts the same but leaves space in the second half, or answers with just two or three notes. Breaks love that because it creates breathing room every other bar.

Now a quick mini practice exercise you can actually finish in like 15 to 20 minutes.

Write a one-bar bass motif with six to eight notes max.

Duplicate it into three clips: A, B, C.

For A: delete two notes and low-pass it.

For B: bring it full, add saturation, and keep the rhythm intact.

For C: keep the rhythm, change two pitches using b7 or 4th for tension, and add a one-beat delay throw.

Arrange into 32 bars with tease, drop, switch, payoff.

Then export a quick bounce and listen on headphones. Ask yourself two questions. Can you still hum the motif in every section? And does B feel bigger than A, while C builds tension and makes you want the return?

That’s the whole concept: identity through repetition, excitement through controlled variation.

If you tell me what substyle you’re aiming for, like jungle, techstep-ish, liquid roller, or neuro-ish, and what break you’re using, I can suggest a specific motif rhythm and two switch options that match the break’s groove.

mickeybeam

Go to drumbasscd.com for +100 drum and bass YouTube channels all in one place - tune in!

Generating PDF preview…