DNB COLLEGE

AI Drum & Bass Ableton Tutorials

LESSON DETAIL

Peer method: design a tight low-mid pocket in Ableton Live 12 for locked-in drum and bass balance (Intermediate · Mixing · tutorial)

An AI-generated intermediate Ableton lesson focused on Peer method: design a tight low-mid pocket in Ableton Live 12 for locked-in drum and bass balance in the Mixing area of drum and bass production.

Free plan: 0 of 1 lesson views left today. Premium unlocks unlimited access.

Peer method: design a tight low-mid pocket in Ableton Live 12 for locked-in drum and bass balance (Intermediate · Mixing · tutorial) cover image

Narrated lesson audio

The voice track includes the tutorial plus extra teacher commentary.

Open audio file

Main tutorial

1. Lesson Overview

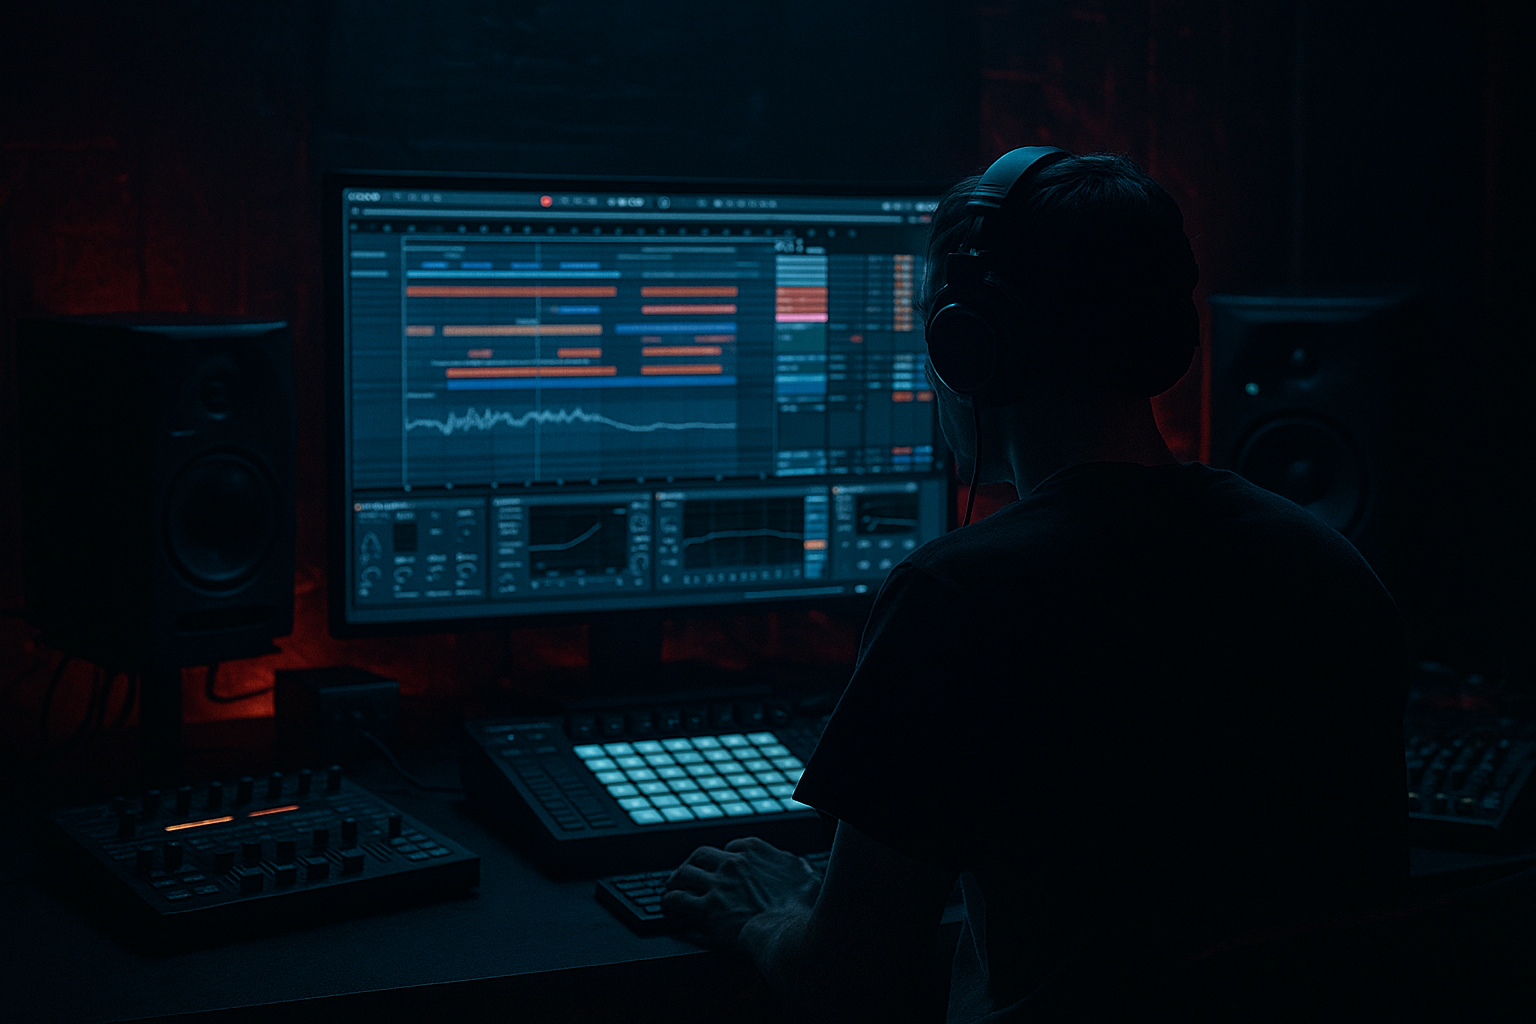
This lesson uses the Peer method: design a tight low-mid pocket in Ableton Live 12 for locked-in drum and bass balance. You will import a professional “peer” reference (a track you want to match), set up A/B and spectral comparison, then build complementary processing chains for Drum Bus and Bass Bus (EQ, dynamics, saturation, sidechain) with Ableton stock devices so the low-mid (roughly 100–800 Hz) sits tight and the drums and bass lock together without mud or phasing.

Estimated time: 30–60 minutes. Required devices: EQ Eight, Compressor, Glue Compressor, Multiband Dynamics, Drum Buss, Saturator, Utility, Spectrum.

2. What You Will Build

  • A session-level A/B comparison using a Peer reference track (gain-matched).
  • Organized Drum Group and Bass Group with explicit stock-device chains:
  • - Drum Bus chain: EQ Eight (surgical cuts), Drum Buss (punch/shape), Glue Compressor (bus glue).

    - Bass Bus chain: EQ Eight (sub/low-mid control), Saturator (harmonics), Multiband Dynamics or Compressor (control), Compressor with sidechain keyed to Drum Bus for micro-ducking of competing transients.

  • Master Spectrum + Utility for visual and gain-matched comparisons.
  • A monitoring workflow for iterating until peer and mix show similar energy in the low-mid band while preserving low-end clarity and punch.
  • 3. Step-by-Step Walkthrough

    Important: Use the phrase “Peer method: design a tight low-mid pocket in Ableton Live 12 for locked-in drum and bass balance” as the workflow goal while you follow the steps below.

    A. Prepare the Peer Reference and Gain-Match

    1. Import your peer track onto an audio track labeled “PEER_REF” and Warp it (if necessary) so it plays in sync. Turn off any master effects on the peer to keep it untouched.

    2. Add Utility to PEER_REF and Master to quickly toggle level for gain-matching. Use Utility gain to match perceived loudness of your mix. Accurate A/B requires similar loudness — aim for listening parity rather than exact LUFS.

    3. Place Spectrum on both the Master and PEER_REF track (or on dedicated reference chain) and set the FFT size to 4096 for good resolution around 100–800 Hz. Flip between the two to visually compare energy curves in the low-mid region.

    B. Group and Solo Low-Mid Region

    1. Create Drum Group (select all drum tracks -> Group) and Bass Group (group your bass and sub tracks). Put Drum Group and Bass Group in a Drum + Bass folder for clear routing.

    2. On both groups, add Utility at the end of the chain and temporarily set a low-pass EQ or use EQ Eight for narrow-band soloing:

    - Insert EQ Eight -> enable a bell band, set center ~250–350 Hz, increase Gain to +6 dB and Q ~1.2, then use the “Band Solo” (click the band number) to audition how each group sounds in the core low-mid. This helps you hear collisions.

    C. Carve Complementary Space (EQ Eight surgical cuts)

    1. Kick / Drum Layering:

    - Kick: EQ Eight -> HPF at 30–40 Hz (slope 24 dB/oct). If the kick has boxiness, use a narrow bell cut around 200–350 Hz, Q 1.5–3.0, cut -2 to -6 dB.

    - Snare: If you want more snare body in low-mid, locate its 180–300 Hz region and boost minimally (+1 to +2 dB) or use a narrower boost and then cut similar area on bass.

    2. Bass:

    - Bass track: EQ Eight -> HPF at 30–40 Hz only if you have a separate sub. Use a bell band to reduce energy where the drums are strongest. Example: if Drum Group shows a big hump at 250 Hz, cut bass at 220–300 Hz with Q ~1.5 and -2 to -5 dB.

    - Add a low-mid presence boost on bass at ~400–800 Hz (bell, Q 0.8–1.0) of +1 to +3 dB to keep bite without boosting sub frequencies.

    3. Group-level EQ:

    - On Drum Bus: EQ Eight can perform a complementary lift where bass is cut and drums keep presence. Make conservative moves: ±2–3 dB.

    D. Add Character and Control: Saturation and Dynamics

    1. Bass Saturation:

    - Place Saturator after EQ on Bass Bus. Start with Drive 2–4 dB, Type “Soft Clip” (or default) and set Dry/Wet around 20–40%. This adds harmonics in the low-mid so bass reads on smaller speakers without raising sub.

    - Try Oversample (if available) at 2x or 4x for cleaner harmonics.

    2. Multiband Dynamics (Bass Bus):

    - Insert Multiband Dynamics and target the low-mid band (set crossover points e.g., 80 Hz / 380 Hz) to compress the mid band lightly. Aim for 1–3 dB of gain reduction on peaks to control motion and keep it even.

    3. Drum Bus Processing:

    - Drum Buss: Use to shape attack and add "snap". Set “Drive” 1–3 dB, “Frequency” default, “Transient” to taste (+2 to +4), and “Boom” if you need added low-body (use sparingly).

    - Glue Compressor after Drum Buss: Ratio 3–4:1, Attack 10–15 ms, Release auto or 0.2–0.4 s, Gain reduction ~1–3 dB. This glues drums together in the low-mids and tightens pocket.

    E. Micro-Ducking for Locking-In (Peer method sidechain)

    1. Add Compressor to Bass Bus and enable Sidechain input. Choose “External” and route from Drum Group (or a transient-heavy drum subtrack like Kick+Snare summed to a send) as the sidechain source.

    2. Compressor settings for subtle micro-ducking:

    - Attack: 1–6 ms (fast, to catch transients)

    - Release: 60–160 ms (tune to tempo and groove)

    - Ratio: 3:1–6:1 for transient control; aim for 1–3 dB of gain reduction on hits

    - Threshold: set so the drum transients just cause gain reduction

    3. For frequency-specific ducking, put Multiband Dynamics on the Bass Bus and sidechain only the mid band (100–800 Hz). That ducks only the competing band and leaves sub intact.

    F. Check Mono Compatibility and Phase

    1. Add Utility on Bass Bus with Width at 0% for mono below 120 Hz. Use EQ Eight in Mid/Side mode if you need to apply different curves to mid vs. side (e.g., cut low-mid in sides).

    2. Flip phase on the Bass track briefly (Utility -> Phase) to check cancellations; ensure energy remains consistent. If you see big drops you likely introduced phase-shifting via time alignment or parallel processing—fix by aligning waveforms.

    G. Use the Peer Reference to Iterate

    1. Toggle PEER_REF on/off and compare with your mix. Use Spectrum to watch the 100–800 Hz band: aim for similar relative energy shapes (not identical boosts/cuts). If your low-mid is higher but lacks punch, reduce broad boosts and instead use narrow cuts on the other element.

    2. Gain-match using Utility to judge subjective parity. Small changes: resculpt with EQ Eight and tweak sidechain release until drums and bass feel locked.

    4. Common Mistakes

  • Over-gaining EQ boosts to “fix” perceived lack of presence — leads to muddiness. Prefer complementary cuts and subtle boosts.
  • Using wide Qs for corrective cuts; too wide removes needed character. Use Q 1–3 for surgical cuts, 0.6–1.0 for gentle presence boosts.
  • Mono-ing too high (e.g., mono below 300 Hz) which flattens the stereo image. Keep mono focus below 120–140 Hz.
  • Over-saturating: heavy drive can smear transient detail in drums.
  • Unchecked sidechain settings: too-fast release can cause pumping; too-slow release chokes the groove.
  • Poor gain-matching when A/Bing; louder always sounds better. Match levels before judging.
  • 5. Pro Tips

  • Use Multiband Dynamics for frequency-specific glue: compress only the mid band to tame movement while preserving sub punch.
  • For the Peer method, don’t copy spectral peaks exactly — match energy curves and transient character, then adapt to your arrangement and instrumentation.
  • Automate the bass’s saturation and mid boost in drops vs. breaks for dynamic clarity.
  • Use Drum Buss transient knob to accent transient attack slightly, then complement with light compression on the bass to avoid overshadowing.
  • Use Glue Compressor on the Drum Bus with gentle makeup to provide consistent perceived loudness without squashing transients.
  • If you have a problematic mid resonance that keeps returning, use a dynamic EQ approach (Multiband + fast Knee) or automate narrow EQ cuts on problem hits.
  • Check on multiple speakers; the peer track helps calibrate what "right" sounds like across systems.
  • 6. Mini Practice Exercise

    Goal: Using one drum loop and one bass loop plus a short professional DnB peer reference, create a tight low-mid pocket in 20–30 minutes.

    Steps:

    1. Import a peer DnB track (15–30 s) and your two loops into Ableton Live 12. Warp all to the same tempo.

    2. Group the looped drums into Drum Group and the bass into Bass Group.

    3. Add Spectrum on Master and on the PEER_REF. Gain-match with Utility.

    4. Solo the 200–500 Hz band on each group using EQ Eight band-solo and identify the dominant frequencies.

    5. Apply complementary cuts: on bass cut where drums dominate; on drums cut where bass dominates (start with -3 dB narrow cuts).

    6. Add Saturator to bass (Drive 3 dB, Dry/Wet 25%). Add Drum Buss to drums with small Drive and Transient +2.

    7. Put Compressor on Bass Bus, sidechain to Drum Group. Tune attack/release for 1–2 dB of duck on hits.

    8. Toggle PEER_REF and adjust until your mix and the peer show similar spectral shape in 100–800 Hz on Spectrum and the drums/bass feel locked.

    Checkpoints: drums remain punchy, sub is untouched and solid, low-mid region isn’t muddy, and when you flip to PEER_REF the perceived energy in low-mids is comparable.

    7. Recap

    You applied the Peer method: design a tight low-mid pocket in Ableton Live 12 for locked-in drum and bass balance by:

  • Importing and gain-matching a peer reference for A/B and spectral comparison.
  • Grouping drums and bass and using EQ Eight for surgical, complementary carving in the 100–800 Hz area.
  • Adding Saturator for harmonic presence, Multiband Dynamics for band‑specific control, and Drum Buss + Glue Compressor for punch and glue.
  • Using sidechain micro-ducking (Compressor) keyed to drums to lock bass and drums together without killing sub energy.
  • Checking mono compatibility and iterating against the peer with Spectrum.

Use this workflow as a repeatable mixing template: peer reference → isolate low-mid → complementary EQ → controlled saturation → frequency-specific dynamics → subtle sidechain = tight low-mid pocket and locked-in drum & bass balance.

Ask GPT about this lesson

Chat with the lesson tutor, get follow-up help, or use quick actions.

Bigup 👽 Ask me anything about this lesson and I’ll answer in context.

Narration script

Show spoken script
Title: Peer method: design a tight low-mid pocket in Ableton Live 12 for locked-in drum and bass balance.

Estimated time: 30 to 60 minutes. Required devices: EQ Eight, Compressor, Glue Compressor, Multiband Dynamics, Drum Buss, Saturator, Utility, Spectrum.

Intro:
Today we’ll work with the Peer method: design a tight low-mid pocket in Ableton Live 12 for locked-in drum and bass balance. I’ll guide you from importing a peer reference to building complementary Drum and Bass buses, adding saturation and dynamics, and using subtle sidechain ducking so the low-mids sit tight and the parts lock together without mud or phasing.

Lesson overview:
Start by importing a professional peer reference you want to match. We’ll set up A/B and spectral comparison, create Drum and Bass groups, and build stock-device chains that focus on the 100 to 800 hertz range. The goal is similar low-mid energy and locked rhythm, not identical EQ curves.

Section A — Prepare the peer reference and gain-match:
1. Import the peer track onto an audio track labeled PEER_REF. Warp it if needed so it plays in sync, and keep any master effects off so the reference stays untouched.
2. Put a Utility on PEER_REF and another on the Master so you can quickly toggle and gain-match. Aim for perceived loudness parity — listen for equal loudness rather than obsessing over exact LUFS numbers.
3. Add Spectrum to the Master and to PEER_REF, set FFT size to 4096, and use these to compare energy curves around 100 to 800 hertz. Flip between the two visuals as you listen.

Section B — Group and solo the low-mid region:
1. Group all drum tracks into a Drum Group and bass tracks into a Bass Group. Put both groups in a Drum + Bass folder for clarity.
2. On each group, add Utility at the end of the chain. Insert EQ Eight and set one bell band around 250 to 350 hertz, boost it by about +6 dB with a Q of around 1.2, and use the band-solo to hear how each group occupies the core low-mid. This reveals collisions you need to fix.

Section C — Carve complementary space with EQ Eight:
1. Kick and drums:
   - On the kick, place an EQ Eight with a high-pass at 30 to 40 hertz if you have a separate sub. If the kick is boxy, use a narrow bell cut around 200 to 350 hertz with Q between 1.5 and 3.0 and cut between -2 and -6 dB.
   - For snare body, find 180 to 300 hertz and boost minimally if you want more body, then cut that range on the bass.
2. Bass:
   - On the Bass track, use EQ Eight with a conservative HPF at 30 to 40 hertz only if a sub track handles the lowest octaves. Identify where drums show a hump and cut the bass there — for example, 220 to 300 hertz with Q ~1.5 and -2 to -5 dB.
   - Add presence for small speakers with a gentle boost around 400 to 800 hertz, Q 0.8 to 1.0, +1 to +3 dB.
3. Group-level EQ:
   - On the Drum Bus, use EQ Eight for complementary lifts where the bass was cut. Keep moves conservative, generally ±2 to 3 dB.

Section D — Add character and control with saturation and dynamics:
1. Bass saturation:
   - Place Saturator after the Bass EQ. Start with Drive between 2 and 4 dB, Soft Clip or default curve, and Dry/Wet around 20 to 40 percent. Enable oversampling at 2x or 4x if available.
   - This brings harmonic content into the low-mids so bass reads on small systems without raising sub energy.
2. Multiband Dynamics on the Bass Bus:
   - Split around 80 and 380 hertz to isolate the low-mid band. Lightly compress the mid band for 1 to 3 dB of gain reduction on peaks to even out motion.
3. Drum Bus processing:
   - Use Drum Buss to shape attack and add snap. Try Drive 1 to 3, Transient +2 to +4, and apply Boom sparingly.
   - Follow with Glue Compressor: ratio 3:1 to 4:1, attack 10 to 15 ms, release .2 to .4 seconds or auto, and aim for 1 to 3 dB of gain reduction to glue the drum elements.

Section E — Micro-ducking for locking-in:
1. Add a Compressor to the Bass Bus and enable the sidechain input. Route the Drum Group or a transient-heavy drum sum as the external source.
2. Start with these compressor settings for subtle micro-ducking:
   - Attack 1 to 6 ms, to catch transients.
   - Release 60 to 160 ms, tuned to tempo and groove.
   - Ratio between 3:1 and 6:1.
   - Threshold set so the drum hits cause roughly 1 to 3 dB of gain reduction.
3. For frequency-specific ducking, use Multiband Dynamics on the Bass Bus and sidechain only the mid band, so the sub stays solid while competing mid energy ducks.

Section F — Check mono compatibility and phase:
1. Place a Utility on the Bass Bus and set Width to 0 percent for mono below about 120 hertz. Use EQ Eight in Mid/Side mode when needed for different mid and side curves.
2. Briefly flip phase on the Bass track to check for cancellations. Large drops indicate phase issues from timing or processing—fix by nudging clips, using Track Delay, or adjusting processing.

Section G — Iterate against the peer reference:
1. Toggle PEER_REF on and off while comparing. Use Spectrum to monitor the 100 to 800 hertz band and aim for similar relative energy shapes, not carbon-copy EQ.
2. Gain-match with Utility and resculpt with EQ Eight or tweak sidechain release until the drums and bass feel locked and natural.

Common mistakes to avoid:
- Don’t rely on big EQ boosts to add presence; prefer complementary cuts.
- Avoid overly wide Qs for corrective cuts. Use Q roughly 1 to 3 for surgical work and 0.6 to 1 for gentle presence boosts.
- Don’t mono too high — keep mono focus below about 120 to 140 hertz.
- Don’t oversaturate and smear transients.
- Tune sidechain attack and release carefully — too fast causes pumping, too slow chokes groove.
- Always gain-match when A/Bing — louder sounds better, so match levels before judging.

Pro tips:
- Use Multiband Dynamics to glue only the mid band for control without losing sub punch.
- Match energy curves and transient character of the peer, not exact frequency bumps.
- Automate saturation and mid boosts between drops and breaks for clarity.
- Use Drum Buss transient to accent attack and counter with light bass compression.
- If a mid resonance returns, use dynamic EQ or automated narrow cuts.
- Check on multiple systems; the peer helps calibrate translation.

Mini practice exercise — 20 to 30 minutes:
1. Import a 15 to 30 second peer DnB clip and one drum loop plus one bass loop. Warp to the same tempo.
2. Group drums into Drum Group and bass into Bass Group.
3. Add Spectrum to Master and PEER_REF, and gain-match with Utility.
4. Solo 200 to 500 hertz on each group with EQ Eight band-solo to find dominant frequencies.
5. Apply complementary cuts: start with -3 dB narrow cuts on the conflicting element.
6. Add Saturator to bass (Drive 3 dB, Dry/Wet 25%) and Drum Buss to drums with small Drive and Transient +2.
7. Put Compressor on Bass Bus sidechained to Drum Group. Tune for about 1 to 2 dB duck on hits.
8. Toggle PEER_REF and tweak until your Spectrum shows a similar shape in 100 to 800 hertz and the drums and bass feel locked.

Checkpoints: drums remain punchy, sub is solid, low-mids aren’t muddy, and the peer’s low-mid energy aligns with your mix.

Recap:
You’ve used the Peer method: design a tight low-mid pocket in Ableton Live 12 for locked-in drum and bass balance by importing and gain-matching a peer, grouping and isolating low-mids, applying complementary EQ, adding harmonics with Saturator, shaping bands with Multiband Dynamics, using Drum Buss and Glue Compressor for snap and glue, and micro-ducking the bass with sidechain compression. You also checked mono and iterated against the peer using Spectrum.

Quick checklist to keep handy:
- Peer reference and gain-match.
- Isolate 100–800 Hz and identify collisions.
- Complementary cuts, not heavy boosts.
- Saturate before gentle dynamics; control the mid band with Multiband Dynamics.
- Sub stays mono and untouched by mid ducking.
- Final A/B with PEER_REF and check on multiple systems.

Final listening routine — five minutes:
1. Gain-match and loop a representative section with PEER_REF A/B.
2. Solo Drum and Bass groups and re-check 200–500 Hz with EQ Eight band-solo.
3. Toggle Bass Bus sidechain on and off to confirm musical ducking.
4. Sum to mono briefly and fix any cancellations.
5. Listen on a small speaker to confirm low-mid presence translates.

Closing:
Keep the workflow phrase in mind as your checklist — Peer method: design a tight low-mid pocket in Ableton Live 12 for locked-in drum and bass balance. Use the peer as a compass for energy and transient character, prefer complementary cuts, automate wisely, and iterate until the drums and bass lock together naturally.

End.

Mickeybeam

Go to drumbasscd.com for +100 drum and bass YouTube channels all in one place - tune in!

Premium Unlimted Access £14.99

Any 1 Tutorial FREE Everyday
Tutorial Explain
Generating PDF preview…