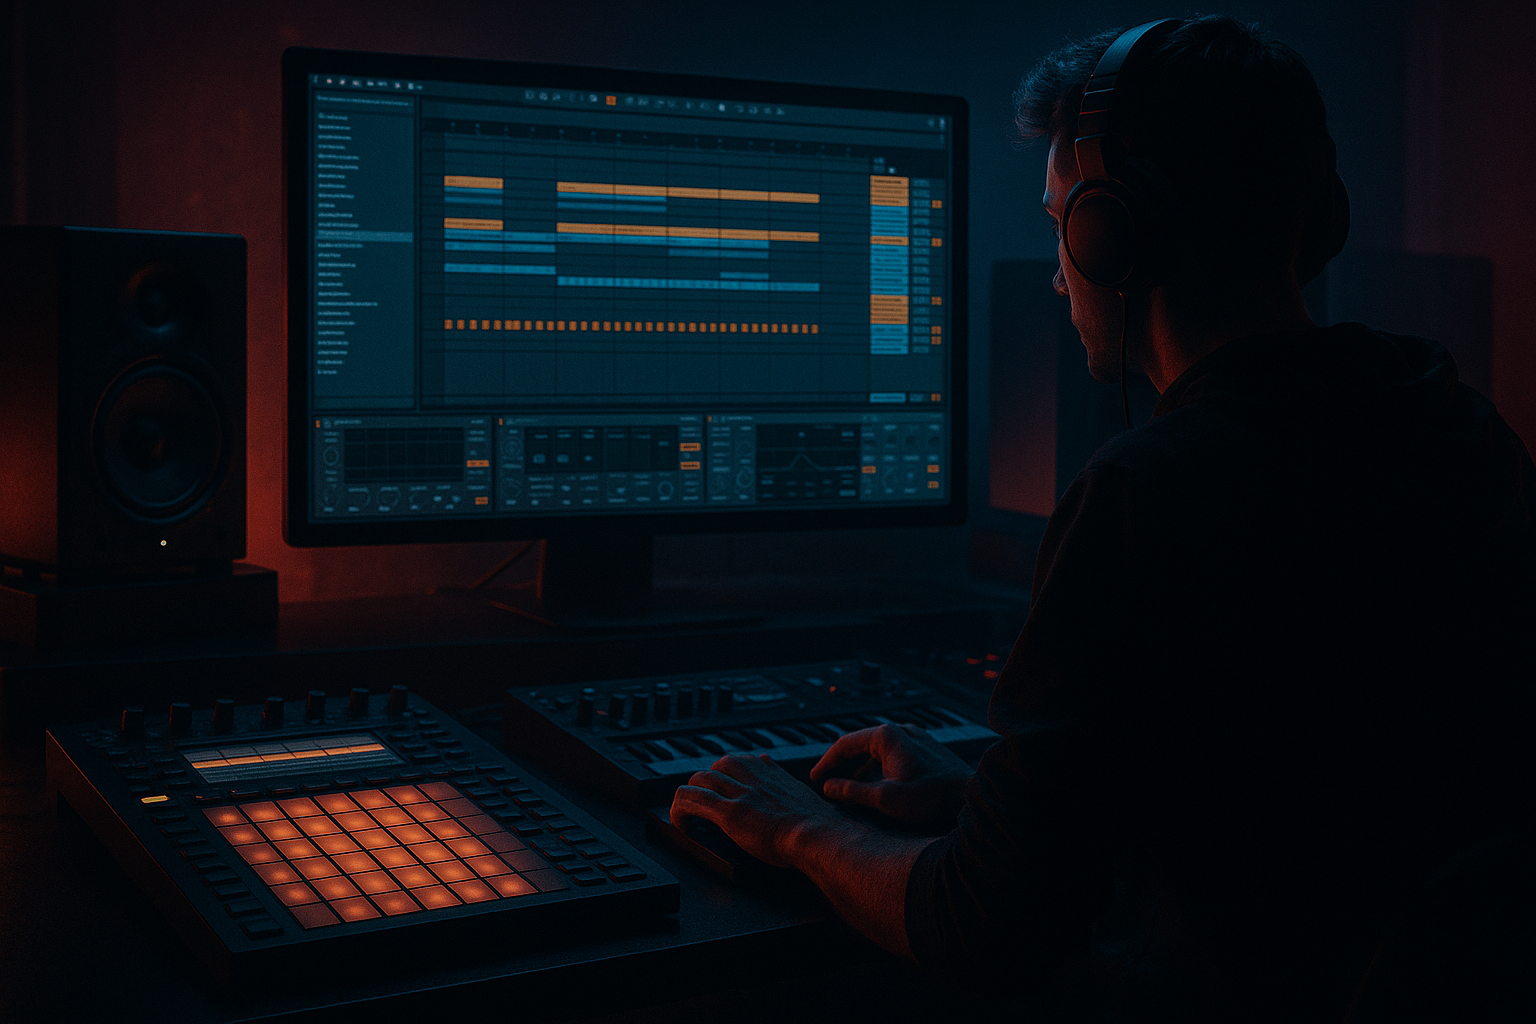
DNB COLLEGE

Drum & Bass Ableton Live 12 Tutorials

LESSON DETAIL

Percussion mute choreography with automation (Intermediate)

An AI-generated intermediate Ableton lesson focused on Percussion mute choreography with automation in the Automation area of drum and bass production.

Back to lessons
Percussion mute choreography with automation (Intermediate) cover image

Narrated lesson audio

The voice track includes the tutorial plus extra teacher commentary.

Open audio file

Main tutorial

```markdown

Percussion Mute Choreography with Automation (DnB in Ableton Live) 🔥🥁

1) Lesson overview

“Mute choreography” is the art of strategically cutting percussion elements in and out to create tension, groove variation, and impact—without constantly adding new sounds. In drum & bass, where patterns can loop for long stretches, micro-arrangement and automated mutes keep your drums feeling alive and “DJ-friendly” while still hitting hard.

In this lesson you’ll learn multiple Ableton Live-native ways to automate percussion muting (safe + musical), plus how to arrange these moves like proper rolling/jungle energy. ⚙️

---

2) What you will build

A 16–32 bar rolling DnB drum arrangement where:

  • Hats, rides, ghosts, and fills are muted/unmuted with intention
  • Transitions are powered by automated cuts + reverb throws
  • Drops and reloads feel heavier because percussion “breathes”
  • You have a repeatable workflow template you can reuse in every track
  • You’ll end up with:

  • A Drum Group with clean sub-groups (Kick/Snare, Hats, Perc, FX)
  • Mute automation lanes (or better alternatives) that are stable in arrangement
  • A few “performance macros” for quick writing and live-style edits 🎛️
  • ---

    3) Step-by-step walkthrough

    Step 0 — Session setup (fast but important)

  • Tempo: 172–176 BPM
  • Grid: set 1/16 (and toggle triplets when doing jungle-ish rolls)
  • Create a Drum Bus group (Cmd/Ctrl + G) containing:
  • - Kick + Snare track (or a Drum Rack)

    - Hats track

    - Perc/Ghosts track

    - FX track (noise sweeps, crashes, impacts)

    Why: You’ll choreograph mutes across layers, not randomly per track.

    ---

    Step 1 — Build a solid “rolling base” percussion loop (8 bars)

    Create an 8-bar loop first. Example DnB percussion structure:

    Kick/Snare:

  • Snare on 2 and 4
  • Kick pattern: keep it simple (2–4 kicks per bar) with variation every 2 bars
  • Hats:

  • Closed hats on offbeats (1/8) and add 1/16 hats for roll
  • Add occasional open hat at the end of bar 4/8
  • Perc/Ghosts:

  • Ghost snare notes around the main snare (low velocity)
  • A rim/wood hit or short foley on syncopations
  • Ableton stock suggestions:

  • Use Drum Rack for hats/percs so you can automate groups easily later.
  • For groove: apply Groove Pool (try Swing 16-XX lightly at 10–20%).
  • ---

    Step 2 — Pick the right “mute method” (avoid the common trap)

    You can automate track mute, but it’s not always the most musical or stable way—especially when resampling, exporting stems, or changing routing.

    Here are four practical mute methods, from safest to most “performance-y”:

    #### Method A (Recommended): Utility gain automation 🎚️

    On your Hats track (and Perc track):

    1. Add Utility as the first device.

    2. Automate Gain from `0 dB` down to `-inf dB` for “mute”.

    3. Add tiny ramps (5–20 ms) to avoid clicks.

    Why it’s great:

  • Reliable in Arrangement
  • No surprise behavior with returns/sidechain
  • Easy to “half-mute” (e.g., -12 dB) for subtle dips
  • #### Method B: Auto Filter “DJ-style cut” 🧼

    1. Add Auto Filter.

    2. Use High-Pass mode (12 or 24 dB/oct).

    3. Automate Frequency up to 300–800 Hz to thin hats/percs or “mute” low content.

    4. Combine with a Utility gain dip for “full blackout” moments.

    DnB use: perfect for making the groove feel like it’s being “pulled back” before a snare.

    #### Method C: Gate with automation (rhythmic muting) 🚪

    1. Add Gate on hats.

    2. Set Threshold so it opens normally.

    3. Automate Threshold high to force it shut (“mute”), or automate Return for texture changes.

    DnB use: tight, choppy hat drops—works great for neuro/techy sections.

    #### Method D: Clip-based mutes (for loop-based writing) ✂️

    If your hats are MIDI:

  • Duplicate the clip and remove notes for “mute” sections.
  • Or use clip envelope for Utility Gain / Filter.
  • DnB use: good for building 64-bar arrangements quickly without messy lanes.

    ✅ For this lesson, use Method A + a touch of Method B.

    ---

    Step 3 — Create a “Mute Choreography Map” (16 bars)

    Think like a DJ and like a drummer. Your goal: contrast.

    Here’s a practical 16-bar plan (copy this vibe):

    Bars 1–4 (establish groove):

  • Full hats + percs
  • Keep it “roll-ready”
  • Bar 5 (micro-dip):

  • Hats dip to -10 to -14 dB for half a bar
  • Perc stays in → groove continues, but energy shifts
  • Bar 8 (pre-phrase punctuation):

  • Full hat mute for 1/4 or 1/2 bar right before the snare
  • Add a tiny reverb throw on a hat hit (see Step 5)
  • Bars 9–12 (variation):

  • Bring hats back but filter slightly up (HP around 200–350 Hz) for a lighter feel
  • Automate small “stutters”: mute hats for 1/8 on bar 11 beat 4
  • Bar 16 (transition moment):

  • Blackout hats + percs for 1 beat
  • Let kick/snare smack alone (classic DnB drama) 😈
  • Implementation:

  • On Hats Utility: draw automation shapes (0 dB ↔ -inf)
  • On Perc Utility: do fewer mutes; keep the “glue” going
  • On Auto Filter: automate Frequency up slightly in build sections
  • ---

    Step 4 — Make it clean: avoid clicks + keep tails controlled

    When you hard-mute percussion, two issues happen:

    1) Clicks/pops (zero-crossing problem)

    2) Reverb/delay tails still going (mud)

    Do this:

  • Always use a tiny fade in the automation curve (5–20 ms).
  • If using sends (Reverb/Delay), consider muting the send amount too.
  • Stock tools:

  • Utility ramp (manual curve)
  • Reverb: keep Decay short for drums (0.6–1.2s) unless throwing
  • Delay: use Echo with Filter on to keep it dark
  • ---

    Step 5 — Add “reverb throw mutes” (signature DnB move) 🌌

    This is a huge part of percussion choreography: you mute the dry sound but let a processed tail carry the moment.

    Setup:

    1. Create a Return track: A – Throw Verb

    2. Put Hybrid Reverb (or Reverb) on it:

    - Hybrid Reverb: Plate or Hall

    - Decay: 1.8–3.5s (longer than normal)

    - High-pass: 250–500 Hz

    - Low-pass: 6–10 kHz

    3. On the Hat track, automate Send A up briefly on a single hat hit (or last 1/16 before a mute).

    4. Immediately after, mute the hats with Utility.

    Result: the hats disappear but the space blooms—perfect for pre-drop tension.

    Optional polish:

  • Put a Compressor after Hybrid Reverb on the return, sidechained to the kick/snare for pumping control.
  • ---

    Step 6 — Macro-ize it for fast writing (performance workflow) 🎛️

    If your hats/percs live in a Drum Rack or group:

    1. Group your Hat chain (Cmd/Ctrl + G).

    2. Map a Macro to Utility Gain (or the on/off of Utility).

    3. Name it: `HATS MUTE`

    4. Repeat for `PERC MUTE`, `TOPS HP`, `THROW SEND`.

    Why it’s powerful:

  • You can write automation like you’re performing a mix.
  • Great for building 64–128 bar arrangements quickly.
  • ---

    Step 7 — Arrangement ideas (how DnB sections actually use mutes)

    Use mute choreography to signal sections:

  • Intro (DJ mixable): hats filtered + sparse percs, gradual unmute
  • First drop: full tops, minimal mutes (let it roll)
  • Mid-16: add 1–2 “air pockets” (1/8–1/2 bar)
  • Breakdown: remove hats entirely, keep ghosts/foley + reverb throws
  • Second drop: more aggressive mutes + more frequent punctuation
  • Outro: reverse of intro—strip tops out in stages
  • A good rule:

    > If your drums loop for 8 bars, add at least 2 deliberate percussion “edits” inside that 8.

    ---

    4) Common mistakes

    1. Muting too much, too often

    If everything is cutting out, nothing feels special. Use mutes like punctuation, not constant stuttering.

    2. Muting the “glue” layer

    Often your ghost/snare texture or quiet shaker is what holds the roll together. Don’t kill all motion at once.

    3. Clicks from hard cuts

    Fix with short automation ramps or use Utility instead of track mute.

    4. Reverb wash building up

    If you do throw verbs without filtering/HP, you’ll cloud the mix fast.

    5. Automation chaos

    Keep a system: hats mutes on one lane, percs on another, filter on another. Name lanes and color tracks.

    ---

    5) Pro tips for darker/heavier DnB 😈

  • Mute tops to reveal distortion character:
  • When you cut hats for a beat, the midrange of the snare + bass grit feels bigger. Great for neuro/techstep vibes.

  • Use “negative space” before the snare:
  • Muting hats for the last 1/8 before snare 2 or 4 makes the snare feel like it jumps forward.

  • Dark tops during heavy bass phrases:
  • Automate Auto Filter low-pass on hats down to 7–10 kHz when the bass does complex movement. Less hash = more weight.

  • Parallel crush for returns only:
  • Put Saturator (Soft Clip on) after Hybrid Reverb on the return—subtle drive makes throws feel expensive.

  • Ride control:
  • If you have rides, don’t full mute—dip to -6 to -12 dB so the track doesn’t lose forward motion.

    ---

    6) Mini practice exercise (15–20 minutes)

    1. Make a 8-bar drum loop (kick/snare + hats + percs).

    2. Duplicate it to 16 bars.

    3. Add Utility to hats and percs.

    4. In bars 1–16, create:

    - Three hat mutes: 1/8, 1/4, and 1 beat (different locations)

    - One perc mute (short) so the groove doesn’t collapse

    - One reverb throw right before a 1-beat hat blackout

    5. Listen and ask:

    - Does the groove still roll when hats cut?

    - Do the mutes feel intentional (like a DJ edit), not random?

    Bonus:

  • Resample drums to audio and try the same choreography with clip gain automation.
  • ---

    7) Recap

  • Mute choreography is arrangement energy control for rolling DnB 🥁
  • Best workflow: Utility Gain automation (clean, reliable), plus Auto Filter for tonal fades
  • Use short ramps to avoid clicks
  • Add reverb throws so mutes feel cinematic instead of empty
  • Build patterns in 8/16-bar phrases with 2–4 intentional “edits” per phrase

If you want, tell me your current drum layout (separate tracks vs Drum Rack) and I’ll suggest a clean macro + routing template tailored to it.

```

Ask GPT about this lesson

Chat with the lesson tutor, get follow-up help, or use quick actions.

Bigup 👽 Ask me anything about this lesson and I’ll answer in context.

Narration script

Show spoken script
Welcome back. In this lesson we’re doing something that instantly makes drum and bass drums feel more alive, more professional, and honestly more fun to arrange: percussion mute choreography with automation.

When I say “mute choreography,” I don’t mean randomly muting tracks to create silence. I mean strategically cutting hats, rides, little ghost layers, and percussion textures in and out so the groove breathes. You create tension, release, and impact without needing to add new sounds every four bars. In DnB, where an 8-bar loop can run for a long time, these tiny edits are what make your drums feel like they’re being performed, not copy-pasted.

By the end, you’ll have a 16 to 32 bar rolling drum arrangement where the tops and percussion change energy on purpose, transitions feel bigger, and you’ve got a workflow you can reuse in basically every track.

Alright. Open Ableton Live and let’s set the foundation.

First, set your tempo to somewhere in that classic range: 172 to 176 BPM. Set your grid to 1/16. And keep in mind: if you’re doing anything jungle-leaning, you’ll probably want to toggle triplets occasionally for those little swingy rolls.

Now do something that will save you from automation chaos later: build a drum bus structure. Make a group called Drum Bus, and inside it aim for four layers:
Kick and Snare, Hats or Tops, Perc or Ghosts, and FX.

Quick teacher note: I want you thinking in energy lanes, not track-by-track panic. If you automate seven different hat tracks independently, you’ll hate your life in two days. But if you automate a TOPS lane and a PERC lane, your arrangement becomes simple and repeatable.

Next, step one: build a solid rolling base loop. Make it 8 bars. Don’t overcomplicate this part. You need a loop that already rolls before you start doing the fancy edits.

Kick and snare: put your snare on 2 and 4. Then build a kick pattern that’s simple and consistent. Two to four kicks per bar is fine. Add a tiny variation every couple bars so it doesn’t feel like a one-bar loop repeated.

Hats: start with closed hats on the offbeats, so that 1/8 feel. Then sprinkle in some 1/16 hats for roll, just enough to create forward motion. Toss in an occasional open hat at the end of bar 4 or bar 8 as a little phrase marker.

Perc and ghosts: add low-velocity ghost snare notes around the main snare. And maybe a rim, a wood hit, or a short foley sound on a syncopation. The goal is motion and character, not clutter.

If you want a quick groove upgrade, use the Groove Pool. Try a Swing 16 groove lightly, like 10 to 20 percent. Keep it subtle. In DnB, you usually want it to still punch clean, not wobble.

Now step two: choosing the right mute method.

Yes, you can automate the actual track mute button. But in practice it’s not always stable or musical, especially when you start resampling, exporting stems, or using return tracks. So instead, we’ll use a method that behaves predictably: Utility gain automation.

On your Hats track, add a Utility as the first device in the chain. First. Before saturation, before transient shaping, before anything that might amplify clicks. Do the same on your Perc track.

Now, in Arrangement View, we’re going to automate Utility Gain. At full volume, it’s at 0 dB. When you want a mute, you bring it down to negative infinity.

Important: don’t make it a perfectly vertical drop. Give it a tiny ramp, like 5 to 20 milliseconds. That tiny fade prevents clicks and pops from abrupt zero-crossing cuts.

And here’s another coach-level detail: if your hats are heavily processed and you still get little pops, it’s not only about ramps. It’s also about where you’re muting. Muting pre-FX is your kill switch. If you want, you can even add a second Utility at the end of the chain for “final trim” moves, but your main mutes should be early.

We’ll also add a touch of a second method: Auto Filter. Put Auto Filter after Utility on the Hats track. Set it to High-Pass, 12 or 24 dB per octave. This isn’t always for full muting. It’s for that DJ-style “pull the groove back” thinning. You can automate the filter frequency up into the 200 to 350 range for a lighter feel, and even up to 300 to 800 if you want it to feel like the low body disappears.

Now step three: the choreography map. This is where you stop thinking like a programmer and start thinking like a DJ and a drummer.

We’ll use a 16-bar phrase plan. You can copy this exact vibe, then later you’ll make your own.

Bars 1 to 4: establish the groove. Full hats, full percs. Let the listener lock in. This is your “promise” section.

Bar 5: micro-dip. On the hats Utility, dip the gain to something like minus 10 to minus 14 dB for half a bar. That’s a soft mute. The hats are still there, but they step back. Keep the perc going so the track doesn’t lose its clock.

Bar 8: punctuation. Do a full hat mute for a quarter bar or half bar right before a snare hit. That little moment of negative space makes the snare feel like it jumps out.

Bars 9 to 12: variation. Bring the hats back, but slightly filtered. Automate your high-pass up to maybe 200 or 350 so it’s lighter and airier. Then add a tiny stutter: for example, mute hats for just one eighth note on bar 11, beat 4. It’s a little “edit” moment, like a DJ cut, but it’s still inside the groove.

Bar 16: transition moment. Do a one-beat blackout where hats and percs drop out, and let kick and snare punch alone. That’s classic DnB drama. If your kick and snare are solid, this will sound instantly heavyweight.

As you draw these moves, keep it organized. One lane for TOPS gain, one lane for TOPS filter, one for PERC gain, and later we’ll do one for the throw send. Name your automation lanes if you can. Future you will thank you.

Now step four: keep it clean. Two problems show up when you mute percussion: clicks, and messy tails.

Clicks we already addressed with tiny ramps and muting pre-FX.

Tails are a different issue. If you’re sending hats to reverb or delay, and you mute the dry hats, the reverb might keep washing on, which can sound muddy and uncontrolled. So if you’re doing a hard blackout, consider also automating the send amount down, or at least be aware of what the returns are doing.

Also, keep your normal drum reverbs short. Something like 0.6 to 1.2 seconds for general drum space. Save the long verbs for special moments.

Which brings us to step five: reverb throw mutes. This is a signature move.

Create a Return track. Name it Throw Verb. Put Hybrid Reverb on it, or regular Reverb if you prefer. Set it to a Plate or Hall. Make it longer than your normal drum space, like 1.8 to 3.5 seconds.

Then filter it. High-pass around 250 to 500 Hz so you’re not filling the low mids with fog. Low-pass around 6 to 10 kHz so it stays smooth and doesn’t hiss.

Now the move: pick a single hat hit right before a mute. Often it’s the last 1/16 before the blackout. Automate the hat track’s Send A up just for that moment, so that one hit blasts into the throw verb. Then immediately after, mute the hats with Utility.

What happens is the dry hats disappear, but the space blooms. It feels cinematic and intentional, not like your drums broke.

Optional polish: put a compressor after the reverb on the return, and sidechain it to kick and snare. That way the throw breathes around your main hits instead of smearing them.

And if you want a throw that doesn’t smear the next bar, you can even add a gate after the reverb, keyed by the hats or a trigger, so it’s dramatic but controlled.

Now step six: turn this into a fast, performance-style workflow with macros.

If your hats and percs are in a Drum Rack or grouped in a bus, group the chain and map key parameters to macros. Map a macro to Utility Gain and name it HATS MUTE. Do the same for PERC MUTE. Map one for TOPS HP, the Auto Filter frequency. And map another for THROW SEND if you want quick control.

Why this matters: you can write automation like you’re performing a mix. Instead of drawing 40 tiny points with your mouse, you can record macro movements, then edit them. It’s faster and it keeps your arrangement feeling human.

Now I want to add two advanced coach concepts that separate “pretty good” from “this rolls like a record.”

First: mute timing is the groove. The most musical cut is not always perfectly on the grid. Try nudging a hat blackout just a tiny amount early, like 5 to 15 milliseconds, by ear. It can feel like a drummer pulling the phrase, and it makes the edit feel less robotic. Don’t overdo it. This is subtle seasoning.

Second: decide what keeps time during a blackout. If you mute all the tops, sometimes the groove feels like it falls over because you removed the listener’s metronome. So either keep a quiet shaker, a filtered ride tail, or a low ghost layer as a clock. Coach rule: when you remove the metronome element, replace it with a different metronome element.

Now quick arrangement guidance, because choreography is really about sections.

In DJ-friendly intros and outros, keep it mixable. Maybe hats are filtered and sparse, and you gradually unmute into the full groove.

In the first drop, let it roll. Don’t over-edit. One or two air pockets per 16 can be enough.

In the breakdown, remove hats entirely, keep ghosts or foley, and use throws to keep space alive.

In the second drop, you can get more aggressive: more frequent punctuation, bigger blackouts, maybe more filter motion.

One practical rule: if your drums loop for 8 bars, add at least two deliberate percussion edits inside that 8 bars. Not ten. Two. Make them count.

Before we wrap, let’s do a mini practice exercise.

Make an 8-bar drum loop with kick and snare, hats, and percs. Duplicate it to 16 bars.

Add Utility to hats and percs.

Across bars 1 to 16, create three hat mutes: one that’s 1/8 note, one that’s 1/4 note, and one that’s a full beat. Place them in different spots so it feels like phrasing, not repetition.

Create one short perc mute, just one, so the groove doesn’t collapse. This is discipline.

Then do one reverb throw right before your one-beat hat blackout.

When you listen back, ask yourself two questions.
Does it still roll when the hats cut?
And do the edits sound intentional, like a DJ edit, not random missing audio?

Bonus move, if you have time: resample your drums to audio and try doing the same choreography with clip gain automation. It’s a different way of thinking, and it’s great for committing ideas.

Let’s recap what you just learned.

Mute choreography is energy control through arrangement. In drum and bass, it’s one of the fastest ways to make repetitive patterns feel performed.

Utility gain automation is the clean, reliable way to “mute,” and Auto Filter adds that DJ-style thinning for builds.

Use tiny ramps to avoid clicks, and be aware of return tails so you don’t build reverb wash.

Reverb throws are the secret sauce: mute the dry sound, let the space carry the moment.

And keep a system: TOPS bus, PERC bus, organized lanes, and macros if you want speed.

If you tell me how your drums are currently laid out, separate tracks versus Drum Rack, and whether you’re using return reverbs, I can suggest a clean TOPS and PERC choreography template with a handful of macros that covers the whole workflow.

mickeybeam

Go to drumbasscd.com for +100 drum and bass YouTube channels all in one place - tune in!

Generating PDF preview…