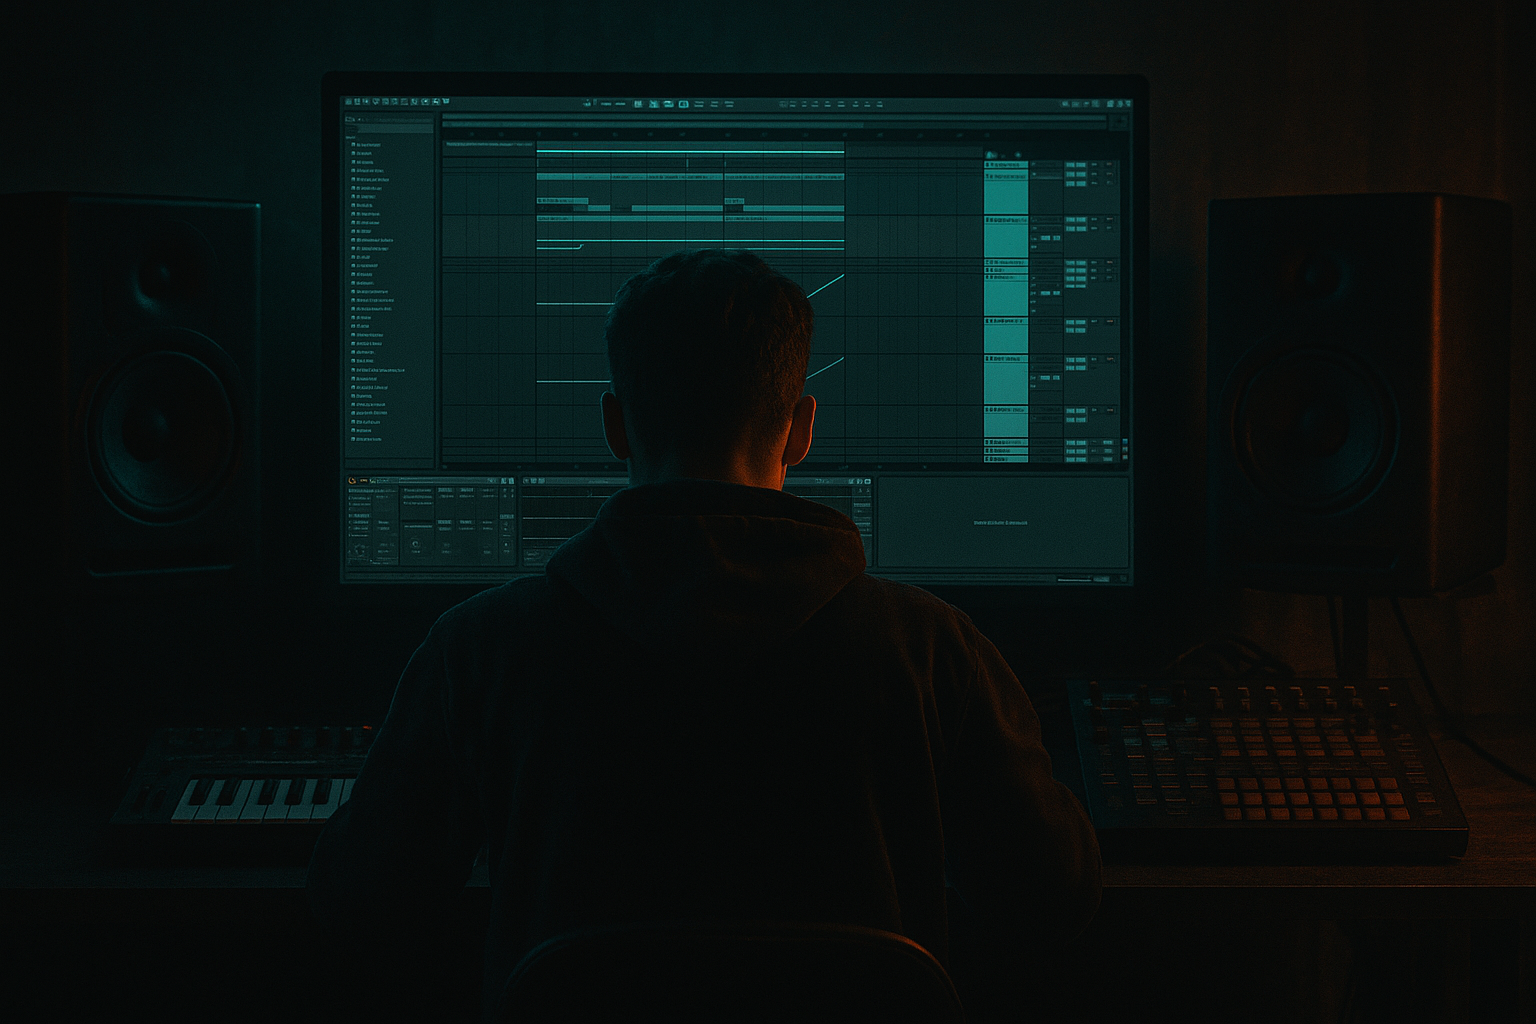
DNB COLLEGE

Drum & Bass Ableton Live 12 Tutorials

LESSON DETAIL

Resample oldskool DnB shuffle with crisp transients and dusty mids in Ableton Live 12 (Beginner)

An AI-generated beginner Ableton lesson focused on Resample oldskool DnB shuffle with crisp transients and dusty mids in Ableton Live 12 in the Risers area of drum and bass production.

Back to lessons
Resample oldskool DnB shuffle with crisp transients and dusty mids in Ableton Live 12 (Beginner) cover image

Narrated lesson audio

The voice track includes the tutorial plus extra teacher commentary.

Open audio file

Main tutorial

Resample Oldskool DnB Shuffle with Crisp Transients and Dusty Mids in Ableton Live 12

1. Lesson overview

In this lesson, you’ll build a classic oldskool jungle / drum and bass shuffle riser by resampling a chopped drum loop, then shaping it so it feels:

  • crisp on the top — sharp transient hits, snappy hats, clear attack
  • dusty in the mids — gritty, worn, vintage character
  • drum and bass-ready — energetic enough to work as a riser, build, or transition FX in a rolling arrangement
  • This is a very useful DnB technique because a lot of jungle and oldskool energy comes from broken drums being repitched, filtered, and reprinted into new textures. Instead of using a generic synth riser, you’ll create something with movement, urgency, and genre identity

    You’ll use stock Ableton Live 12 tools like:

  • Simpler
  • Warp
  • Drum Buss
  • EQ Eight
  • Saturator
  • Redux
  • Auto Filter
  • Reverb
  • Glue Compressor
  • Resampling / audio recording
  • ---

    2. What you will build

    By the end, you’ll have a short riser made from:

    1. A chopped oldskool drum break

    2. A resampled version with tightened transients

    3. A dusty midrange layer with grit and crunch

    4. A build-up automation that increases tension

    5. A final version that works as a transition riser before a drop, fill, or switch-up

    Think of it as a broken-beat drum lift that sounds like it could sit in a 90s jungle intro or a modern rolling DnB breakdown.

    ---

    3. Step-by-step walkthrough

    Step 1: Choose the right source material

    Start with a drum loop that has:

  • a solid kick/snare pattern
  • plenty of ghost notes or swung hats
  • some room tone or vinyl character
  • not too much low-end mud
  • Good source ideas:

  • classic jungle break samples
  • dusty amen-style loops
  • shuffled drum loops
  • old funk break fragments
  • If you don’t have a break sample, you can create one from:

  • a kick
  • a snare
  • a closed hat
  • a rimshot
  • a ride or shaker
  • Practical tip

    Look for a loop in the 165–175 BPM range. That sits naturally in DnB territory and keeps the shuffle feeling energetic.

    ---

    Step 2: Import the loop and warp it properly

    1. Drag the loop into an audio track

    2. Double-click the clip to open Clip View

    3. Turn Warp on

    4. Set Warp Mode to:

    - Beats for punchy drum loops

    - Complex Pro only if the loop has lots of mixed tonal content

    For oldskool shuffle, Beats mode is usually best.

    #### Suggested Beats mode settings:

  • Preserve: 1/16 or 1/8
  • Transients: around 80–100
  • Envelope: medium-high if you want more sustain
  • Why this matters

    You want the loop to stay rhythmic, but still feel slightly loose and human. Over-warping will kill the swing. Over-stretching will smear the transient detail.

    ---

    Step 3: Chop the best rhythmic section

    Now choose a section of the loop with:

  • a clean snare hit
  • a hat shuffle
  • some syncopated ghost notes
  • a short tail after the hit
  • You can do this in two ways:

    #### Option A: Simpler

    1. Drag the loop into Simpler

    2. Set mode to Classic

    3. Enable One-Shot if you want to trigger pieces manually

    4. Slice or map the loop into separate notes if needed

    #### Option B: Manual slicing in Arrangement View

    1. Duplicate the clip

    2. Trim to a 1-bar or 2-bar section

    3. Use Cmd/Ctrl + E to split

    4. Keep the most interesting rhythmic fragments

    Recommended chop length

    For a riser, start with:

  • 1 bar for subtle build
  • 2 bars for more dramatic tension
  • ---

    Step 4: Create the shuffle motion

    The oldskool feel comes from rhythmic movement, not just sound design.

    Try this approach:

    1. Copy the chopped loop across 1–2 bars

    2. Offset some hits slightly ahead or behind the grid

    3. Leave a few gaps so the groove breathes

    4. Add a repeated snare or hat pattern at the end to intensify the build

    Groove settings

    Open the Groove Pool and try:

  • MPC 16 Swing
  • MPC 16 Swing 57
  • any light swing groove around 54–58%
  • Apply only a little groove. In DnB, too much swing can make the part feel lazy instead of driving.

    ---

    Step 5: Resample the loop into audio

    This is where the magic starts 🔥

    1. Create a new audio track

    2. Set its input to Resampling

    3. Arm the track

    4. Play your loop and record it in real time

    Why resample?

  • It commits the groove
  • It lets you process the sound as a new audio texture
  • It makes the part feel more “printed” and authentic
  • After recording, you now have a fresh audio file you can further manipulate.

    ---

    Step 6: Build crisp transients

    Now we’ll make the attack pop.

    Place this chain on the resampled audio track:

    #### Suggested device chain:

    1. EQ Eight

    2. Drum Buss

    3. Saturator

    4. Glue Compressor

    #### EQ Eight settings

  • High-pass gently around 120–180 Hz if the riser is not meant to carry low-end
  • Add a small boost around 2.5–5 kHz for snare/hat presence
  • If needed, cut a little around 300–500 Hz to reduce boxiness
  • #### Drum Buss settings

  • Drive: 5–15%
  • Crunch: low to medium
  • Transient: +10 to +30
  • Boom: usually off or very low for risers
  • This is great for making the top of the loop hit harder while keeping the body under control.

    #### Saturator settings

  • Mode: Analog Clip or Soft Sine
  • Drive: 2–6 dB
  • Soft Clip: On
  • This adds density and helps the transient feel more urgent.

    #### Glue Compressor settings

  • Ratio: 2:1
  • Attack: 10 ms
  • Release: Auto or 0.3 s
  • Gain reduction: only 1–3 dB
  • This glues the chops together without flattening the groove.

    ---

    Step 7: Add dusty mids and grime

    Now let’s make it sound like it came off a worn tape loop or a battered sampler.

    Add these devices after the transient chain:

    #### Suggested dusty mid chain:

    1. Redux

    2. Auto Filter

    3. Saturator or Overdrive

    4. Reverb very subtly

    #### Redux settings

  • Downsample: gently, around 2x–4x style degradation
  • Bit reduction: light, not extreme
  • Use it carefully — you want texture, not digital destruction
  • Redux is excellent for giving that pixelated oldschool edge in the mids and highs.

    #### Auto Filter settings

  • Use a band-pass or low-pass
  • Automate the cutoff to rise over the build
  • Add a touch of resonance for excitement
  • Example:

  • Start cutoff around 500 Hz
  • End near 10–14 kHz
  • Resonance: 10–25%
  • This creates the riser motion.

    #### Reverb settings

    Keep it short and gritty:

  • Decay: 0.5–1.2 s
  • Size: small to medium
  • Low cut: 200–400 Hz
  • Dry/Wet: 5–12%
  • Use reverb very lightly. You want dust, not wash.

    ---

    Step 8: Automate the build

    This is what turns the loop into a proper riser.

    Automate these parameters over 1–2 bars:

  • Filter cutoff rising upward
  • Saturator drive slowly increasing
  • Redux amount slightly increasing near the end
  • Reverb dry/wet rising a touch in the final beat
  • Volume up by 1–3 dB if needed
  • Optional: pitch rising slightly if the sample responds well
  • Practical automation shape

    A strong DnB riser often works like this:

  • first half: mostly rhythmic and tight
  • second half: brighter, dirtier, more intense
  • final 1/4 bar: tension spike before the drop
  • If you want a more classic jungle feel, automate the filter in a slightly uneven way rather than a perfectly smooth ramp. That helps it feel more like a sampler being pushed to the edge.

    ---

    Step 9: Add micro-edits for excitement

    To make it feel more alive, do tiny edits in the last half-bar:

  • reverse a snare tail
  • duplicate one hat hit for a stutter
  • mute the kick for a beat before the drop
  • slice a small fragment and pitch it up
  • use Simpler to retrigger one chopped transient rapidly
  • A very classic trick:

  • repeat the last snare or hat 3–4 times
  • make each repeat slightly louder or brighter
  • end with a short noise burst or reverb tail
  • This creates a very DnB-friendly “pull into the drop” feeling.

    ---

    Step 10: Arrange it like a real DnB transition

    Here’s a simple arrangement idea:

    #### 2-bar riser example

  • Bar 1: chopped shuffle loop, mostly dry
  • Bar 2 beat 1–2: filter starts opening
  • Bar 2 beat 3: saturation increases
  • Bar 2 beat 4: short stutter or snare repeat
  • Last 1/4 bar: reverb tail and cutoff open fully
  • Drop: hard cut into kick/snare and bass
  • #### Works especially well before:

  • a drop into a rolling bassline
  • a drum fill
  • a halftime switch-up
  • a breakdown-to-drop transition
  • ---

    4. Common mistakes

    1. Making it too clean

    Oldskool shuffle should feel slightly worn and imperfect. If everything is pristine, it loses character.

    Fix: Add light saturation, Redux, and subtle warp imperfections.

    ---

    2. Over-compressing the break

    Too much compression kills the transient detail and makes the riser flat.

    Fix: Keep Glue Compressor gain reduction light, around 1–3 dB.

    ---

    3. Using too much reverb

    If the riser gets too washed out, the shuffle disappears.

    Fix: Use short reverb and filter out lows from the reverb return.

    ---

    4. Letting the low end build up

    A riser usually should not fight the sub and bass that come in at the drop.

    Fix: High-pass the riser or cut lows with EQ Eight.

    ---

    5. Automating too smoothly

    A perfectly smooth filter ramp can sound generic.

    Fix: Add small rhythmic changes, stutters, or uneven movement.

    ---

    6. Losing the groove while editing

    If you chop too aggressively, the oldskool feel vanishes.

    Fix: Keep some of the original pocket and swing.

    ---

    5. Pro tips for darker/heavier DnB

    Tip 1: Use band-pass filtering for tension

    A band-pass sweep can sound darker and more focused than a simple low-pass rise.

  • Start narrow
  • Open it gradually
  • Add a little resonance near the end
  • This works great for dark rollers and neuro-leaning intros.

    ---

    Tip 2: Layer a noise texture underneath

    Add a quiet layer of:

  • vinyl noise
  • rain ambience
  • tape hiss
  • filtered white noise
  • Then process it with:

  • Auto Filter
  • Saturator
  • Utility to control width
  • This helps the riser feel deeper and more cinematic.

    ---

    Tip 3: Parallel dirt

    Duplicate the riser track and process the copy more aggressively:

  • Redux
  • Overdrive
  • Amp
  • EQ Eight band-passed
  • Then blend it quietly underneath the main clean-ish version.

    This gives you:

  • crisp transient layer
  • dirty midrange layer
  • Very effective for heavyweight DnB.

    ---

    Tip 4: Use Utility for stereo control

    Keep the low mids centered and let the top breathe a little.

  • Use Utility
  • Turn down width slightly on the dirty layer if it gets messy
  • Keep the main transient layer fairly focused
  • This helps the riser punch through a busy mix.

    ---

    Tip 5: Pitch the final hit

    If the sample allows it, pitch the last chop up by a semitone or two.

    That last lift can make the transition feel more urgent, especially before a drop with a hard bass switch.

    ---

    6. Mini practice exercise

    Try this 15-minute exercise:

    Goal

    Create a 1-bar oldskool DnB riser from a chopped break.

    Steps

    1. Find a 1-bar drum loop at 170 BPM

    2. Warp it in Beats mode

    3. Chop it into 4–6 pieces

    4. Resample the chopped groove to audio

    5. Add this chain:

    - EQ Eight

    - Drum Buss

    - Saturator

    - Auto Filter

    - Redux

    6. Automate the filter cutoff upward across the bar

    7. Add one stutter at the end

    8. Bounce it and listen in context with a kick/snare + bass drop

    Challenge

    Make two versions:

  • Version A: cleaner and more transient
  • Version B: dirtier and more lo-fi
  • Compare which one works better before your drop.

    ---

    7. Recap

    You’ve now built an oldskool DnB shuffle riser in Ableton Live 12 by:

  • choosing a breakbeat with swing and character
  • warping it properly
  • chopping it into rhythmic fragments
  • resampling it into audio
  • enhancing transients with Drum Buss, EQ Eight, and Saturator
  • adding dusty midrange texture with Redux and filtering
  • automating the build for tension
  • arranging it like a proper jungle / drum and bass transition
  • This is a powerful workflow because it turns a simple drum loop into something that feels alive, gritty, and genre-authentic. Once you get comfortable with it, you can make endless variations for risers, fills, breakdown lifts, and drop transitions 🎛️

    If you want, I can also give you:

  • a rack chain with exact settings
  • a MIDI drum pattern version
  • or a dark 90s jungle-style Ableton session layout.

Ask GPT about this lesson

Chat with the lesson tutor, get follow-up help, or use quick actions.

Bigup 👽 Ask me anything about this lesson and I’ll answer in context.

Narration script

Show spoken script
Welcome to this Ableton Live 12 lesson.

In this one, we’re going to build a classic oldskool drum and bass shuffle riser by resampling a chopped breakbeat and shaping it into something with crisp transients, dusty mids, and that gritty, urgent jungle energy. Think of it like turning a simple drum loop into a transition tool that feels alive, raw, and genre-authentic.

This is a really useful technique because oldskool DnB and jungle get so much of their power from broken drums being repitched, filtered, saturated, and reprinted into a new texture. So instead of reaching for a generic synth riser, we’re going to make our own from drums. That gives us more movement, more attitude, and a sound that actually belongs in the style.

Let’s start with the source.

You want a drum loop that already has some character. Ideally it should have a solid kick and snare pattern, some swung hats or ghost notes, and maybe a little room tone or vinyl dust. A classic amen-style loop works great, but any shuffled drum break can work as long as it isn’t too muddy in the low end.

If you don’t have a break sample, you can build one from a kick, snare, closed hat, rimshot, or shaker. The key is that it has a broken rhythmic feel, not a straight loop.

A good target tempo is somewhere around 165 to 175 BPM. That sits naturally in drum and bass territory and helps the shuffle feel energetic without being too slow.

Once you’ve got your loop, drag it into an audio track in Ableton Live 12.

Open the clip view and turn Warp on. For a punchy drum loop, Beats mode is usually the best choice. It keeps the rhythm tight while preserving the attack of the transients. If the loop has lots of tonal material mixed in, you could use Complex Pro, but for oldskool shuffle, Beats is usually the move.

In Beats mode, try preserving around 1/16 or 1/8, and keep the transient settings fairly high so the hits stay clear. The goal is to keep the loop rhythmic, but not so locked down that it loses its human swing. If you over-warp it, the groove starts to flatten out.

Now let’s find the best section of the loop.

For a riser, you want a fragment that has a strong snare, some hat movement, and a little tail after each hit. A one-bar section is great for a subtle build, and a two-bar section gives you more room for tension and movement.

You can work with Simpler if you want to trigger slices, or you can stay in Arrangement View and chop the audio manually. A simple beginner-friendly approach is to duplicate the clip, trim it down, and split it with Cmd or Ctrl plus E until you’ve got the most interesting rhythmic pieces.

Now comes the shuffle feel.

The oldskool vibe is not just about the sound, it’s about the motion. So copy your chopped loop across one or two bars and let it breathe. Don’t put everything perfectly on the grid. Offset a few hits slightly early or slightly late. Leave some tiny gaps. Maybe repeat a snare or hat near the end to intensify the build.

You can also open the Groove Pool and try a light swing groove, something like an MPC-style 16 swing. Keep it subtle. In drum and bass, too much swing can make the part feel lazy. We want it to still drive.

Now we’re ready for one of the most important steps: resampling.

Create a new audio track, set its input to Resampling, arm it, and record your chopped loop in real time. This is where the magic starts. Resampling commits the groove, prints the sound as audio, and gives you a fresh texture to process. It also helps the part feel more authentic, because now it’s a printed piece of audio instead of just a loop playing back.

Once you’ve recorded it, you can shape it like a new sample.

First, let’s get the transients crisp.

On the resampled track, start with EQ Eight. If this riser isn’t supposed to carry low-end, put a gentle high-pass somewhere around 120 to 180 Hz. Then add a little presence around 2.5 to 5 kHz to help the snare and hats cut through. If the sound feels boxy, you can cut a bit around 300 to 500 Hz.

After that, add Drum Buss. Keep the Drive moderate, the Crunch low to medium, and push the Transient control a little so the front edge of the hits pops. Boom should usually stay off or very low for a riser, unless you specifically want extra low punch. For this kind of build, we’re aiming for attack, not sub weight.

Next, add Saturator. Try Analog Clip or Soft Sine, give it a few dB of Drive, and turn Soft Clip on if needed. This adds density and makes the transients feel more urgent without making the loop fall apart.

Then finish that section with Glue Compressor. Keep it light. A ratio of 2 to 1, a medium attack, and only a small amount of gain reduction is enough. We want the chops to glue together, not get flattened. If you over-compress, the transient detail disappears and the riser loses energy.

Now let’s bring in the dusty mids.

This is where we give it that worn sampler, tape-loop, old-school grime feeling.

Add Redux next. Don’t go crazy here. A little downsampling and a touch of bit reduction is enough to add grain and vintage texture. The idea is not to destroy the sound, just to rough it up a bit so the mids and highs feel more aged.

After Redux, use Auto Filter. A band-pass or low-pass sweep works really well for this kind of riser. Start with the cutoff fairly low, maybe around 500 Hz, and automate it up toward 10 to 14 kHz over the build. A little resonance can make the rise feel more exciting, but don’t overdo it.

Then add a little Reverb, but keep it short and controlled. A decay around half a second to a second and a bit, with the low end filtered out, can give the riser some space without washing away the groove. We want dust, not a huge smear.

Now it’s time to automate the build.

Over one or two bars, slowly open the filter cutoff. Increase saturation a little as the riser progresses. You can also bring in a bit more Redux near the end for extra grit, and maybe raise the reverb slightly on the final beat. A small volume lift can help too if the riser needs more impact.

If your sample responds well, a subtle pitch rise on the last hit or two can be really effective. Even a tiny amount of pitch movement can make the whole thing feel more tense and more ready to drop.

A good oldskool build often feels a little uneven, not perfectly smooth. That’s important. A sampler being pushed to the edge sounds more exciting than a sterile, perfectly linear ramp. So don’t be afraid to let the automation feel a little raw.

Now add some micro-edits to make it more alive.

In the last half-bar, you could reverse a snare tail, duplicate a hat hit for a stutter, mute the kick for a beat, or retrigger a small chopped fragment with Simpler. One really classic move is to repeat the last snare or hat three or four times, making each repeat feel a little more urgent. That kind of tightening motion pulls the listener into the drop.

If you want even more movement, you can make a second, dirtier version of the same riser and layer it underneath the cleaner one. The cleaner pass gives you transient definition, and the dirtier pass gives you age and texture. That layered approach is super effective in drum and bass.

You can also use Utility to control stereo width. Keep the low mids centered and let the top breathe a little. If the dirty layer starts to clutter the mix, narrow it down slightly. The goal is for the riser to punch through without fighting the bass that comes in after it.

Here’s a simple arrangement idea.

For a two-bar riser, the first bar can stay mostly dry and rhythmic. In the second bar, open the filter, add more saturation, and brighten the sound. On the final beat, throw in a quick stutter or reverse hit, then let the cutoff open fully right before the drop. When the drop lands, cut the riser hard so the impact feels clean and deliberate.

That kind of transition works great before a rolling bassline, a drum fill, a halftime switch, or the drop back into the main section.

A few common mistakes to watch out for.

First, don’t make it too clean. Oldskool shuffle should feel a little worn and imperfect. A bit of saturation, Redux, and warp character is part of the vibe.

Second, don’t over-compress it. Too much compression kills the transient energy and makes the riser feel flat.

Third, don’t drown it in reverb. If the shuffle gets washed out, the whole point of the breakbeat disappears.

Fourth, don’t let the low end build up. A riser usually should support the drop, not compete with it. High-pass it sooner than you think if necessary.

And finally, don’t automate everything perfectly smooth. Tiny rhythmic changes often sound more exciting than a clean, generic sweep.

Here’s a great beginner practice exercise.

Take a one-bar drum loop at around 170 BPM. Warp it in Beats mode. Chop it into four to six pieces. Resample the chopped groove to audio. Then add EQ Eight, Drum Buss, Saturator, Auto Filter, and Redux. Automate the filter upward across the bar and add one stutter at the end. Bounce it and listen in context with a kick, snare, and bass drop.

If you want to push yourself, make two versions. One cleaner and more transient-focused. One dirtier and more lo-fi. Then compare which one hits harder before the drop.

So that’s the workflow.

Choose a break with character, warp it properly, chop it into a tight shuffle, resample it, enhance the transients, add dusty midrange grit, automate the build, and arrange it like a real drum and bass transition. That’s how you turn a simple oldskool drum loop into a riser that feels alive, gritty, and fully in the genre.

Once you get comfortable with this, you can make endless variations for fills, breakdown lifts, and drop transitions.

Now go print a rough version, trust your ears, and let the drums do the talking.

mickeybeam

Go to drumbasscd.com for +100 drum and bass YouTube channels all in one place - tune in!

Generating PDF preview…