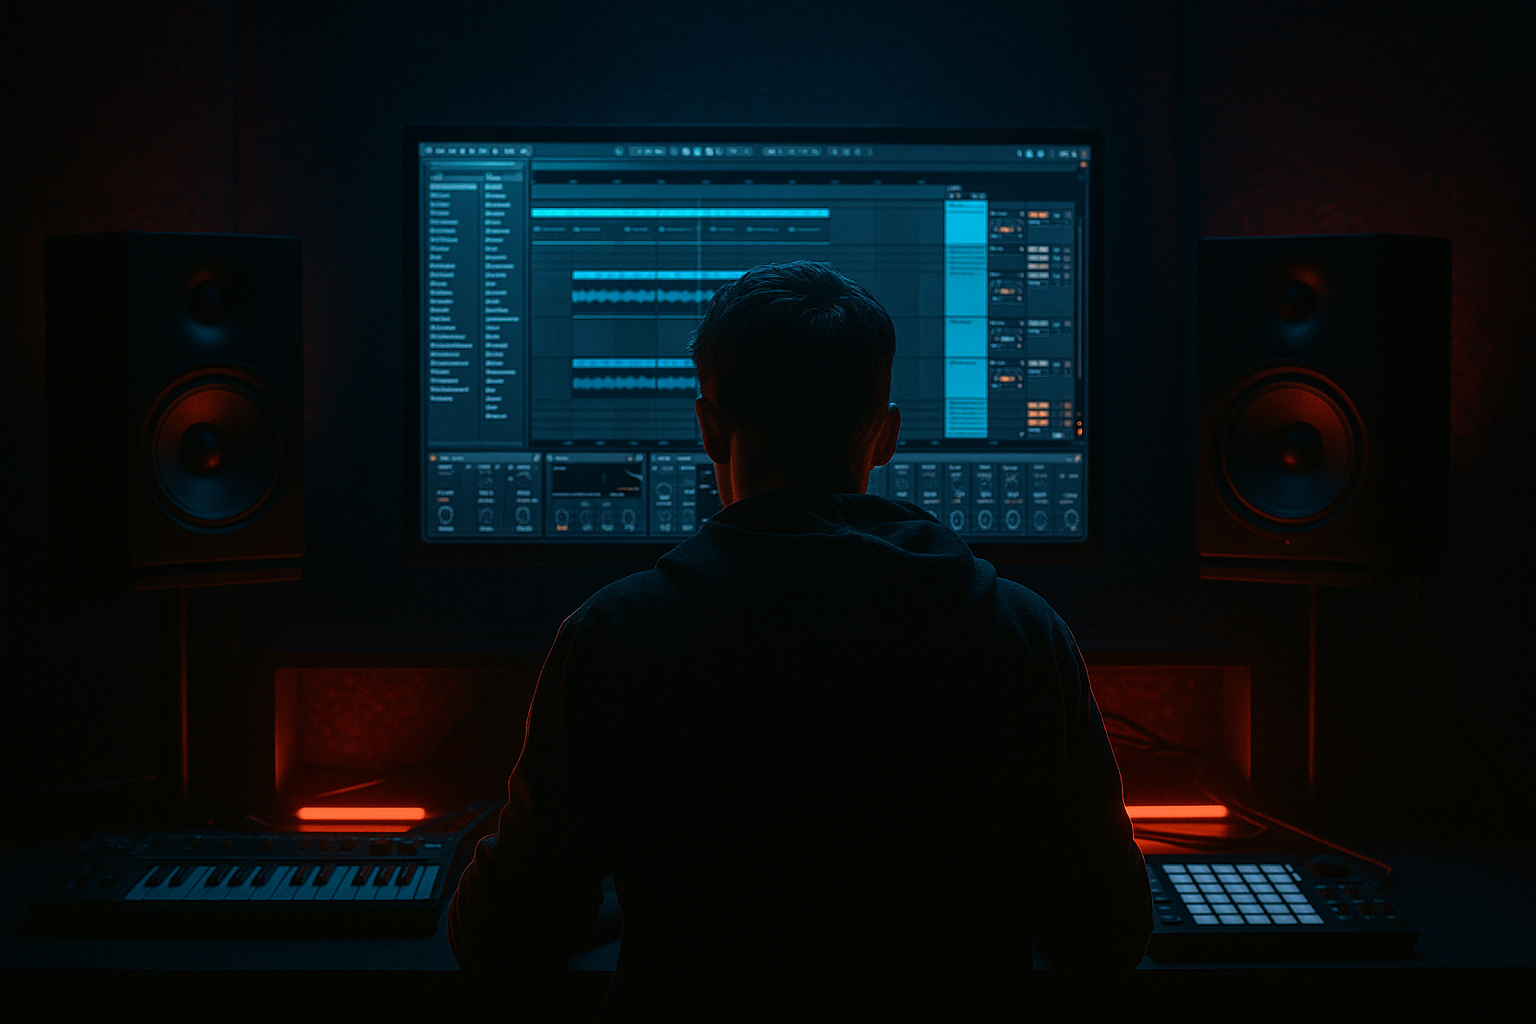
DNB COLLEGE

Drum & Bass Ableton Live 12 Tutorials

LESSON DETAIL

Ruffneck: ragga cut slice for rewind-worthy drops in Ableton Live 12 (Beginner)

An AI-generated beginner Ableton lesson focused on Ruffneck: ragga cut slice for rewind-worthy drops in Ableton Live 12 in the Basslines area of drum and bass production.

Back to lessons
Ruffneck: ragga cut slice for rewind-worthy drops in Ableton Live 12 (Beginner) cover image

Narrated lesson audio

The voice track includes the tutorial plus extra teacher commentary.

Open audio file

Main tutorial

```markdown

Ruffneck: Ragga Cut Slice for Rewind-Worthy Drops in Ableton Live 12

Skill level: Beginner

Category: Basslines

Style focus: Drum & bass / jungle / rolling bass music

Goal: Build a ragga-style cut-up bass drop that feels raw, heavy, and made for a rewind 🔥

---

1. Lesson overview

A ruffneck ragga cut slice is a chopped-up vocal or ragga-style phrase that gets retriggered, gated, pitched, and arranged like an instrument. In DnB, this works especially well as a drop hook or bassline accent, because it gives you:

  • Energy and attitude
  • A call-and-response feel with the drums and bass
  • A way to create rewind moments and crowd impact
  • A fast route to making your drop sound more jungle / soundsystem-ready
  • In this lesson, you’ll build a short ragga cut-slice bass drop in Ableton Live 12 using stock devices only.

    We’ll focus on:

  • finding or recording a vocal phrase
  • slicing it cleanly
  • turning it into a rhythmic bassline element
  • processing it for weight and aggression
  • arranging it into a drop that hits hard in DnB
  • ---

    2. What you will build

    By the end, you will have:

  • A 1-bar or 2-bar ragga cut-up phrase
  • A drum and bass groove at 170–174 BPM
  • A bass-layered vocal chop that sits like a stab
  • A drop arrangement with tension, impact, and a rewind-style moment
  • A simple Ableton device chain you can reuse on future tracks
  • Sound result

    Think:

  • chopped Jamaican-style vocal energy
  • gritty midrange
  • short, punchy rhythmic slices
  • a bass drop that feels like it could land after a DJ reload 😎
  • ---

    3. Step-by-step walkthrough

    Step 1: Set your project tempo and create the core groove

    1. Open Ableton Live 12.

    2. Set tempo to 172 BPM as a solid starting point.

    3. Create:

    - 1 MIDI track for drums

    - 1 Audio track for the ragga vocal sample

    - 1 MIDI or audio track for bass support

    4. Make a 4-bar loop in Arrangement View or Session View.

    Step 2: Build a basic DnB drum foundation

    Before the ragga cut works, the drums need to move properly.

    #### Use a simple drum pattern:

  • Kick: bar 1 beat 1, plus one or two syncopated hits
  • Snare/Clap: strong on beat 2 and 4
  • Hi-hats: 1/8 or 1/16 pattern with velocity variation
  • Ghost hits: small percussion between snare hits for swing
  • Suggested stock devices

    On your drum group, use:

  • Drum Rack
  • EQ Eight
  • Glue Compressor
  • Drum Buss
  • Saturator
  • #### Quick drum chain idea

    Drum Group

    1. EQ Eight

    - Cut unnecessary low end from hats/percs

    2. Drum Buss

    - Drive: low to medium

    - Crunch: subtle

    3. Glue Compressor

    - Light glue, not smashing

    4. Saturator

    - Soft Clip on if needed

    Keep the drums punchy but not over-processed. The vocal cut will need space.

    ---

    Step 3: Find or record a ragga-style phrase

    You need a short phrase with attitude. Good sources:

  • your own vocal recording
  • royalty-free ragga / MC-style sample pack
  • spoken word or one-shots you manipulate into a ragga feel
  • #### What to look for

    Choose a phrase with:

  • a strong consonant attack
  • a natural rhythm
  • a short, repeatable phrase
  • enough character to survive heavy processing
  • Examples of useful shapes:

  • “Run it!”
  • “Sound boy!”
  • “Come again!”
  • “Watch this!”
  • “Selecta!”
  • “Rewind!”
  • > Tip: Even a plain spoken phrase can become ragga-style once you chop, pitch, and process it.

    ---

    Step 4: Warp and clean the sample

    Drag the sample into an Audio Track.

    #### In Clip View:

    1. Turn Warp on.

    2. Set Warp mode to:

    - Complex Pro for full vocal phrases

    - Beats if it’s very percussive and chopped

    3. Adjust the start point so the phrase begins cleanly.

    4. Trim silence before the phrase.

    5. If needed, enable Loop to hear it in context.

    Practical cleanup

    Use Utility or Clip Gain if the sample is too loud or too quiet.

    #### If the sample has messy low end:

  • Add EQ Eight
  • High-pass around 100–150 Hz
  • Keep the cut focused in the mids so it doesn’t fight the sub
  • ---

    Step 5: Slice the ragga phrase into playable pieces

    This is the key step.

    #### Option A: Slice to new MIDI track

    1. Right-click the audio clip.

    2. Choose Slice to New MIDI Track.

    3. Slice by:

    - Transient if the phrase has strong attacks

    - 1/8 or 1/16 if you want a grid-based chop

    4. Ableton creates a Drum Rack with slices mapped to pads.

    This is ideal for beginners because it turns the vocal into a playable instrument. 🎛️

    #### Option B: Keep it on one audio track and cut manually

    Use this if you want to draw slices directly in Arrangement View.

    ---

    Step 6: Program a ragga cut rhythm

    Now create a call-and-response rhythm that works with the drums.

    #### Start with a 1-bar pattern

    Use short note hits on the slices like:

  • slice 1 on beat 1
  • slice 2 on the “and” of 2
  • slice 3 on beat 3
  • slice 4 on the “and” of 4
  • Think of it as a bassline phrase, not just random chopping.

    Rhythm approach

    A good ragga cut often:

  • leaves space for the snare
  • answers the kick
  • repeats a memorable hook
  • uses syncopation to create bounce
  • #### Example 1-bar idea

  • 1.1 phrase start
  • 1.2.3 quick repeat
  • 1.3.2 answer slice
  • 1.4.3 final hit before loop resets
  • In Ableton MIDI editor:

  • use short note lengths
  • try 1/16 grid
  • shift a few hits slightly off-grid for swagger
  • ---

    Step 7: Add pitch movement for the “ruffneck” feel

    This is where the cut becomes heavier and more aggressive.

    #### In the Drum Rack chain or on the audio slices:

    Use Simpler or sample transposition to pitch slices.

    Try:

  • some slices pitched down 3–7 semitones
  • one or two slices pitched up 2–5 semitones for contrast
  • a final slice pitched very low to act like a punchy bass stab
  • Important rule:

    Don’t pitch everything equally.

    A good ragga cut has contrast between hits.

    #### If using Simpler:

  • Mode: Classic or One-Shot
  • Filter: slightly open, then automate if needed
  • Glide/portamento: subtle, if you want slide-like movement
  • ---

    Step 8: Make it feel like a bassline, not just a vocal

    To make the ragga slice function as a bassline element, add body and weight.

    #### Layer with a sub or bass support

    Create a separate bass track with:

  • Operator
  • Wavetable
  • Analog
  • or even a sampled sub in Simpler
  • ##### Simple sub idea

  • sine wave
  • mono
  • note follows the main chopped rhythm
  • low-pass or no filter
  • keep it very clean
  • Device chain for the bass layer

    Operator

  • Oscillator A: Sine
  • Volume envelope: short decay, low sustain
  • Mono mode on if needed
  • Then add:

  • Saturator for harmonics
  • EQ Eight to remove mud above ~200 Hz if necessary
  • #### Blend tip

    The vocal chop should carry attitude in the mids, while the sub carries the weight underneath. That’s the DnB balance.

    ---

    Step 9: Add movement with effects

    To make the cut feel alive, use effects sparingly but purposefully.

    #### Useful stock devices

  • Auto Filter
  • Echo
  • Reverb
  • Redux
  • Frequency Shifter
  • Saturator
  • Overdrive
  • Utility
  • Suggested processing chain for the ragga cut

    Ragga Chop Track

    1. EQ Eight

    - high-pass low rumble

    - small cut if any harshness around 2–5 kHz

    2. Saturator

    - Drive: mild to medium

    - Soft Clip: on if needed

    3. Auto Filter

    - automate cutoff for tension before drop

    4. Echo

    - short delay, low feedback

    - automate for transitions only

    5. Utility

    - use Width carefully if you want mono control

    If you want extra grime

    Try Redux very lightly for crunchy digital texture.

    Be careful: too much will destroy the vocal intelligibility.

    ---

    Step 10: Make a rewind-worthy drop moment

    A rewind moment needs a phrase that feels like a declaration.

    #### Arrangement idea

    Use this structure:

  • Bar 1–2: drums only or drums + filtered teaser
  • Bar 3–4: riser/tension, remove sub, cut vocal hints
  • Bar 5: full drop with ragga cut and bass
  • Bar 6: repeat with variation
  • Bar 7: drop out half the drums
  • Bar 8: reload-style stop or vocal hit
  • Easy rewind trick

    Before the main drop:

  • stop the drums for 1/2 bar
  • leave a single vocal hit
  • add a reverse cymbal or delay throw
  • then slam back into the drop
  • This creates the kind of space that DJs and crowds respond to instantly.

    ---

    Step 11: Use automation to create impact

    Automation is what turns a loop into a proper drop.

    #### Automate:

  • Filter cutoff on the ragga chop
  • Reverb send on the last word only
  • Delay feedback for transition moments
  • Pitch on one or two slices
  • Utility gain to create a quick pre-drop dip
  • Example automation move

    On the last hit before the drop:

  • increase Echo feedback
  • then cut the audio abruptly
  • follow with full drums and bass
  • That contrast is what makes the drop feel hard.

    ---

    Step 12: Final mix checks

    #### Keep these balance goals:

  • vocal chop: clear, aggressive, not too loud
  • sub: clean and centered
  • drums: punchy and stable
  • effects: felt, not cluttering
  • Quick mix checklist

  • Mono below 120 Hz
  • High-pass vocal chops to avoid mud
  • Sidechain sub to kick if the low end gets crowded
  • Use EQ Eight to carve space around the snare and vocal mids
  • Check at low volume: can you still hear the rhythm and attitude?
  • ---

    4. Common mistakes

    1. Over-chopping the vocal

    If every syllable is random, the phrase loses identity.

    Fix: keep one recognizable hook and vary around it.

    2. Too much low end in the vocal sample

    A ragga cut should not compete with your sub.

    Fix: high-pass with EQ Eight around 100–150 Hz.

    3. No rhythmic pocket

    If the chop doesn’t lock with the snare, it won’t feel like DnB.

    Fix: place hits around the drum groove, not on top of everything.

    4. Excessive reverb

    Big reverb can smear the attack and kill the drop.

    Fix: use short reverb or automate only on transition hits.

    5. Flat pitch choices

    All slices at the same pitch sound static.

    Fix: pitch some slices up, some down, and leave some natural.

    6. Weak arrangement

    A loop can sound cool by itself but fail in a track.

    Fix: build a clear intro, tension, drop, and reload-style moment.

    ---

    5. Pro tips for darker/heavier DnB

    Here’s how to push this idea into darker territory.

    Tip 1: Use gritty saturation, not just volume

    Add controlled drive with:

  • Saturator
  • Overdrive
  • Drum Buss
  • This adds aggression and makes the slice cut through dense drums.

    Tip 2: Make the chop more percussive

    Shorten slice lengths so they hit like drum elements.

  • Tight attack
  • short release
  • minimal tail
  • Tip 3: Layer with metallic textures

    Add subtle layers like:

  • foley hits
  • rewound vinyl noise
  • industrial one-shots
  • jungle percussion
  • This gives the cut a darker rave context.

    Tip 4: Use call-and-response with the drums

    Let the ragga phrase answer the snare, kick, or a fill.

    This makes the groove feel intentional and heavyweight.

    Tip 5: Use negative space

    In dark DnB, silence is powerful.

    Drop out the bass for a beat, then bring back the ragga cut hard. That contrast creates tension.

    Tip 6: Keep the sub clean

    For heavier music, the sub should stay focused and monophonic.

    If your chop has too much low mid, the track will sound blurry rather than powerful.

    ---

    6. Mini practice exercise

    Exercise: Build a 2-bar ragga cut drop

    #### Your mission:

    Create a 2-bar loop at 172 BPM using:

  • 1 ragga vocal phrase
  • 1 sub bass layer
  • basic DnB drums
  • #### Steps:

    1. Pick a short vocal like “Rewind!” or “Selecta!”

    2. Slice it into 4–8 pieces.

    3. Program a 2-bar rhythm using only those slices.

    4. Add a sine sub that follows the most important hits.

    5. Process the vocal with:

    - EQ Eight

    - Saturator

    - Auto Filter

    6. Add one transition effect:

    - Echo throw

    - or a reverse sample

    7. Arrange a mini-drop:

    - 1 bar intro

    - 1 bar tension

    - 2-bar drop

    #### Challenge version

    Make the last vocal hit of bar 2:

  • pitch down
  • delay slightly
  • followed by a drum fill
  • That’s a classic reload setup.

    ---

    7. Recap

    You now know how to create a ruffneck ragga cut slice in Ableton Live 12 for DnB.

    Key takeaways:

  • Start with a strong ragga-style phrase
  • Slice it into playable pieces
  • Use rhythm, not randomness
  • Layer a clean sub underneath for bass weight
  • Process with stock Ableton devices like:
  • - Drum Rack

    - Simpler

    - EQ Eight

    - Saturator

    - Auto Filter

    - Echo

    - Drum Buss

  • Arrange for impact, space, and rewind energy

Final mindset

A great ragga cut drop is about attitude, rhythm, and contrast.

If it feels like it could make a crowd shout “reload!” then you’re on the right track 👊

---

If you want, I can also turn this into:

1. a follow-along Ableton project template,

2. a MIDI note example for the chop rhythm, or

3. a darker neuro-ragga version of this lesson.

```

Ask GPT about this lesson

Chat with the lesson tutor, get follow-up help, or use quick actions.

Explain this lesson in a simpler way for a beginner.
Turn this into exact step-by-step Ableton actions I can follow.
Absolutely — here’s a **follow-along Ableton Live 12 checklist** for building this **ruffneck ragga cut slice** drop. --- # Ruffneck Ragga Cut Slice: exact Ableton steps ## 1) Set up the project 1. Open **Ableton Live 12**. 2. Set the tempo to **172 BPM**. 3. Create **3 tracks**: - **Track 1: MIDI** for drums - **Track 2: Audio** for the vocal sample - **Track 3: MIDI** for sub bass 4. Set the loop brace to **4 bars**. --- ## 2) Build the drum foundation first ### On Track 1, make a Drum Rack 1. Click **Create > Insert MIDI Track** if needed. 2. Drag **Drum Rack** onto Track 1. 3. Load these sounds into pads: - kick - snare/clap - closed hat - open hat or percussion ### Draw a basic DnB pattern 1. Double-click an empty MIDI clip on Track 1. 2. In the MIDI editor, set the grid to **1/16**. 3. Add: - **Kick** on **1.1** - **Snare** on **1.2** - **Kick** somewhere after the snare, like **1.2.4** or **1.3** - **Snare** on **1.4** - Hats on offbeats or 1/16s with some gaps ### Make it feel more like DnB 1. Keep the **snare strong on 2 and 4** if you’re thinking in a full bar. 2. Add a few extra kick or percussion hits, but don’t overcrowd it. 3. Use lighter velocity on some hats so it grooves more. ### Add simple drum processing On the drum track, after Drum Rack, add: 1. **EQ Eight** - cut unnecessary low end from hats/percs 2. **Drum Buss** - Drive low to medium 3. **Glue Compressor** - light compression only 4. **Saturator** - turn on **Soft Clip** if needed --- ## 3) Load your ragga vocal sample 1. Import a short ragga-style vocal phrase onto **Track 2**. - good examples: “Rewind!”, “Selecta!”, “Sound boy!”, “Watch this!” 2. Click the clip so you see it in **Clip View**. 3. Turn **Warp** on. 4. Use **Complex Pro** if it’s a full vocal phrase. 5. Move the start marker so the vocal begins right on the first word. 6. Trim any silence before the phrase. ### Clean the sample 1. Add **EQ Eight** on the vocal track. 2. Put on a **high-pass filter** around **100–150 Hz**. 3. If the vocal is too loud or too quiet, adjust **Clip Gain** or track volume. --- ## 4) Slice the vocal into playable pieces ### Easiest beginner method 1. Right-click the vocal clip. 2. Choose **Slice to New MIDI Track**. 3. In the dialog: - choose **Transient** if the words have clear hits - or **1/8** if you want a grid-based chop 4. Ableton creates a **Drum Rack** with the slices. Now you can play the vocal like an instrument. --- ## 5) Program the ragga cut rhythm 1. Open the new MIDI clip created from slicing. 2. Set grid to **1/16**. 3. Start with only a few notes. ### Good beginner pattern idea Place slices like this: - **Beat 1**: main vocal hit - **Beat 2 offbeat**: second slice - **Beat 3**: another hit - **Beat 4 offbeat**: final hit ### Important: - leave space for the snare - don’t fill every 16th note - keep one slice as the main hook ### Make it feel like DnB 1. Shift some notes slightly off-grid if it feels too stiff. 2. Keep the rhythm tight with the drums. 3. Duplicate the pattern for 2 bars and change one or two notes in bar 2. --- ## 6) Add pitch movement To give it the “ruffneck” feel, pitch some slices differently. ### If the slices are in Drum Rack / Simpler 1. Click a slice pad. 2. Open **Simpler** if needed. 3. Change the **Transpose** value. ### Try this: - one slice: **0 semitones** - one slice: **-3 to -7 semitones** - one slice: **+2 to +5 semitones** - save the lowest pitch for the strongest hit ### Rule: Do **not** pitch every slice the same way. --- ## 7) Make it work like a bassline The vocal cut needs sub support underneath it. ### On Track 3, create a sub bass 1. Add **Operator** to Track 3. 2. Set Oscillator A to **Sine**. 3. Turn on **Mono** if available. 4. Make a MIDI clip that follows the main chop rhythm. 5. Keep the notes simple and low. ### Bass processing After Operator, add: 1. **Saturator** - mild drive 2. **EQ Eight** - remove mud if needed ### Basic rule - vocal chop = midrange attitude - sub = low-end weight --- ## 8) Add effects to the chop On the vocal chop track, add these in order: 1. **EQ Eight** - high-pass low rumble - small cut if harsh around 2–5 kHz 2. **Saturator** - add grit, but keep it controlled 3. **Auto Filter** - automate cutoff for buildup 4. **Echo** - use only on transitions or certain hits 5. **Utility** - keep the width under control if needed ### Optional grime - Add **Redux** very lightly if you want crunch - Don’t overdo it or the phrase gets messy --- ## 9) Build the drop arrangement Use a simple structure like this: ### 8-bar example - **Bars 1–2:** drums only, or drums + filtered vocal teaser - **Bars 3–4:** tension build, less bass, short vocal bits - **Bar 5:** full drop - **Bar 6:** repeat with variation - **Bar 7:** drop out some drums - **Bar 8:** stop for a rewind-style moment ### Easy rewind moment 1. Mute drums for **half a bar**. 2. Leave one strong vocal hit. 3. Add a short delay throw or reverse sound. 4. Bring the full drop back in. --- ## 10) Use automation for impact ### Automate these: - **Auto Filter cutoff** on the vocal chop - **Echo wet/dry or feedback** - **Reverb send** on just one word - **Track volume** for a pre-drop dip - **Pitch** on one important slice if you want tension ### Simple automation move 1. Pick the last vocal hit before the drop. 2. Increase **Echo feedback** briefly. 3. Cut the sound hard before the drop lands. 4. Bring everything back at full power. That contrast makes the drop hit harder. --- ## 11) Quick mix checks 1. Keep **sub bass centered and mono**. 2. High-pass the vocal chop so it doesn’t fight the sub. 3. Make sure the vocal rhythm is still clear at low volume. 4. If the drop feels muddy, reduce reverb and low mids. 5. Check the loop **with and without the bass**. --- # Beginner-safe shortcut version If you want the fastest version, do this in order: 1. Set tempo to **172 BPM** 2. Make a **DnB drum loop** 3. Import one ragga vocal phrase 4. Warp it and clean it 5. **Slice to New MIDI Track** 6. Program a short 1-bar chop rhythm 7. Add a **sine sub bass** 8. Add **EQ Eight + Saturator + Auto Filter** 9. Arrange a short drop with a rewind moment 10. Bounce and listen for groove --- # What to focus on first If you get stuck, only care about these 3 things: - **Does the vocal rhythm work with the snare?** - **Is the sub clean and simple?** - **Does the drop leave space for the rewind moment?** --- If you want, I can next turn this into: 1. a **very detailed button-by-button Ableton guide**, or 2. a **clean 8-bar MIDI pattern example** for the drum and vocal chops.

Narration script

Show spoken script
Welcome back. In this lesson, we’re building a ruffneck ragga cut slice drop in Ableton Live 12, beginner style, but with serious jungle attitude.

The goal is simple: take a short ragga-style vocal phrase, chop it up, reshape it like an instrument, and turn it into a rewind-worthy drop that hits hard with your drums and bass. Think raw energy, call-and-response movement, and that soundsystem moment where the crowd wants the reload.

We’re keeping this one stock-devices only, so you can follow along with Ableton’s built-in tools and still get a proper result.

First, set your tempo to around 172 BPM. That’s a solid drum and bass starting point. Then create a simple session with three parts: one track for drums, one audio track for your vocal sample, and one track for bass support. If you like working in Arrangement View, set up a short four-bar loop so you can hear everything repeating while you build.

Before we touch the vocal, get the drums moving. A ragga cut works best when it has a solid groove underneath it. Start with a kick, snare, hats, and maybe a few ghost hits or small percussion sounds. Keep the snare strong on beats two and four. Let the kick do a little syncopation, but don’t overcrowd the pattern. The chop needs space to speak.

On your drum group, a simple chain like EQ Eight, Drum Buss, Glue Compressor, and Saturator can help keep things punchy. Use EQ Eight to clean up low end from hats and percussion. Add a little Drum Buss for drive and crunch. Use Glue Compressor lightly, just enough to glue the kit together. Then if needed, use Saturator with Soft Clip on for a bit of extra bite. The key is punch, not overcooking.

Now find or record your ragga-style phrase. It could be something like “Run it,” “Selecta,” “Watch this,” or “Rewind.” You want a phrase with attitude, a strong attack, and a shape that feels rhythmic even before you edit it. If you don’t have an actual ragga sample, a plain spoken phrase can still work once you chop, pitch, and process it.

Drag the sample into your audio track and open Clip View. Turn Warp on. If it’s a full vocal phrase, Complex Pro is usually a good choice. If it’s very percussive and chopped, Beats mode can work well too. Clean up the start point so the phrase begins right on time, and trim any silence before the main word. If the sample is too loud or too quiet, adjust it with Utility or clip gain.

If the sample has too much low end, high-pass it with EQ Eight somewhere around 100 to 150 hertz. That keeps the vocal chop from fighting your sub. In this style, the vocal should live mostly in the mids. The sub will do the heavy lifting underneath.

Now for the fun part. Slice the vocal into playable pieces. In Ableton, right-click the clip and choose Slice to New MIDI Track. For beginners, this is the easiest way to turn one sample into an instrument. Slice by transients if the phrase has clear attacks, or use 1/8 or 1/16 if you want a more grid-based chop. Ableton will create a Drum Rack with the slices mapped across pads.

This is where the lesson starts feeling like real production. You’re not just editing a sample anymore. You’re playing the vocal like a rhythm instrument.

Now program a ragga cut rhythm. Don’t just throw slices everywhere. Think in phrases, not syllables. Leave room for the snare. Let the vocal answer the drums instead of fighting them. A simple one-bar pattern might place a slice on beat one, another on the and of two, another on beat three, and a final hit near the end of the bar. That gives you a call-and-response feel.

A good beginner rule is this: if the chop feels awkward, move it until it speaks to the kick or snare. The drum loop is your reference. The vocal should feel like it belongs in the groove, not sitting on top of it.

Keep the notes short in the MIDI editor. Use a 1/16 grid if that helps. A few slightly off-grid hits can add swagger, but don’t lose the pocket. The groove is more important than technical perfection here.

Next, make the cut feel more rugged by adding pitch movement. Some slices should be pitched down a few semitones, maybe three to seven, while one or two can go up a little for contrast. A final slice pitched low can act like a heavy stab. If everything is the same pitch, the idea gets flat fast. The contrast is what makes it feel alive.

If you’re working in Simpler, try Classic or One-Shot mode. You can also use filter movement or a tiny bit of glide if you want some slide-like motion. Just keep it subtle. This is about impact, not smooth vocal pop style.

Now let’s make the chop feel like a bassline element, not just a vocal edit. Layer it with a clean sub. A simple sine wave from Operator works perfectly. Keep it mono, keep it centered, and let it follow the main rhythm of your chop. The vocal brings the character in the mids, and the sub brings the weight underneath. That combo is what gives the drop its power.

On the bass layer, keep the sound clean. Use a sine oscillator, short decay, and low sustain. Add a little Saturator if you want harmonics, but don’t muddy the low end. If the low mids start piling up, use EQ Eight to carve space. In this style, clarity in the low end matters a lot.

Now add some movement and grime to the vocal chop. A useful chain is EQ Eight, Saturator, Auto Filter, Echo, and Utility. Use EQ Eight first to clean low rumble and maybe tame any harshness. Add Saturator for mild drive. Use Auto Filter to automate a little tension before the drop. Add a short Echo only on transition moments, not all the time. Utility can help keep the width under control if the stereo image gets too wide.

If you want a bit more digital grit, try Redux very lightly. Be careful though. Too much crunch and you lose the vocal’s identity. You want grime, not mush.

Now we’re at the part that really sells the whole thing: the rewind-worthy drop moment. A reload moment needs a phrase that feels like a statement. Build a short arrangement where the first bars tease the idea, then the full drop lands with authority. For example, use a couple bars of drums and filtered vocal hints, then strip out the sub, create tension, and bring in the full ragga cut with the bass.

A simple trick is to stop the drums for half a bar before the drop, leave one vocal hit hanging, maybe throw in a reverse cymbal or a delay tail, then slam everything back in. That kind of space makes the return hit harder. The silence is part of the impact.

Automation helps turn a loop into a real drop. Automate filter cutoff on the vocal chop to open things up as the drop arrives. Automate reverb or delay on the last word only. Automate pitch on a slice or two for a quick rise or fall. You can even automate Utility gain to create a slight pre-drop dip, which makes the drop feel bigger by contrast.

One of the most useful teacher tips here is to check the loop both with and without bass. Sometimes the chop sounds great alone, but once the sub enters it becomes too busy. If that happens, simplify the chop, shorten the slices, or leave more empty space.

Also do a quick mono check. If the energy disappears in mono, narrow the width or simplify the effects. For this kind of bass music, the low end should stay focused and centered.

Let’s talk about a few common mistakes. First, over-chopping. If every syllable is random, the phrase loses its identity. Keep one recognizable hook and vary around it. Second, too much low end in the vocal sample. High-pass it so it doesn’t clash with the sub. Third, no rhythmic pocket. If the chop doesn’t lock with the drums, it won’t feel like drum and bass. Fourth, too much reverb. That can smear the attack and ruin the drop. Fifth, flat pitch choices. Pitch contrast is what gives the phrase movement. And sixth, weak arrangement. A good loop still needs a clear intro, build, drop, and reload-style moment.

If you want the sound darker and heavier, use saturation instead of just turning things louder. Drum Buss, Overdrive, and Saturator can give you attitude without killing the groove. Keep the chop percussive by shortening the slices. Add metallic layers or little foley hits if you want more rave texture. And remember, silence can be powerful. Dropping the bass out for a beat before the return is often more effective than adding more sounds.

Here’s a simple workflow if you ever get stuck. Build in this order: drums, one vocal hit, a second vocal response, bass layer, effects, then arrangement. That keeps the session from getting messy too early and helps you focus on the groove first.

For practice, try building a two-bar ragga cut drop at 172 BPM. Pick one short phrase, slice it into four to eight pieces, create a rhythm using only those slices, and add a sine sub that follows the important hits. Process the chop with EQ Eight, Saturator, and Auto Filter. Then add one transition effect, like an Echo throw or a reverse sound. Finish with a mini arrangement: one bar intro, one bar tension, then two bars of drop.

If you want a slightly bigger challenge, make the last hit in bar two pitch down, delay slightly, and lead into a drum fill. That’s a classic reload setup.

And that’s the core idea: a ruffneck ragga cut slice is all about attitude, rhythm, and contrast. Slice the vocal, keep the phrase recognizable, leave space for the drums, support it with a clean sub, and arrange it so the drop feels like it demands a rewind.

If it makes you want to shout reload, you’re on the right track.

mickeybeam

Go to drumbasscd.com for +100 drum and bass YouTube channels all in one place - tune in!

Generating PDF preview…