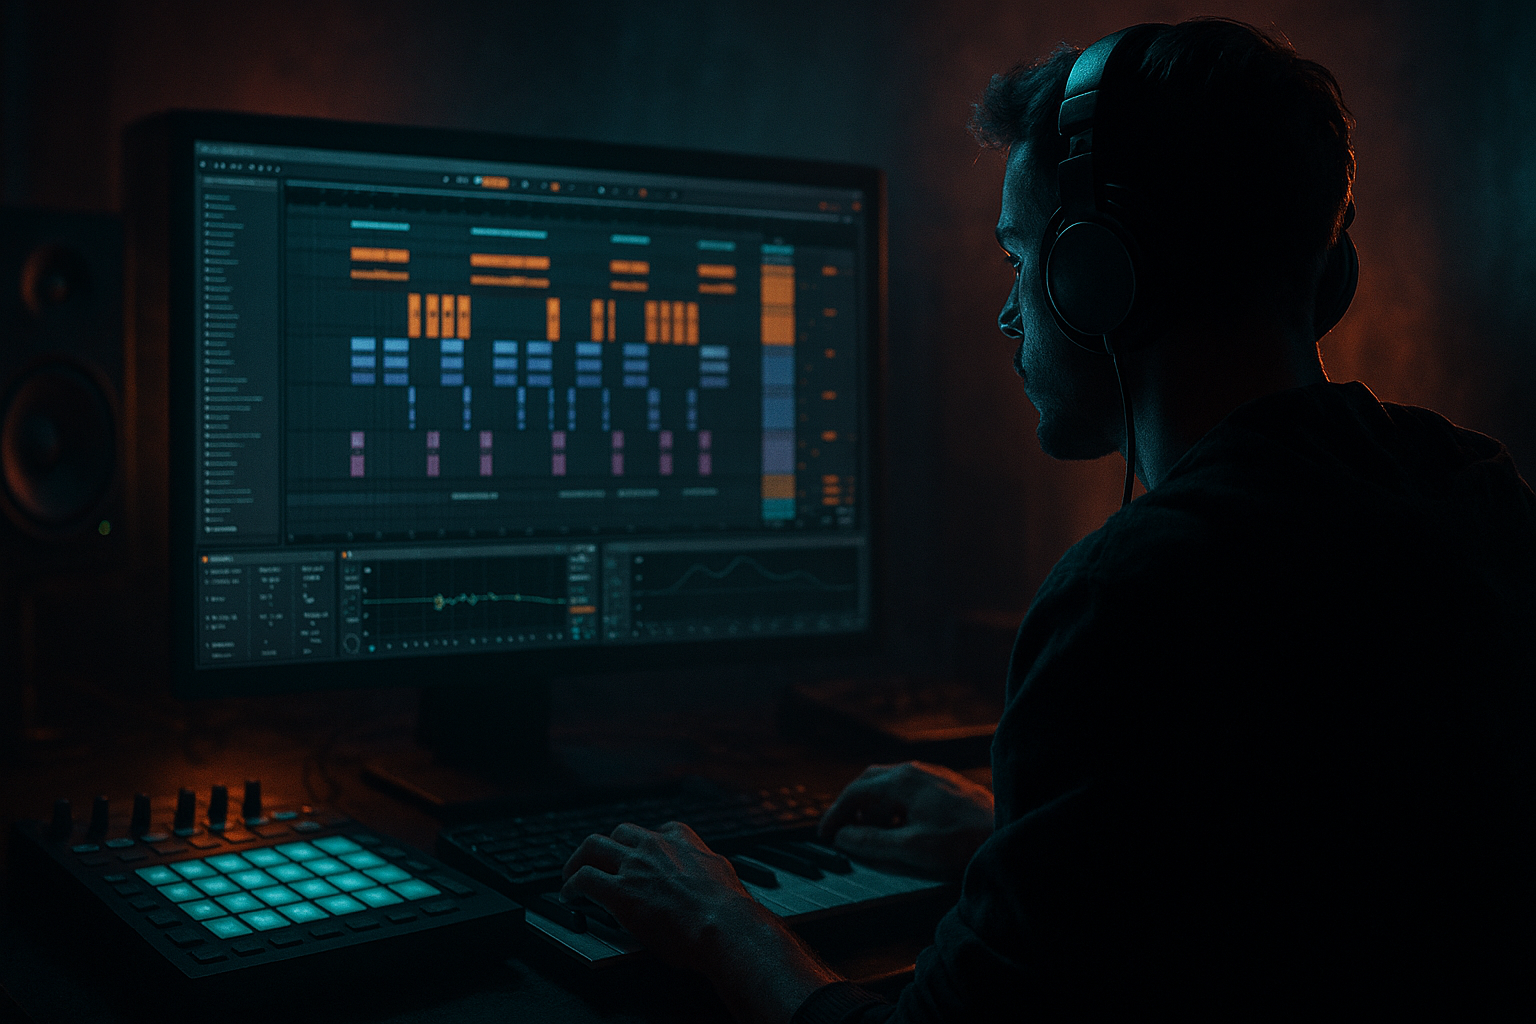
DNB COLLEGE

Drum & Bass Ableton Live 12 Tutorials

LESSON DETAIL

Short roller arrangements masterclass at 170 BPM (Intermediate)

An AI-generated intermediate Ableton lesson focused on Short roller arrangements masterclass at 170 BPM in the Arrangement area of drum and bass production.

Back to lessons
Short roller arrangements masterclass at 170 BPM (Intermediate) cover image

Narrated lesson audio

The voice track includes the tutorial plus extra teacher commentary.

Open audio file

Main tutorial

```markdown

Short Roller Arrangements Masterclass @ 170 BPM (Ableton Live) 🥁⚡️

Level: Intermediate • Category: Arrangement • Genre: Drum & Bass / Jungle / Rollers

---

1) Lesson overview

A “short roller” is a compact DnB idea (typically 16–32 bars) that feels like a full track moment: tight drums, rolling bass, forward momentum, and quick, purposeful transitions. The goal is maximum impact with minimal length—perfect for DJ tools, doubles, edits, TikTok/short content, or building blocks for a full tune.

In this lesson, you’ll learn a repeatable arrangement blueprint for 170 BPM rollers in Ableton Live, focusing on:

  • Bar-level tension/release
  • Micro-variations (the secret sauce)
  • Transitional ear candy (fills, impacts, risers)
  • Energy shaping with automation + stock devices
  • ---

    2) What you will build

    A 32-bar short roller at 170 BPM with:

  • 8-bar intro switch (DJ-friendly)
  • 16-bar main roller drop
  • 8-bar exit / turnaround (loops cleanly or sets up a larger arrangement)
  • Core elements:

  • Drum rack: kick, snare, hats, rides, ghost notes, fills
  • Rolling bass (reese or wobble) with movement
  • Minimal hook (stab/vocal chop/texture)
  • 3–5 transition tools: impacts, sweeps, noise, reverse, fill
  • ---

    3) Step-by-step walkthrough

    Step 0 — Session setup (2 minutes)

    1. Set tempo: `170 BPM`

    2. Time signature: `4/4`

    3. In Arrangement View, create markers:

    - `1–9` Intro (8 bars)

    - `9–25` Main (16 bars)

    - `25–33` Exit (8 bars)

    Workflow tip: Color-code groups: DRUMS, BASS, MUSIC, FX, MASTER.

    ---

    Step 1 — Build a roller drum foundation (bars 9–25)

    You need a drum loop that can stay exciting for 16 bars without “changing the beat” too much.

    #### A) Core pattern (classic 2-step roller)

  • Kick: Bar grid in 1/16
  • - Put kick on `1.1.1` and a second kick around `1.3.1` (or slightly before with groove).

  • Snare: solid backbeat
  • - `1.2.1` and `1.4.1` (every bar)

  • Closed hats: 1/16s or 1/8s depending on vibe
  • Ghost snare: subtle hits around `1.2.3` / `1.4.3` (low velocity)
  • #### B) Ableton devices (tight + punchy)

    On your Drum Group:

    1. Drum Buss

    - Drive: `5–15%` (taste)

    - Boom: `20–40 Hz` (if kick is light) OR keep off if sub is big

    - Transients: `+5 to +20`

    2. EQ Eight

    - High-pass (gentle) around `20–30 Hz` (clean rumble)

    - Dip mud: `200–400 Hz` if boxy

    3. Glue Compressor

    - Attack: `3–10 ms`

    - Release: `Auto`

    - Ratio: `2:1`

    - Gain reduction: ~`1–2 dB`

    DnB rule: If your snare doesn’t feel “locked,” fix it before adding more layers.

    ---

    Step 2 — Add the “rolling” movement with ghost notes + percussion

    This is where the loop becomes a roller instead of a basic 2-step.

    1. Ghost snare lane (same snare sample or a tighter layer)

    - Velocity: `15–45` (keep it quiet)

    - Slightly early placement on a few hits (2–8 ms) for pull

    2. Ride or shaker layer

    - Put a ride on offbeats or a shuffled 1/16 pattern

    3. Perc hits (1–2 sounds max)

    - Rim / wood / foley tick: place sparingly, e.g. every 2 bars

    Ableton trick: Add Groove Pool groove (e.g. MPC swing) lightly:

  • Amount: `10–25%`
  • Apply to hats + ghosts, keep kick/snare mostly straight for power.
  • ---

    Step 3 — Bass that drives the arrangement (the “engine”) 🔊

    For a short roller, bass must provide movement and phrasing.

    #### A) Bass sound approach (simple but effective)

    Use one of these:

  • Reese: wide mids + controlled sub
  • Wobble/stepper: automated filter/LFO movement
  • Jungle subs: clean sine with mid layer
  • #### B) Stock Ableton chain (solid starting point)

    On a Bass Group with two tracks:

    Track 1: SUB

  • Instrument: Operator
  • - Osc A: Sine

    - Envelope: fast attack, medium release (avoid clicks)

  • EQ Eight: low-pass around `80–120 Hz` (keep it pure)
  • Compressor (Sidechain from kick)
  • - Ratio `4:1`, Attack `1–5 ms`, Release `60–120 ms`

    - Aim for `2–4 dB` duck

    Track 2: MID BASS

  • Instrument: Wavetable (or Operator/Simpler)
  • - Start with a saw-ish wavetable

  • Auto Filter
  • - 12dB or 24dB

    - Automate cutoff rhythmically (more below)

  • Saturator
  • - Drive `3–8 dB`, Soft Clip ON

  • EQ Eight
  • - High-pass around `120 Hz` (leave room for sub)

  • Optional: Chorus-Ensemble (light) or Phaser-Flanger for motion
  • #### C) Arrangement-minded bass phrasing (16 bars)

    Program a bassline that has:

  • A phrase (bars 9–17): establishes groove
  • A’ phrase (bars 17–25): same groove, 2–3 changes
  • Practical changes that work:

  • Change the last 1 bar of each 4-bar block (a “turnaround” bar)
  • Add a call/response: stab on bar 2, answer on bar 4
  • Automate mid-bass filter slightly higher every 8 bars
  • Automation suggestion (MID BASS Auto Filter):

  • Bars 9–13: cutoff ~`200–600 Hz` movement
  • Bars 13–17: slightly brighter peaks (~`800–1.2kHz`)
  • Bars 17–25: introduce 1–2 “open” moments hitting `1.5–2.5kHz` (briefly)
  • ---

    Step 4 — Build the short roller arrangement (32 bars) 🎛️

    Here’s a clean blueprint that feels “DJ-ready”:

    #### Bars 1–9 (8 bars) — Intro switch

    Goal: mixable and sets the tone.

  • Start with hats + texture (noise bed or vinyl crackle)
  • Bring in kick/snare by bar 3 or 5
  • Tease bass (high-passed) in bars 7–8
  • Practical Ableton moves:

  • On bass group, automate EQ Eight HPF from `200 Hz → 40 Hz` over bars 7–8.
  • Add a reverb throw on a vocal stab at bar 8:
  • - Hybrid Reverb (short plate)

    - Automate send up just for that hit.

    #### Bars 9–25 (16 bars) — Main roller drop

    This is your “statement.”

  • Full drums + bass
  • Add a minimal hook (one stab, one vocal chop, or one texture)
  • Make micro-variations every 2 bars so it never loops lazily
  • Micro-variation checklist (pick 1–2 every 2 bars):

  • Remove hats for half a bar then slam back
  • Add a tiny snare flam (two hits 20–40 ms apart)
  • Add a kick ghost very low velocity
  • Add a reverse cymbal into snare on bar endings
  • Change bass note length on the last 1/4 of bar 4, 8, 12, 16
  • #### Bars 25–33 (8 bars) — Exit / turnaround

    Options:

  • DJ tool exit: strip to drums + atmosphere for clean loop-out
  • Tease next section: keep bass but filter it down
  • Practical:

  • Bars 25–29: keep groove, reduce hook elements
  • Bars 29–33: automate a low-pass on master music group (not master master) to darken + add an impact at bar 33
  • ---

    Step 5 — Transitions that feel “pro” (without overdoing it) 💥

    Use 3–5 FX elements total, placed intentionally.

    A) Classic DnB transition toolkit

    1. Impact (bar 9 and/or 25)

    2. Noise riser (last 1 bar before drop)

    3. Reverse cymbal into snare

    4. Tape stop or pitch drop (sparingly)

    5. Drum fill (last 1/2 bar of every 8)

    B) Ableton stock chain for a riser

    On an audio track with white noise:

  • Auto Filter (HP → BP sweep up)
  • Redux (very light for grit)
  • Hybrid Reverb (small, 10–20% wet)
  • Automate volume to peak at drop
  • C) Quick fill method (fast + clean)

    Duplicate your drum loop for the last 1/2 bar of bar 16 and:

  • Remove kick
  • Add extra snare hits (1/16 ramp)
  • Add Reverb (or Hybrid Reverb) just on the fill, then hard cut at drop
  • ---

    Step 6 — Energy shaping with automation (the “arrangement glue”)

    Short rollers succeed when they breathe.

    Automate these (subtle moves):

  • Hat bus EQ Eight: tiny shelf boost `+1–2 dB` at `8–12 kHz` in the second 8 bars
  • Drum Buss Drive: up by `1–3%` in bars 17–25
  • Bass mid Auto Filter: slightly wider/brighter in bars 17–25
  • Reverb send throws: only on specific snare hits (bar 8, 24, 32)
  • Pro workflow: Use Utility for quick “mute automation”:

  • Put Utility on your hook track; automate Gain to `-inf` for quick dropouts.
  • ---

    4) Common mistakes

    1. No phrasing: A 16-bar loop repeated with zero changes feels amateur. Add planned micro-variations.

    2. Overcrowded mids: Reese + wide pads + vocals = muddy. Keep the hook minimal.

    3. Sub clashes with kick: If the low end feels unstable, check:

    - Sidechain timing (release too long = pumping)

    - Kick fundamental vs sub note collisions

    4. Too many FX: One good riser + one impact beats 10 random whooshes.

    5. Snare not consistent: If your snare changes tone because of processing or layering, the groove loses authority.

    ---

    5) Pro tips for darker/heavier DnB 🕶️

  • Parallel distortion on drum room:
  • Create a return track with Saturator → EQ Eight (band-limit) → Compressor. Blend in quietly for grit.

  • Dark atmosphere bed:
  • Use Granulator III (if available) or Simpler with a field recording, then:

    - Auto Filter low-pass

    - Hybrid Reverb long/dirty tail

    Keep it quiet but constant.

  • Reese control:
  • Put Utility on MID BASS and automate Width:

    - Verses/intro: `0–30%`

    - Drop moments: `60–100%`

    (Sub stays mono.)

  • Aggressive fills:
  • For the last 1/2 bar before a switch, use Beat Repeat on drums:

    - Interval: `1 Bar`

    - Grid: `1/16`

    - Chance: `10–25%` (or automate On)

  • Tension with silence:
  • Remove the kick for 1/4 bar before a drop hit. That tiny “gap” can feel massive at 170.

    ---

    6) Mini practice exercise (20–30 minutes)

    Goal: Make a 16-bar roller that feels “released” and DJ-ready.

    1. Create a 16-bar loop (bars 1–17) with drums + bass.

    2. Add micro-variation rules:

    - Every 2 bars: change one drum element (mute hat for 1/2 bar, add ghost, etc.)

    - Every 4 bars: add a bass turnaround note or rhythmic change

    3. Add exactly 3 FX:

    - 1 riser (bar 16)

    - 1 impact (bar 1 or bar 9)

    - 1 reverse cymbal (into snare on bar 8 or 16)

    4. Bounce a quick export and listen on loop:

    - If it gets boring by the 6th repeat, add two more small variations, not a new section.

    ---

    7) Recap ✅

  • Short rollers succeed through phrasing + micro-variation, not constant new parts.
  • Use a 32-bar blueprint: Intro (8) → Main (16) → Exit (8).
  • Keep hooks minimal, focus on drum authority and bass movement.
  • Stock Ableton tools like Drum Buss, Glue Compressor, EQ Eight, Auto Filter, Utility, Hybrid Reverb can get you to a pro result fast.
  • Dark/heavy energy comes from controlled distortion, atmospheres, and intentional gaps, not just louder sounds.

If you want, tell me your sub style (clean sine vs heavy sub) and whether you’re going jungle-leaning or modern neuro-ish, and I’ll give you a tailored 32-bar arrangement template with exact bar-by-bar variation ideas.

```

Ask GPT about this lesson

Chat with the lesson tutor, get follow-up help, or use quick actions.

Bigup 👽 Ask me anything about this lesson and I’ll answer in context.

Narration script

Show spoken script
Welcome in. This is the Short Roller Arrangements Masterclass at 170 BPM, intermediate level, built for Ableton Live Arrangement View. We’re making a short roller: a compact 16 to 32 bar idea that still feels like a full, finished track moment. Tight drums, rolling bass, forward momentum, and transitions that sound intentional.

Think of this as a DJ tool, a double-ready loop, or a building block you can expand into a full tune later. The big goal today is maximum impact with minimal length, and the secret isn’t adding more parts. It’s phrasing, micro-variation, and really smart “what disappears” moments.

Alright, set your tempo to 170 BPM, keep it 4/4, and go to Arrangement View.

First, let’s set up the runway so you don’t get lost. Drop locators and name them:
Bars 1 to 9: Intro, 8 bars.
Bars 9 to 25: Main, 16 bars.
Bars 25 to 33: Exit, 8 bars.

And here’s an extra coach move that saves you from endless tweaking: add a few more bar targets as locators inside the main section. Name them like:
Bar 8: pre-drop tension.
Bar 12: micro switch.
Bar 16: phrase turnaround.
Bar 24: second lift.
Bar 32: exit hook-down.

Now color-code your groups: DRUMS, BASS, MUSIC, FX. You’re basically telling your future self, “This is organized. This is finishable.”

Next, we build the foundation: drums for the main drop, bars 9 through 25. You want a loop that stays exciting for 16 bars without changing the beat every five seconds.

Start with a classic two-step roller skeleton.
Kick on the 1, and then a second kick around beat 3. You can place it right on 3, or a touch early with groove later.
Snare on 2 and 4, every bar, no exceptions.
That snare is your anchor. If the snare doesn’t feel locked, do not move on. Fix that first. In drum and bass, the snare is authority.

Add closed hats. You can go 1/8 if you want it steppy and minimal, or 1/16 if you want it more pushing. Either way, keep it consistent for now. We’ll make it interesting with micro-variation later.

Then add subtle ghost snares around the “and” after 2 and the “and” after 4. Keep velocity low. This is important: ghost notes should be felt more than heard. If you can clearly identify every ghost hit, they’re too loud.

Now tighten and glue the drum group with stock Ableton tools.
Put Drum Buss on the drum group. Drive somewhere around 5 to 15 percent, depending on how dirty you want it. Transients up a bit, maybe plus 5 to plus 20. Boom can be great if your kick is thin, but if your sub is heavy, be careful. You don’t want a kick boom fighting your sub.

Then EQ Eight on the drums. High-pass gently around 20 to 30 Hz just to clear rumble. If it’s boxy, dip a bit around 200 to 400.

Then Glue Compressor: slow-ish attack, like 3 to 10 milliseconds, release on Auto, ratio 2 to 1. You’re not trying to crush it. Aim for one to two dB of gain reduction, just to weld the kit.

Now, the roller part: movement. This is where a two-step becomes a roller.

First, ghost note lane refinement. Keep velocities maybe 15 to 45. And here’s a real pro-feeling trick: micro-timing. Pick a few ghost notes and nudge them slightly early, literally a couple milliseconds. Two to eight milliseconds. That tiny “pull” creates urgency at 170.

If you don’t want to manually nudge notes forever, do it at the track level. Use track delay in milliseconds on the ghost or percussion track. Or apply a groove only to hats and ghosts, not your kick and snare. That way the groove moves, but the backbone stays punchy.

Bring in a ride or shaker layer. Offbeats work great, or a lightly shuffled 1/16. And add one or two percussion hits max. Rim, wood, foley tick. Sparingly. Like once every two bars. This is punctuation, not another drum kit.

Now let’s talk about grooves for a second. Use Groove Pool lightly. MPC swing, subtle. Amount around 10 to 25 percent. Apply it to hats and ghosts. Keep kick and snare mostly straight so they still smack.

Cool. Drums are rolling. Now we build the engine: bass.

For a short roller, the bass has to do two jobs at once. It has to be the sound, and it has to be the arrangement. Meaning: bass movement and phrasing are what make 16 bars feel like a journey.

Set up a bass group with two tracks: SUB and MID.

On SUB, use Operator with a sine wave. Fast attack, medium release so it doesn’t click. Then EQ Eight low-pass around 80 to 120 Hz. Keep that sub clean. Then add a Compressor sidechained from the kick. Ratio 4 to 1, attack 1 to 5 ms, release 60 to 120 ms. Aim for two to four dB of ducking. Consistent, not dramatic.

On MID BASS, use Wavetable or Operator or even Simpler. Start with something saw-ish. Then Auto Filter. Choose 12 or 24 dB slope. This filter is going to be a big part of your arrangement. Add Saturator, drive 3 to 8 dB, soft clip on. EQ Eight, high-pass around 120 Hz so the sub has its own lane. If you want extra movement, add Chorus-Ensemble very lightly, or Phaser-Flanger, but keep it controlled.

Now write your bassline in phrases.
Bars 9 to 17 is your A phrase: establish the groove.
Bars 17 to 25 is your A-prime phrase: same idea, but with two or three changes.

Here are changes that always work in rollers:
Change the last bar of each 4-bar block. That’s your turnaround bar.
Add call and response: a hit on bar 2, an answer on bar 4.
Shorten the last note at the end of a bar to create a pocket, like a breath before the loop resets.
Or replace one hit with silence. Silence is groove at this tempo.

Now automate the MID BASS filter like an arranger, not like a sound designer showing off.
Bars 9 to 13, keep the movement more closed: maybe it peaks around 200 to 600 Hz.
Bars 13 to 17, let it get a bit brighter: peaks up toward 800 to 1.2k.
Bars 17 to 25, give it one or two brief “open” moments, where it pops to 1.5k or even 2.5k for just a second. Short, controlled flashes. That reads as lift without changing the song.

If you want a super efficient method, build a one-knob “open the reese” macro on the MID track: map filter cutoff, saturator drive, a tiny bit of Erosion, and Utility width. Then for bars 17 to 25, you draw one automation line that lifts the whole mid-bass energy. Fast, musical, repeatable.

And quick note: keep anchors. In the main drop, choose two anchor elements that stay stable the whole time. I recommend snare tone and level, and sub rhythm. Everything else can flex, but those two make the drop feel trustworthy.

Now we arrange the full 32 bars.

Bars 1 to 9: the intro switch. DJ-friendly. Mixable.
Start with hats and texture. A noise bed, vinyl crackle, atmosphere. Something quiet but constant.
Bring in kick and snare by bar 3 or bar 5. Keep it clean.
Then tease the bass in bars 7 to 8, but high-passed. Here’s the practical Ableton move: automate an EQ Eight high-pass on the bass group from around 200 Hz down to about 40 Hz over those two bars. That’s your “doors opening” into the drop.

And add one little ear candy moment: a reverb throw on a vocal stab or a tiny hit at bar 8. Use Hybrid Reverb, short plate, and automate the send up just for that hit. Then back down. That kind of detail feels expensive.

Bars 9 to 25: main roller drop.
Full drums, full bass. Add one minimal hook. One stab, one vocal chop, or one texture. Just one. If you add three hooks, you’re going to crowd the mids and your roller will lose its punch.

Now, micro-variations. This is the entire difference between “loop” and “record.”
Every two bars, choose one or two small changes. Not a new section. Just a tiny switch so the ear stays engaged.

Here are great micro-variations:
Mute hats for half a bar, then slam them back.
Add a tiny snare flam: two hits about 20 to 40 milliseconds apart.
Add a super low velocity kick ghost.
Put a reverse cymbal into the snare at the end of a phrase.
Change bass note length in the last quarter of bar 4, 8, 12, and 16.

If you want a system you can repeat every time, use a “2-bar rotation.”
Every two bars, pick one change from drums, one from bass, and optionally one from FX.
Drums: maybe swap one closed hat hit to an open hat, just once. Or add a shadow snare hit right after the backbeat. Or nudge one ghost slightly early and raise velocity a tiny bit.
Bass: shorten an end note, insert a rest, or do a one-hit octave jump in the mid while the sub stays steady.
FX: a single reverse tail into the snare, or a delay throw on the stab only on bars 4, 8, 12, 16, or a one-beat micro riser instead of a full bar.

That keeps constant motion without that amateur vibe of “new section every four bars.”

Now bars 25 to 33: the exit or turnaround.
You have two choices. A DJ tool exit, where you strip down to drums and atmosphere so it loops out cleanly. Or a tease, where you keep bass but filter it down so it feels like it’s setting up something bigger.

A simple plan:
Bars 25 to 29, keep the groove but reduce hook elements.
Bars 29 to 33, automate a low-pass on your music group, not the master. Darken it gradually. Then add one impact at bar 33.

And here’s a loop-friendly upgrade: if your 32 bars must loop seamlessly, save your most dramatic switch for bar 24 or bar 32, not bar 25. That way the loop point still feels stable, but there’s still a “woah” moment inside the loop.

Now transitions. Pro, not overloaded.
Use three to five FX elements total across the whole 32 bars. Total. Not per section.

The core toolkit:
Impact at bar 9 and/or bar 25.
Noise riser in the last bar before the drop.
Reverse cymbal into a snare.
Optional tape stop or pitch drop, but sparingly.
A drum fill: last half bar of every 8, but not the same one every time.

For a stock Ableton riser, you can literally use white noise on an audio track, then Auto Filter sweeping, maybe HP to BP up, a touch of Redux for grit, Hybrid Reverb small and lightly wet, and automate volume to peak right at the drop.

For a fast fill: duplicate your drum loop for the last half bar of bar 16, remove the kick, ramp extra snare hits in 1/16, add reverb just on that fill, then hard cut the reverb at the drop. Clean and aggressive.

Now energy shaping. This is arrangement glue.
Short rollers succeed when they breathe.

Automate subtle stuff:
On the hat bus, a tiny high shelf boost, like plus one or two dB at 8 to 12k, in the second half of the drop.
Drum Buss drive up by one to three percent in bars 17 to 25.
Mid-bass filter a bit wider and brighter in bars 17 to 25.
And reverb send throws only on specific snare hits: bar 8, bar 24, bar 32. Not everywhere.

And use Utility as your quick mute tool. Put Utility on the hook track and automate gain to negative infinity for dropouts. That creates tension instantly, and it’s way faster than chopping clips.

Two more pro checks before we wrap.
One: check mono earlier than you think. Put Utility on a monitor group or even temporarily on master and flip width to zero. If the roller collapses, usually your mid-bass is too wide and masks the snare crack, or your hats only exist on the sides.
Two: remember your arrangement is mostly what disappears, not what gets added. At 170, your listener’s ear overloads fast. Those quarter-bar and half-bar removals are your punctuation marks.

Common mistakes to avoid while you build:
If you have no phrasing and it’s just a 16-bar loop repeated, it will feel amateur. Plan micro-variations.
If your mids are overcrowded, reduce the hook. One hook. Minimal.
If sub clashes with kick, check sidechain timing and note collisions.
If you’re using too many FX, cut them. One good riser beats ten random whooshes.
If your snare tone changes because of layering or processing, your groove loses authority. Keep that snare consistent.

Now a quick practice challenge you can do right after this:
Build a 16-bar roller first. Drums and bass only. Then enforce rules:
Every two bars, one small drum change.
Every four bars, one bass turnaround change.
Add exactly three FX: one riser on bar 16, one impact on bar 1 or bar 9, and one reverse cymbal into a snare on bar 8 or 16.
Then export and loop it. If it gets boring by the sixth repeat, don’t add a new instrument. Reduce layers first, then add two tiny variations.

And if you want the full homework mode: make the 32-bar version with a strict variation budget. No new instruments after bar 9. Every four bars, a deliberate negative space moment. Two different turnarounds at bar 16 and bar 24. Then do a DJ test: loop bars 9 to 25 for three minutes. If it gets tiring, simplify, then vary.

Alright. Recap.
A short roller succeeds through phrasing and micro-variation, not constant new parts.
Use the 32-bar blueprint: 8-bar intro, 16-bar main, 8-bar exit.
Keep hooks minimal. Focus on snare authority and bass movement.
And Ableton stock tools are enough: Drum Buss, Glue, EQ Eight, Auto Filter, Utility, Hybrid Reverb.

If you tell me what your sub style is—clean sine or heavy—and whether you’re going jungle-leaning or modern neuro-ish, I can map you a bar-by-bar variation schedule that fits your style and still loops perfectly.

mickeybeam

Go to drumbasscd.com for +100 drum and bass YouTube channels all in one place - tune in!

Generating PDF preview…