DNB COLLEGE

Drum & Bass Ableton Live 12 Tutorials

LESSON DETAIL

Signature jungle texture rack creation (Intermediate)

An AI-generated intermediate Ableton lesson focused on Signature jungle texture rack creation in the Sound Design area of drum and bass production.

Back to lessons
Signature jungle texture rack creation (Intermediate) cover image

Narrated lesson audio

The voice track includes the tutorial plus extra teacher commentary.

Open audio file

Main tutorial

```markdown

Signature Jungle Texture Rack Creation (Ableton Live) 🥁🌿

Skill level: Intermediate

Category: Sound Design (DnB/Jungle)

---

1. Lesson overview

In jungle and rolling DnB, “texture” is that constant moving grit behind the drums and bass: hiss, air, vinyl, room tone, distorted reese tails, tape wobble, subtle pitch drift, and chopped ambience. In this lesson, you’ll build a Signature Jungle Texture Rack in Ableton Live using mostly stock devices—a playable, automatable rack that sits behind your groove and instantly adds era-accurate jungle character.

You’ll end with a rack that can do:

  • Vinyl/tape noise beds
  • Filtered breaks ambience
  • Resampled “room” and “air” layers
  • Stereo movement + wow/flutter
  • Controlled saturation + transient shaping
  • One-knob macros for performance and arrangement
  • ---

    2. What you will build

    An Audio Effect Rack you can drop on:

  • a Drum Bus (breaks + tops)
  • a Return track (send textures from drums/bass)
  • or a dedicated Texture track
  • Rack architecture (high-level)

    Audio Effect Rack: “Jungle Texture”

  • Chain A: Noise/Vinyl Bed
  • Chain B: Break Air / Ghost Break
  • Chain C: Room/Resonant Layer
  • Chain D: Stereo Motion + Glue
  • All chains feed into a final “master” stage for consistent level and tone.

    ---

    3. Step-by-step walkthrough

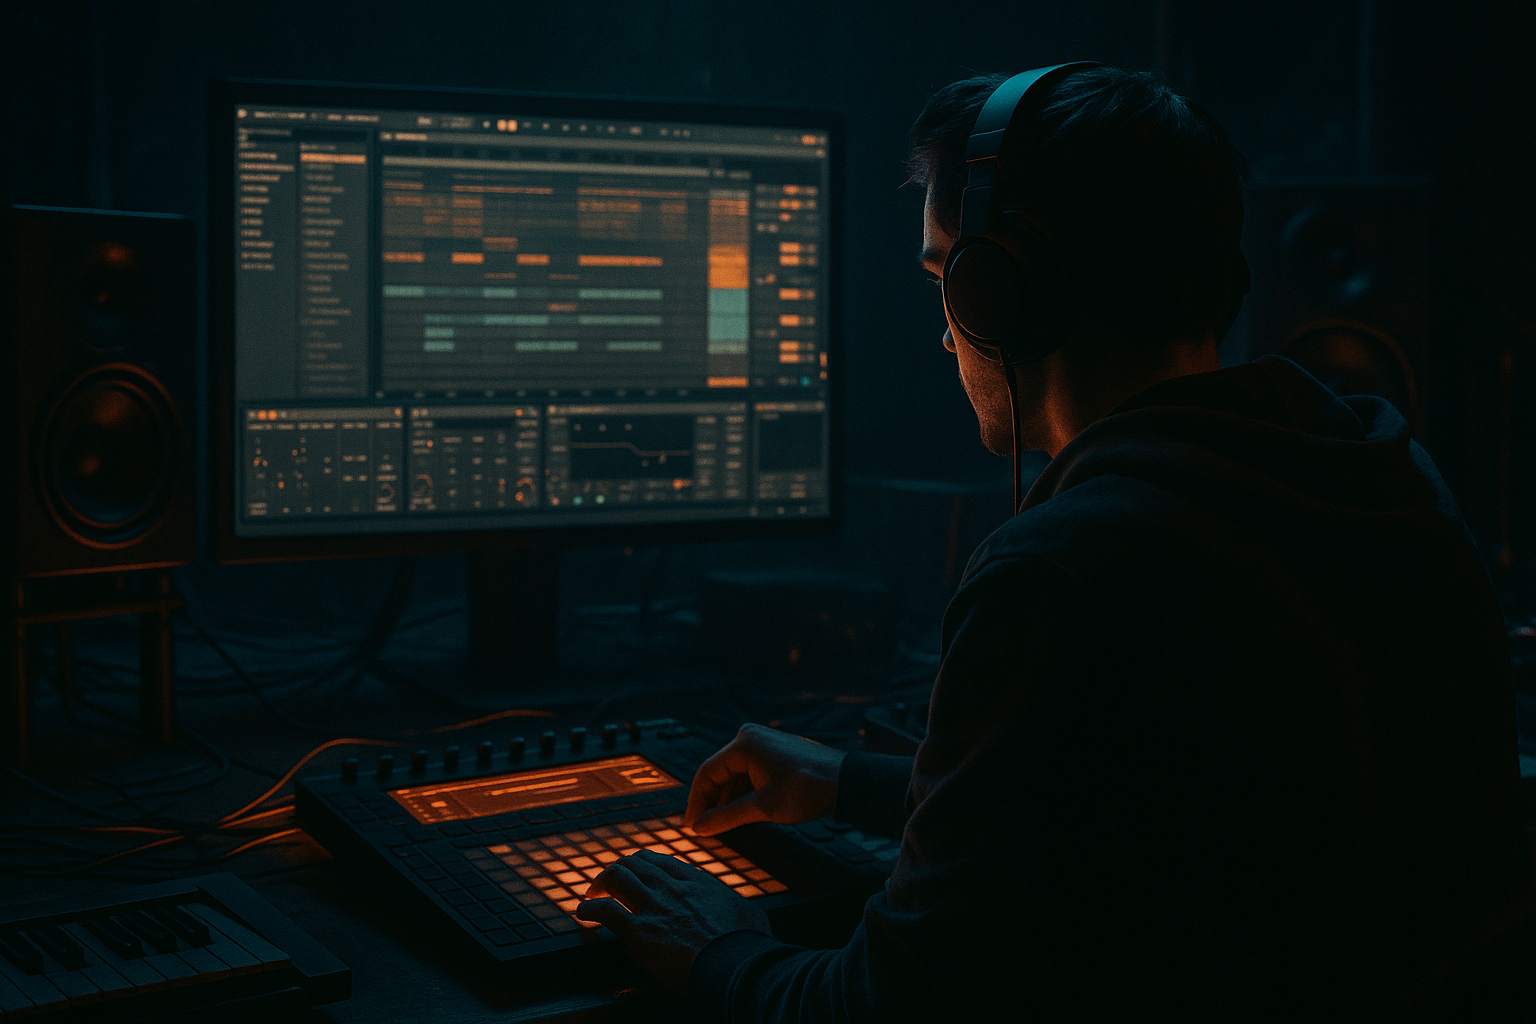
    Step 0 — Session context (so it sits right) 🎛️

    Before building, set a typical jungle/DnB environment:

  • Tempo: 165–174 BPM
  • Have a break (Amen, Think, etc.) or a modern break chop loop playing.
  • Have a sub/bass playing (simple sine or reese).
  • Textures should support the groove, not steal it.

    ---

    Step 1 — Create the rack shell

    1. Create an Audio Track called `TEXTURE RACK`.

    2. Drop an Audio Effect Rack on it.

    3. In the rack, click Show/Hide Chain List.

    4. Create 4 chains (right-click → Create Chain) and name them:

    - `A Vinyl`

    - `B Break Air`

    - `C Room/Reso`

    - `D Motion/Glue`

    You can feed this track in two ways:

  • Option 1 (recommended): Set `TEXTURE RACK` to Audio From → Drum Bus (or a group) and blend subtly.
  • Option 2: Use it as a Return (send from drums/bass).
  • ---

    Chain A — Vinyl/Noise Bed (the constant jungle dust) 🧼➡️🪵

    Step 2A — Source your noise

    You have a few solid options:

  • Use a vinyl noise sample (short loop)
  • Use field recordings (room tone, cassette hiss)
  • Or generate noise internally (less authentic but usable)
  • Practical method: Drop a short vinyl noise loop onto the `TEXTURE RACK` track in a clip slot and loop it.

    Then resample later (classic workflow).

    Step 2B — Process the noise with stock devices

    On chain `A Vinyl`, add:

    1. EQ Eight

    - HP filter: 24 dB/oct @ 180–300 Hz (remove rumble)

    - Gentle shelf: +1 to +3 dB @ 8–12 kHz (air if needed)

    2. Auto Filter

    - Mode: Band-Pass

    - Freq: 2.5–6 kHz

    - Resonance: 0.60–0.85

    - Envelope: 0 (we’ll animate with LFO)

    - LFO: Amount 10–25%, Rate 0.10–0.30 Hz, Phase 180°

    3. Saturator

    - Mode: Soft Clip ON

    - Drive: 2–6 dB

    - Output: adjust to match

    4. Utility

    - Width: 120–160% (keep noise wide)

    - Gain: pull down so it’s subtle

    Goal: You should feel it when muted, but not “hear noise” as a lead element.

    ---

    Chain B — Break Air / Ghost Break (the “jungle haze”) 🌫️

    This chain uses a break as texture—filtered, compressed, and tucked behind your main drums.

    Step 3B — Create the ghost break layer

    1. Duplicate your break loop to the `TEXTURE RACK` input path (or route from drums).

    2. On chain `B Break Air`, add:

    Device chain:

    1. EQ Eight

    - HP: 24 dB/oct @ 350–700 Hz

    - Dip harshness: -2 to -5 dB @ 3–5 kHz if it bites

    2. Compressor

    - Ratio: 4:1

    - Attack: 10–30 ms

    - Release: 80–180 ms (or Auto)

    - Aim for: 4–8 dB GR (make it steady)

    3. Drum Buss (stock, super useful)

    - Drive: 5–15%

    - Crunch: 10–25%

    - Boom: OFF (usually)

    - Transients: -5 to +5 (often slightly negative for smear)

    4. Auto Filter

    - Mode: High-Pass

    - Cutoff: 500–1.2 kHz

    - LFO: Amount 5–15%, Rate 0.06–0.20 Hz (slow movement)

    Why this works: old jungle records often have a constant break-derived “air layer” from resampling, compression, and bandwidth limitation.

    ---

    Chain C — Room/Reso Layer (small room bite + metallic vibe) 🏚️

    This creates that slightly resonant space behind hits—like your drums are in a gritty room or sampled from tape.

    Step 4C — Build the room tone + resonances

    On chain `C Room/Reso`, add:

    1. Hybrid Reverb

    - Algorithm: Room or Chamber

    - Decay: 0.4–1.2 s

    - Predelay: 5–20 ms

    - Size: Small to Medium

    - High Cut: 4–7 kHz

    - Low Cut: 200–500 Hz

    - Dry/Wet: 15–30%

    2. Corpus (this is the secret weapon for “metal/box” character)

    - Mode: Tube or Plate

    - Tune: start around 120–220 Hz (or try ~180 Hz)

    - Decay: 0.2–0.8 s

    - Dry/Wet: 5–20%

    3. Saturator or Overdrive

    - Keep it subtle: 1–4 dB drive

    4. EQ Eight

    - Notch any nasty ring: sweep and cut -3 to -8 dB if it whistles

    - HP: 24 dB/oct @ 200–400 Hz

    Result: a controlled “boxy room + resonant edge” that feels sampled and physical.

    ---

    Chain D — Stereo Motion + Glue (movement without losing punch) 🌀

    This chain adds “record-like” motion and cohesion.

    Step 5D — Movement and glue

    On chain `D Motion/Glue`, add:

    1. Chorus-Ensemble

    - Mode: Chorus

    - Rate: 0.15–0.40 Hz

    - Amount: 10–25%

    - Width: 120–200%

    - Mix: 10–25%

    2. Redux (classic jungle grit, but easy to overdo)

    - Bits: 10–14 (start at 12)

    - Downsample: 1.5–4.0

    - Dry/Wet: 5–15%

    3. Glue Compressor

    - Attack: 3–10 ms

    - Release: Auto

    - Ratio: 2:1

    - Soft Clip: ON

    - Aim: 1–3 dB GR (just to knit)

    If this chain makes your drums feel smaller, back off Redux and widen less.

    ---

    Step 6 — Rack “Master” stage (control + macros) 🎚️

    After the chains (outside the chain list, on the rack output), add:

    1. EQ Eight

    - HP: 30–60 Hz (keep sub clean)

    - Gentle tilt if needed (tiny moves)

    2. Limiter

    - Ceiling: -1.0 dB

    - Only catching occasional peaks (1–2 dB max)

    Step 7 — Map performance macros (your signature controls) 🧩

    Create 8 macros and map them like this:

    1. Macro 1: Texture Amount

    - Map to each chain volume (A/B/C/D)

    - Set sensible ranges so it never overwhelms

    Example: A max -18 dB, B max -16 dB, C max -20 dB, D max -18 dB

    2. Macro 2: Air / Dust

    - Map to Chain A Auto Filter cutoff + EQ shelf

    3. Macro 3: Ghost Break Presence

    - Map to Chain B EQ Eight HP cutoff (350 → 900 Hz)

    4. Macro 4: Room Size

    - Map to Hybrid Reverb Decay (0.4 → 1.2 s) and Dry/Wet (10 → 30%)

    5. Macro 5: Resonance

    - Map to Corpus Dry/Wet (0 → 20%) and Tune small range

    6. Macro 6: Movement

    - Map Chorus Amount (10 → 30%) + Rate (0.15 → 0.45 Hz)

    7. Macro 7: Grit

    - Map Saturator Drive (1 → 6 dB) + Redux Dry/Wet (0 → 15%)

    8. Macro 8: Mono Safe

    - Map a Utility at the end: Width (140% → 90%)

    Now save the rack: click disk icon → `Jungle Texture Rack.adg`.

    ---

    Step 8 — Arrangement ideas (make it musical) 🎼

    Textures shine when they change with sections:

  • Intro: high Texture Amount, more vinyl/room, less ghost break (tease groove).
  • Drop: reduce vinyl a bit, keep ghost break tucked, tighten room.
  • Mid-16 variation: increase Movement + Grit for 4 bars.
  • Breakdown: push Room Size + Air, automate a slow filter sweep down.
  • Final drop: slightly more ghost break presence for “lift” without adding new drums.
  • Automation suggestion: automate Macro 1 (Texture Amount) and Macro 3 (Ghost Break Presence) every 8 or 16 bars—subtle is enough.

    ---

    4. Common mistakes 🚫

    1. Too loud: texture should be felt more than heard. If you notice it as a separate layer, it’s likely too hot.

    2. Too much low-mid (150–500 Hz): this muddies bass + snares fast. High-pass aggressively.

    3. Over-widening: wide noise can collapse weirdly in mono. Use Macro 8 and check mono.

    4. Over-Reduxing: bit reduction can turn into fizzy harshness. Keep Dry/Wet low.

    5. Reverb eating punch: room layers should be filtered and short. Long decays blur groove.

    ---

    5. Pro tips for darker/heavier DnB 🖤

  • Sidechain the texture to the kick/snare:
  • Put a Compressor after the rack, sidechain from your drum group.

    - Ratio 3:1, Attack 2–10 ms, Release 80–140 ms, GR 2–5 dB

    Keeps texture present but out of the way.

  • Add “industrial” edge with Corpus + Saturator:
  • Small Corpus Decay + moderate Drive makes a menacing, metallic tail behind snares.

  • Reese tail texture:
  • Send your bass bus slightly into the rack (Return track setup). Filter it heavily (HP 300–700 Hz) and distort lightly—instant dark haze.

  • Dynamic control with Multiband Dynamics (stock):
  • Use it gently on the rack output to keep high fizz controlled in loud masters.

  • Resample for authenticity:
  • Record 8–16 bars of the texture rack to audio, then re-warp it with Beats mode and micro-chop. This gives that “sampled from a record” feeling.

    ---

    6. Mini practice exercise 🧪

    Goal: Build a 32-bar loop that evolves like a classic jungle arrangement.

    1. Make a 16-bar break loop (chopped Amen or Think) + sub bass.

    2. Add this rack on a texture track fed by your drum group.

    3. Automate:

    - Bars 1–8: Macro 1 at 35%, Macro 4 higher (roomy)

    - Bars 9–16: Macro 3 up slightly (ghost break comes forward)

    - Bars 17–24 (drop): Macro 1 down a touch, Macro 8 toward mono-safe

    - Bars 25–32: Macro 7 (Grit) up for 4 bars, then back

    4. Bounce/resample the texture track and fade it into the intro of a new idea.

    Deliverable: a 32-bar clip where the texture moves but never ruins drum clarity.

    ---

    7. Recap ✅

  • You built a Signature Jungle Texture Rack with 4 purposeful chains: Vinyl, Ghost Break Air, Room/Reso, Motion/Glue.
  • You mapped musical macros so it’s easy to automate across sections.
  • You learned how to keep textures band-limited, controlled, and DnB-appropriate—supporting the groove rather than fighting it.
  • Next step: resample and chop your own textures to create a personal “fingerprint” that shows up in every track.

If you want, tell me what subgenre you’re targeting (90s jungle, rollers, neuro, halftime) and what your main drum source is (Amen/Think, modern breaks, synthesized kit), and I’ll suggest a tuned macro range + a darker variant of the rack.

```

Ask GPT about this lesson

Chat with the lesson tutor, get follow-up help, or use quick actions.

Bigup 👽 Ask me anything about this lesson and I’ll answer in context.

Narration script

Show spoken script
Title: Signature Jungle Texture Rack Creation (Intermediate)

Alright, let’s build something you can drop into basically any jungle or rolling DnB project and instantly get that “moving grit behind the drums” vibe. Not the kind of texture that sounds like you accidentally left a noise sample playing… but the kind that makes the drums feel like they came off a record, got resampled twice, and lived in a room for 20 years.

This is an intermediate Ableton Live sound design lesson, and the goal is a Signature Jungle Texture Rack. It’ll be playable, automatable, and built mostly with stock devices. By the end you’ll have a rack with four chains: a vinyl or noise bed, a ghost break air layer, a room and resonance layer, and a motion plus glue layer. Then we’ll map macros so you can perform and arrange with it, instead of endlessly tweaking.

Before we start: set the scene so the rack makes sense in context. Put your tempo somewhere in that classic pocket, like 165 to 174 BPM. Have a break loop playing, Amen, Think, or any modern chopped break. And have a basic sub or reese running. Your texture should support the groove, not compete with it. If you’re ever unsure, mute the texture. The drums should still be the star.

Step one: create the rack shell.

Make a new audio track and name it TEXTURE RACK. Drop an Audio Effect Rack on it. Open the chain list, and create four chains. Name them A Vinyl, B Break Air, C Room/Reso, and D Motion/Glue.

Now decide how you want to feed the rack. The easiest, most controllable way is: set this TEXTURE RACK track to take audio from your Drum Bus or your drum group. That way it reacts to what your drums are doing, and it feels “printed” with the groove. Alternatively, you can do this as a return track and send drums or bass into it. Either works; for now, the drum-group input is the most straightforward.

Quick coach note before we dive into devices: gain staging inside racks is the difference between “this is a signature sound” and “why is this messy and unpredictable.” After you build each chain, we’re going to make sure each chain hits roughly similar loudness when soloed. That way, when you map the big Texture Amount macro, it behaves like an instrument instead of a gamble.

Chain A: Vinyl or noise bed. This is your constant jungle dust.

First, choose your noise source. The most authentic approach is a short vinyl noise loop or cassette hiss recording. Drop it on the TEXTURE RACK track in a clip slot, loop it, and let it run. Even if you end up routing drums into the rack, having a noise clip available is great because you can resample a “print” later.

On chain A Vinyl, add EQ Eight first. High-pass it pretty hard, something like 24 dB per octave around 180 to 300 Hz. We are not donating low end to the noise gods. If you want more air, do a gentle high shelf around 8 to 12 kHz, like plus one to plus three dB, but keep it tasteful.

Next add Auto Filter. Set it to band-pass mode. Put the frequency somewhere in the 2.5 to 6 kHz region, and set resonance around 0.6 to 0.85. Keep envelope at zero. Turn on the LFO. Set the LFO amount around 10 to 25 percent, rate really slow, around 0.10 to 0.30 Hz. And set phase to 180 degrees so it doesn’t feel like a static whistle. What this does is create that subtle shifting “air band” that feels like movement, not an obvious filter sweep.

Then add Saturator. Turn on Soft Clip. Drive around 2 to 6 dB, and match the output so you’re not tricking yourself with loudness. Then add Utility and widen it a bit, like 120 to 160 percent. Keep the gain down. The goal is: you should miss it when it’s muted, but you shouldn’t notice it as its own foreground element.

And here’s the first “teacher check.” Turn chain A on and off while the full drums play. If you hear “noise,” it’s too loud. If you feel the groove get slightly more alive when it’s on, you’re in the pocket.

Chain B: Break Air, also known as the ghost break. This is the jungle haze.

This chain is break-derived texture, but band-limited and controlled. Old records often got this by resampling and compressing the living daylights out of breaks, plus bandwidth limitation from samplers and tape.

On chain B Break Air, start with EQ Eight. High-pass it higher than you think. Try 24 dB per octave somewhere between 350 and 700 Hz. You’re aiming to stay out of the kick and the body of the snare. If it’s biting, do a small dip, like minus two to minus five dB, around 3 to 5 kHz.

Add a Compressor next. Ratio 4 to 1. Attack 10 to 30 milliseconds so some transient shape survives. Release 80 to 180 milliseconds, or Auto if it feels smoother. Aim for about 4 to 8 dB of gain reduction. You’re making it steady, like a consistent mist behind the drums.

Then drop in Drum Buss. This is a secret weapon for this kind of layer. Drive around 5 to 15 percent, Crunch around 10 to 25 percent. Usually keep Boom off. Transients can go slightly negative if you want it smeared and “printed,” or slightly positive if it needs a little definition. Keep checking in the full mix; this layer should not create a second drum kit.

After that, add Auto Filter in high-pass mode. Set cutoff around 500 Hz to 1.2 kHz, and add slow LFO movement, like 5 to 15 percent amount, at 0.06 to 0.20 Hz. This makes the air layer subtly breathe over time.

Coach note on bandwidth lanes, because this is where people get cloudy mixes. Think of chain B living mostly in the 700 Hz to 6 kHz lane, and actively avoiding the 200 to 500 Hz buildup zone. If the whole drum bus suddenly feels cardboard-y or nasal, it’s usually too much low-mid in this chain. High-pass harder and lower its level.

Chain C: Room and resonance layer. This gives you small-room bite and that metallic sampled vibe.

On chain C Room/Reso, add Hybrid Reverb. Set it to Room or Chamber. Decay around 0.4 to 1.2 seconds, short and controlled. Predelay 5 to 20 milliseconds. Size small to medium. Filter it: high cut around 4 to 7 kHz, low cut around 200 to 500 Hz. Dry/wet around 15 to 30 percent, but remember this chain should stay quiet. It’s not “reverb on drums.” It’s “a physical space shadow.”

Now add Corpus. This is the character piece. Set it to Tube or Plate. Tune somewhere around 120 to 220 Hz to start, maybe around 180 Hz as a default. Decay 0.2 to 0.8 seconds. Dry/wet 5 to 20 percent. You’re listening for a subtle boxy metallic tail, not an obvious resonator note.

Then add a gentle saturator or overdrive, like one to four dB drive. After that, EQ Eight again. Sweep for any nasty ringing and notch it, maybe minus three to minus eight dB if something whistles. And high-pass at 200 to 400 Hz to keep the mix clean.

Optional but powerful: tune the resonance to your track key. If your track is in F sharp, for example, you might try resonances around 92 Hz for F#2 or 139 Hz for C#3. Keep it quiet. This is cohesion, not melody.

Chain D: Stereo motion and glue. Movement without losing punch.

Add Chorus-Ensemble. Set it to Chorus mode. Rate around 0.15 to 0.40 Hz, amount 10 to 25 percent, width 120 to 200 percent, mix 10 to 25 percent. This is slow drift.

Then add Redux. Go easy. Bits around 10 to 14, start at 12. Downsample around 1.5 to 4. Dry/wet 5 to 15 percent. This is where you get “classic grit,” but also where you can accidentally create fizzy harshness. If the top end starts sounding like angry soda, back it off.

Then add Glue Compressor. Attack 3 to 10 milliseconds, release Auto, ratio 2 to 1. Turn on Soft Clip. Aim for just one to three dB of gain reduction. This is knitting, not smashing.

If chain D makes the drums feel smaller, the usual culprits are too much Redux and too much stereo modulation. Reduce Redux wet, reduce chorus mix, or narrow the width.

Now, the rack master stage.

Outside the chains, on the rack output, add EQ Eight. High-pass around 30 to 60 Hz to keep the sub region clean. If you need tone shaping, make tiny moves, like a gentle tilt, but don’t over-EQ the whole texture; each chain already has its lane.

Add a Limiter after that, ceiling at minus 1 dB. You only want it catching occasional peaks, one to two dB at most. This is just safety.

Now let’s do the thing that turns this from a “stack of devices” into a signature instrument: macro mapping.

Create eight macros.

Macro 1 is Texture Amount. Map it to each chain volume. And this is important: set safe ranges so it never overwhelms. For example, you might cap chain A around minus 18 dB max, chain B around minus 16 dB, chain C around minus 20 dB, and chain D around minus 18 dB. The exact numbers will vary, but the principle is: the macro’s maximum position should still sound usable in a real mix.

Before you finalize those ranges, do the gain staging trick. Solo each chain one at a time. Add a Utility at the end of each chain if you need it, and trim so each chain feels roughly similar loudness post-processing. Not equal meters, just similar perceived level. Now the Texture Amount macro will feel smooth and predictable.

Macro 2 is Air or Dust. Map it to chain A’s Auto Filter cutoff and maybe that EQ shelf. This becomes your “more dusty, more bright, more alive” control.

Macro 3 is Ghost Break Presence. Map it to chain B’s EQ high-pass cutoff, something like 350 up to 900 Hz. Higher cutoff usually means thinner, more “air-only” presence; lower cutoff brings more body, which can get muddy. So set it carefully.

Macro 4 is Room Size. Map Hybrid Reverb decay from 0.4 to 1.2 seconds, and dry/wet from about 10 to 30 percent.

Macro 5 is Resonance. Map Corpus dry/wet from 0 to 20 percent, and if you want, map tune with a small safe range so it doesn’t jump into weird pitches.

Macro 6 is Movement. Map Chorus amount from 10 to 30 percent and rate from 0.15 to 0.45 Hz.

Macro 7 is Grit. Map Saturator drive, maybe one to six dB, and Redux dry/wet from zero to 15 percent.

Macro 8 is Mono Safe. Put a Utility at the very end of the rack, after everything, and map width from something like 140 percent down to 90 percent. This way, when you need the mix to translate, you can pull it in.

Macro mapping tip that’ll save you headaches: set safe ranges while each chain is soloed. Turn the chain on, solo it, move the macro min and max until both extremes still sound usable. Then turn all chains back on and fine-tune how they interact. This prevents accidental “festival mode texture” when you draw automation later.

Now do a quick mono compatibility check. Temporarily drop a Utility on the master channel and set width to zero percent, just for a moment while you listen. If the texture disappears entirely in mono, you’re relying too much on phase-y modulation. Fix it by narrowing chain D, lowering chorus mix, or adding a mono anchor.

Optional advanced variation: add a Mono Anchor chain. This is chain E if you want it.

Create a new chain called Mono Anchor. Put EQ Eight with a high-pass around 500 to 900 Hz and a low-pass around 4 to 7 kHz. Add mild saturator, one to three dB. Then Utility with width at zero to 30 percent. Map it to Texture Amount, but keep the maximum very low. This tiny chain can make the whole rack feel consistent on small speakers and in mono, without making the texture louder.

Alright, now let’s make it musical with arrangement thinking.

Textures shine when they change with sections, not when they sit at one static level for three minutes.

For an intro: you can run higher texture amount, more vinyl and room, but less ghost break, so you’re teasing the groove. On the drop: pull the vinyl down a bit, keep ghost break tucked, tighten the room. For a mid-16 variation: push movement and grit for four bars, then bring it back. In a breakdown: increase room size and air, maybe automate a slow filter sweep so the texture “comes into focus.” And for the final drop: a tiny bit more ghost break presence can give lift without adding new drums.

Here’s a really effective upgrade move: instead of raising the texture volume in the intro, automate bandwidth. Put a gentle low-pass or tilt on the rack output, and gradually open the top end over 8 or 16 bars. It feels like the track is sharpening into view, which is more musical than “now it’s louder noise.”

Common mistakes to avoid, quickly.

First: too loud. If you notice it as a separate layer, it’s too hot. Second: too much low-mid, especially 150 to 500 Hz. That’s where bass and snare clarity dies. High-pass aggressively. Third: over-widening. Wide noise can collapse weirdly in mono, so use Mono Safe and check. Fourth: over-Reduxing. It gets fizzy fast; keep wet low. Fifth: reverb eating punch. Keep rooms short, filtered, and quiet.

Now a pro tip for darker, heavier DnB: sidechain the texture.

Put a compressor after the rack on the TEXTURE RACK track. Sidechain it from your drum group. Ratio around 3 to 1, attack 2 to 10 ms, release 80 to 140 ms, and aim for two to five dB of gain reduction. This keeps texture present but makes it politely step back on hits.

Even more advanced: duck only the bright components. Use Multiband Dynamics on the rack output, sidechain from your snare or drum group, and duck mainly the high band by one to three dB. That classic jungle breathing effect happens without the whole texture disappearing.

Now the authenticity move that really makes this sound like “jungle print” instead of “live plugin”: resample it.

Record 8 to 16 bars of the texture rack to audio. Then re-import it, warp it using Beats or Texture mode, and do tiny micro-chops. You can even do a second gentle processing pass, a little saturator soft clip or subtle Redux. Two light passes often sound more believable than one extreme pass. Also, it saves CPU, and Hybrid Reverb plus modulation can definitely spike your system. If you like it, freeze and flatten, or print it.

Let’s wrap with a mini practice exercise so you actually walk away with results.

Build a 32-bar loop: 16 bars of chopped break plus sub bass. Feed your texture rack from the drum group. Then automate only a few moves.

Bars 1 to 8: Texture Amount around 35 percent, and Room Size a bit higher so it feels spacious.
Bars 9 to 16: bring up Ghost Break Presence slightly, like it’s creeping forward.
Bars 17 to 24, your drop: pull Texture Amount down a touch, and turn Mono Safe slightly toward narrower so the drums hit harder.
Bars 25 to 32: push Grit for four bars, then bring it back.

Then bounce or resample that texture track and try fading it into the intro of a new idea. That’s how you start building a recognizable fingerprint across multiple tracks.

Finally, save the rack. Click the disk icon and name it Jungle Texture Rack. This is the kind of tool that gets better over time as you tweak it for your taste.

Recap: you built a four-chain Jungle Texture Rack with vinyl dust, ghost break haze, room and resonance character, and stereo motion plus glue. You mapped performance macros so you can automate it across sections like an instrument. You learned to keep textures band-limited, gain-staged, and mix-friendly, so they support the groove instead of fighting it. Next step is printing and chopping your own textures, because that’s where “signature” really happens.

If you tell me whether you’re aiming for bright 94-style jungle or darker 98-style, and whether your main drum source is Amen, Think, or a modern break pack, I can suggest tighter macro ranges and a “clean print” versus “pirate copy” version of the rack for your homework.

mickeybeam

Go to drumbasscd.com for +100 drum and bass YouTube channels all in one place - tune in!

Generating PDF preview…