DNB COLLEGE

Drum & Bass Ableton Live 12 Tutorials

LESSON DETAIL

Stack an Amen-style rewind moment using groove pool tricks in Ableton Live 12 (Advanced)

An AI-generated advanced Ableton lesson focused on Stack an Amen-style rewind moment using groove pool tricks in Ableton Live 12 in the Edits area of drum and bass production.

Back to lessons
Stack an Amen-style rewind moment using groove pool tricks in Ableton Live 12 (Advanced) cover image

Narrated lesson audio

The voice track includes the tutorial plus extra teacher commentary.

Open audio file

Main tutorial

Stack an Amen-Style Rewind Moment Using Groove Pool Tricks in Ableton Live 12 (Advanced DnB Edits) 🔁🥁

1. Lesson overview

A proper rewind is part sound design, part crowd psychology. In jungle/DnB, the classic “Amen stutter → pullback → drop again” works because it warps time in a controlled way and makes the listener anticipate impact.

In this lesson you’ll build a stacked Amen rewind moment in Ableton Live 12 using Groove Pool tricks (commit, extract, apply, and automate groove strength/timing) to make the edit feel human, frantic, and intentional—not like a generic stutter.

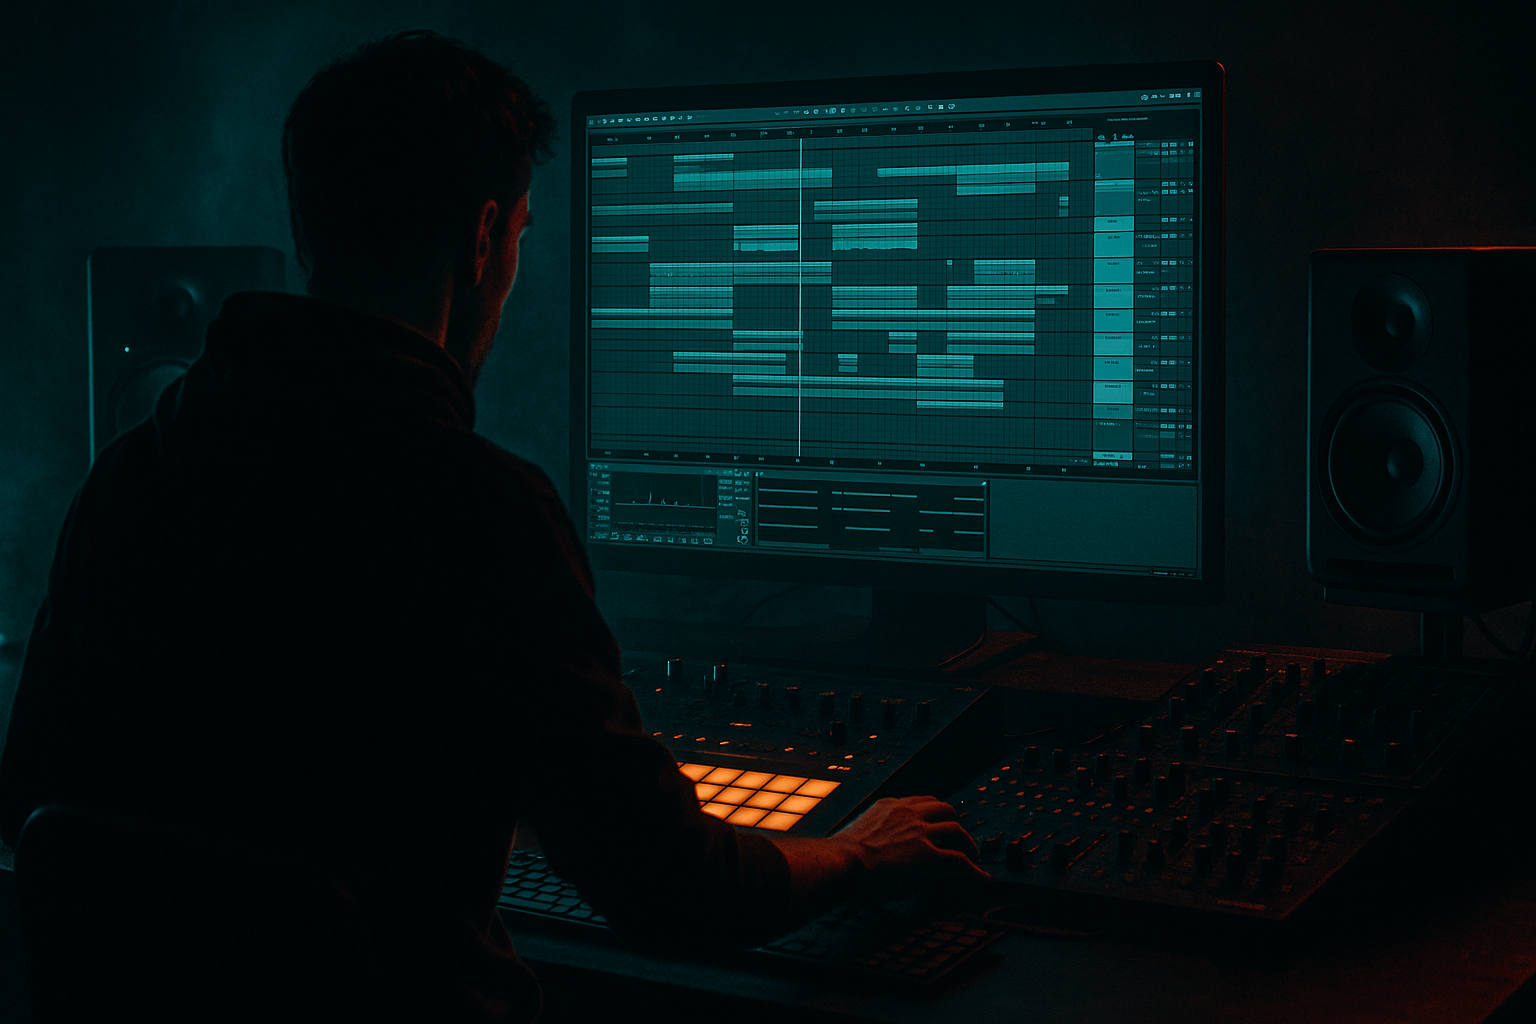
You’ll use only stock Ableton devices (plus your Amen sample).

---

2. What you will build

A short arrangement section (2–4 bars) that does this:

1. Amen build-up: increasingly tight micro-swings and stutters

2. Rewind pullback: a “tape/turntable” style reverse + time drag

3. Impact re-drop: original groove returns, harder, tighter, and louder

You’ll end with a reusable rewind rack and a workflow for stacking multiple grooves.

---

3. Step-by-step walkthrough

A) Prep: Set up your session like a DnB editor

1. Tempo: 172–176 BPM (use 174 BPM as a neutral starting point).

2. Create tracks:

- `DRUMS - AMEN (Audio)`

- `DRUMS - MAIN (Group)` (optional if you already have a full kit)

- `FX - REWIND (Return or Audio)`

3. Drop in your Amen break (a clean one-shot loop or a 1–2 bar slice).

4. In the clip view:

- Warp: ON

- Mode: Beats (transients stay punchy)

- Preserve: Transients

- Transient Loop Mode: Forward (we’ll do reverse later deliberately)

Why: Beats mode keeps the Amen crispy during aggressive groove manipulation.

---

B) Build a Groove Pool “stack” from real DnB feels

You’re going to layer multiple grooves by applying them at different moments and committing them.

#### 1) Add three grooves to the Groove Pool

Open Groove Pool (bottom left panel) and add:

  • Groove 1 (baseline swing): a subtle MPC-ish or shuffled groove
  • Example: something around 55–60% swing feel.

  • Groove 2 (shuffle push): a more aggressive shuffle
  • Groove 3 (micro-rush): something that pushes hats/snares earlier (or extract from a reference)
  • If you don’t have good grooves handy:

  • Find any Ableton groove that feels “breaky”
  • Or extract groove from a classic jungle loop:
  • Extract from audio (best for authenticity):

    1. Take a reference break (or a second Amen loop with a great feel).

    2. Right-click the clip → Extract Groove.

    3. The extracted groove appears in Groove Pool with timing/velocity from the loop.

    DnB note: Extracting groove from an actual break often gives better push/pull than library swing presets.

    ---

    C) Apply grooves in stages (the “stacking” trick)

    Groove Pool doesn’t truly “stack” multiple grooves at once on a clip—but you can print/commit each stage, then apply the next groove on top.

    #### Stage 1: Create your “normal” Amen feel

    1. Select your Amen clip.

    2. In clip view, choose Groove 1.

    3. In Groove Pool for Groove 1:

    - Timing: 20–35%

    - Velocity: 10–25% (keep it subtle)

    - Random: 2–6% (tiny humanization)

    4. Click Commit (Groove Pool → Commit).

    Now your clip has that feel baked in.

    #### Stage 2: Intensify swing toward the rewind

    Duplicate the Amen clip into the bar right before the rewind.

    1. Apply Groove 2 to that clip.

    2. Settings:

    - Timing: 40–65%

    - Velocity: 15–35%

    - Random: 4–10%

    3. Commit again.

    Now you’ve “stacked” the timing decisions: Groove 1 is printed, Groove 2 is added on top and printed.

    #### Stage 3: Add a “panic rush” micro-feel (the hype moment)

    For the final half-bar or last 1 beat before the rewind:

    1. Split the clip (Cmd/Ctrl+E) so you have a small region (e.g., last 1/2 bar).

    2. Apply Groove 3.

    3. Settings:

    - Timing: 70–100% (yes, go extreme)

    - Velocity: 0–15% (don’t destroy dynamics; the timing is the main effect)

    - Random: 0–5% (keep it tight)

    4. Commit.

    At this point your Amen should feel like it’s getting increasingly unstable and urgent—perfect rewind energy.

    ---

    D) Create the Amen stutter that leads into the pullback

    A rewind often “catches” on a fragment (classic: snare or a crunchy ghost note).

    1. Find a tasty transient (usually the snare hit or a crunchy kick-snare cluster).

    2. Duplicate that micro-region 4–16 times to create a stutter:

    - Use grid 1/16 or 1/32 depending on aggression.

    3. For realism, don’t make every repeat identical:

    - Slightly vary clip gain (±1–2 dB)

    - Nudge one or two hits a few ms late/early (or use groove!)

    Groove Pool trick:

    Apply a groove just to the stutter region with:

  • Timing: 80–100%
  • Velocity: 25–45%
  • Then Commit.

    This creates stutters that feel like a human chopping a break, not a DAW copy/paste.

    ---

    E) The rewind pullback (reverse + “time drag”)

    Now we create the actual rewind gesture. You’ll build a dedicated rewind clip from audio.

    #### Method: Resample + Reverse + Warp automation

    1. Create a new audio track: `REWIND PRINT`.

    2. Set input to Resampling.

    3. Arm it and record the last 1 bar of your Amen build/stutter.

    Now you have a printed audio file that contains the hype.

    4. On that recorded clip:

    - Right-click → Reverse

    - Warp: ON

    - Warp mode: Complex Pro (smoother pitch/time smear)

    (For dirtier: Complex is fine; for crunchy: Texture works too.)

    #### Make it “drag” like a deck pullback

    In clip view, shape the rewind feel using Warp markers:

    1. Place a warp marker at the start of the reversed clip.

    2. Place another warp marker near what will become the “rewind stop point”.

    3. Stretch the later portion so it slows down into the stop.

    - You want audible deceleration over ~1/2 bar to 1 bar.

    Optional but very effective:

  • Automate Clip Transpose down slightly during the pullback (e.g., 0 → -3 semitones) for that “tape losing speed” vibe.
  • ---

    F) Stack groove inside the rewind (yes, groove on reversed audio)

    Here’s the subtle advanced sauce: you can groove the reversed audio so it “wobbles” rhythmically.

    1. Apply a groove (often Groove 2 or extracted groove).

    2. Set:

    - Timing: 15–35% (don’t overdo it on the rewind)

    - Random: 0–5%

    3. Do NOT commit yet—try automating groove intensity by duplicating clips:

    - Clip A: Timing 15%

    - Clip B: Timing 35%

    - Clip C: Timing 0% right at the “stop” (tight cut)

    This makes the rewind feel “performed” and synced to your drums.

    ---

    G) Add the classic “rewind system” processing chain (stock devices)

    On the `REWIND PRINT` track, use this chain:

    1. EQ Eight

    - HPF around 30–50 Hz (remove rumble)

    - Gentle dip 250–400 Hz if it muddies

    - Optional small boost 3–6 kHz for needle/sizzle

    2. Roar (or Saturator if you prefer)

    - Roar: choose a Drive style that adds grit

    - Mix: 10–35%

    - Keep low end controlled (use Roar’s filters if needed)

    3. Auto Filter

    - Automate cutoff to “close down” during slowdown

    Example: 12 kHz → 1.5–3 kHz over the pullback

    - Resonance: 10–25% (small peak = classic “whoop”)

    4. Delay (Echo)

    - Time: 1/8 or 1/4

    - Feedback: 15–30%

    - Wobble: tiny (adds instability)

    - Filter inside Echo: roll off lows below 200 Hz

    5. Reverb

    - Short/medium: 0.8–1.6s

    - High-pass in reverb around 300 Hz

    - Automate Dry/Wet up slightly during rewind, then kill it at the drop

    Arrangement move: Hard cut the FX tail right before the drop for maximum impact.

    ---

    H) The “STOP” moment + re-drop impact

    A rewind lands because the silence is dramatic.

    1. Add a very short mute gap (1/16 to 1/8 bar) before the drop.

    2. Fill the gap with either:

    - A vinyl stop-style tail (very short)

    - Or a sub hit (careful—keep it tight)

    3. Drop back into your main drums + bass.

    Punch trick: On the drop bar, layer:

  • Original Amen (clean, ungrooved or lightly grooved)
  • Your main kick/snare (if you use one)
  • A crash or ride
  • A tight sub note on beat 1
  • ---

    I) Make the groove evolve with automation (advanced arrangement)

    Because Groove Pool controls are global per groove, a clean workflow is:

  • Use multiple copies of the same groove in Groove Pool (duplicate groove entries), each with different settings:
  • - `AmenSwing_Light` (Timing 25%)

    - `AmenSwing_Med` (Timing 55%)

    - `AmenSwing_Max` (Timing 95%)

    Then apply them to different clips across the build. This makes your rewind feel like it’s escalating, not just repeating.

    ---

    4. Common mistakes

  • Over-grooving the main drop: If your drop is late and sloppy, it won’t hit. Keep the drop tighter than the build.
  • Stutter is too clean: Identical repeats sound like EDM gating. Add velocity variation and tiny timing differences.
  • Rewind is too long: In DnB, rewind is usually 1 bar-ish (sometimes 2), not a 4-bar cinematic breakdown—unless it’s a specific vibe.
  • FX masking the snare: If reverb/echo sits over your drop snare, you lose the slap. Hard cut FX returns at the drop.
  • Low-end in the rewind FX: Rewind noise + sub = mud. High-pass your rewind chain.
  • ---

    5. Pro tips for darker/heavier DnB 🖤

  • Make the rewind “violent,” not polite: Use Roar after EQ with controlled low end. Drive mids, not sub.
  • Neuro-style tension: Add Corpus subtly on the rewind audio (metallic body resonance), then cut it on the drop.
  • Half-time ghost pressure: During the build, briefly switch to a half-time perception (leave only snare on 3), then bring full roll back right before rewind.
  • Clip gain staging: Before saturation, set rewind print clip gain so it hits processors consistently (e.g., peaks around -6 dBFS).
  • Layer a “needle scratch” top: Duplicate rewind print, high-pass at 3–5 kHz, distort harder, keep low in the mix. Adds nasty texture without muddying.
  • ---

    6. Mini practice exercise (15–25 minutes) 🎯

    1. Pick a 2-bar Amen loop.

    2. Build a 1-bar escalation using three committed groove stages:

    - 25% timing → 60% timing → 95% timing (each committed)

    3. Create a 1/2-bar stutter on the snare transient with groove applied and committed.

    4. Resample the last bar, reverse it, and create a deceleration with warp markers.

    5. Add the rewind processing chain (EQ Eight → Roar → Auto Filter → Echo → Reverb).

    6. Drop back into a clean 16-bar rolling section.

    Goal: When you A/B, the rewind should feel like it pulls the crowd back, then the drop feels even tighter than before.

    ---

    7. Recap

  • You “stacked” grooves by applying + committing in stages to create escalating urgency.
  • You used Groove Pool strategically: subtle on the build, extreme on micro-stutters, controlled on the rewind audio.
  • You built the rewind from a resampled print, reversed it, and shaped the slowdown with warp markers.
  • You locked it into DnB impact by cutting FX tails, keeping the drop tight, and controlling low end.

If you want, tell me your subgenre target (jungle / rollers / foghorn / neuro / dancefloor) and I’ll suggest specific groove choices + bar-by-bar rewind placement that matches that style.

Ask GPT about this lesson

Chat with the lesson tutor, get follow-up help, or use quick actions.

Bigup 👽 Ask me anything about this lesson and I’ll answer in context.

Narration script

Show spoken script
Title: Stack an Amen-style rewind moment using groove pool tricks in Ableton Live 12 (Advanced)

Alright, let’s build a proper jungle-style rewind moment in Ableton Live 12, but not the generic “copy-paste stutter then reverse” thing. We’re going to make it feel performed: urgent, human, a little chaotic, and then we’ll snap the re-drop back into place so it hits even harder.

Think of a rewind as two jobs happening at once. Sound design, yeah. But also crowd psychology. You’re literally bending time in a way that makes everyone lean forward, because they know what’s about to happen. The secret sauce here is Groove Pool, not as “swing,” but as micro-timing automation that we’re going to print in stages.

Set your tempo to something DnB neutral, like 174 BPM. Now create an audio track called DRUMS - AMEN. If you’ve got a full kit already, you can keep it in a group called DRUMS - MAIN, but it’s optional. And create another track for the rewind print, we’ll call it REWIND PRINT. You can also set up an FX return if you like, but for this lesson, printing the rewind on its own track keeps it super controllable.

Drop in a clean Amen break. One or two bars is perfect. In the clip view, turn Warp on. Set Warp mode to Beats, preserve transients, and keep transient loop mode on Forward for now. The reason we start in Beats mode is simple: when you start doing aggressive micro-timing and chops, you want the transients to stay punchy. Complex modes can smear the attack in a way that kills the break’s bite.

Now open the Groove Pool. The whole concept today is “stacking” grooves, even though Live doesn’t literally apply multiple grooves at the same time on one clip. We fake it by applying a groove, committing it, then applying another groove on top of the already-committed timing. That’s the trick.

We want three grooves.
First, a baseline swing. Something subtle, MPC-ish, around a 55 to 60 percent feel. Not too wobbly.
Second, a more aggressive shuffle or push. This is the “things are getting excited” groove.
Third, a micro-rush groove. Something that makes the rhythm feel like it’s leaning forward, almost panicking.

If you don’t have grooves you love in the library, here’s the move that usually sounds more authentic: extract groove from real audio. Grab a reference break, or even a second Amen loop that has the feel you want. Right-click the clip and choose Extract Groove. That extracted groove carries timing and velocity fingerprints from an actual performance or break chop, and that’s often way better than a generic swing template.

Before we start committing anything, here’s a coach move that will save you later: make an escape hatch. Duplicate your original Amen clip to a safety lane, or just keep a clean consolidated version muted underneath. Because in advanced edits, you’ll often want to undo only the last layer of groove, without losing the earlier baked-in feel.

Stage one: your “normal” Amen feel.
Select your Amen clip, choose Groove 1 in the clip’s Groove chooser. Then in Groove Pool, set Timing somewhere like 20 to 35 percent. Velocity, maybe 10 to 25 percent, subtle. Random around 2 to 6 percent, just enough to make it breathe. Now commit. That prints the micro-timing into the clip.

And here’s the big mental shift: once you commit, you can edit transients, fades, and slice points with confidence, because your feel is baked in. You’re not going to accidentally change the vibe later by bumping groove settings globally.

Stage two: intensify toward the rewind.
Duplicate that Amen clip into the bar right before the rewind moment. Apply Groove 2 to this duplicated clip. Set Timing more like 40 to 65 percent, Velocity 15 to 35 percent, Random 4 to 10 percent. Then commit again.

You should already feel it: the break sounds like it’s getting more animated, more restless, like the drummer is pushing.

Stage three: the panic rush.
Split out just the last half-bar, or even the last beat before your rewind. Command or Control E to split. Apply Groove 3 to that tiny region. Now go extreme: Timing 70 to 100 percent. Keep Velocity low, like 0 to 15 percent, because we’re not trying to destroy dynamics right before the rewind. Random 0 to 5 percent, tighter. Commit.

At this point, your Amen should feel like it’s escalating in urgency, not because you turned up volume, but because the micro-timing is getting more intense.

Now we build the stutter that “catches” before the pullback. Classic rewind energy often latches onto a snare transient, or a crunchy little kick-snare cluster.

Zoom in, find that tasty transient. Split a tiny region around it. Then duplicate it several times. Four to sixteen repeats depending on how savage you want it. If it’s a clean dancefloor thing, 1/16 grid might do it. If you want it more frantic, try 1/32.

But do not make every repeat identical. That’s how you get that EDM gate sound. Instead, vary clip gain slightly, like plus or minus one or two dB. And add tiny timing differences, either by nudging a couple hits manually, or, even better, apply groove to only the stutter region.

So, apply a groove just to the stutter slice. Timing 80 to 100 percent, Velocity 25 to 45 percent, then commit. Now your stutter sounds like hands on audio, not copy-paste.

Also, micro-crossfades are the difference between “sick rewind” and “clicky edit.” Any time you slice audio like this, add tiny fades, one to five milliseconds. And a cool realism trick: vary fade-out lengths on every second or fourth stutter hit. It subtly implies hand-chopping.

If you notice the groove starts flamming your snare, meaning the snare feels like it’s double-hitting or late in a bad way, don’t immediately reduce groove across the board. Instead, isolate the snare as its own slice and keep it tighter, while letting hats and ghosts swing harder. In DnB, the snare is often the anchor even when everything else is going nuts.

Now we print the rewind. This is where it stops being a “clip trick” and starts becoming a real performable moment.

Go to your REWIND PRINT track. Set its input to Resampling. Arm it. Record the last bar of your build, including that stutter and escalation. Now you’ve got a printed audio clip that contains all the hype you designed.

On that recorded clip, right-click and reverse it. Turn Warp on. Switch warp mode to Complex Pro for that smoother, tape-like smear during time stretching. If you want it dirtier, Complex works. If you want it more crunchy and grainy, Texture can be a vibe too.

Now create the “drag,” like a DJ pulling the deck back.
This is important: Warp markers define the big motion. Groove adds performance feel inside that motion. So if the deceleration feels wrong, fix warp first.

Put a warp marker right at the start of the reversed clip. Put another warp marker near where you want the rewind to “stop.” Then stretch the later portion so it audibly slows down into the stop over about half a bar to a full bar. You’re sculpting deceleration: fast at the start, then increasingly slow and sticky.

For extra realism, automate clip transpose slightly down during the pullback. Something like 0 down to minus 3 semitones over the slowdown. And here’s a little pro detail: don’t just glide down. Add a tiny bounce right at the end. Like dip down, then a quick up by one semitone right before the stop. That micro recoil feels like a hand letting go of the platter.

Now for the advanced sauce: groove on reversed audio.
Yes, you can apply a groove to the reversed clip so the rewind itself has rhythmic wobble. Use Groove 2 or your extracted groove, but keep it subtle. Timing 15 to 35 percent, Random 0 to 5.

Instead of committing immediately, try this workflow: duplicate the reversed clip into two or three versions. One with Timing at 15 percent, one at 35 percent, and one at 0 percent right at the stop. That way the rewind feels like it’s being controlled and then snapped tight at the end.

Now let’s process the rewind track with a classic “system” chain, all stock.

First, EQ Eight. High-pass around 30 to 50 Hz, because rewind noise plus sub equals mud. If it feels boxy, dip a bit around 250 to 400 Hz. And if you want more needle bite, a gentle boost around 3 to 6 kHz.

Next, Roar, or Saturator if you prefer. We want grit, but controlled. Drive the mids more than the sub. Keep mix around 10 to 35 percent.

Then Auto Filter. This is where the rewind talks. Automate cutoff from something open like 12 kHz down to maybe 1.5 to 3 kHz over the slowdown. Add a little resonance, like 10 to 25 percent, to get that “whoop” peak. It’s a classic.

Then Echo. Set it to 1/8 or 1/4. Feedback 15 to 30 percent. Add a tiny bit of wobble for instability. And filter inside Echo: roll off lows below 200 Hz so your echoes don’t smear the low end.

Then Reverb. Short to medium, like 0.8 to 1.6 seconds. High-pass the reverb around 300 Hz. Automate dry/wet up slightly during the rewind, but here’s the rule: kill it at the drop. Hard cut that tail right before impact. That silence is part of the punch.

Now we design the stop.
Give yourself a micro mute gap before the re-drop. One sixteenth to one eighth of a bar. That tiny silence is crowd control. You can fill it with a very short vinyl-stop tail, or a tight little sub hit, but be careful: don’t let it blur the downbeat.

And when the drop returns, make it tighter than the build. That’s the contrast that makes the rewind feel bigger.
Layer your original Amen again, either ungrooved or lightly grooved. Bring your main kick and snare if you use them. Add a crash or a ride for impact. And a tight sub note on beat one if it fits your tune.

A key mistake is making the main drop as loose as the buildup. If the drop is late and sloppy, it won’t hit. The build can be frantic, the drop should feel like it snaps back into focus.

If you want to push this even further, here are a couple upgrade options you can try quickly.
You can do a dual rewind: a tiny fake-out pullback for like an eighth note, then straight into the real one-bar rewind. It creates a “wait, what?” moment before the full reload.
Or try a triplet panic stutter: for the last beat before the pullback, switch grid to 1/12 or 1/24, just for one beat, then go back to straight as the reverse begins. That little metric tilt feels physical.

And for sound design texture, you can layer a needle noise on top using stock synth noise. Operator or Analog noise oscillator into a bandpass around 4 to 10 kHz, a bit of overdrive, and automate the filter downward as the rewind slows. Blend it quietly so the motion reads even on small speakers.

One more high-level arrangement tip: set up negative space. Two beats before the stutter, remove an element, like the hat loop or a mid-bass layer. The rewind reads clearer when the ear isn’t already overloaded.

Now, quick practice run to lock it in.
Take a two-bar Amen loop. Build a one-bar escalation using three groove stages committed: 25 percent timing, then 60, then 95. Make a half-bar snare stutter with groove applied and committed. Resample the last bar, reverse it, and sculpt deceleration with warp markers. Add your processing chain. Then drop back into a clean rolling section and make sure the re-drop is tighter than before.

When you A and B it, the rewind should feel like it pulls the room backwards, and the drop should feel like it returns with authority, even if the volume is the same.

That’s the whole method: stage-committed groove stacking for escalation, grooved stutters for human chop energy, resample and reverse for a controllable pullback, warp markers for the big slowdown, and then tight contrast at the re-drop with hard-cut FX and clean low end.

If you tell me what subgenre you’re aiming for—jungle, rollers, foghorn, neuro, dancefloor—I can suggest the exact groove choices and a bar-by-bar placement that fits that vibe.

mickeybeam

Go to drumbasscd.com for +100 drum and bass YouTube channels all in one place - tune in!

Generating PDF preview…