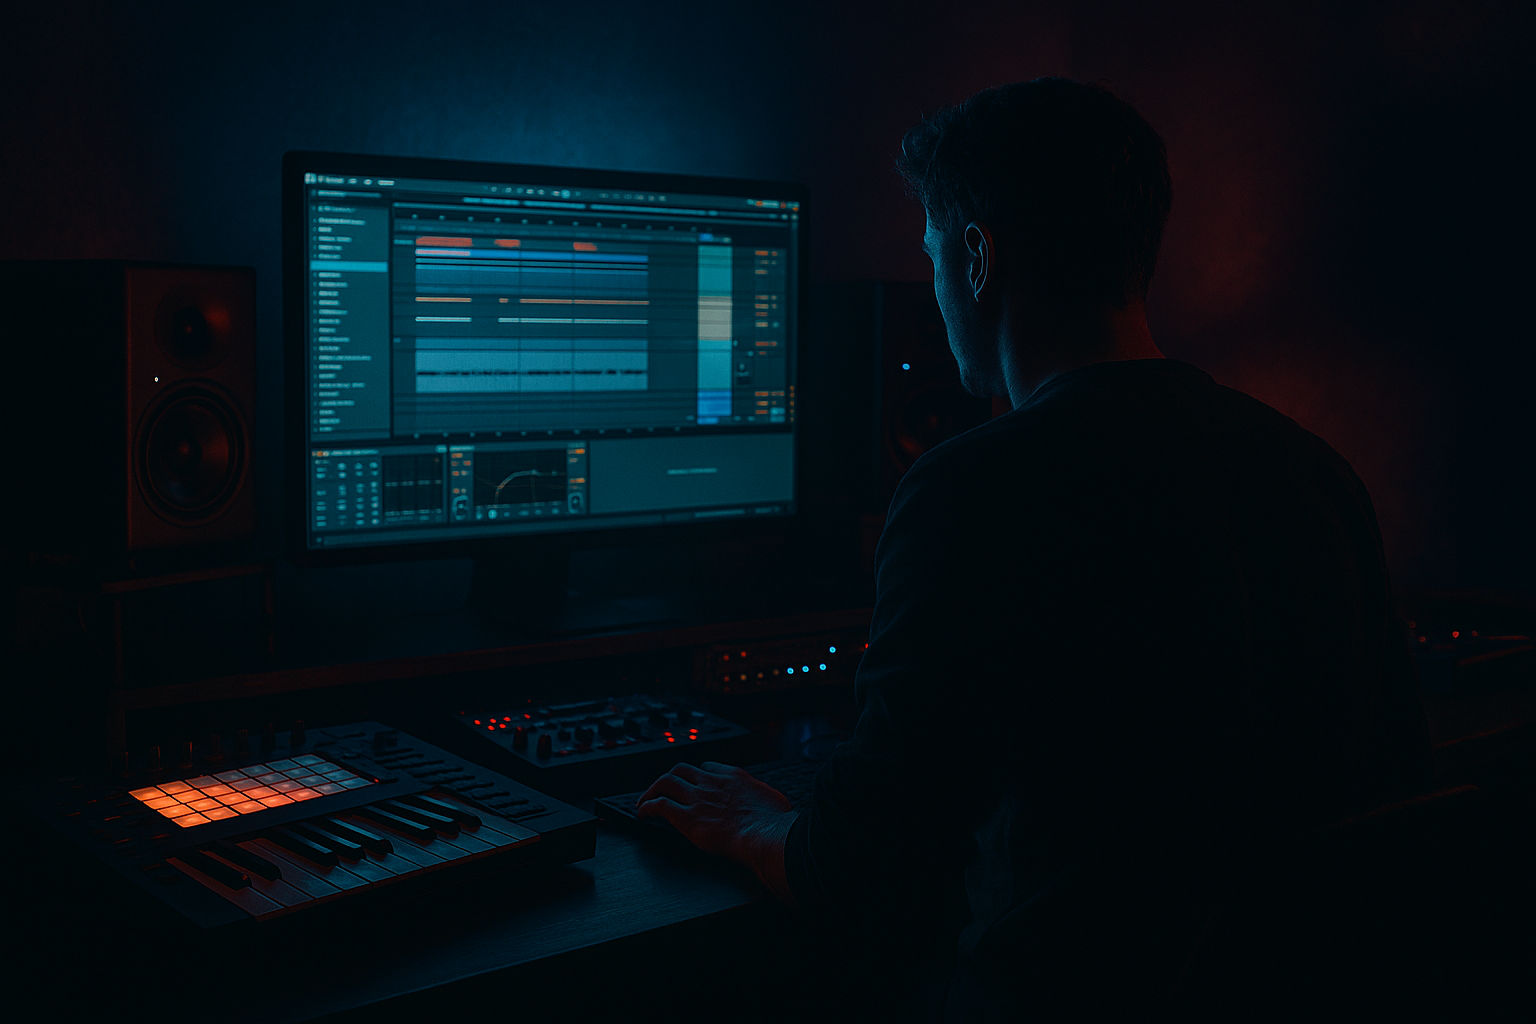
DNB COLLEGE

Drum & Bass Ableton Live 12 Tutorials

LESSON DETAIL

Stepper: vocal texture transform for pirate-radio energy in Ableton Live 12 for jungle oldskool DnB vibes (Advanced)

An AI-generated advanced Ableton lesson focused on Stepper: vocal texture transform for pirate-radio energy in Ableton Live 12 for jungle oldskool DnB vibes in the Edits area of drum and bass production.

Back to lessons
Stepper: vocal texture transform for pirate-radio energy in Ableton Live 12 for jungle oldskool DnB vibes (Advanced) cover image

Narrated lesson audio

The voice track includes the tutorial plus extra teacher commentary.

Open audio file

Main tutorial

Stepper: Vocal Texture Transform for Pirate-Radio Energy (Ableton Live 12) 📻🔥

Advanced | Edits | Jungle / Oldskool DnB vibes

---

1. Lesson overview

This lesson is all about turning a clean vocal phrase into a steppy, chopped, band-limited, distorted “pirate radio” texture that feels like it’s been broadcast through dodgy FM gear and resampled off tape—perfect for jungle stabs, oldskool MC clips, rave callouts, and rolling DnB drops.

You’ll build a repeatable Ableton Live 12 workflow that combines:

  • tight transient chopping + step sequencing
  • bandpass/telephone filtering
  • resampling + Redux / Saturator / Overdrive
  • movement via Auto Filter + chorus/widening
  • arrangement tricks for tension into drops
  • All using mostly stock devices.

    ---

    2. What you will build

    A vocal chain and editing workflow that outputs:

  • A 16th-note “stepper” vocal loop (syncopated, jittery, rhythmic)
  • A pirate-radio tone: narrow bandwidth, gritty distortion, slight warble
  • A macro-controlled rack for live performance + fast variations 🎛️
  • Arrangement-ready versions:
  • - Intro “radio tune-in”

    - Build-up chatter

    - Drop punctuations / call-and-response with drums

    ---

    3. Step-by-step walkthrough

    Step 0 — Pick the right source + prep

    Source suggestions (works best):

  • Short MC phrase: “Inside the ride…!”
  • Rave vocal: “Ready or not…”
  • Any 1–2 bar phrase with attitude.
  • Prep in Arrangement View:

    1. Drag the vocal onto an audio track.

    2. Turn Warp ON.

    3. Set Warp Mode = Complex Pro (for intelligibility) or Texture (for grainy artifacts).

    4. Tighten timing: place the vocal so the key syllables hit near 1.1 / 1.2 / 1.3 / 1.4 (or wherever your groove sits).

    Advanced note: If the vocal is already dirty/lofi, consider Repitch for more authentic pitch movement when you later do speed changes.

    ---

    Step 1 — Create the Stepper chop grid (fast + surgical) ✂️

    Goal: slice the vocal into rhythmic “cells” you can resequence like a drum pattern.

    Method A (fastest): Slice to MIDI

    1. Right-click the audio clip → Slice to New MIDI Track.

    2. Slicing preset: Built-in → Slicing (or “Transients” to start).

    3. Slice by:

    - Transient if the vocal is percussive

    - 1/16 or 1/32 if you want very consistent stepping

    4. In the created Drum Rack, open Simpler for a few slices:

    - Disable Snap if it’s truncating too aggressively

    - Set Fade In/Out tiny (0.5–3 ms) to avoid clicks

    Now program the “stepper” feel:

  • Create a 1-bar MIDI clip at 170–174 BPM.
  • Put hits on a grid like this (classic stepped chatter):
  • - Start with 16ths: 1.1, 1.1.2, 1.2, 1.2.3, 1.3, 1.3.2, 1.4, 1.4.4

  • Then add swing by shifting a few notes slightly late (or use Groove Pool).
  • Groove tip: Use MPC 16 Swing 57–63 and reduce timing to ~30–50% so it stays tight.

    ---

    Step 2 — Build the Pirate-Radio FX chain (stock devices) 📻

    Create an Audio Effect Rack after the Drum Rack (or after the vocal track if you’re not slicing). Name it: PIRATE STEPPER.

    #### Device Chain (in this order):

    1) EQ Eight (pre-clean)

    2) Auto Filter (bandpass + movement)

    3) Saturator (drive + presence)

    4) Redux (bit + sample rate grit)

    5) Overdrive (mid bite)

    6) Amp or Pedal (optional heavier character)

    7) Chorus-Ensemble (subtle width)

    8) Utility (mono control + gain)

    9) Limiter (safety)

    Here are practical settings that land in the jungle/DnB pocket:

    ---

    #### 1) EQ Eight (pre-clean)

  • HP filter: 24 dB, around 120–200 Hz
  • Small cut if boomy: 250–400 Hz, -2 to -4 dB, Q ~1.2
  • Optional presence boost: 2.5–4.5 kHz, +2 dB, Q ~0.8
  • ---

    #### 2) Auto Filter (the “radio band”)

  • Filter Type: Band-Pass
  • Freq: 1.2–2.2 kHz (start at ~1.6 kHz)
  • Resonance: 0.70–1.20 (enough to “honk”)
  • Drive: 2–6 dB (if available in the filter model)
  • Envelope: subtle, or off
  • Movement (key for pirate energy):

  • LFO: ON
  • Shape: Sine or Random
  • Rate: 1/8 or 1/16 (sync)
  • Amount: 10–25%
  • Phase: try 180° for stereo motion (if it works with your chain)
  • ---

    #### 3) Saturator

  • Mode: Analog Clip
  • Drive: 4–10 dB
  • Soft Clip: ON
  • Output: trim so you’re not slamming later devices too hard
  • ---

    #### 4) Redux (the “resampled” crunch)

  • Downsample: 2.0–6.0
  • Bit Reduction: 8–12 bits (start at 10)
  • Keep it subtle enough to still understand words.
  • ---

    #### 5) Overdrive (midrange bite)

  • Freq: 1.5–3.5 kHz
  • Drive: 20–45%
  • Tone: 45–60%
  • Dynamics: ON (if you want it to respond to hits)
  • ---

    #### 6) Amp or Pedal (optional)

    Amp: “Clean” or “Blues” can add edge without fizz.

  • Gain: low to medium
  • Bass: low (you already filtered)
  • Middle: push it
  • Treble: careful—can get harsh fast
  • Pedal: use for gnarlier modern jungle edges.

  • Drive moderate
  • Filter after it if it spits too much top-end
  • ---

    #### 7) Chorus-Ensemble (subtle width)

  • Amount: 10–25%
  • Rate: 0.20–0.60 Hz (slow)
  • Width: 60–120%
  • Keep this minimal: pirate radio is often mono-ish, but a touch of movement feels “live.”

    ---

    #### 8) Utility

  • Width: 0–50% (try near mono for authenticity)
  • Gain: final level staging
  • ---

    #### 9) Limiter (safety)

  • Ceiling: -0.8 dB
  • Don’t rely on it—use it to catch spikes.
  • ---

    Step 3 — Make it step like a drum (gating + rhythm locking) 🥁

    To get that on/off transmitter feel, add a Gate (or sidechain compression) so the vocal “ticks” with your drum grid.

    #### Option A: Gate (choppy and obvious)

    Add Gate after distortion:

  • Threshold: set so it opens only on strong syllables
  • Return: short
  • Floor: -inf for hard cuts
  • Attack: 0.1–1 ms
  • Hold: 5–20 ms
  • Release: 20–70 ms (faster = more “step”)
  • #### Option B: Sidechain Compressor (musical + consistent)

    1. Add Compressor after the chain.

    2. Enable Sidechain.

    3. Sidechain input: a ghost hi-hat/16th click track (or your shaker).

    4. Ratio: 4:1 to 10:1

    5. Attack: 1–5 ms

    6. Release: 30–90 ms

    This makes the vocal “dance” with your groove without you manually chopping everything.

    ---

    Step 4 — Resample for commitment + oldskool workflow 🎙️➡️🎛️

    This is where it becomes real jungle: commit, bounce, chop again.

    1. Create a new audio track: RESAMPLED VOX.

    2. Set input to Resampling.

    3. Arm it, record 4–8 bars of your stepper performance.

    4. Now warp the resample:

    - Warp Mode: Beats

    - Preserve: 1/16

    - Transients: 100

    - Optional: “Envelope” down for less click

    Why this works: You’re essentially doing the classic “sample the sampler” process. The second generation introduces glue + artifacts that read as authentic.

    ---

    Step 5 — Arrangement: how to use it in a jungle/DnB tune 🧱

    Here are 3 practical placements that consistently work.

    #### A) Intro “tune-in” (8–16 bars)

  • Start with only the vocal through Auto Filter bandpass (very narrow).
  • Automate Filter Freq from 900 Hz → 2.2 kHz slowly.
  • Add a vinyl crackle or noise bed.
  • Bring in a distant break (high-passed) behind it.
  • #### B) Build-up chatter (last 8 bars before drop)

  • Increase step density (move from 1/8 to 1/16 chops).
  • Automate Redux Downsample up slightly.
  • Add short delays only on the last word of each 2 bars.
  • Stock Delay settings (for throw):

  • Time: 1/8 or 3/16
  • Feedback: 18–35%
  • Filter: HP ~500 Hz, LP ~4 kHz
  • Ping-Pong: low, or off for mono
  • #### C) Drop punctuation (callouts between snares)

  • Use single stepped hits on the 2 and 4 snare space.
  • Keep it short—don’t fight the drums.
  • Consider making a second version that’s even more band-limited so it sits above the break.
  • ---

    Step 6 — Performance macros (Audio Effect Rack) 🎛️

    Map these to 8 macros so you can “DJ” the texture:

    1. Radio Freq → Auto Filter Frequency

    2. Radio Q → Auto Filter Resonance

    3. Dirt → Saturator Drive + Overdrive Drive (linked)

    4. Bit Crush → Redux Bits (12→8)

    5. Downsample → Redux Downsample (2→8)

    6. Step Tight → Gate Release (70 ms→20 ms)

    7. Width → Utility Width (0→80%)

    8. Throw → Delay Dry/Wet (0→25%)

    This macro setup makes the vocal feel alive—like someone riding knobs on a dodgy mixer in a squat rave 😄

    ---

    4. Common mistakes

  • Over-crushing too early: If Redux/Overdrive is too hot, consonants turn into white noise. Back off and re-add later.
  • Too wide in stereo: Pirate-radio energy is usually mid-focused. Keep width controlled (Utility near mono).
  • Competing with the snare: If your stepped vocal hits exactly where the snare lives (1–3 kHz), it’ll mask the crack. Use EQ or move hits.
  • No commitment/resampling: The best results come from printing audio, re-warping, and re-chopping.
  • Warp mode mismatch: Complex Pro for clarity; Beats/Texture for character. Pick intentionally.
  • ---

    5. Pro tips for darker/heavier DnB 🖤

  • Layer a sub-oct “ghost”: Duplicate the resampled vocal, pitch it -12 or -24, low-pass at 120–200 Hz, distort lightly, keep very quiet. It adds menace without sounding like “a vocal.”
  • Make it feel “illegal”: Add a subtle noise bed (vinyl/static) and gate it with the vocal so the noise opens with each chop.
  • Midrange discipline: If your bass is reese-heavy (200–800 Hz), push the vocal bandpass higher (1.8–3 kHz) so it rides above.
  • Rude stabs approach: Freeze/flatten a single syllable, pitch it across a Sampler/Simpler and play it like a stab—classic jungle weapon.
  • Dark reverb trick: Put Reverb on a return, but EQ the return heavily (HP 500 Hz, LP 3–4 kHz), short decay (0.6–1.2 s). Send only the last chops of each phrase.
  • ---

    6. Mini practice exercise (15–25 minutes) ⏱️

    1. Choose one vocal phrase (1–2 bars).

    2. Slice to MIDI by 1/16.

    3. Write two stepper patterns:

    - Pattern A: sparse (8 hits/bar)

    - Pattern B: dense (12–16 hits/bar)

    4. Build the PIRATE STEPPER rack and map 8 macros as above.

    5. Resample 8 bars while performing macros:

    - Bars 1–4: narrow band, low dirt

    - Bars 5–8: increase downsample + tighter gating

    6. In Arrangement:

    - Put the resample as an 8-bar build into a drop

    - Add 1 delay throw on the final word before the drop

    Deliverable: a bounced 8-bar build that sounds like a pirate broadcast melting into the drop.

    ---

    7. Recap

  • You created a step-sequenced vocal chop that behaves like percussion.
  • You built a pirate-radio tone chain using stock Ableton devices (EQ Eight, Auto Filter, Saturator, Redux, Overdrive, etc.).
  • You resampled for authentic oldskool texture and faster arrangement control.
  • You mapped macros for performance and rapid variation—crucial for jungle edits.

If you want, tell me your tempo, the type of vocal (MC/shout/sung), and whether your drums are more Amen-forward or 2-step steppers, and I’ll suggest a step pattern + exact frequency pockets to keep it slamming without masking your snare.

Ask GPT about this lesson

Chat with the lesson tutor, get follow-up help, or use quick actions.

Bigup 👽 Ask me anything about this lesson and I’ll answer in context.

Narration script

Show spoken script
Title: Stepper: vocal texture transform for pirate-radio energy in Ableton Live 12 for jungle oldskool DnB vibes (Advanced)

Alright, let’s build one of those proper jungle weapons: a clean vocal phrase transformed into a steppy, chopped, band-limited, slightly broken “pirate radio” texture. The goal is that illegal-FM, resampled-off-tape energy that sits right in the edits zone of drum and bass production. Not just “put a filter on it,” but a repeatable workflow you can perform, resample, and arrange into intros, builds, and drop callouts.

Before you touch any effects, we’re going to think like an old sampler mindset: find a phrase, slice it into cells, make it rhythmic like percussion, then commit it to audio so the artifacts become part of the sound.

Step zero: choose the source and prep it properly.

Pick a phrase that has attitude in one or two bars. MC shout, rave callout, anything with a strong consonant. And here’s a coach tip that matters: choose your anchor syllable. In jungle edits, the whole illusion often hangs on one consonant that reads like a drum hit. A hard T, K, P, or a nice “ss” can become your ghost-snare of the vocal. We’ll build patterns around that slice, instead of trying to make every word perfectly intelligible.

Drag the vocal onto an audio track in Arrangement View. Turn Warp on. Now choose a warp mode deliberately.
If you want intelligibility, start with Complex Pro.
If you want grain and character, Texture is a vibe.
And if the sample is already dirty and you want that authentic pitch movement when things get sped or bent later, Repitch can be the secret sauce.

Then tighten timing. Line up the important syllables so they land where your groove actually hits. In a lot of jungle at 170 to 174 BPM, that might mean your key syllables are near the quarter notes, or tucked just around them depending on your break. The point is: don’t accept sloppy timing now. Clean timing equals better chops later.

Now step one: create the Stepper chop grid.

We want surgical chopping, but fast. The quickest method is Slice to MIDI.

Right-click the audio clip and choose Slice to New MIDI Track. For slicing, you can start with transients if the vocal has clear attacks. If you want consistent stepping, slice by 1/16 or even 1/32.

Ableton will build a Drum Rack full of Simplers, one per slice. Open a few slices and immediately handle the click problem the oldskool way.

Add micro-fades. One to five milliseconds fade in and fade out inside Simpler. Tiny. Just enough to remove the click but not soften the attack.

If it still clicks, don’t just lengthen fades until it’s dull. Instead, nudge the Start point forward a hair. Often that’s all it takes. You’re shaving off the zero-crossing problem without killing the transient.

Now program the stepper feel.

Make a one-bar MIDI clip at around 170 to 174. Start with a classic stepped chatter pattern. Think of it like this: not a straight machine-gun on every 16th, but a syncopated set of hits that suggests speech while functioning like percussion.

Place hits on a grid like: downbeat, a quick follow-up, then another, then a skip, then another cluster. If you need a starting point, aim for something like hits on 1.1, 1.1.2, 1.2, 1.2.3, 1.3, 1.3.2, 1.4, and a final one near the end of the bar. You can swap which slice plays each hit, but keep your anchor syllable recurring as the “punctuation.”

Then humanize it without losing discipline. Use Groove Pool, something like MPC 16 Swing around 57 to 63, but don’t slam it to 100 percent. Try 30 to 50 percent timing so it stays tight.

And here’s an advanced move: accents. If you want this to behave like a lead line, not just a loop, make velocity matter. Higher velocity on offbeats can make the vocal “talk” like a synth phrase. You can route velocity to filter or drive inside Simpler, or just use velocity as your performance control and map it later if you’re doing more complex routing.

Okay. Now we’ve got rhythm. Next: the pirate radio tone chain.

After the Drum Rack, add an Audio Effect Rack and name it something you’ll recognize, like PIRATE STEPPER. We’re going stock devices, and the order matters because we’re shaping bandwidth, then adding dirt, then controlling movement and width.

Start with EQ Eight, pre-clean.
High-pass it pretty hard. 24 dB slope somewhere around 120 to 200 Hz. You don’t need low end in a radio vocal, and you definitely don’t need it fighting your break and bass.
If it’s boxy, dip 250 to 400 a couple dB.
If it needs presence, a gentle bump around 2.5 to 4.5 kHz can help, but be careful because we’re about to band-limit it anyway.

Now Auto Filter. This is the “radio band.”
Set it to band-pass. Start the frequency around 1.6 kHz, and sweep later depending on your track.
Resonance: enough to honk, around 0.7 to 1.2.
If the filter model gives you drive, use a little. A few dB can make the band feel energized.

Then add movement. Turn on the LFO. Sine is smooth. Random is chaos. Both can work, depending on how sketchy you want the “signal” to feel.
Sync the rate to 1/8 or 1/16. Keep the amount controlled, say 10 to 25 percent. The key idea: movement should feel like unstable broadcast gear, not like a modern EDM wobble.

Next, Saturator.
Analog Clip mode, drive around 4 to 10 dB, soft clip on. This is where the vocal becomes forward and slightly aggressive without instantly turning to sand.
Teacher note: gain-stage here. If you just crank everything, your consonants become white noise and the words disappear. You want grit with readability.

Now Redux, for the resampled crunch.
Downsample around 2 to 6, and bit reduction around 8 to 12 bits. Start at 10 bits. Subtle. You should still understand the phrase. If it’s turning into spray can noise, you’ve gone too far.

Then Overdrive for that mid bite.
Set the frequency somewhere in the 1.5 to 3.5 kHz zone, drive 20 to 45 percent, tone around 45 to 60. If you want it to respond to the hits, enable Dynamics. This can give that “operator riding the channel” feel.

Optional: Amp or Pedal.
If you want extra character, Amp on Clean or Blues can give edge without fizzy top end. Keep bass low because you already high-passed and band-passed. Push mids, treat treble carefully.
Pedal is for when you want it nastier, but if it starts spitting harsh highs, you’ll need to tame that with filtering after.

Then Chorus-Ensemble, subtle.
Amount 10 to 25 percent, slow rate like 0.2 to 0.6 Hz, width maybe 60 to 120 percent. But remember: pirate radio is often mono-ish. Think “movement,” not “wide pop vocal.”

Then Utility.
This is where you decide your authenticity. Try width near 0 to 50 percent. Almost mono during the most broadcast moments, then you can open it a bit on fills so it feels like a special event.

Finally a Limiter, purely safety. Ceiling around minus 0.8. Don’t rely on it to do your mix. It’s there to catch spikes from distortion.

Now step three: make it step like a drum. This is where it goes from “cool effect” to “proper edit.”

We want that on-off transmitter feel. Two main options: a Gate for obvious choppiness, or a sidechain compressor for a more musical pump.

If you want hard, obvious stepping, put a Gate after the distortion section.
Set threshold so it opens on the syllables you want.
Floor to negative infinity for hard cuts.
Fast attack, tiny. Hold 5 to 20 milliseconds. Release 20 to 70 milliseconds. Faster release equals more tick-tick-step.

If you want consistent rhythmic motion without destroying the words, use a Compressor with sidechain.
Feed it from a ghost 16th-click track or a tight shaker. Ratio 4:1 up to 10:1, attack 1 to 5 milliseconds, release 30 to 90.
The result is the vocal “dances” in the pocket with your grid, even if the original phrase wasn’t perfectly percussive.

Advanced coach note here: keep distortion stable with gain staging, not limiter heroics.
Put a Utility before the distortion cluster and treat it like “Drive Into Chain.” If your input level is consistent, your radio tone stays consistent. If your input is all over the place, the distortion changes note to note, and unless you’re doing that on purpose, it just sounds messy.

Now step four: resample for commitment. This is the oldskool workflow moment.

Create a new audio track called RESAMPLED VOX.
Set its input to Resampling.
Arm it. Record 4 to 8 bars while you mess with the chain. Ride the filter frequency a bit, tighten the gate release, maybe push Redux slightly in the last couple bars.

Now warp the resample.
Switch warp mode to Beats.
Preserve 1/16.
Transients up at 100, then reduce the envelope if you’re getting too clicky.
This second generation of processing is the magic: it glues, it artifacts, and it starts to feel like it’s been through “a process,” not just a clean clip with plugins.

Now step five: arrangement. Three placements that work almost every time.

First: the intro tune-in.
Start with just the vocal through a very narrow band-pass. Automate the filter frequency like you’re tuning a station. And here’s the upgrade: don’t sweep constantly. Do it like a human scanning.
Scan, pause, scan, then lock onto a stable frequency in the last couple bars before the drums really arrive.
Add a noise bed, vinyl crackle, or static, and bring in a distant high-passed break behind it.

Second: build-up chatter.
Increase step density as you approach the drop. Go from 1/8-ish rhythm to 1/16 chopped chatter. Automate Redux downsample up slightly over time. And do delay throws only on the last word every two bars, so it feels intentional.
Delay time 1/8 or 3/16, feedback 18 to 35, filter it hard with high-pass around 500 and low-pass around 4k. Keep ping-pong low or off if you want that mono broadcast thing.

Third: drop punctuation.
Use single stepped hits in the gaps between snares, not directly on top of them.
Teacher tip: snare masking is real here, because your radio band lives right where snares live. If your snare owns 1 to 3 kHz, either shift the vocal band a bit higher, like 1.8 to 3 kHz, or place the vocal hit a 16th before the snare so the snare still wins the transient.

Now, bonus sound design that makes it feel illegally real: the FM trash layer.

Make a Return track called RADIO NOISE.
Put a static loop or a noise source on it.
Band-pass it with Auto Filter, add a little Saturator, then put a Gate on the return and sidechain that Gate from your vocal track.
Now the noise opens only when the vocal hits. Blend it quietly. This is one of those “you don’t notice it until you mute it” tricks, and it screams pirate radio.

Optional extra: cheap speaker resonance.
Drop Resonators after the band-pass, turn on one or two resonators, tuned around 1 to 2 kHz, and keep dry/wet low. It fakes that boxy small-driver ring.

Now step six: performance macros. This is where you stop treating it like a fixed effect and start treating it like an instrument.

Map macros like this:
Radio Frequency to the Auto Filter frequency.
Radio Q to resonance.
Dirt to Saturator drive and Overdrive drive together.
Bit Crush to Redux bits from 12 down to 8.
Downsample to Redux downsample from 2 up to 8.
Step Tight to the Gate release from around 70 down to 20 milliseconds.
Width to Utility width from 0 to around 80, but automate it like a creative choice.
Throw to Delay dry/wet, maxing maybe 25 percent.

And if you added that pre-distortion Utility, map it as Drive Into Chain. That’s your “push the transmitter” knob.

For extra “pirate operator” chaos without losing the grid, use Follow Actions.
In Session View, make four to eight one-bar MIDI clips, each with a different step pattern: sparse, medium, dense, and at least one weird one. Then set Follow Action to jump every bar with a bit of “play again” probability. It’ll feel live, but it’s still locked to tempo, which is exactly the jungle sweet spot.

Now advanced variations if you want to push it.

Polyrhythmic stepper: keep drums straight, but make the vocal pattern loop every 12 sixteenth-notes, so it repeats every three beats instead of four. That creates 3-over-4 tension, the pattern walks across the bar line, and suddenly your loop feels like it’s going somewhere without touching the break.

Ghost call and response: duplicate the rack. One station is higher and bitey, one station is lower and throaty. Alternate hits between them. Keep both near center; the contrast comes from tone, not panning gimmicks.

Tape stop hiccup: on the resampled audio, automate a tiny region into Repitch and stretch it slightly. Like one eighth note. It gives that abused-deck speed wobble. Use it like a fill, not constantly.

Now, common mistakes to avoid as you build this.

Over-crushing too early. If Redux and Overdrive are too hot, consonants become fizz and the phrase disappears. Back off, then re-add intensity later with automation or resampling.

Too wide. That pirate energy is mid-focused. Keep it mostly mono and open width only for fills.

Fighting the snare. If your stepped vocal is sitting in the same mid band as the snare and hitting at the same moment, one of them loses. Usually the snare should win. Move the vocal hits into the gaps, or shift your band-pass center frequency.

Not committing. The best results come from printing audio, re-warping, and re-chopping. Jungle is a resampling culture. Second-generation artifacts are not a flaw; they’re the identity.

Now a quick mini practice you can actually finish today.

Pick one vocal phrase, one to two bars.
Slice it by 1/16.
Write two patterns: one sparse, about eight hits per bar, and one dense, twelve to sixteen.
Build the PIRATE STEPPER rack, map the macros.
Resample eight bars while performing:
Bars one to four: narrow band, low dirt.
Bars five to eight: increase downsample, tighten the gate, maybe add one delay throw at the end.
Then in Arrangement, use that resample as an eight-bar build into a drop, and do one intentional hard-mute right before the drop. Like an eighth or a quarter note of absolute silence, no tail. Then bring back a single punchy chop after the first downbeat.

That negative space reads huge in jungle. It’s one of the easiest ways to make your edit feel like it belongs on a system.

Recap to lock it in.

You took a vocal and treated it like percussion by slicing and sequencing.
You built a pirate-radio tone with band-pass filtering, controlled distortion, and resampling grit.
You forced it into the groove with gating or sidechain rhythm.
You committed it to audio, then used arrangement tricks like tune-in scanning, throws, and hard mutes.
And you mapped macros so you can perform the texture like an instrument instead of a static loop.

If you tell me your BPM, what kind of vocal it is, and whether your drums are Amen-forward or more 2-step steppers, I can suggest a specific step pattern set and where to park that band-pass so it hits hard without masking your snare.

mickeybeam

Go to drumbasscd.com for +100 drum and bass YouTube channels all in one place - tune in!

Generating PDF preview…