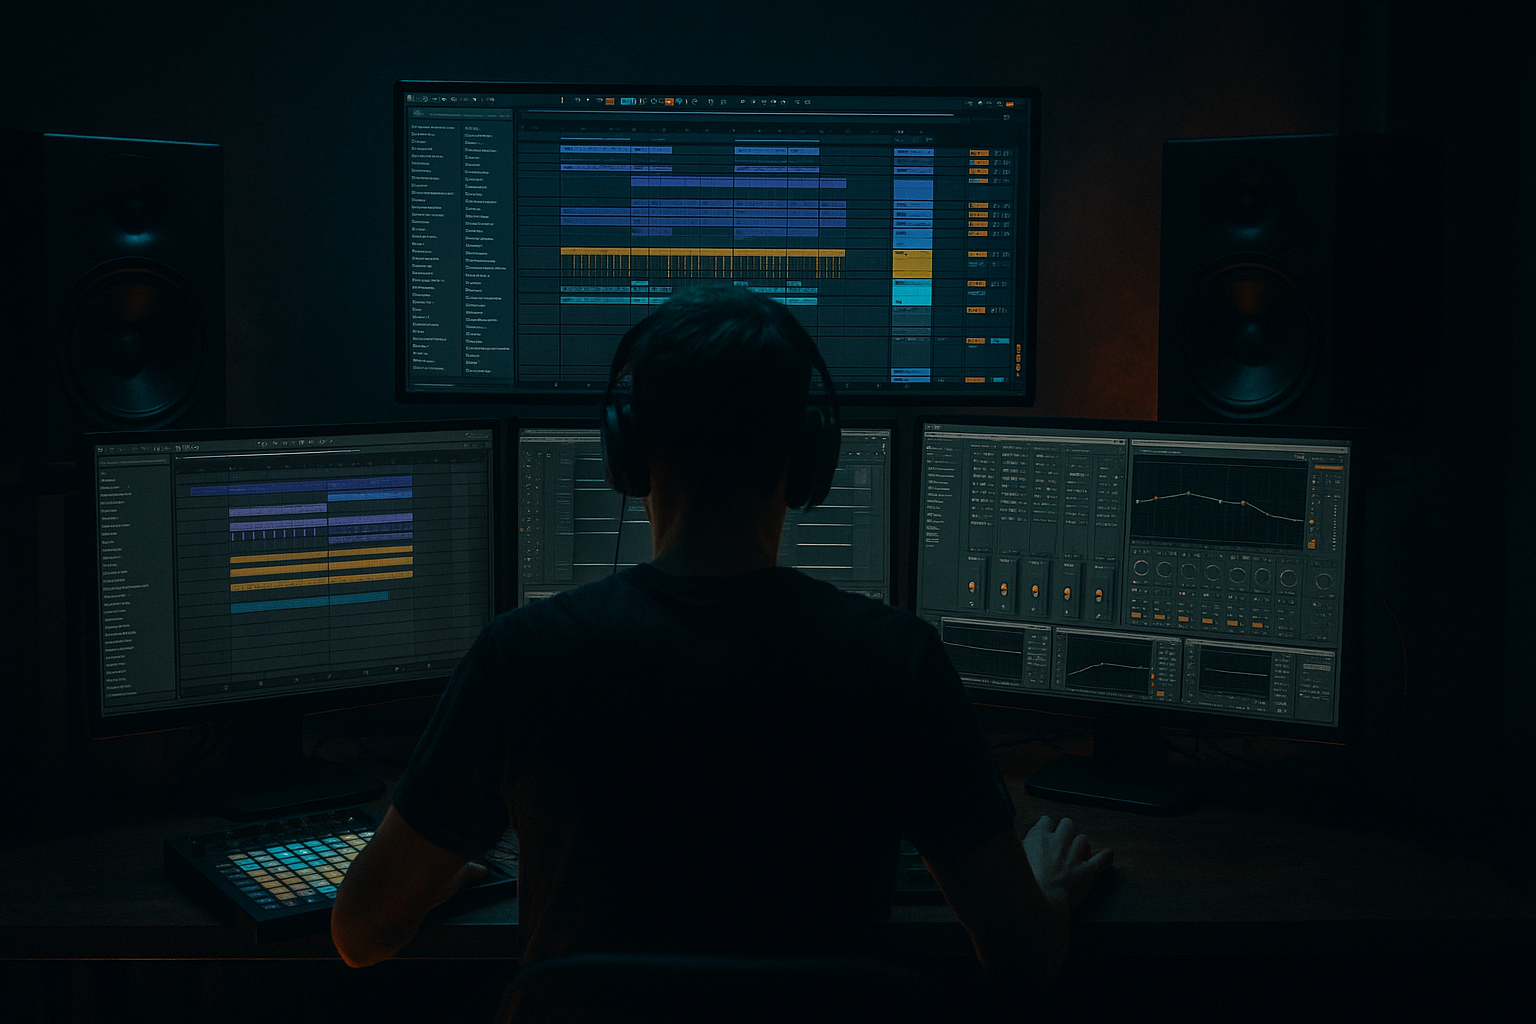
DNB COLLEGE

Drum & Bass Ableton Live 12 Tutorials

LESSON DETAIL

Stretching pads from one-shots masterclass for DJ-friendly sets (Advanced)

An AI-generated advanced Ableton lesson focused on Stretching pads from one-shots masterclass for DJ-friendly sets in the Sampling area of drum and bass production.

Back to lessons
Stretching pads from one-shots masterclass for DJ-friendly sets (Advanced) cover image

Narrated lesson audio

The voice track includes the tutorial plus extra teacher commentary.

Open audio file

Main tutorial

Stretching Pads From One‑Shots Masterclass (DJ‑Friendly DnB Sets) 🎛️🌌

1) Lesson overview

In drum & bass, pads aren’t just “pretty background.” In DJ-friendly productions, they’re mixing glue: they create long, stable harmonic beds that make intros/outros feel professional, help DJs blend keys, and keep energy rolling while drums drop in/out.

This masterclass shows how to take tiny one-shot samples (vox hits, foley, chord stabs, synth plucks, reese resamples) and stretch them into lush, evolving pads in Ableton Live, while keeping them tempo-locked, key-aware, and mix-ready for DnB arrangement norms (16/32-bar phrases).

You’ll do this with stock tools: Sampler/Simpler, Warp modes, Granulator III (if you have it), Wavetable, Hybrid Reverb, Echo, Auto Filter, Chorus-Ensemble, Utility, Saturator, Glue Compressor, and Resampling.

---

2) What you will build

By the end, you’ll have:

  • A pad instrument rack built from one-shot(s) that can generate:
  • - 16–32 bar intros/outros for DJs 🧩

    - breakdown beds behind atmos and FX

    - “rolling fog” pads that sit behind reese + drums without masking

  • A DJ-friendly arrangement template:
  • - 32-bar intro (pads + atmos)

    - 16-bar “tease” (pads + perc)

    - drop, breakdown, 32-bar outro

  • A repeatable workflow: stretch → stabilize pitch → add motion → mix carve → print stems.
  • ---

    3) Step-by-step walkthrough

    Step 0 — Choose the right one-shot (this matters)

    Pick one-shots with harmonic information or rich texture:

  • Short chord stab, string hit, vocal tone, analog synth pluck, frozen reverb tail, reese note, metallic foley
  • Avoid super transient-only hits (unless you want noisy pads)
  • DnB vibe tip: Jungle-era pads often come from resampled stabs + reverb tails, stretched and filtered.

    ---

    Step 1 — Set project foundations for DJ-friendly behavior

    1. Set tempo: 172–176 BPM.

    2. Decide your key early (e.g., F minor / G minor / D minor are common for heavier DnB).

    3. Turn on Loop brace to 32 bars and start thinking in phrases:

    - intros/outros usually 32 bars (sometimes 16).

    ---

    Step 2 — Stretch in Simpler (fastest “pad from one-shot” method) ⚡

    1. Drag your one-shot into Simpler (not Sampler yet).

    2. Go to Classic mode.

    3. Enable Warp inside Simpler.

    4. Choose a warp mode:

    - Complex Pro for tonal/musical content (chords, vox, synth)

    - Set Formants around 0–30 (avoid chipmunking when pitching)

    - Set Envelope around 64–128 for stability

    - Texture for noisy/foley/atmos

    - Set Grain Size ~ 80–200 ms

    - Flux ~ 10–25% for motion without chaos

    5. Turn on Loop:

    - Find a section of the sample that sounds “steady” (even if tiny).

    - Set Loop Length typically 50–400 ms.

    - Add a Fade (crossfade) to kill clicks:

    - Fade around 20–80 ms depending on loop length.

    6. Shape amplitude:

    - Attack: 50–300 ms (pads don’t “tick”)

    - Release: 1–6 s (long tail for DJ blends)

    - Enable Voices: 6–12 if you plan to play chords.

    Checkpoint: Hold a note for 8 bars. It should sound continuous, not clicky, and not wildly pitch-wobbling.

    ---

    Step 3 — Get it in key (advanced but essential)

    Pads that aren’t in key = DJs hate you (and your drop won’t feel “intentional”).

    Method A: Use Simpler’s Transpose

  • In Simpler, adjust Transpose until the pad feels in key.
  • If you know the note: tune so your played C sounds like your project key root (or vice versa).
  • Method B: Use Ableton Tuner + resample

    1. Drop Tuner after Simpler.

    2. Play a single note (e.g., C3) and watch the reading.

    3. Adjust Transpose until stable.

    4. Optional: Freeze + Flatten to print it clean.

    Pro approach: once tuned, consider printing a single sustained note and re-importing it. That locks it down for consistent DJ intros/outros.

    ---

    Step 4 — Add movement like a pro (without overcomplicating) 🌫️

    A pad that’s static for 32 bars will feel lifeless. Add slow motion.

    #### A) Filter movement (classic DnB intro vibe)

    Add Auto Filter after Simpler:

  • Mode: Lowpass 24 dB
  • Cutoff: start around 300–800 Hz
  • Resonance: 5–15%
  • Enable LFO:
  • - Rate: 0.03–0.10 Hz (very slow)

    - Amount: small, 5–15%

    Automate the cutoff across phrases:

  • Bar 1–16: slowly open
  • Bar 17–32: either open more or pull back before drop
  • #### B) Width & haze (make it “cinematic” but controlled)

    Add Chorus-Ensemble:

  • Mode: Ensemble
  • Amount: 10–30%
  • Rate: 0.05–0.20 Hz
  • Width: 80–120% (watch mono compatibility)
  • Add Hybrid Reverb:

  • Start with Convolution + Algorithm (best of both worlds)
  • Decay: 4–10 s
  • Predelay: 10–30 ms (keeps clarity)
  • High Cut: 6–10 kHz (darker DnB-friendly)
  • Mix: 10–25% (or use a Return track)
  • #### C) Tempo-synced “air” pulses (subtle DJ glue)

    Add Echo:

  • Time: 1/4 or 3/8 (DnB loves 3/16, 3/8 feels spacious)
  • Feedback: 10–25%
  • Filter: HP 200–400 Hz, LP 4–8 kHz
  • Mod: a touch (but keep it classy)
  • ---

    Step 5 — Make it sit in a rolling DnB mix (serious mix carving) 🥁

    Pads can ruin your drop if you don’t carve.

    Device chain (recommended):

    1. EQ Eight

    - HP filter: 24 dB @ 120–250 Hz

    (higher if your bass is huge)

    - Dip: 200–500 Hz if boxy (2–4 dB)

    - Dip: 1–3 kHz if it fights snares/vocals

    2. Utility

    - Bass Mono: set 120–200 Hz (keep low end centered)

    - Width: 80–110% depending on the pad

    3. Glue Compressor (gentle)

    - Ratio: 2:1

    - Attack: 10–30 ms

    - Release: Auto

    - GR: aim 1–2 dB

    4. Sidechain compression (mandatory for DnB)

    - Use Compressor with Sidechain from your Kick+Snare group (or whole Drum Buss)

    - Ratio: 4:1

    - Attack: 1–5 ms

    - Release: 80–160 ms (tune to groove)

    - GR: 2–6 dB depending on density

    DnB arrangement note: In intros/outros, you can reduce sidechain to keep it lush. During drops, increase it for punch.

    ---

    Step 6 — “Print it” for DJ-friendly reliability (resampling workflow) ✅

    Once your pad sounds good, print stems so it’s consistent and CPU-light.

    Option A: Freeze/Flatten

  • Right-click pad track → Freeze Track
  • Right-click → Flatten
  • Option B: Resample to audio (my go-to)

    1. Create a new Audio track named `PAD_PRINT`.

    2. Set its input to Resampling.

    3. Arm and record 32 bars of your pad performance (intro length).

    4. Consolidate (Cmd/Ctrl + J) into a single clip.

    5. Warp mode for the printed audio:

    - Usually Complex (or Complex Pro if needed)

    6. Add tiny clip fades to eliminate any start clicks.

    Now you have a DJ-ready pad stem you can drop into any arrangement.

    ---

    Step 7 — DJ-friendly arrangement ideas (DnB/Jungle rooted)

    Here are three proven ways to use the pad:

    #### Template A: “Classic 32-bar blend intro”

  • Bars 1–8: pad + noise bed (LP filtered, darker)
  • Bars 9–16: bring in hats/shaker loop, subtle uplifter
  • Bars 17–24: add break ghost layer or rim ticks
  • Bars 25–32: automate filter open + tension FX → drop
  • #### Template B: “Jungle throwback”

  • Pad printed from a stab + huge verb tail
  • Layer with a filtered Amen at low volume
  • Add vinyl noise and dub delay throws (Echo) at phrase ends
  • #### Template C: “Minimal roller tool”

  • Pad is very low in level, mostly mid/high texture
  • Sidechain stronger
  • Use it to fill gaps when bass is sparse, keeping energy consistent
  • ---

    4) Common mistakes

  • Warp mode mismatch: Using Beats mode on tonal material = warbly/phasey nonsense.
  • Loop clicks: No crossfade or loop too short without fades.
  • Pads fighting the bass: Not high-passing enough (pads do not need sub).
  • Too wide too low: Huge stereo width below ~200 Hz = mono problems in clubs.
  • No sidechain: Pads blur transients; DnB needs punch.
  • Over-reverb: Long decay + bright top end = harsh wash that kills drums.
  • Untuned source: If your pad is “between notes,” your whole track feels amateur.
  • ---

    5) Pro tips for darker/heavier DnB 🖤

  • Make pads “smoke,” not “shine”:
  • Use Hybrid Reverb High Cut (6–8 kHz) + Auto Filter to keep it moody.

  • Resample through saturation for grit:
  • Add Saturator (Soft Clip on, Drive 2–6 dB) before reverb, then print.

  • Pitch down for menace (carefully):
  • Pitch -3 to -12 semitones + Complex Pro with modest formant settings.

  • Add subtle dissonance:
  • Duplicate pad track, detune +7 cents, low volume, more reverb. Instant tension.

  • Mid/Side EQ discipline:
  • With EQ Eight in M/S mode:

    - Cut some Side around 200–600 Hz

    - Let Side live more above 2–5 kHz (but keep it dark overall)

  • Reese-compatible space:
  • If your reese owns 200–1k, carve the pad there and let pad focus on 1–4k air (quietly) + stereo tails.

    ---

    6) Mini practice exercise (20 minutes) ⏱️

    1. Pick one one-shot (vocal “ah,” synth stab, or foley tone).

    2. Build a Simpler pad:

    - Warp: Complex Pro (tonal) or Texture (noisy)

    - Loop: 100–250 ms + Fade 30–60 ms

    - ADSR: A 150 ms, R 3 s

    3. Add chain:

    - Auto Filter (LP24, slow LFO)

    - Hybrid Reverb (Decay 7 s, Predelay 20 ms, High Cut 7 kHz)

    - EQ Eight (HP @ 180 Hz, small dip at 300 Hz)

    - Sidechain Compressor from drums

    4. Record/print 32 bars as audio.

    5. Arrange a DJ intro:

    - Bars 1–16: pad only + subtle noise

    - Bars 17–32: hats + filtered break

    - Automate filter open into bar 33 (drop point)

    Export a quick bounce and listen like a DJ: does it blend smoothly for 30–60 seconds without getting annoying?

    ---

    7) Recap

  • Stretching pads from one-shots is about warp choice + loop technique + fades.
  • Make it DJ-friendly by thinking in 32-bar phrases, key stability, and printed stems.
  • Make it DnB-ready with HP filtering, sidechain, controlled width, and dark, intentional space.
  • Resampling is your friend: commit the vibe, reduce CPU, and keep consistency across the set.

If you tell me what kind of one-shot you want to use (vocal, stab, reese, foley) and your target subgenre (liquid, neuro, jungle, minimal roller), I can suggest exact warp/loop ranges and a rack preset structure tailored to it.

Ask GPT about this lesson

Chat with the lesson tutor, get follow-up help, or use quick actions.

Bigup 👽 Ask me anything about this lesson and I’ll answer in context.

Narration script

Show spoken script
Title: Stretching Pads from One-Shots Masterclass for DJ-friendly Sets (Advanced)

Alright, welcome in. This is an advanced Ableton Live lesson for drum and bass producers who want that professional, DJ-friendly glue in their tracks: long, stable pads that make intros and outros mix like a dream, sit behind heavy drums and bass without fighting, and hold a key center so the blend feels intentional.

Here’s the big idea. Pads in DnB aren’t just “background pretty.” In a DJ context they’re functional. They give the next track something to grab onto harmonically, they smooth transitions while drums come and go, and they keep energy rolling across 16 and 32-bar phrases. And the cheat code is: you don’t need a fancy synth patch. You can take tiny one-shots, like a chord stab, a vocal “ah,” a reese resample, even metallic foley, and stretch them into lush evolving beds.

We’re going to build a repeatable workflow: choose the right source, stretch it inside Simpler, stabilize tuning, add slow movement that locks to phrases, carve it so it behaves in a rolling DnB mix, then print stems so it’s reliable and CPU-light for actual arrangement work.

Before you touch warp, decide the pad’s job. This will stop you from going down a rabbit hole.
If it’s a blend pad, it should be almost invisible under drums and bass. That means carved low mids, controlled width, strong sidechain.
If it’s a statement pad, it can be featured in breakdowns: more harmonics, more movement, more automation.
If it’s a transition pad, the DJ tool: predictable dynamics, stable tonal center, and it should loop cleanly for 32 bars without annoying artifacts.

Step zero is choosing the one-shot, and yes, this matters more than people admit. Pick something with harmonic information or rich texture. Chord stabs, string hits, vocal tones, synth plucks, frozen reverb tails, reese notes, metallic room tones. If it’s purely transient, you can still make a pad, but it’ll turn into noise fast, which is fine if that’s what you want. Classic jungle trick, by the way: resampled stabs into massive reverb tails, then you stretch and filter the tail. That’s the heritage.

Now set your project foundations like you’re actually building a DJ-ready arrangement. Tempo in the 172 to 176 BPM zone. Decide your key early. D minor, F minor, G minor are common territory for heavier DnB, but pick whatever suits your tune. Then set your loop brace to 32 bars. Start thinking in phrases immediately, because we’re not designing a pad for four seconds, we’re designing something that can sit for half a minute and still feel intentional.

Now we stretch. Fastest method: Simpler, not Sampler yet.
Drag your one-shot into Simpler. Put it in Classic mode. Turn on Warp inside Simpler.

Warp mode choice is basically “what kind of material is this?”
If it’s tonal or musical, like chords, vocals, synth notes, go Complex Pro. Then set Formants somewhere around zero to 30 so pitching doesn’t turn into chipmunk mode, and set the Envelope around 64 to 128 so it stays stable.
If it’s noisy, textural, foley, air, room tone, go Texture mode. Grain Size around 80 to 200 milliseconds is a strong starting range, and Flux around 10 to 25 percent gives you motion without it turning into chaos.

Next, loop it. Turn Loop on, and you’re hunting for the most “steady” part of the sample, even if it’s tiny. Think of this like oscillator design. The loop is your waveform. The warp mode is your oscillator algorithm. And the fade is your anti-click, anti-aliasing trick. If you move the loop start by a few milliseconds, it can go from boring to record-like. This is where the magic actually is.

Set the loop length typically anywhere from 50 to 400 milliseconds. Shorter loops feel more synthetic and stable, longer loops feel more organic and evolving. Then add Fade, basically a crossfade, to kill clicks. Fade around 20 to 80 milliseconds depending on your loop length. If you’re hearing little ticks, don’t reach for a de-click plugin. Just increase the fade, or slightly change the loop start and end.

Now shape the amplitude so it behaves like a pad. Attack around 50 to 300 milliseconds. You don’t want a “tick” at note-on. Release anywhere from one to six seconds so it can blend like a DJ tool. And if you want to play chords, increase voices to something like 6 to 12 so it doesn’t choke.

Quick checkpoint: hold one note for eight bars. Not one bar, eight bars. You’re listening for three things: no clicking, no sudden tonal jumps, and no accidental pitch wobble. If it wobbles, we’ll add wobble later on purpose. Right now, we want stability.

Next: tuning. This is the difference between “sounds cool solo” and “works in a set.” If your pad is between notes, the whole track feels amateur and a DJ will feel the clash even if they can’t explain it.

First pass: tune for correctness. Add Ableton’s Tuner after Simpler. Play something like C3, watch the reading, and adjust Simpler’s Transpose until it locks. If the sample is messy, you might not get a perfect reading, but you can still find the best center. Once it’s tuned, consider printing a single sustained note and re-importing it. That’s a pro move for DJ-friendly intros and outros because it locks the pad’s behavior down. Tuning is correctness.

Second pass is vibe. After you know it’s correct, you can add micro-instability intentionally. A slow vibrato, a tiny random detune, a slight grain flux. The key is you decide the movement, instead of warping deciding for you.

Now we add movement like a pro, but we keep it slow and phrase-aware. If your pad is static for 32 bars, it feels like a loop. If it moves too fast, it becomes an effect. We want slow breathing.

Start with Auto Filter after Simpler. Lowpass 24 dB. Cutoff somewhere around 300 to 800 Hz to begin, resonance around 5 to 15 percent. Turn on the LFO, and go extremely slow: 0.03 to 0.10 Hz. That’s the zone where you feel motion but you don’t hear “wobble.” Keep LFO amount small, like 5 to 15 percent.

And here’s a big upgrade: phrase-lock your motion. Instead of letting an LFO free-run, automate the cutoff in the clip, or in arrangement, over exactly 8, 16, or 32 bars. Bar one to sixteen, slowly open. Bar seventeen to thirty-two, maybe open a little more, or pull it back before the drop. When modulation lands on bar lines, it feels like arrangement, not randomness.

Next, width and haze. Chorus-Ensemble is your friend, but you have to respect mono compatibility. Use Ensemble mode, Amount maybe 10 to 30 percent, Rate 0.05 to 0.20 Hz. Width 80 to 120 percent. If you go huge, make sure you check mono.

Then Hybrid Reverb. For DnB pads, I like Convolution plus Algorithm for a blend of realistic space and controllable tail. Decay four to ten seconds. Predelay 10 to 30 milliseconds so your pad still has a defined front edge and doesn’t smear instantly. High Cut at about 6 to 10 kHz to keep it darker and less harsh. Mix around 10 to 25 percent if it’s inserted, or better yet, do it on a return so you can keep your dry signal stable and control the wet separately.

Add Echo if you want tempo-synced air. Keep it subtle. Try 1/4 or 3/8 for spaciousness, with feedback 10 to 25 percent. High-pass the echo around 200 to 400 Hz, low-pass around 4 to 8 kHz. A touch of modulation is fine, but you’re aiming for classy glue, not sci-fi chaos.

Now we do the serious part: making it sit in a rolling DnB mix. Pads can absolutely ruin your drop if you don’t carve. Your bass and your drums are the main character; the pad is the environment.

Start with EQ Eight. High-pass, 24 dB slope, somewhere around 120 to 250 Hz. If you’ve got a huge sub and a thick reese, go higher. If it feels boxy, dip 200 to 500 Hz by two to four dB. If it fights snare crack or vocals, dip around 1 to 3 kHz. Don’t overdo it; you’re making space, not deleting the pad.

Then Utility. Set Bass Mono somewhere around 120 to 200 Hz so the low end stays centered. Adjust Width to taste, typically 80 to 110 percent for the core pad. Wider is not automatically better. Wide in the wrong frequency range just becomes fog.

Then Glue Compressor, gentle. Ratio 2:1, attack 10 to 30 milliseconds, release Auto. You’re just controlling the pad so it doesn’t jump around. One to two dB of gain reduction is plenty.

Then sidechain compression, and in DnB this is basically mandatory. Use Compressor with Sidechain enabled, keyed from your Kick and Snare group, or your full Drum Buss. Ratio 4:1, fast attack 1 to 5 milliseconds, release 80 to 160 milliseconds. Tune the release so it breathes with the groove. Gain reduction two to six dB depending on how dense the track is.

Arrangement tip: in intros and outros, you can back off the sidechain to keep it lush. During the drop, increase it so drums punch and the pad stays supportive, not smearing transients.

Now do the stability check that saves you from club system disasters. Loop 32 bars, and yes, do it with your full drum and bass drop playing, even if you mute later. Now toggle the pad track to mono. Utility, width to zero. If your tone disappears or gets hollow, you have phase problems. It’s usually chorus, reverb width, or too-wide low mids. Fix it by narrowing width, mono-ing the lows higher, or reducing stereo information in the 200 to 800 Hz area with mid-side EQ.

At this point, you’ve designed something that works. Now we make it DJ-friendly by printing it. Because a pad that changes behavior every time you hit play, or eats CPU, is not the vibe when you’re arranging quickly.

You can freeze and flatten. That’s fine. But my go-to is resampling.
Create a new audio track called PAD_PRINT. Set its input to Resampling. Arm it, and record 32 bars of your pad performance, exactly intro length. Consolidate into one clip. Add tiny clip fades to remove start clicks. Warp the printed audio if needed, usually Complex, or Complex Pro if it’s still very tonal.

And here’s an advanced workflow upgrade: print in layers, not just one stereo stem. Export a PAD_DRY with no reverb or delay. Export a PAD_WET that’s just your reverb and delay, and high-pass it so it’s not dumping low mids into the mix. Export a PAD_MOTION layer, like your chorus and filter movement character. When you have those three, you can adapt to different venues, different mastering chains, or even different tracks in a set, without rebuilding the patch.

Now let’s talk DJ-friendly arrangement templates, because sound design without arrangement intent is only half the job.

Template one is classic 32-bar blend intro. Bars one to eight: pad plus a noise bed, lowpass filtered, darker. Bars nine to sixteen: bring in hats or a shaker loop, maybe a subtle uplifter. Bars seventeen to twenty-four: add ghost break layers or rim ticks to hint at the groove. Bars twenty-five to thirty-two: open the filter and add tension FX into the drop.

Template two is jungle throwback. Your pad is printed from a stab plus a huge reverb tail. Layer a filtered Amen at low volume. Add vinyl noise and dubby echo throws at phrase ends. Make sure it’s loopable and stable, because a DJ might ride that section.

Template three is the minimal roller tool. Keep the pad low in level, more mid and high texture than chords, stronger sidechain. It fills the gaps when bass goes sparse and keeps energy consistent without stepping forward.

A couple common mistakes to avoid as you go.
If you use the wrong warp mode, like Beats on tonal stuff, you’ll get warbly, phasey nonsense.
If you hear clicks, it’s almost always loop and fade settings.
If your pad is fighting the bass, you didn’t high-pass enough. Pads do not need sub.
If you’re huge and wide below about 200 Hz, you’re asking for mono problems in clubs.
If you skip sidechain, your drums will feel less punchy.
If you over-reverb with a bright top end, you’ll create a harsh wash that kills drum clarity.
And if it isn’t tuned, everything sounds accidental.

Now quick pro tips for darker, heavier DnB. Make pads smoke, not shine. Use the reverb high cut around six to eight kHz, and keep the filter lower. For grit that survives big systems, use mild Saturator, soft clip on, drive two to six dB, then shave a little 3 to 6 kHz if it gets brittle. If you pitch down for menace, like minus three to minus twelve semitones, do it with Complex Pro and modest formants so it stays believable. For tension, duplicate the pad, detune it plus seven cents, keep it low in volume, and send it to more reverb. That subtle dissonance reads as emotion.

If your reese owns the 200 to 1k range, carve the pad there. Let the pad live as texture and tail, maybe a little 1 to 4k air, but quietly. It’s a support role.

Let’s wrap with a 20-minute practice run so you actually lock this in.
Pick one one-shot. Build a Simpler pad with Warp on. Use Complex Pro for tonal, Texture for noisy. Loop 100 to 250 milliseconds with a fade around 30 to 60 milliseconds. Set attack about 150 milliseconds, release around three seconds.
Add Auto Filter, lowpass 24, slow movement. Add Hybrid Reverb, decay around seven seconds, predelay 20 milliseconds, high cut about seven kHz. EQ Eight high-pass around 180 Hz, small dip around 300 Hz if needed. Sidechain from drums.
Print 32 bars to audio.
Then arrange a DJ intro: bars one to sixteen, pad only plus subtle noise. Bars seventeen to thirty-two, hats plus a filtered break. Open the filter toward bar thirty-three, the drop point.
Export a quick bounce and listen like a DJ. Can it blend smoothly for 30 to 60 seconds? Does it stay in key? Does it feel structured every eight bars? Does it survive mono?

Recap: stretching pads from one-shots is warp choice plus loop technique plus fades. DJ-friendly means 32-bar thinking, stable key, and printed stems. DnB-ready means high-pass filtering, controlled width, sidechain, and dark, intentional space. Resampling is how you commit the vibe and keep it consistent across the set.

If you tell me what one-shot you’re using, vocal, stab, reese, or foley, and what subgenre you’re aiming at, liquid, jungle, neuro, minimal roller, I can suggest exact warp and loop ranges and a macro map for a two-layer core-plus-halo rack that’s optimized for DJ intros and outros.

mickeybeam

Go to drumbasscd.com for +100 drum and bass YouTube channels all in one place - tune in!

Generating PDF preview…