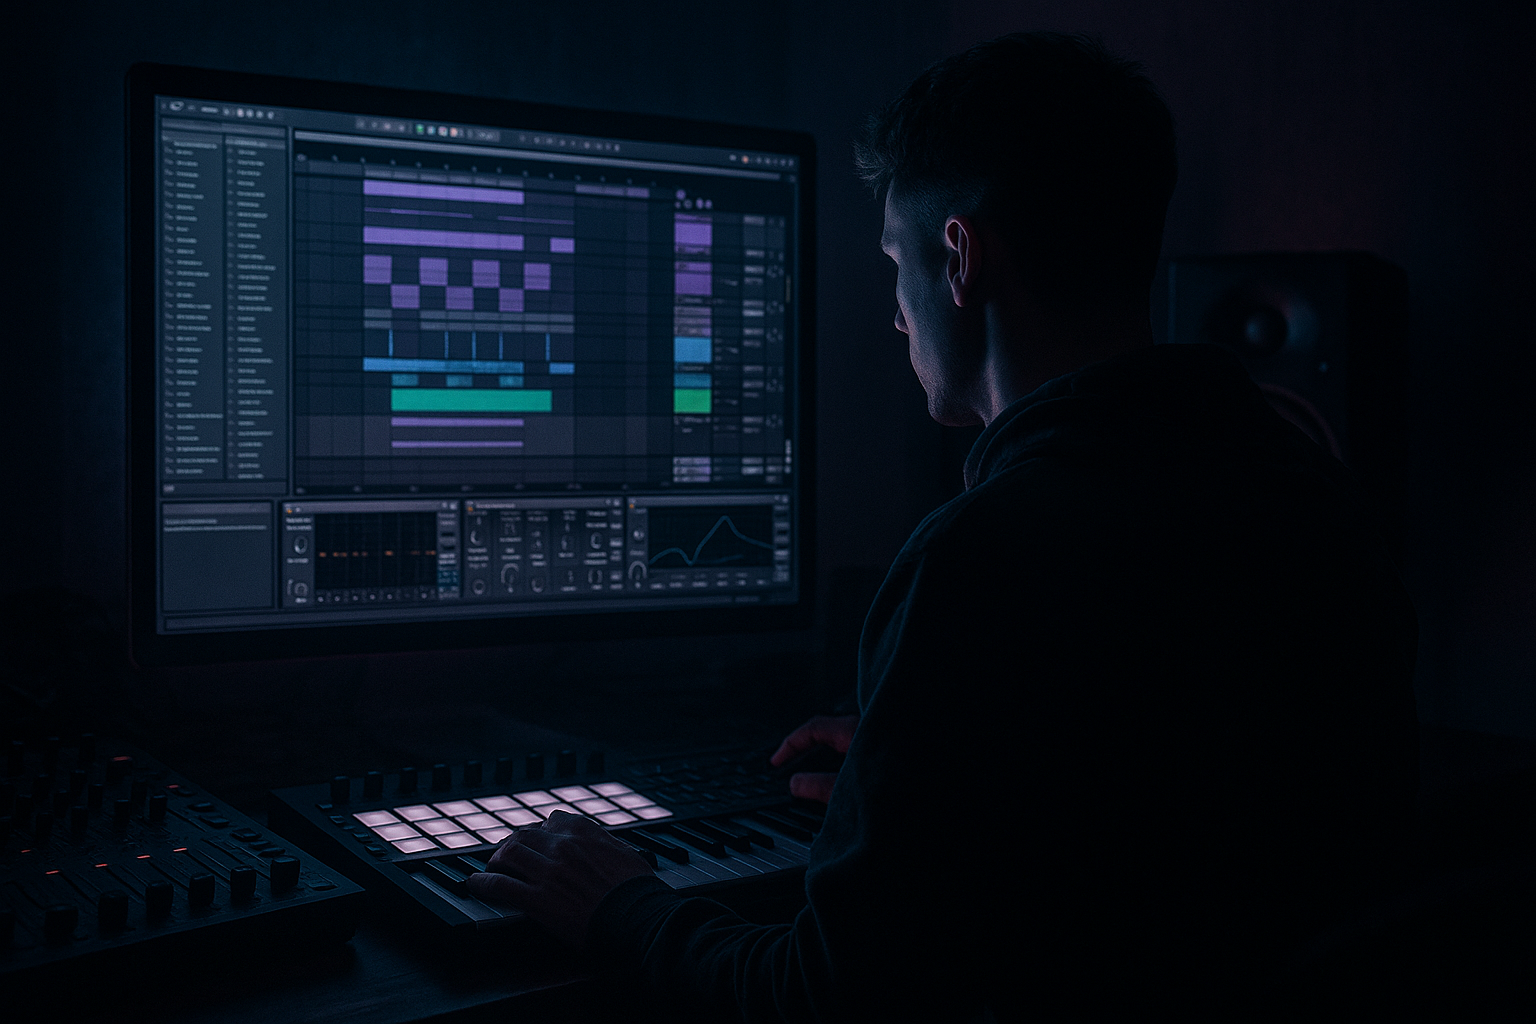
DNB COLLEGE

Drum & Bass Ableton Live 12 Tutorials

LESSON DETAIL

Subtle groove macro controls (Advanced)

An AI-generated advanced Ableton lesson focused on Subtle groove macro controls in the Groove area of drum and bass production.

Back to lessons
Subtle groove macro controls (Advanced) cover image

Narrated lesson audio

The voice track includes the tutorial plus extra teacher commentary.

Open audio file

Main tutorial

Subtle Groove Macro Controls (Advanced) — Drum & Bass in Ableton Live 🎛️🥁

1. Lesson overview

In drum & bass, “groove” isn’t just swing—it’s microtiming, velocity shape, ghost-note behavior, transient emphasis, and tiny layer balance changes that make a loop roll.

This lesson shows how to build a single Macro “Groove Hub” in Ableton Live that lets you perform subtle groove variations (push/pull, ghost intensity, hat shuffle, snare snap, room feel) without wrecking timing or phase.

We’ll do this with stock devices (Drum Rack, Groove Pool, MIDI Effects, Audio Effects, Racks, LFO/Shaper via Max for Live if available) and a workflow that’s tight for rolling DnB / jungle / dark minimal.

---

2. What you will build

A reusable Groove Macro Rack controlling a DnB drum bus with 8 macros:

1. Push/Pull (micro-delay feel on specific elements)

2. Hat Shuffle (swing feel focused on hats, not the whole kit)

3. Ghosts (velocity + tone of ghost notes)

4. Kick Tight (transient/low-end focus)

5. Snare Snap (attack + presence zone)

6. Room/Space (short room that glues, not washes)

7. Break Dirt (parallel saturation for jungle vibe)

8. Motion (slow modulation for “alive” loops)

End result: you can automate a few macros across a 64-bar section and make the groove evolve subtly like a pro.

---

3. Step-by-step walkthrough

Step 0 — Session prep (fast + reliable)

  • Tempo: 172–176 BPM
  • Create groups:
  • - DRUMS (Group Track)

    - Inside it: KICK, SNARE, HATS, BREAK/AMEN (optional), PERC

  • Set a clean starting drum pattern:
  • - Kick: typical 2-step or rolling pattern

    - Snare: on 2 and 4

    - Hats: 1/16ths + occasional offbeats

    - Ghost snare: low-velocity notes around the backbeat

    Why: macros work best when the arrangement is already “correct”—we’re enhancing movement, not fixing poor sequencing.

    ---

    Step 1 — Build a Drum Rack that’s macro-friendly 🧱

    1. On the DRUMS group, create a MIDI track (or keep separate MIDI for hats etc.—either works).

    2. Insert Drum Rack.

    3. Load:

    - Kick sample (tight, short tail)

    - Snare sample (body + crack)

    - Closed hat, open hat

    - Ghost snare (can be same snare sample pitched or filtered)

    - Optional: an Amen/think break slice chain (Simpler in Slice mode)

    Key tip: Keep kick and sub-bass relationship stable; we won’t “groove” the kick timing much.

    ---

    Step 2 — Separate “groove timing” from “groove feel”

    Groove is often destroyed by applying global swing to everything. Instead:

    #### A) Groove Pool for hats only 🎚️

    1. Open Groove Pool (Cmd/Ctrl+Alt+G).

    2. Add a groove like:

    - Swing 16-65 (or MPC 16 Swing 57–63 style)

    3. Drag that groove onto your Hats MIDI clip only.

    4. Set groove parameters:

    - Timing: 10–25%

    - Velocity: 0–15%

    - Random: 0–5%

    5. Commit? Not yet. Keep it live so macros can complement it.

    DnB rationale: hats carry shuffle; snare anchors; kick drives.

    ---

    Step 3 — Create the “Groove Hub” Audio Effect Rack on the DRUMS bus

    On the DRUMS group track, add:

    1. Audio Effect Rack → rename: `Groove Hub`

    2. Create these chains inside the rack:

    - `DRY`

    - `ROOM` (parallel ambience)

    - `DIRT` (parallel saturation)

    - `SNAP` (parallel transient/presence)

    Right-click chain area → Create Chain four times.

    Now we’ll map macros.

    ---

    Step 4 — Macro 1: Push/Pull (micro feel without ruining phase) ⏱️

    Goal: A tiny “late” or “early” perception—without shifting the kick or smearing transients.

    Best practice: apply to percussion/break layers, not the kick.

    How (simple + effective):

    1. On your BREAK/AMEN track (or a PERC bus), insert Track Delay (bottom of mixer, enable D in mixer view).

    2. Set base delay 0.0 ms.

    3. Map Track Delay to Macro 1 (you can map track delay by grouping that track into DRUMS and mapping within a rack on the group—if mapping is awkward, put an Audio Effect Rack on the break track and keep the macro there).

    Suggested range:

  • Macro “Push/Pull” → -8 ms to +12 ms
  • Start around +6 ms for a lazier roll; -3 ms for urgency.
  • Note: Avoid delaying the snare unless you want that draggy halftime vibe. In rolling DnB, snare usually stays tight.

    ---

    Step 5 — Macro 2: Hat Shuffle (timing + transient softening)

    We’ll create shuffle perception without changing MIDI timing again by shaping hats.

    On HATS chain (if you have hats as audio) or on the hats track:

    1. Add Auto Filter

    - Mode: HP12

    - Freq: ~300–800 Hz (depending on hats)

    2. Add Saturator

    - Drive: 1–4 dB

    - Soft Clip: On

    3. Add Utility

    - Width: 80–140% (optional)

    Map Macro 2 “Hat Shuffle” to:

  • Auto Filter Envelope Amount (subtle dynamic movement)
  • Saturator Drive
  • Utility Width
  • Macro range idea:

  • Envelope Amount: 0 → 15
  • Drive: 0.5 dB → 4 dB
  • Width: 90% → 135%
  • This makes hats feel like they “lean” and breathe even when quantized.

    ---

    Step 6 — Macro 3: Ghosts (velocity + tone control) 👻

    Ghost notes are the difference between a loop and a roll.

    Option A (MIDI ghost control with stock devices):

    On your Ghost Snare MIDI track, add:

    1. Velocity MIDI effect

    - Drive: 0

    - Random: 0–8

    - Out Hi: mapable

    2. Auto Filter

    - LP12, Freq 2–8 kHz depending on taste

    3. Drum Buss (yes, on the ghost chain can be great)

    - Drive 0–10%, Crunch 0–10%

    Map Macro 3 “Ghosts” to:

  • Velocity Out Hi (e.g. 45 → 85)
  • Filter Frequency (e.g. 3 kHz → 9 kHz)
  • Drum Buss Drive (e.g. 0% → 8%)
  • Result: one macro controls how present ghosts are without rewriting MIDI.

    ---

    Step 7 — Macro 4: Kick Tight (transient focus + sub cleanup)

    On the KICK track (or kick chain):

    1. EQ Eight

    - HP filter off (don’t kill subs), but consider:

    - small cut at 200–350 Hz if boxy (Q ~1.2, -1 to -3 dB)

    2. Drum Buss

    - Transients: +5 to +25

    - Boom: 0–10% (careful in DnB)

    3. Optional: Glue Compressor

    - Attack: 10–30 ms

    - Release: Auto

    - Ratio: 2:1

    - GR: 1–2 dB max

    Map Macro 4 “Kick Tight” to:

  • Drum Buss Transients (0 → +25)
  • EQ Eight bell gain (0 → -3 dB at ~250 Hz)
  • Pro groove angle: tighter kick = groove reads cleaner, making small hat/ghost changes more noticeable.

    ---

    Step 8 — Macro 5: Snare Snap (parallel presence without harshness) 💥

    Use the `SNAP` chain in the Groove Hub rack.

    Inside `SNAP` chain:

    1. EQ Eight

    - HP at 150 Hz

    - Gentle boost at 3–6 kHz (+1 to +4 dB)

    2. Saturator

    - Drive 2–8 dB, Soft Clip On

    3. Compressor

    - Attack 3–10 ms

    - Release 50–120 ms

    - Ratio 4:1

    - Aim 2–6 dB GR (parallel chain, so it’s fine)

    Now map Macro 5 “Snare Snap” to:

  • `SNAP` chain volume (or Rack Chain Volume)
  • Optionally the EQ boost gain
  • Macro range: Chain Volume from -inf → -10 dB (so you blend it in).

    This gives a controllable “crack” that helps the groove stay forward as hats shuffle.

    ---

    Step 9 — Macro 6: Room/Space (short room glue)

    Use the `ROOM` chain.

    Inside `ROOM` chain:

    1. Reverb

    - Type: Room / Ambience

    - Decay: 0.25–0.6 s

    - Predelay: 0–10 ms

    - Size: 20–45%

    - HiCut: 6–10 kHz

    - LowCut: 200–500 Hz

    - Dry/Wet: 100% (because it’s parallel)

    2. Compressor

    - Sidechain from DRY drums optional (advanced glue)

    3. EQ Eight after Reverb

    - Trim any harsh ring at 2–4 kHz if needed

    Map Macro 6 “Room” to:

  • `ROOM` chain volume (blend)
  • Reverb Decay Time (slight range only)
  • Macro range:

  • Chain Volume: -inf → -14 dB
  • Decay: 0.25 → 0.55 s
  • Short room adds “togetherness” and perceived groove without obvious reverb tails.

    ---

    Step 10 — Macro 7: Break Dirt (jungle energy, controlled)

    Use the `DIRT` chain.

    Inside `DIRT`:

    1. Saturator

    - Drive: 3–10 dB

    - Soft Clip On

    2. Redux (optional, very subtle)

    - Downsample: 1.00 → 1.30 (tiny movement)

    3. Auto Filter

    - Bandpass or HP to keep it from muddying

    4. Glue Compressor

    - Attack 1–3 ms

    - Release Auto

    - Ratio 4:1

    - Add makeup to taste

    Map Macro 7 “Break Dirt” to:

  • `DIRT` chain volume
  • Saturator Drive
  • Filter Frequency (so dirt comes in “focused”)
  • Macro idea: dirt increases intensity in fills, 2nd drop, or last 8 bars.

    ---

    Step 11 — Macro 8: Motion (slow “alive” drift) 🌒

    This is the “subtle automation” macro.

    If you have Max for Live:

    1. Add LFO (M4L) on the Groove Hub rack.

    2. Map LFO to:

    - `ROOM` chain volume (tiny)

    - `DIRT` chain volume (tiny)

    - Hat filter frequency (tiny)

    3. LFO settings:

    - Rate: 1/8 → 1/2 bar (try 1 bar for subtle)

    - Depth: very small (1–3%)

    - Offset so it never hits extremes

    Then map Macro 8 “Motion” to LFO Amount (0 → small).

    No M4L alternative: manually automate Macro 6/7 in arrangement with gentle curves.

    ---

    Step 12 — Arrangement: where to automate for rolling DnB

    In Arrangement View, think in 16-bar logic:

  • Bars 1–16 (Drop A): conservative
  • - Ghosts: medium

    - Room: low

    - Dirt: low

  • Bars 17–32 (Variation): increase movement
  • - Hat Shuffle slightly up

    - Motion up a touch

  • Bars 33–48 (Drop B / response): intensity
  • - Snare Snap up (parallel)

    - Dirt up (but keep lows clean)

  • Bars 49–64 (Outro / fill): pull back
  • - Reduce snap/room

    - Let groove breathe

    Use automation lanes for macros, not individual devices—this keeps your decisions musical.

    ---

    4. Common mistakes

  • Swinging the whole drum rack: makes snares late and kills punch. Put groove on hats/percs first.
  • Too much track delay: ±20 ms is huge at 174 BPM—your loop will sound drunk, not rolling.
  • Parallel chains out of control: if ROOM/DIRT/SNAP are too loud, you’ll lose the dry transients that define DnB.
  • Over-widening hats: wide hats plus mono clubs = phasey groove. Check in mono (Utility → Width 0% briefly).
  • Randomizing everything: tiny randomness works; big randomness sounds messy and “un-DnB”.
  • ---

    5. Pro tips for darker/heavier DnB 🖤

  • Keep sub + kick stable: do not “groove” sub timing with macros unless you really know what you’re doing. Groove the tops.
  • Use frequency-focused dirt: distort 800 Hz–6 kHz regions for aggression while keeping <150 Hz clean.
  • Ghost notes should be felt, not heard: set them so you miss them when muted, but they don’t call attention.
  • Room is usually shorter in dark DnB: 0.25–0.45s ambience is often enough.
  • Make the snare “snap” a parallel layer: this preserves body while letting you automate crack intensity per section.
  • ---

    6. Mini practice exercise (15 minutes) ⏱️

    1. Take a 2-bar rolling drum loop (kick/snare/hats/ghosts).

    2. Build the Groove Hub rack with ROOM + SNAP only.

    3. Automate:

    - Macro 3 (Ghosts): slowly up from 35% → 55% over 16 bars

    - Macro 6 (Room): add just in the last 4 bars before a fill

    - Macro 5 (Snare Snap): bump +10–20% on bar 15–16 only

    4. Bounce/export that 16 bars and A/B:

    - Version A: no automation

    - Version B: macro automation

    5. Listen specifically for:

    - Does it feel more “rolling” without sounding louder overall?

    - Is the snare still the anchor?

    ---

    7. Recap

  • Advanced DnB groove comes from controlled micro-variation, not heavy swing.
  • Use a Macro-driven rack to perform groove: ghosts, hat feel, snap, room, dirt, motion.
  • Keep the kick and snare foundation stable, and move the supporting elements.
  • Automate macros across 16-bar phrases for a pro, evolving roll.

If you want, tell me whether you’re building minimal rollers, jungle/amen, or neuro-ish, and I’ll suggest macro ranges and a device chain tailored to your drum samples and mix style.

Ask GPT about this lesson

Chat with the lesson tutor, get follow-up help, or use quick actions.

Bigup 👽 Ask me anything about this lesson and I’ll answer in context.

Narration script

Show spoken script
Title: Subtle Groove Macro Controls (Advanced)

Alright, let’s get into the kind of groove work that separates a decent drum loop from something that rolls like it’s alive.

In drum and bass, groove isn’t just “add swing and call it a day.” Real groove is microtiming, velocity shape, ghost note behavior, transient emphasis, and tiny layer balance moves that change how the loop breathes. And the goal today is to make that controllable.

By the end of this lesson, you’re going to have one macro-controlled “Groove Hub” on your drums bus. Eight macros that let you perform subtle variations like push and pull, ghost intensity, hat shuffle, snare snap, room glue, break dirt, and a little motion… without wrecking your timing, without smearing transients, and without turning your mix into phase soup.

Let’s set the context fast.

Set your project tempo around 172 to 176 BPM. Now create a DRUMS group, and inside it keep your elements separated: kick, snare, hats, percussion, and optionally a break layer like an Amen or Think. Start with a clean, correct pattern first. Snare on two and four, hats doing sixteenths with some intention, and ghost snares around the backbeat at low velocity.

That part matters: macros are not here to fix a bad pattern. They’re here to add controlled movement to a good one.

Now, build your drum sources in a macro-friendly way. You can do a single Drum Rack, or separate tracks; both work. Just keep the kick tight and stable, and keep the sub relationship sacred. In DnB, your low-end timing is not where you want random “groove experiments,” at least not today.

Next concept: separate groove timing from groove feel.

A super common mistake is slapping a groove on the entire drum rack. It makes hats feel nice… and it also makes snares late, which kills punch. So we’re going to use the Groove Pool in a targeted way.

Open the Groove Pool. Grab something like Swing 16-65, or an MPC-style 16 swing in the high 50s or low 60s. Drag it onto your hats clip only. Then pull the groove amount down. Timing around 10 to 25 percent. Velocity maybe 0 to 15. Random very small, like 0 to 5. And don’t commit it yet. Keep it live. We’re going to let the macros complement this, not fight it.

Now we build the main structure: the Groove Hub.

On the DRUMS group track, add an Audio Effect Rack, and rename it Groove Hub. Inside, create four chains: DRY, ROOM, DIRT, and SNAP.

Quick mindset check: DRY is your truth. Everything else is seasoning. If your parallel chains get too loud, your drums stop sounding like drums and start sounding like processing.

Before we even map macros, do a little pro move: gain stage your chains. You want each macro at zero percent to be basically inactive, meaning silent or nearly silent on parallel chains. And at one hundred percent, it should still be mix-safe. A really solid target is that cranking a macro should not raise the overall drum bus more than about one to two dB RMS. That forces you to build subtle controls that translate.

Now, Macro 1: Push and Pull.

This is microtiming feel without destroying phase. Here’s the rule: don’t mess with the kick. Be extremely careful with the snare. This macro is for tops, percussion, and break layers.

The simplest method: use Track Delay on the break layer or percussion track. Start at zero milliseconds and map it to Macro 1. Set a tight range: negative eight milliseconds up to positive twelve milliseconds. Around plus six feels lazier and deeper. Around minus three feels more urgent and forward.

And keep perspective: at 174 BPM, twenty milliseconds is huge. If you go too far, it doesn’t sound groovy, it sounds drunk.

Macro 2: Hat Shuffle.

We already used Groove Pool timing on hats, so now we add the illusion of shuffle without further timing changes. This is about transient shape, tone, and a little width control.

On your hats track, add Auto Filter in high-pass mode, 12 dB slope. Somewhere around 300 to 800 Hz depending on your hats. Add a Saturator with Soft Clip on, drive around one to four dB. Optionally add Utility for width.

Now map Macro 2 to three things: the filter envelope amount, the Saturator drive, and a safe width range. Keep the envelope amount subtle, like 0 to 15. Drive maybe 0.5 dB up to 4 dB. Width cap it, like 90 percent to 135 percent.

And here’s the teacher note: don’t widen hats to feel “bigger.” Widen hats to feel “more alive,” and always check in mono. A lot of “cool shuffle” disappears in mono if it’s just phasey width.

Macro 3: Ghosts.

This is one of the biggest “pro roller” differences. Ghost notes should be felt, not heard. You want them to disappear into the groove, but when you mute them, the whole loop suddenly feels stiff. That’s the sweet spot.

On the ghost snare MIDI track, add a Velocity MIDI effect. Keep drive at zero, random small, like 0 to 8. Add Auto Filter after the sampler: low-pass mode is great here, cutoff somewhere in the 2 to 8 kHz zone depending on how bright the ghost is. Then add Drum Buss lightly for tone, drive and crunch small.

Map Macro 3 to Velocity Out Hi, filter cutoff, and Drum Buss drive. A good mapping range is Out Hi from 45 up to 85, filter from about 3 kHz to 9 kHz, and Drum Buss drive from 0 up to around 8 percent.

And here’s a more advanced trick: couple velocity to timbre. When the macro increases ghost loudness, let it also brighten slightly. That’s what real drummers do naturally: harder hits are brighter.

Macro 4: Kick Tight.

This isn’t about making the kick louder. It’s about making the kick read cleanly, so the rest of the groove detail becomes more audible.

On the kick, add EQ Eight and optionally set a small cut around 200 to 350 Hz if it’s boxy. Like one to three dB, gentle Q. Add Drum Buss and map the Transients parameter. Keep boom low or off in DnB unless you know exactly where your sub is living.

Map Macro 4 to Drum Buss Transients, from 0 up to plus 25, and map that boxiness cut from 0 down to minus 3 dB.

Teacher note: tighter kick doesn’t just make the kick punchier. It makes your hat shuffle and ghost work more noticeable, because the groove “grid” feels more defined.

Macro 5: Snare Snap.

We’ll do this as parallel presence so you don’t destroy the main snare body.

Go into the SNAP chain. Add EQ Eight with a high-pass around 150 Hz, and a gentle boost somewhere in the 3 to 6 kHz range. Add Saturator with Soft Clip on, drive maybe 2 to 8 dB. Add a Compressor with a fast-ish attack, like 3 to 10 milliseconds, release 50 to 120 milliseconds, ratio around 4:1. Because it’s parallel, you can hit it harder.

Map Macro 5 primarily to the SNAP chain volume. Set it so at zero it’s off, and at full it’s still blended, not dominant. A good range might top out around minus 10 dB on the chain volume, depending on your snare.

Extra coach note: watch the 5 to 8 kHz zone. Snap can turn into ice pick fast. If it does, set up a simple de-essing approach on the SNAP chain, like Multiband Dynamics focusing on the high band, so as snap comes up, harshness is automatically kept under control.

Macro 6: Room and Space.

This is short room glue, not reverb “effect.” It’s how you make the kit feel like it exists in one place.

On the ROOM chain, add Reverb set to Room or Ambience. Decay somewhere around 0.25 to 0.6 seconds. Predelay 0 to 10 milliseconds. Size 20 to 45 percent. High cut around 6 to 10 kHz, low cut 200 to 500 Hz. And because it’s parallel, set dry/wet to 100 percent.

Put EQ after it if needed to tame any ring. Optionally add compression, even sidechained from the dry drums, for controlled glue.

Map Macro 6 to ROOM chain volume and slightly to decay time. Keep decay range small, like 0.25 to 0.55 seconds. Chain volume again: zero is basically off, and full is still subtle.

And here’s a really useful upgrade: gate the ambience. Add a Gate after the reverb so tails don’t blur your fast hats. You can even map the gate release so the room can go from tight to slightly looser in controlled amounts.

Macro 7: Break Dirt.

This is jungle energy, but controlled and focused. Dirt should live in the mids, not in your sub.

In the DIRT chain, first put an EQ Eight and high-pass before distortion, somewhere around 200 to 400 Hz. Optionally low-pass around 8 to 12 kHz to keep fizz down. Then add Saturator with Soft Clip on, drive about 3 to 10 dB. If you want, add Redux extremely subtly. Then add Glue Compressor to make it feel like a cohesive layer.

Map Macro 7 to DIRT chain volume, saturator drive, and maybe the filter frequency so the dirt comes in focused rather than just louder.

Also: if you’re layering a break, try the “air gap” trick. Low-pass the break slightly so your programmed hats own the 8 to 12 kHz sparkle. That keeps your top end consistent and your macros more predictable.

Macro 8: Motion.

This is the “alive” control. The point is not to hear an LFO. The point is to feel that nothing is perfectly static.

If you have Max for Live, drop an LFO into the Groove Hub and map it gently to things like ROOM chain volume, DIRT chain volume, and maybe hat filter cutoff. Set the rate around half a bar to one bar for subtle movement. Depth tiny, like one to three percent. Then map Macro 8 to the LFO amount so you can dial motion in and out.

If you don’t have Max for Live, no problem. Just automate Room and Dirt macros with slow, gentle curves. Same result, just manual.

Now, before we automate anything, let’s add guard rails.

Don’t map parameters full range by default. Constrain anything time-based to tiny windows. Cap stereo width. Cap parallel chain volume so it can never become the main signal. These ranges are what make the macros feel professional, because you can perform them quickly without fear.

Also, do two checks that people skip.

First, check in mono. Put a Utility on the drum group, set width to zero briefly. If your groove collapses, your “groove” was probably just stereo tricks.

Second, check at low volume. Microtiming and ghost feel can trick you when it’s loud. If it still rolls quietly, you’re winning.

If you start hearing flam or comb filtering, especially when you blend parallels, that’s usually latency differences between chains. Some devices add latency, especially oversampling or certain modes. The fix is either use lighter devices, or add the same latency-inducing device to the DRY chain so everything aligns, or high-pass the parallel chains more aggressively so you’re not mixing identical transients.

Now let’s talk arrangement, because this is where the whole system becomes musical.

Think in 16-bar logic. Bars 1 to 16, keep it conservative. Medium ghosts, low room, low dirt. Bars 17 to 32, add a little hat shuffle and a touch of motion. Bars 33 to 48, intensity: bring in snare snap and dirt, but don’t max both at once. Let them take turns so the groove breathes. Bars 49 to 64, pull back room and dirt, keep a tiny bit of motion so it still feels alive but lighter.

And here’s an advanced arrangement trick: negative groove before the drop. Two bars before a drop, reduce ghosts and reduce shuffle briefly. When the drop hits and those return, it feels like impact without turning anything up.

Another trick: macro spikes for fills. One beat of extra dirt. The last eighth note gets a tiny room spike. The last snare before a turnaround gets a snap bump. Those micro-moves read as detail, not “effects.”

Now a big workflow upgrade if you’re on Live 11 or newer: Macro Variations.

Once you find a few good macro combinations, save them as variations. For example: Tight Roller, with low room, low dirt, higher kick tight. Human Hats, with a bit more shuffle and ghosts but less snap. Pre-Fill Tension, with more motion and room, and slightly less kick tight.

Then you can perform the groove by switching variations, and only automate the transitions. That’s one of the fastest ways to get a professional, evolving 64-bar drum section without drawing a million automation lanes.

Let’s do a quick mini exercise you can knock out in fifteen minutes.

Take a two-bar rolling loop. Build Groove Hub with just ROOM and SNAP first. Then automate Ghosts slowly rising from about 35 percent to 55 percent over 16 bars. Add Room only in the last four bars before a fill. And bump Snare Snap slightly only on bars 15 and 16.

Then bounce two versions: one with no automation, one with macro automation. When you A/B, don’t ask “is it louder.” Ask: does it roll more? Does the snare still anchor? Does it feel more played without sounding messy?

Quick recap to lock it in.

Advanced DnB groove is controlled micro-variation, not heavy swing. Keep the kick and snare foundation stable, and move the supporting elements: hats, ghosts, room, dirt, snap, and motion. Build the Groove Hub so macros are safe across their whole travel, and automate across 16-bar phrases like you’re choreographing energy, not just ramping everything up.

If you tell me whether your drums are in one Drum Rack or split across tracks, and whether you’re aiming for minimal rollers, jungle, or neuro-ish, I can suggest the cleanest mapping layout and the safest macro ranges for your exact setup.

mickeybeam

Go to drumbasscd.com for +100 drum and bass YouTube channels all in one place - tune in!

Generating PDF preview…