DNB COLLEGE

Drum & Bass Ableton Live 12 Tutorials

LESSON DETAIL

Swing jungle sampler rack using groove pool tricks in Ableton Live 12 (Intermediate)

An AI-generated intermediate Ableton lesson focused on Swing jungle sampler rack using groove pool tricks in Ableton Live 12 in the Composition area of drum and bass production.

Back to lessons
Swing jungle sampler rack using groove pool tricks in Ableton Live 12 (Intermediate) cover image

Narrated lesson audio

The voice track includes the tutorial plus extra teacher commentary.

Open audio file

Main tutorial

Lesson Overview

Swing is one of the fastest ways to make Drum & Bass feel alive instead of sequenced. In jungle, rollers, and darker half-time-leaning DnB, a tight but slightly off-grid drum feel can instantly make an 8-bar loop feel like a record instead of a draft. In this lesson, you’ll build a swing jungle sampler rack in Ableton Live 12 using Drum Rack, Simpler, and the Groove Pool to create break-inspired drums with controlled shuffle, ghost-note movement, and repeatable composition structure.

The goal is not to “randomize” your drums. The goal is to create a playable rhythmic system: kick, snare, break chops, hats, and ghost details all moving with a coherent pocket. That matters in DnB because the groove has to do two things at once:

1. drive the tune hard enough for the floor, and

2. leave space for sub weight, bass phrasing, and arrangement tension.

This technique sits perfectly in the intro-to-drop pipeline of a DnB tune. Use it for 8-bar drum loops, stripped-back roller intros, jungle drop energy, switch-up fills, or a second section that opens up after a more rigid first drop. If your drums feel too straight, too copy-pasted, or too “MIDI grid,” this is the fix. 🎛️

What You Will Build

You’re going to build a multi-slot Drum Rack designed for jungle/DnB groove writing:

  • A main break lane chopped in Simpler
  • A snare layer with strong backbeat impact
  • A kick layer that punches without taking over the sub
  • A ghost/percussion lane that adds swing and forward motion
  • A groove-controlled rack where different elements inherit different shuffle amounts
  • A bus-style processing chain for glue, grit, and transient control
  • Musically, the result should feel like a loop that sits in the pocket between:

  • classic jungle chop energy,
  • modern roller discipline,
  • and darker bass music weight.
  • By the end, you’ll have an 8-bar drum section that can be dropped under a reese bassline, sub-led roller, or amens-and-fill jungle arrangement.

    Step-by-Step Walkthrough

    1. Start with a clean 8-bar drum composition grid

    In Arrangement or Session View, set up an 8-bar MIDI clip at a DnB tempo. A strong starting range is 170–175 BPM for straight jungle / modern DnB, or 168–172 BPM if you want a slightly looser, heavier pocket.

    Build a simple composition first:

    - Bar 1–2: stripped intro groove

    - Bar 3–4: add break chops and ghost notes

    - Bar 5–6: full groove

    - Bar 7–8: small fill or variation

    Why this matters in DnB: the listener needs a clear phrasing arc even inside a loop. A good DnB drum loop is not just rhythmic; it’s arranged. Think in 2-bar and 4-bar logic, because that’s how DJs and dancers feel the energy lift.

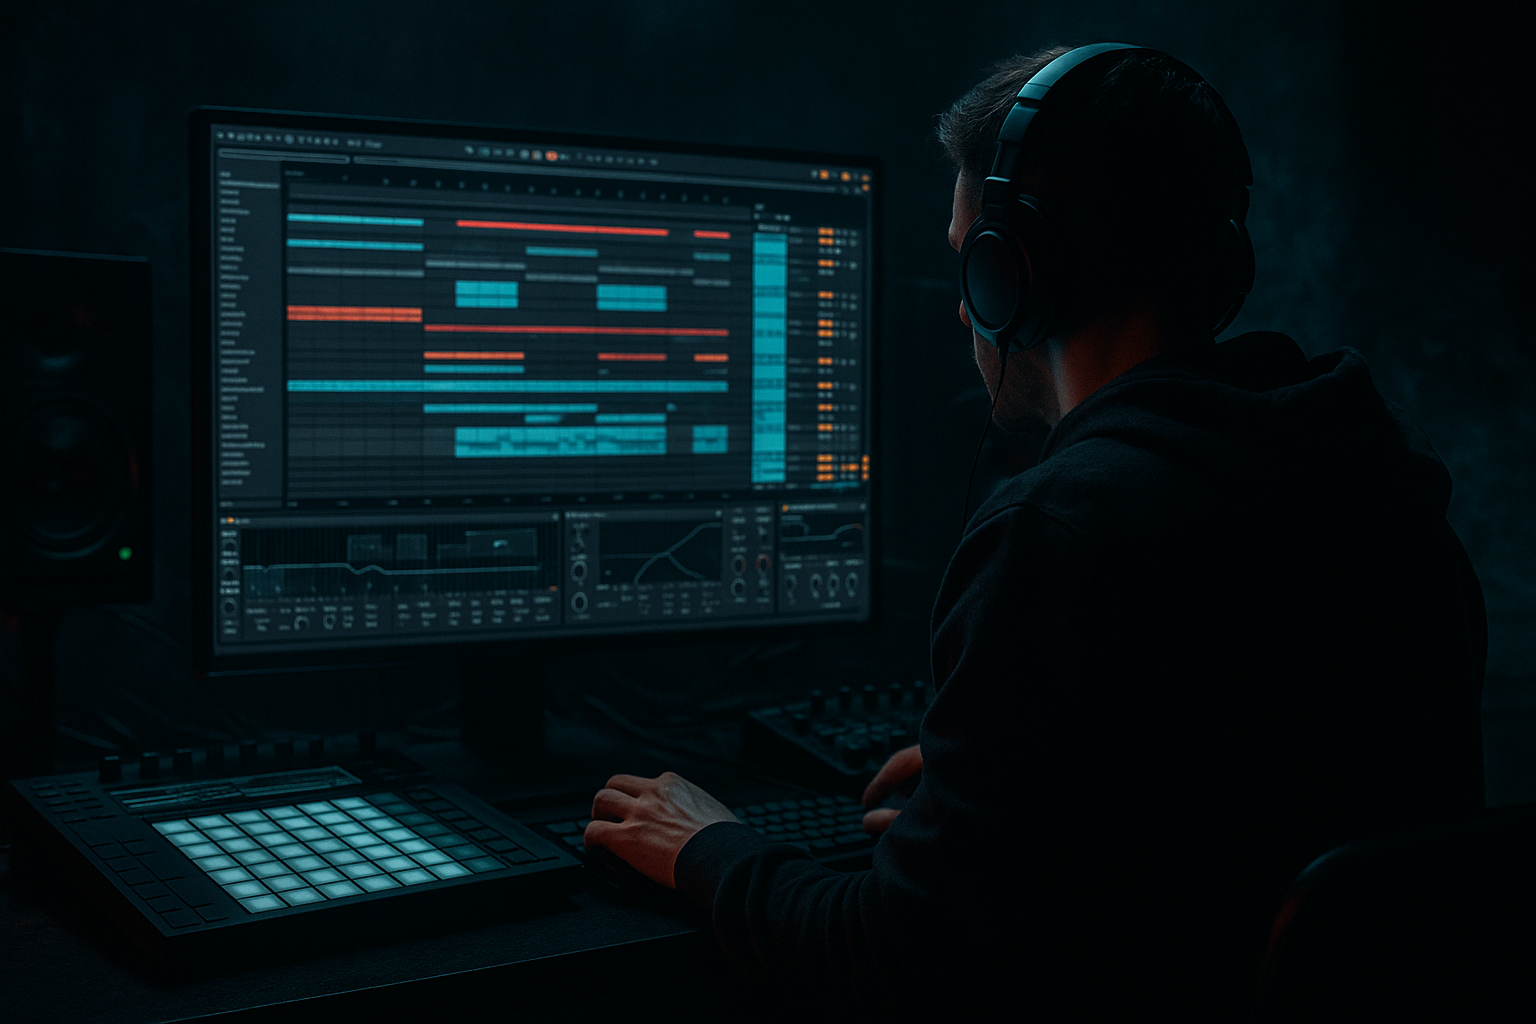
    2. Create a Drum Rack with dedicated lanes for kick, snare, break, and ghost detail

    Add a Drum Rack to a MIDI track. Put these sounds into separate pads:

    - Kick

    - Snare

    - Main break chop

    - Ghost snare / perc

    - Closed hat

    - Rim / click / top layer

    Keep your sounds organized by function, not just by sample source. For example:

    - Kick pad: short, clean kick with a click

    - Snare pad: punchy snare with body

    - Break pad: a chopped amen or funky break hit

    - Ghost pad: quieter snare ghost or hat shuffle

    On each pad, use Simpler if you want quick sample control. In Simpler, set:

    - Warp mode: Complex Pro for tonal loops, or Beats for drum chops

    - Start: trim tight to transient

    - Fade: very short, around 3–10 ms

    - Filter: low-pass lightly if the chop is too bright

    Keep the break lane separate from the main snare so you can shape swing without destroying the core backbeat.

    3. Build the main backbeat first, then layer the swing around it

    Program a classic DnB backbone:

    - Snare on beat 2 and 4

    - Kick on 1 and a few syncopated off-beats

    - Hats on straight 1/8s or 1/16s as a reference

    Then add break chops around the backbeat rather than on top of everything. Use the break lane to fill the gaps:

    - a little pickup before beat 2

    - a ghost hit after beat 2

    - a tiny chopped flourish before beat 4

    Suggested starting pattern:

    - Kick: beat 1, a light kick before 3, and one syncopated note near the end of bar 2

    - Snare: 2 and 4

    - Break chop: off-grid accents around the “and” of 1, late 2, early 4

    - Hat: steady 1/8 or 1/16 to support the groove

    The point is to preserve a clear DnB spine while letting the break add human movement. If the break becomes the whole groove, the drop can lose impact. If it’s too rigid, it won’t feel jungle enough.

    4. Extract or apply groove from a classic break and use the Groove Pool on purpose

    This is the core trick.

    Grab a break loop with real swing energy — an amen, think break, or any classic jungle-style percussion loop. In Ableton Live 12, you can use groove workflows to capture that feel and apply it to your MIDI or audio clips.

    Workflow:

    - Drag a break loop into the project

    - Open the Groove Pool

    - Extract groove from the loop if needed

    - Apply that groove to your Drum Rack MIDI clip

    Start with these groove ideas:

    - Timing: around 55–65%

    - Random: keep low, around 0–5%

    - Velocity: around 10–25%

    - Base: test between 50–70%

    Use groove subtly on the full drum clip first, then fine-tune per lane. For example:

    - Apply stronger groove to hats and ghost notes

    - Apply lighter groove to kick and snare

    - Leave the sub-bass MIDI mostly straight

    Why this works in DnB: the groove pool gives you the “human” pocket of jungle without forcing the entire track off-grid. That means your drums feel alive, but your low-end can still hit with precision.

    5. Use clip-level swing differences to create call-and-response

    Don’t give every element the same groove amount. In DnB, contrast creates tension. Use clip or lane variation to set up a question-and-answer feel:

    - Straight kick/snare = the answer

    - Swingy break chop = the question

    - Ghost hat fill = the lead-in

    In practice:

    - Keep your main snare clip relatively tight

    - Make a separate ghost/percussion clip with stronger groove

    - Use a second break chop clip that enters only at the end of bar 4 or bar 8

    A useful arrangement idea:

    Bars 1–4 = restrained groove

    Bars 5–8 = more swing, more chop density, extra pickup into the next phrase

    This is especially strong for rollers and darker DnB, where the groove must evolve without becoming busy.

    6. Shape the rack with Drum Rack chains, not just sample choice

    Inside Drum Rack, use chain-level processing to make each rhythmic layer sit correctly.

    Good stock Ableton tools here:

    - EQ Eight on each chain

    - Saturator for soft grit

    - Drum Buss for punch and low-end bloom

    - Utility for mono control

    Suggested settings:

    - Kick chain EQ: high-pass only if needed, but often leave low end intact and trim mud around 200–350 Hz

    - Snare chain: gentle boost around 180–220 Hz for body, and 3–7 kHz for crack if needed

    - Break chain: high-pass around 120–200 Hz so it doesn’t fight the kick/sub

    - Ghost hats/percs: roll off lows aggressively, sometimes up to 400–600 Hz

    For saturation:

    - Saturator Drive: start around 1–4 dB

    - Soft Clip: on if you want tighter peak control

    - Drum Buss Transients: small positive push for snap, usually 5–20%

    Keep the rack punchy, not crushed. The aim is to make the swing feel glued into the drums, not flattened.

    7. Program micro-variations and ghost notes to stop the loop from looping

    Intermediate DnB writing lives in the micro-details.

    Add:

    - very quiet ghost snares before the main backbeat

    - tiny hat pickups leading into bar 4 and bar 8

    - one or two altered kick placements across 8 bars

    - a break chop that only plays once every 2 bars

    Keep ghost note velocities lower than the main hits:

    - main snare: around 110–127

    - ghost snare: around 20–60

    - hats: vary between 40–90

    For composition, think “same groove, changing sentence.” A 2-bar jungle idea becomes more musical when bar 2 slightly answers bar 1. This is exactly what keeps modern DnB drum loops interesting over a long bassline.

    8. Automate energy into the groove over the 8 bars

    Use arrangement automation to create lift:

    - Open the Auto Filter on the break lane and automate a gentle high-pass rise into bar 8

    - Automate Saturator Drive upward by 1–2 dB during the build to the drop

    - Increase Reverb decay briefly on a snare fill, then cut it dry again on the drop

    - Automate Utility Width narrower in the intro and broader right before the drop, then snap back to mono-friendly drums on impact

    A smart DnB arrangement example:

    - Bars 1–4: filtered drum intro with sparse hats

    - Bars 5–6: full swing groove

    - Bar 7: snare fill plus break chop variation

    - Bar 8: short impact or pickup to the next section

    Keep automation practical. You’re not making a cinematic FX showcase; you’re directing energy into a heavy beat.

    9. Check low-end discipline and make the drum/bass relationship intentional

    Even though this lesson is about swing, your groove only works if the low end is clean.

    Do a quick check:

    - Put Utility on the drum bus and check mono

    - High-pass break elements that do not need low end

    - Make sure kick and sub aren’t constantly landing on the exact same transient unless that’s the intended hit

    - Use EQ Eight to carve around sub space if the kick is long

    A good rule in DnB: if the bassline owns the sub, let the kick be short and present. If the kick owns a bit more low-mid, make the sub line more controlled and slightly later in the pocket. The groove should feel intentional, not crowded.

    Common Mistakes

  • Over-applying groove to everything
  • - Fix: keep kick and snare tighter; give more swing to hats, ghost notes, and break chops.

  • Using a full break loop without control
  • - Fix: slice it into functional pieces and separate the body from the texture.

  • Letting break lows fight the kick/sub
  • - Fix: high-pass the break lane and keep the low end reserved for dedicated elements.

  • Too much randomization
  • - Fix: use velocity and timing variation subtly. DnB groove should feel human, not unstable.

  • No arrangement variation
  • - Fix: change one or two elements every 2 bars so the loop progresses like a phrase.

  • Saturating the drum bus too early
  • - Fix: get the groove right first, then add glue and grit after the pattern is working.

    Pro Tips for Darker / Heavier DnB

  • Keep the kick short and aggressive if your bassline is a reese or neuro-style mid-bass. A shorter kick leaves more room for bass movement.
  • Use a darker break source and filter the top end slightly so the groove feels shadowy rather than crisp.
  • Layer a quiet rim or click on the off-beats to give the drums a stalking, mechanical feel.
  • Try subtle timing contrast: keep the main snare straight, but let the break chops sit a touch late through Groove Pool.
  • Use Drum Buss carefully for density. A little Drive and Crunch can help darker DnB drums feel closer and more physical.
  • Automate tension into fills by pushing a high-pass filter on the break lane and then dropping it out hard on the downbeat.
  • Make one section more stripped so the heavier return hits harder. In dark rollers, less movement before the drop often makes the groove feel larger when it arrives.
  • Use mono discipline on the low end with Utility. Wide drums are fine up top, but the club cares about center-heavy weight.
  • Mini Practice Exercise

    Set a timer for 15 minutes and build this:

    1. Create a 170 BPM Drum Rack with kick, snare, break chop, and ghost hat lanes.

    2. Program an 8-bar drum loop with snare on 2 and 4, plus simple kick placement.

    3. Add one chopped amen-style or break-style lane and extract/apply groove from it.

    4. Set groove timing differently per lane:

    - kick: light groove

    - snare: very light or none

    - break chops and hats: stronger groove

    5. Add one ghost-note variation every 2 bars.

    6. Put EQ Eight on the break lane and high-pass it so it stops competing with the kick.

    7. Add one automation move: filter rise, saturation increase, or reverb fill into bar 8.

    8. Export or bounce the loop and listen once with a reese bassline underneath.

    Goal: make the loop feel like a real jungle/roller foundation, not just a MIDI sketch.

    Recap

  • Build the groove around a clear DnB backbone first.
  • Use Drum Rack + Simpler to separate kick, snare, break chops, and ghost details.
  • Apply Groove Pool selectively so the swing feels human but controlled.
  • Keep low-end elements disciplined and let the break provide movement, not mud.
  • Use small arrangement changes every 2 bars to make the loop feel composed.
  • For darker DnB, aim for weight, tension, and clarity at the same time.

If you get the balance right, this technique gives you that sweet spot where the drums feel jungly, modern, and ready to carry a serious bassline.

Ask GPT about this lesson

Chat with the lesson tutor, get follow-up help, or use quick actions.

Bigup 👽 Ask me anything about this lesson and I’ll answer in context.

Narration script

Show spoken script
Welcome back. In this lesson, we’re building a swing jungle sampler rack in Ableton Live 12 using Drum Rack, Simpler, and the Groove Pool to make our drum loop feel alive, not stiff. This is an intermediate workflow, so we’re not just placing hits on a grid and calling it a day. We’re designing a playable rhythmic system that can carry a DnB or jungle arrangement with enough movement for the floor, but enough control to sit cleanly under a bassline.

The big idea here is simple: swing is not random. We’re not trying to make the drums messy. We’re trying to make them feel human, coordinated, and intentional. In drum and bass, that matters a lot because the groove has to do two jobs at once. It has to hit hard, and it has to leave room for the sub, the bass phrasing, and the energy of the arrangement.

So let’s think in lanes. That’s the first teacher tip here. Don’t think of this as one loop. Think of it as separate rhythmic voices inside one rack. You’ve got your anchor sounds, like kick and main snare. You’ve got your motion sounds, like hats, ghost hits, and break chops. And then you’ve got your spice, like fills, pickup hits, and tiny variations. The more important the sound is, the less it should drift. The more supportive it is, the more swing and personality it can carry.

Start with a clean 8-bar MIDI clip at a DnB tempo. A solid starting point is around 170 to 175 BPM. If you want a slightly heavier, looser pocket, go a touch slower, maybe 168 to 172. The point is to set up a loop that already has arrangement logic inside it. We’re not just making an 8-bar repeat. We’re making a phrase.

A really useful structure is this: bars 1 and 2 are stripped back, bars 3 and 4 bring in more break detail and ghost notes, bars 5 and 6 feel like the full groove, and bars 7 and 8 add a fill or variation to push into the next section. That kind of phrasing is essential in DnB because listeners feel energy in two-bar and four-bar chunks. Even when the loop is repeating, it needs to feel like it’s going somewhere.

Now create a Drum Rack on a MIDI track. Keep your lanes organized by function. Put your kick on one pad, your main snare on another, your break chop on another, and then add separate pads for ghost snare or percussion, closed hats, and maybe a rim, click, or top layer. If you’re using Simpler on each pad, which is a great move here, set your warp mode based on the source. Use Beats for drum chops, Complex Pro if you’re working with more tonal or sustained material, trim the start tightly to the transient, and keep the fade short, somewhere around 3 to 10 milliseconds. If the break is too bright, a light low-pass can help. If it’s too muddy, carve it with EQ later.

The important thing is that your break lane stays separate from your core backbeat. That gives you control. It means you can make the break feel swung without wrecking the authority of the snare.

Now program the backbone first. Put the snare on beats 2 and 4. Put the kick on beat 1, then add a few syncopated notes that support the phrase instead of dominating it. You can add a steady 1/8 or 1/16 hat pattern as a reference, just to keep the time visible. Then bring in the break chops around the backbeat, not on top of it. That means little pickups before beat 2, a ghost hit after beat 2, a chopped flourish into beat 4, or a tiny accent on the and of 1. That kind of placement gives the groove character without stealing the spine of the rhythm.

And that spine matters. In DnB, if the break becomes the whole story, the drop can lose impact. If everything is too straight, it can feel like a MIDI sketch. So we want the sweet spot: clear backbone, human movement around it.

Now for the main trick: the Groove Pool. This is where the jungle feel really comes alive. Find a break loop with authentic swing, like an amen or another classic break source. Drag it into your project and use Ableton’s groove workflow to extract the feel. Then apply that groove to your MIDI clip. This is not about slapping a template onto everything. Use groove like a filter, not like a preset. Apply it, listen, and then reduce it until only the useful character remains.

A good starting point is moderate timing influence, maybe around 55 to 65 percent. Keep random pretty low, around 0 to 5 percent. Velocity can sit somewhere around 10 to 25 percent if you want a bit of dynamic life. Then test different base values until the feel locks in. The key move is to apply groove more strongly to hats and ghost notes, more lightly to kick and snare, and keep the sub-bass mostly straight. That gives you layered motion instead of a whole track that wobbles off the grid.

This is one of the most useful mental models for DnB: anchors, motion, spice. Kick and main snare are anchors. Hats, ghost notes, and break chops are motion. Fills and pickup hits are spice. The anchors stay reliable. The motion can lean into swing. The spice can be more expressive. That’s how you get a loop that feels human without becoming unstable.

Now let’s make the groove feel like a conversation. Use different groove amounts for different clips or lanes. Keep the main snare fairly tight. Give the ghost lane stronger groove. Make a second break chop clip that only appears in the last bar or the last half of the phrase. In other words, don’t let every element sway the same way. Contrast creates tension. A straight kick and snare can feel like the answer, while a swingy break chop feels like the question. That call-and-response is a huge part of compelling DnB programming.

Next, shape the sound with chain processing inside the Drum Rack. This is where the rack becomes more than a sample folder. Put EQ Eight on each chain if needed. Use a little Saturator for grit and cohesion. Use Drum Buss for punch and transient energy. Use Utility for mono control and gain discipline. On the kick, usually don’t overdo the EQ. Just trim mud if needed, often around 200 to 350 Hz. On the snare, a gentle boost around 180 to 220 Hz can help body, and a little presence around 3 to 7 kHz can help crack. On the break lane, high-pass it so it doesn’t fight the kick or sub. Depending on the source, that might be around 120 to 200 Hz or even higher. For ghost hats and percussion, roll off the lows aggressively, sometimes up to 400 or 600 Hz if the sound is just supposed to sit in the background.

For saturation, start subtle. Maybe 1 to 4 dB of drive. If you want tighter peak control, turn on soft clipping. With Drum Buss, a little transient push can add snap, but don’t crush the groove. The point is glue, not flattening. You want the swing to feel physically connected, not squashed.

Now add micro-variations. This is where the loop stops sounding like a loop. Add very quiet ghost snares before the backbeat. Put tiny hat pickups before bar 4 and bar 8. Change one kick placement every few bars. Let a break chop happen only once every two bars. These are small moves, but they matter a lot in intermediate DnB writing because they keep the listener engaged without cluttering the mix.

A really helpful velocity guide is this: main snare around 110 to 127, ghost snare around 20 to 60, hats somewhere in the 40 to 90 range depending on the role. You’re not aiming for random velocity chaos. You’re building a sentence that repeats with slight changes. Same groove, changing sentence. That’s the mindset.

Now let’s talk arrangement energy. Use automation to bring the loop to life over the 8 bars. You can automate an Auto Filter on the break lane so the top end opens gradually into bar 8. You can increase Saturator drive by a dB or two during the build. You can add a little reverb to a snare fill, then cut it dry again on the drop. You can even narrow the drum width early on and broaden it slightly before impact, then snap back to a more mono-focused, club-safe low end when the drop lands.

That’s how you make a drum section feel composed instead of just repeated. A smart DnB shape might be filtered, sparse drums in bars 1 to 4, a fuller swing groove in bars 5 and 6, a fill in bar 7, and a pickup or impact in bar 8. Keep it practical. You’re not scoring a film trailer here. You’re directing energy into a heavy groove.

And don’t forget the low end. Even though this lesson is about swing, the drum and bass relationship has to be intentional. Check the drums in mono with Utility. Make sure the break isn’t carrying low-end mud. Make sure the kick and sub aren’t constantly smashing into each other unless that overlap is part of the sound. A good rule is that if the bassline owns the sub, the kick should stay shorter and more present. If the kick is longer in the low-mid area, then the bassline needs to leave more room. The groove should feel deliberate, not crowded.

A few common mistakes to avoid here. First, don’t over-apply groove to everything. If the kick and snare are too loose, the whole track can fall apart. Let the hats, ghosts, and break chops carry most of the swing. Second, don’t use a full break loop without control. Slice it into roles so the body and texture can be treated separately. Third, don’t let break lows fight your kick and sub. High-pass that lane. Fourth, don’t over-randomize. DnB groove should feel alive, not unstable. And fifth, don’t forget arrangement variation. Even tiny changes every two bars can make the loop feel like a real phrase.

If you want a darker or heavier DnB flavor, there are a few extra moves that work really well. Keep the kick short and aggressive if your bass is a reese or neuro-style mid-bass. Use a darker break source and gently roll off some top end for a shadowy feel. Add a quiet rim or click on off-beats for a stalking, mechanical vibe. Let the main snare stay straight while the break chops sit just a touch late. Use Drum Buss carefully to add density. And when you’re building tension, automate a high-pass rise on the break lane, then drop it out hard on the downbeat. That contrast can hit really hard.

Here’s a fast practice challenge. Build a 170 BPM Drum Rack with kick, snare, break chop, and ghost hat lanes. Program an 8-bar loop with snare on 2 and 4 and a simple kick pattern. Add one chopped amen-style lane and extract or apply groove from it. Set groove differently per lane, with light swing on the kick, very light or no swing on the snare, and stronger swing on the hats and break chops. Add at least one ghost-note variation every two bars. Put EQ Eight on the break lane and high-pass it so it doesn’t compete with the kick. Then automate one thing into bar 8, like a filter rise, saturation increase, or a short reverb fill. Finally, listen to the loop with a reese or sub underneath. If it still feels good with bass in place, you’ve done it right.

The goal is to end up with something that feels like a real jungle or roller foundation, not just a sketch. When you get the balance right, the drums feel jungly, modern, and ready to carry a serious bassline. Swing, but controlled. Human, but disciplined. That’s the sweet spot.

If you take one thing from this lesson, let it be this: build the groove around a clear backbone, then use the Groove Pool and your rack lanes to bring the motion to life. Keep the low end clean, keep the phrasing moving, and let each rhythmic voice do its job. That’s how you turn a simple loop into something that feels like a record.

mickeybeam

Go to drumbasscd.com for +100 drum and bass YouTube channels all in one place - tune in!

Generating PDF preview…