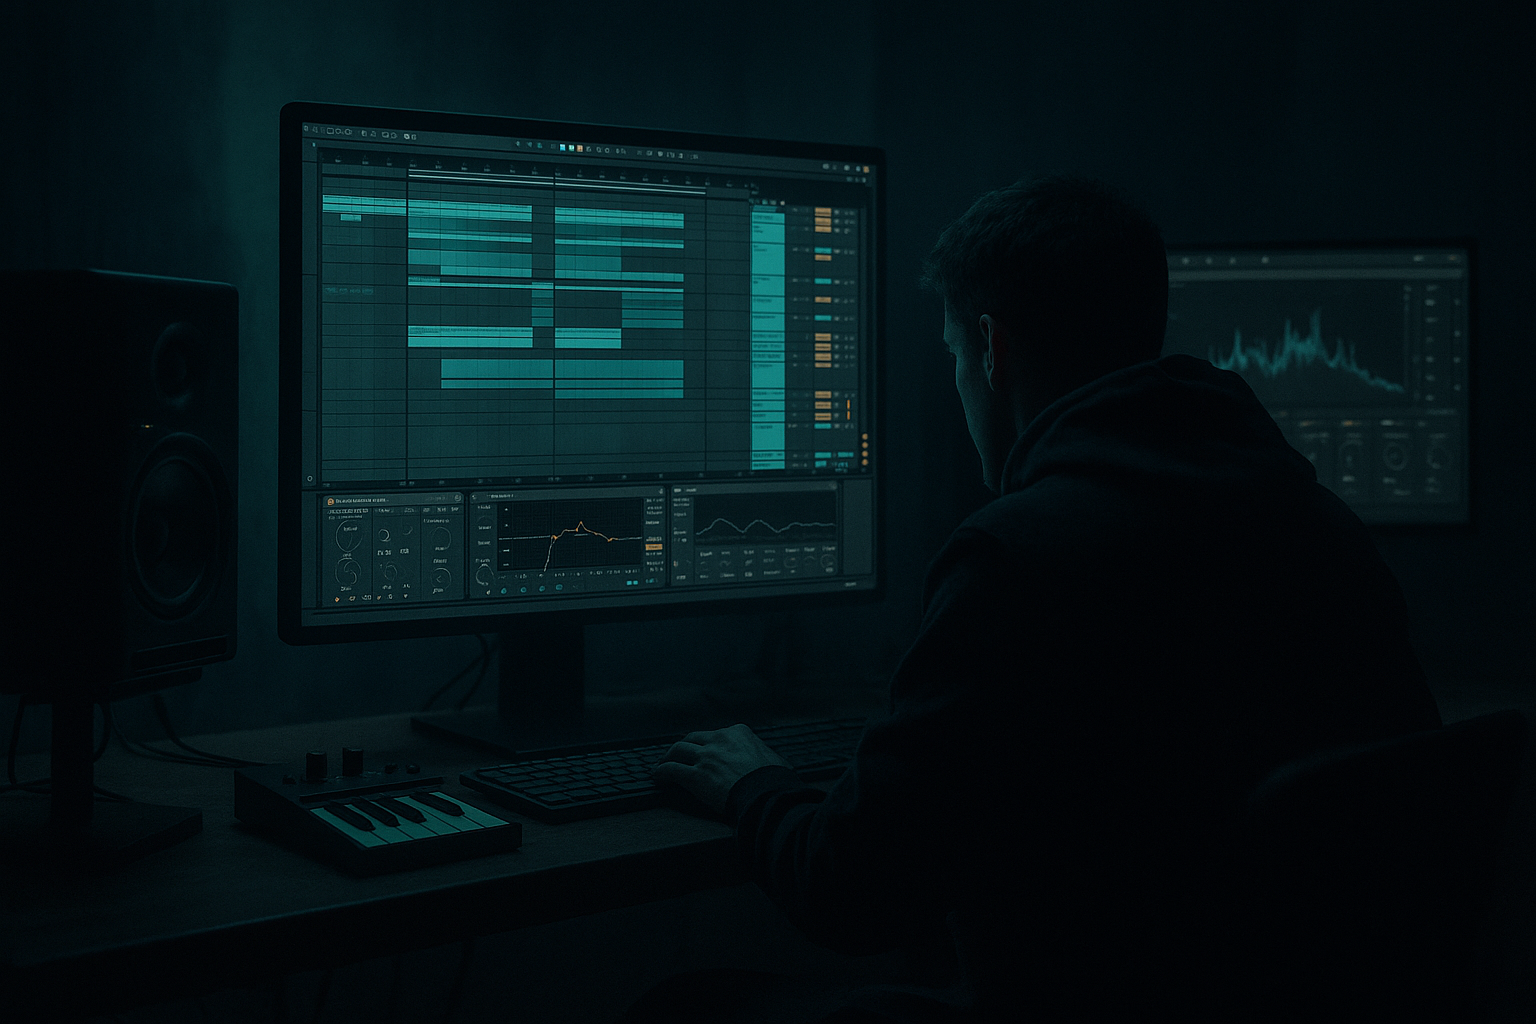
DNB COLLEGE

Drum & Bass Ableton Live 12 Tutorials

LESSON DETAIL

Tonal risers from resampling: in Ableton Live 12 (Advanced)

An AI-generated advanced Ableton lesson focused on Tonal risers from resampling: in Ableton Live 12 in the Sound Design area of drum and bass production.

Back to lessons
Tonal risers from resampling: in Ableton Live 12 (Advanced) cover image

Narrated lesson audio

The voice track includes the tutorial plus extra teacher commentary.

Open audio file

Main tutorial

Tonal Risers from Resampling (Ableton Live 12) — DnB Sound Design 🎛️🚀

1. Lesson overview

Tonal risers in drum & bass aren’t just “noise whooshes.” The best ones carry pitch, hint at the key, and build tension with movement that matches the energy of a drop (think: rolling neuro, jungle atmos, techy rollers). In this lesson you’ll create tonal risers by resampling—meaning you’ll generate audio from synths/effects, print it, then push it further with audio-only techniques (warp, pitch, texture, FX automation).

This method is fast, CPU-friendly, and gives you that “produced” sound where the riser feels like it belongs to the track—not pasted on top.

---

2. What you will build

You’ll build three reusable tonal risers, all made via resampling:

1. Harmonic Tonal Riser (key-locked, chord-ish, wide)

2. Neuro-Tension Riser (aggressive midrange movement, reese-adjacent)

3. Jungle Atmos Riser (textured, airy, tape-ish, nostalgic)

You’ll also build a Resample Bus workflow so you can print variations quickly.

---

3. Step-by-step walkthrough

A) Setup: Resample workflow (do this once) ✅

Goal: Print audio fast and iterate.

1. Create an Audio Track named: `RESAMPLE PRINT`.

2. Set Audio From to Resampling.

3. Set Monitor to Off (to avoid feedback).

4. Arm the track when you want to print.

5. Create a Return Track named: `RISER VERB` (optional but useful).

- Add Hybrid Reverb:

- Algorithm: Hall (or Shimmer for more tonal sparkle)

- Decay: 6–14 s (depends on tempo and vibe)

- Predelay: 20–40 ms

- Low Cut: 200–400 Hz (keep mud out)

- High Cut: 8–12 kHz (avoid hiss build-up)

- Add EQ Eight after it:

- Cut ~250–500 Hz if boxy

- Gentle shelf down above 12–14 kHz if fizzy

DnB note: At 172–176 BPM, risers often live comfortably in 4, 8, or 16 bars, with the last 1 bar being the most intense.

---

B) Riser 1 — Harmonic Tonal Riser (key-locked, wide, modern) 🌈

This is a clean, musical riser that reinforces your track’s key.

#### 1) Create the source tone (MIDI track)

1. Create a MIDI Track named `TONAL SOURCE`.

2. Add Wavetable (stock).

3. Suggested patch settings:

- Osc 1: Basic Shapes → Sine or Triangle (start clean)

- Osc 2: Basic Shapes → Saw (very low level, just for harmonics)

- Unison: 2–4 voices, Amount low (10–25%), Width 80–120%

- Filter: LP24

- Cutoff: ~200–600 Hz (start low)

- Drive: 5–15%

- Amp Env: Attack 10–30 ms, Release 300–900 ms

4. MIDI: draw a single long note (e.g., root note of your drop, like F or G) for 8 bars.

#### 2) Add movement + tension (device chain)

Add devices after Wavetable:

1. Auto Filter

- Type: LP24

- Envelope: small amount (5–15)

- Map Cutoff to a macro later

2. Saturator

- Mode: Analog Clip

- Drive: 2–8 dB (don’t crush yet)

- Soft Clip: ON

3. Chorus-Ensemble

- Mode: Chorus

- Amount: 15–35%

- Rate: 0.10–0.35 Hz

4. Hybrid Reverb (or send to `RISER VERB`)

- Keep the low cut fairly high (250–500 Hz)

#### 3) Resample it

1. Arm `RESAMPLE PRINT`.

2. Solo `TONAL SOURCE`.

3. Record 8 bars while you automate the filter cutoff upward (slow ramp).

- Tip: In Arrangement, automate Wavetable/Auto Filter cutoff from ~300 Hz → 8–12 kHz.

#### 4) Turn the print into a riser (audio warping + pitch)

1. Take the recorded audio clip on `RESAMPLE PRINT`.

2. Consolidate to exact length (Cmd/Ctrl+J).

3. Warp mode:

- Try Complex Pro for harmonic content

- Formants: 0 to +40 (experiment)

4. Add pitch motion:

- Clip Transpose: automate from -12 → +7 (classic tension curve)

- OR use Shifter (more controllable glide):

- Mode: Pitch

- Fine: automate up slowly

- Dry/Wet: 100%

#### 5) Make it “drop-ready” (ducking + final EQ)

1. Add EQ Eight:

- High-pass around 150–300 Hz (DnB drops need sub space)

- Optional narrow cut if a harsh frequency builds (2–5 kHz)

2. Add Compressor (sidechain from kick/snare group):

- Sidechain input: your Drum Bus or Kick track

- Ratio: 2:1–4:1

- Attack: 1–10 ms

- Release: 80–180 ms

- Aim for 2–5 dB gain reduction near the end

Arrangement idea: Use this riser in the last 8 bars before the drop, but fade it in so it only becomes obvious around bar -4 to -1.

---

C) Riser 2 — Neuro-Tension Riser (aggressive, moving, reese-like) 🧨

This one is about midrange movement + threat, great for neuro/tech DnB.

#### 1) Build a dirty source (MIDI)

1. New MIDI Track: `NEURO SOURCE`.

2. Add Operator (stock) for fast, solid harmonics.

- Algorithm: 1 (all carriers) or use simple FM lightly

- Osc A: Saw (or Square), Level -6 dB

- Osc B: Sine, used as FM (if you want edge): B level 10–25

- Filter: ON

- Type: LP24

- Drive: 6–18

3. MIDI: long note root (8 bars).

#### 2) Movement chain (this is the secret sauce)

After Operator:

1. Auto Filter

- LP24, Cutoff low→high automation later

2. Roar (Ableton Live 12) 🔥

- Start with a preset like Warm Drive then tweak:

- Drive: 20–45% (watch output)

- Tone: slightly darker (DnB likes weight)

- Mod: add subtle movement (slow LFO)

3. Phaser-Flanger

- Mode: Phaser

- Amount: 20–40

- Feedback: 10–30

- Rate: 0.05–0.20 Hz

4. Redux (careful)

- Downsample: 1.5–4 (small)

- Bit Reduction: 0–2 (tiny!)

5. Limiter (only to catch spikes while resampling)

#### 3) Resample + “staircase pitch”

1. Record 8 bars into `RESAMPLE PRINT`.

2. In the printed audio clip:

- Warp: Texture

- Grain Size: 80–200 ms

- Flux: 10–30%

3. Create pitch steps (very DnB):

- Duplicate the clip into 4 sections (each 2 bars)

- Transpose sections: -12, -7, -3, +0 (or any climb)

- Add a final 1-bar ramp: +0 → +5 right before the drop

#### 4) Add rhythmic gating (so it “rolls”)

1. Add Auto Pan after the audio clip:

- Amount: 100%

- Shape: Square

- Rate: 1/8 or 1/16 (sync)

- Phase: 0° (acts like a trance gate)

2. Put Utility after it:

- Width: automate from 50% → 140% toward the end (widen into drop)

Arrangement idea: Use this behind drums in the last 4 bars, then cut it dead for a micro-silence (1/8–1/4 bar) before the drop. That pause hits hard in rolling DnB.

---

D) Riser 3 — Jungle Atmos Riser (airy, nostalgic, textured) 🌫️

Perfect for jungle intros, liquid breaks, or “history lesson” moments before a modern drop.

#### 1) Source material: resample a pad + noise

1. Create MIDI Track `ATMOS SOURCE`.

2. Add Meld (or Wavetable if you prefer).

- Make a pad (slow attack, rich but not bright).

3. Add Noise layer:

- Use Operator set to noise (or a Simpler noise sample)

4. Send both into `RISER VERB` fairly heavily.

#### 2) Print long reverb tails

1. Arm `RESAMPLE PRINT`.

2. Record 8–16 bars, then stop playback and let the verb tail ring another 2–4 bars.

3. Consolidate the best section.

#### 3) Turn it into “tape-lift” tension

On the audio clip:

1. Warp mode: Complex Pro

2. Automate Transpose up 5–12 semitones over time.

3. Add Echo

- Time: 1/8 dotted or 1/4

- Feedback: 20–45%

- Filter: dark (low-pass around 4–7 kHz)

4. Add Vinyl Distortion (subtle)

- Tracing Model: 1–3

- Pinch: 0–1

5. Add Auto Filter HP

- Ramp HP cutoff from 150 → 600 Hz so it “lifts” and doesn’t fight the drop.

Arrangement idea: Layer this under an Amen edit or break fill—keep it wide, keep it emotional, then slam into a clean, punchy modern drop.

---

4. Common mistakes ⚠️

  • Too much low end in the riser: it masks your sub and makes the drop feel smaller. High-pass early.
  • No pitch information: pure noise risers don’t feel “tonal.” Even subtle harmonics help.
  • Over-widening the entire riser: keep early sections narrower and widen near the end for impact.
  • Harsh top-end build (6–12 kHz): distortion + reverb + chorus can get crispy fast. Use EQ and darker reverb filters.
  • Riser fights the snare: if your snare is the drop’s anchor, sidechain or dip around the snare’s crack (often 180–250 Hz body and 2–4 kHz snap varies by sample).
  • ---

    5. Pro tips for darker/heavier DnB 😈

  • Use dissonant intervals: print a minor 2nd or tritone layer quietly (e.g., root + 1 semitone) for unease—keep it low in the mix.
  • Midrange modulation > volume: automate filter/resonance/phase movement rather than just making it louder.
  • Clip-to-drop “vacuum”: right before the drop (last 1/4 bar), automate:
  • - Utility Gain down slightly

    - Reverb send down

    - High-pass up

    This makes the drop feel like it “fills the room.”

  • Transient shaping via resample: once printed, you can hard-edit the final 1 bar and add a short noise hit or reverse cymbal to punctuate.
  • Roar as a macro-tension tool: automate Roar Drive + Tone darker→brighter into the drop, then hard-cut it at impact.
  • ---

    6. Mini practice exercise 🧪

    In a 174 BPM project:

    1. Make a 16-bar pre-drop section.

    2. Build one tonal riser using the Harmonic method:

    - Print 8 bars

    - Warp Complex Pro

    - Transpose -12 → +7

    3. Duplicate it and make a second version:

    - Warp Texture

    - Add Auto Pan gating at 1/16

    4. Arrange:

    - Bars 1–8: Atmos version low in mix, narrow

    - Bars 9–15: Add gated neuro version, widen gradually

    - Bar 16: micro-silence (1/8–1/4 bar) + a short impact (reverse hit or vocal chop)

    5. Bounce both risers and A/B them against a reference DnB tune’s build.

    ---

    7. Recap ✅

  • Tonal risers in DnB work best when they support the key and escalate tension through pitch + timbre + space.
  • The resampling workflow lets you commit, edit faster, and use audio techniques (warp modes, pitch ramps, gating) that feel more “record-like.”
  • Stock devices that do heavy lifting: Wavetable/Operator/Meld, Auto Filter, Roar, Hybrid Reverb, Shifter, Echo, Auto Pan, EQ Eight, Utility, Compressor.
  • Think like an arranger: narrow → wide, dark → bright, simple → complex, then cut right before the drop for maximum impact.

If you want, tell me your track key and vibe (liquid/roller/neuro/jungle) and I’ll suggest exact note choices and an 8-bar automation roadmap for your riser chain.

Ask GPT about this lesson

Chat with the lesson tutor, get follow-up help, or use quick actions.

Bigup 👽 Ask me anything about this lesson and I’ll answer in context.

Narration script

Show spoken script
Title: Tonal risers from resampling in Ableton Live 12, advanced drum and bass sound design

Alright, let’s build tonal risers the way a lot of serious DnB records do it: not as a random noise sweep, but as something that actually has pitch, implies the key, and grows in intensity in a way that makes the drop feel bigger.

The core idea today is resampling. We’ll generate something cool with synths and effects, print it to audio, and then treat that audio like clay. Warping, pitching, texturing, gating, and arranging it like a producer, not like a preset.

By the end, you’ll have three reusable risers:
a harmonic tonal riser that’s clean and modern,
a neuro tension riser that’s aggressive and moving,
and a jungle atmos riser that’s wide, emotional, and tape-ish.
And you’ll have a resample workflow that makes variations fast.

Before we start: at 172 to 176 BPM, most DnB builds feel best in 4, 8, or 16 bars. And the last bar is where you earn the drop. That’s where the intensity spikes, the space gets managed, and you set up that “vacuum” moment right before impact.

Let’s set up the workflow first.

Create an audio track and name it RESAMPLE PRINT. Set Audio From to Resampling. Set Monitor to Off so you don’t create feedback loops. When you want to print anything, you arm this track and record.

Optional but extremely useful: create a return track called RISER VERB. Put Hybrid Reverb on it. Choose Hall for depth, or Shimmer if you want that tonal sparkle. Set Decay somewhere around 6 to 14 seconds. Predelay 20 to 40 milliseconds. Then filter it, because long reverbs get messy fast: low cut around 200 to 400 hertz, and high cut around 8 to 12k. After the reverb, add EQ Eight and shave out boxiness if it shows up, often around 250 to 500, and if it gets fizzy, gently pull down the extreme top.

Quick teacher note here: long reverb is basically a pitch blender. If you feed it muddy input, you get reverb soup. So if you’re going heavy on verb later, the pro move is to EQ before you send, not just after.

Cool. Now riser one: the harmonic tonal riser. This is the musical one that reinforces your track key.

Create a MIDI track called TONAL SOURCE and drop in Wavetable. Start clean. Oscillator one, Basic Shapes, pick a sine or triangle. Oscillator two, Basic Shapes, saw wave, but turn it way down. It’s just there to add a little harmonic spine.

Add a touch of unison, maybe two to four voices, keep the amount low, like 10 to 25 percent, and set width around 80 to 120 percent.

Add a low-pass filter, LP24. Start cutoff low, somewhere like 200 to 600 hertz, and add a bit of drive, five to fifteen percent. Amp envelope: a small attack, like 10 to 30 milliseconds so it doesn’t click, and a release around 300 to 900 milliseconds so it feels smooth.

Now draw a single long MIDI note for eight bars. Ideally, this is your drop root note. If your track is in F, use F. If you’re not sure, use the note your sub bass will hit on the drop.

Now we add movement and tension after Wavetable.

Put Auto Filter, also LP24, and later we’ll automate the cutoff upward. Add a touch of envelope if you want some extra “bloom,” but keep it subtle.

Then add Saturator, Analog Clip mode, drive two to eight dB, Soft Clip on. We’re not crushing it; we’re just making it read in a mix.

Add Chorus-Ensemble, chorus mode, amount 15 to 35 percent, rate slow, like 0.10 to 0.35 hertz. Slow modulation equals expensive. Fast modulation equals seasick.

And then either add Hybrid Reverb on the track, or send to the RISER VERB return. Either way, keep the low cut pretty high, like 250 to 500, because we are not building sub with our riser. We are building tension.

Now resample it.

Arm RESAMPLE PRINT, solo TONAL SOURCE, and record eight bars while you automate the filter cutoff upward. Do it as a smooth ramp, like 300 hertz up to 8, 10, even 12k. The exact curve matters: if you ramp too fast early, you have nowhere to go later. Try a curve that stays restrained for the first half and then accelerates in the last two bars.

Once recorded, consolidate the clip to exactly eight bars so it’s clean and easy to manipulate.

Now the fun part: audio warping and pitch.

Set warp mode to Complex Pro. It usually holds harmonic content best for this kind of tonal material. And then, experiment with the Formants control. Even a small change can make it feel like it’s “singing” instead of just rising.

Now add pitch motion. You can do this two ways.
One, automate clip Transpose from minus 12 up to plus 7. That’s a classic tension curve. It feels like you’re climbing stairs and then reaching.
Or two, use Shifter for a smoother, more controllable glide. Put Shifter after the clip, set mode to Pitch, set dry/wet to 100 percent, and automate pitch up slowly.

Teacher note: calibrate your pitch ramp to your drop note. The easiest way to get this right is: make sure the riser’s last moment lands on the drop root, or the fifth. Even if the riser gets weird in the middle, that final landing point makes the drop feel inevitable. If your source note is already the root, you can end your transpose automation at zero semitones and you’ll land perfectly.

Now make it drop-ready.

Put EQ Eight and high-pass around 150 to 300 hertz. If it gets harsh, notch a little around 2 to 5k, because distortion plus chorus plus reverb loves to scream there.

Then add sidechain compression keyed from your kick or drum bus. Ratio two to one up to four to one, fast attack, and release around 80 to 180 milliseconds. You’re aiming for maybe two to five dB of gain reduction near the end so it breathes with the drums and doesn’t sit on top like a sticker.

Arrangement tip: this harmonic riser is best when it’s not obvious too early. Fade it in so you mostly feel it around bar minus four to bar minus one, not the entire eight bars.

Now riser two: neuro tension. This is midrange threat. Reese-adjacent. Great for techy rollers and neuro.

Create a MIDI track called NEURO SOURCE. Drop in Operator. For speed, start with algorithm one, mostly carriers. Osc A: saw or square, bring level down a bit. If you want some extra edge, use Osc B as light FM: sine wave, and bring B level up just enough to add hair, not enough to turn it into a laser.

Turn Operator’s filter on. LP24, and push the drive, like 6 to 18. This is where weight comes from.

Draw a long root note for eight bars again.

Now the movement chain. This is where it becomes alive.

Auto Filter first, LP24, you’ll automate cutoff later.

Then Roar. This is one of the biggest Live 12 advantages for DnB sound design. Start from a warm drive style preset, then push drive somewhere like 20 to 45 percent, and keep an eye on output. Make the tone slightly darker early, then brighten toward the end. You can even add subtle modulation inside Roar with a slow LFO so it never sits still.

Add Phaser-Flanger next, phaser mode. Amount 20 to 40, feedback 10 to 30, rate very slow, 0.05 to 0.20 hertz. Slow phase movement makes that “creeping machinery” vibe.

Add Redux, but be careful. Downsample maybe 1.5 to 4, and bit reduction tiny, like zero to two. It’s seasoning. If you hear it crackle like a broken MP3, you went too far.

Put a Limiter at the end just to catch spikes while resampling. Not to make it loud. Just to prevent random distortion you didn’t choose.

Now record eight bars into RESAMPLE PRINT.

On the printed audio, set warp mode to Texture. Grain size around 80 to 200 milliseconds, flux 10 to 30 percent. Texture warp is amazing for making it feel like it’s tearing and stretching, but it can also make pitch unstable. So we’ll use it intentionally.

Now do the DnB staircase pitch.

Duplicate the clip and split it into four sections of two bars each. Transpose those sections: minus 12, minus 7, minus 3, and zero. Then for the final bar before the drop, add a ramp from zero up to plus five.

This is such a powerful trick because it’s not just a smooth sweep. It feels like you’re stepping up levels of danger, then doing the final lunge.

Now add rhythmic gating so it rolls.

Put Auto Pan after the clip. Set amount to 100 percent, shape to square, and rate to one eighth or one sixteenth, synced. Phase at zero degrees. That turns Auto Pan into a trance gate.

Then put Utility after it. Automate width from maybe 50 percent early up to 140 percent late. That narrow-to-wide arc is a big part of “build energy,” and it translates even on smaller speakers.

Arrangement move: place this neuro riser behind the drums in the last four bars. Then, right before the drop, cut it dead for a micro-silence, like an eighth note or a quarter note. That pause is pure leverage. The drop feels louder without you turning it up.

Now riser three: jungle atmos. Airy, nostalgic, textured. Perfect under an Amen edit or a liquid-to-modern transition.

Create a MIDI track called ATMOS SOURCE. Use Meld if you want a rich pad fast, or Wavetable if you’re more comfortable there. Build a pad with slow attack, not too bright.

Then add a noise layer. You can do Operator noise, or a Simpler noise sample. The goal is breath, not hiss.

Send both pretty heavily into RISER VERB. This one is all about the tail.

Arm RESAMPLE PRINT. Record eight to sixteen bars, and then here’s the key move: stop playback and let the reverb tail ring out another two to four bars. That extra tail is gold for atmosphere.

Consolidate the best section.

Now make it feel like tape lift tension.

Warp it in Complex Pro. Automate transpose up five to twelve semitones over time. Add Echo with a dotted eighth or quarter note timing, feedback 20 to 45 percent, and filter it dark, low-pass around 4 to 7k. That keeps it moody and avoids harsh build-up.

Add Vinyl Distortion subtly. Tracing model one to three, pinch close to zero. You’re not trying to make it lo-fi, you’re trying to make it human.

Then add Auto Filter in high-pass mode and ramp that high-pass cutoff from about 150 up to 600 hertz. This is how you lift it out of the way of the drop while still keeping the sense of rising.

Now let’s talk about the producer mistakes that ruin risers, so you can skip the pain.

First, too much low end. It masks the sub and makes the drop feel smaller. High-pass early and often.

Second, no pitch information. Pure noise can work, but tonal risers feel like they belong in the track. Even subtle harmonics make the brain latch onto it.

Third, widening the entire riser. If it’s wide the whole time, the end doesn’t feel special. Stage it: narrower early, wider late.

Fourth, harsh top build. The six to twelve kHz range gets crispy fast when you stack distortion, chorus, and reverb. Use darker reverb filters, and don’t be afraid to de-ess the riser with a multiband setup if needed.

Fifth, it fights the snare. In DnB the snare is often the anchor. If your riser is stepping on the snare crack, sidechain it or dip around where your snare lives. There’s no single magic frequency, but 2 to 4k is a common snap zone, and 180 to 250 can be body depending on the sample.

Now, advanced coach notes that will make this sound “finished,” not just “made.”

Print in layers, not one perfect take. Do three to six quick resample passes where each pass has one main idea: filter lift, resonance peak, distortion climb, width change. Then comp the best moments into one riser using fades and crossfades. This is how you get that produced, intentional feeling.

Use Spectrum and Tuner while resampling. Warping and distortion can drift pitch. Put Tuner at the end of your audio riser chain and check the last bar. If the note reads unstable, reduce texture flux, reduce distortion, or low-pass earlier so the fundamental dominates.

Micro-timing matters. Try starting the riser five to twenty milliseconds late, or give it a tiny fade-in, so it glues against drums instead of clicking.

And here are a few advanced variations you can steal immediately.

Implied chords without writing chords: duplicate your printed tonal riser to two or three audio tracks. Keep one at zero transpose, transpose another up seven semitones for a fifth, and a third layer quietly up three or four semitones depending on minor or major. Then band-limit each layer differently with EQ. It reads like harmony, but stays controlled.

Psychoacoustic lift: duplicate the riser, put Shifter on the duplicate, fine tune plus six to plus fifteen cents, pan it slightly opposite, and keep it quiet, like twelve to twenty dB down. That creates width without going full chorus.

Reverse-resample hybrid: duplicate your printed riser, reverse it, put reverb or echo only on the reversed version, then resample both together. The reversed ambience pulls you forward, the forward tonal layer keeps it musical.

And if you want a talking riser: use high resonance filtering and formant movement. In Complex Pro, automate Formants, and sweep a resonant filter so it feels like it goes from “oo” to “aa” to “ee” in the last couple of bars. Subtle is the word. You want vibe, not a cartoon.

Now a quick practice assignment you can do in a 174 BPM project.

Make a 16-bar pre-drop.
Build one harmonic tonal riser: print eight bars, warp Complex Pro, transpose minus 12 to plus 7.
Duplicate it and make a second version: warp Texture, add Auto Pan gating at one sixteenth.
Arrange it like an energy script: bars one through eight, keep the atmos version low and narrow. Bars nine through fifteen, bring in the gated neuro version and widen it gradually. Bar sixteen, do a micro-silence, an eighth to a quarter bar, and add a short impact like a reverse hit or a vocal chop.

Then bounce both and A/B against a reference DnB build. Not for loudness. For movement. Ask yourself: does the last bar feel like the room gets sucked out, so the drop fills it back in?

Let’s recap the mindset.

Great tonal risers support the key and escalate tension through three lanes at once: pitch, timbre, and space. Resampling makes you commit, it keeps CPU low, and it gives you audio-only tricks like warp modes and hard edits that feel more like record-making than tweaking knobs forever.

Your go-to tools here are Wavetable, Operator, Meld, Auto Filter, Roar, Hybrid Reverb, Shifter, Echo, Auto Pan, EQ Eight, Utility, and sidechain compression.

And the arranger’s mantra for builds is simple: narrow to wide, dark to bright, simple to complex, then cut right before the drop.

If you tell me your track key and whether your drop hits on kick or snare, I can give you a precise last-bar pitch target and a clean automation roadmap for an eight-bar riser that lands perfectly on your downbeat.

mickeybeam

Go to drumbasscd.com for +100 drum and bass YouTube channels all in one place - tune in!

Generating PDF preview…