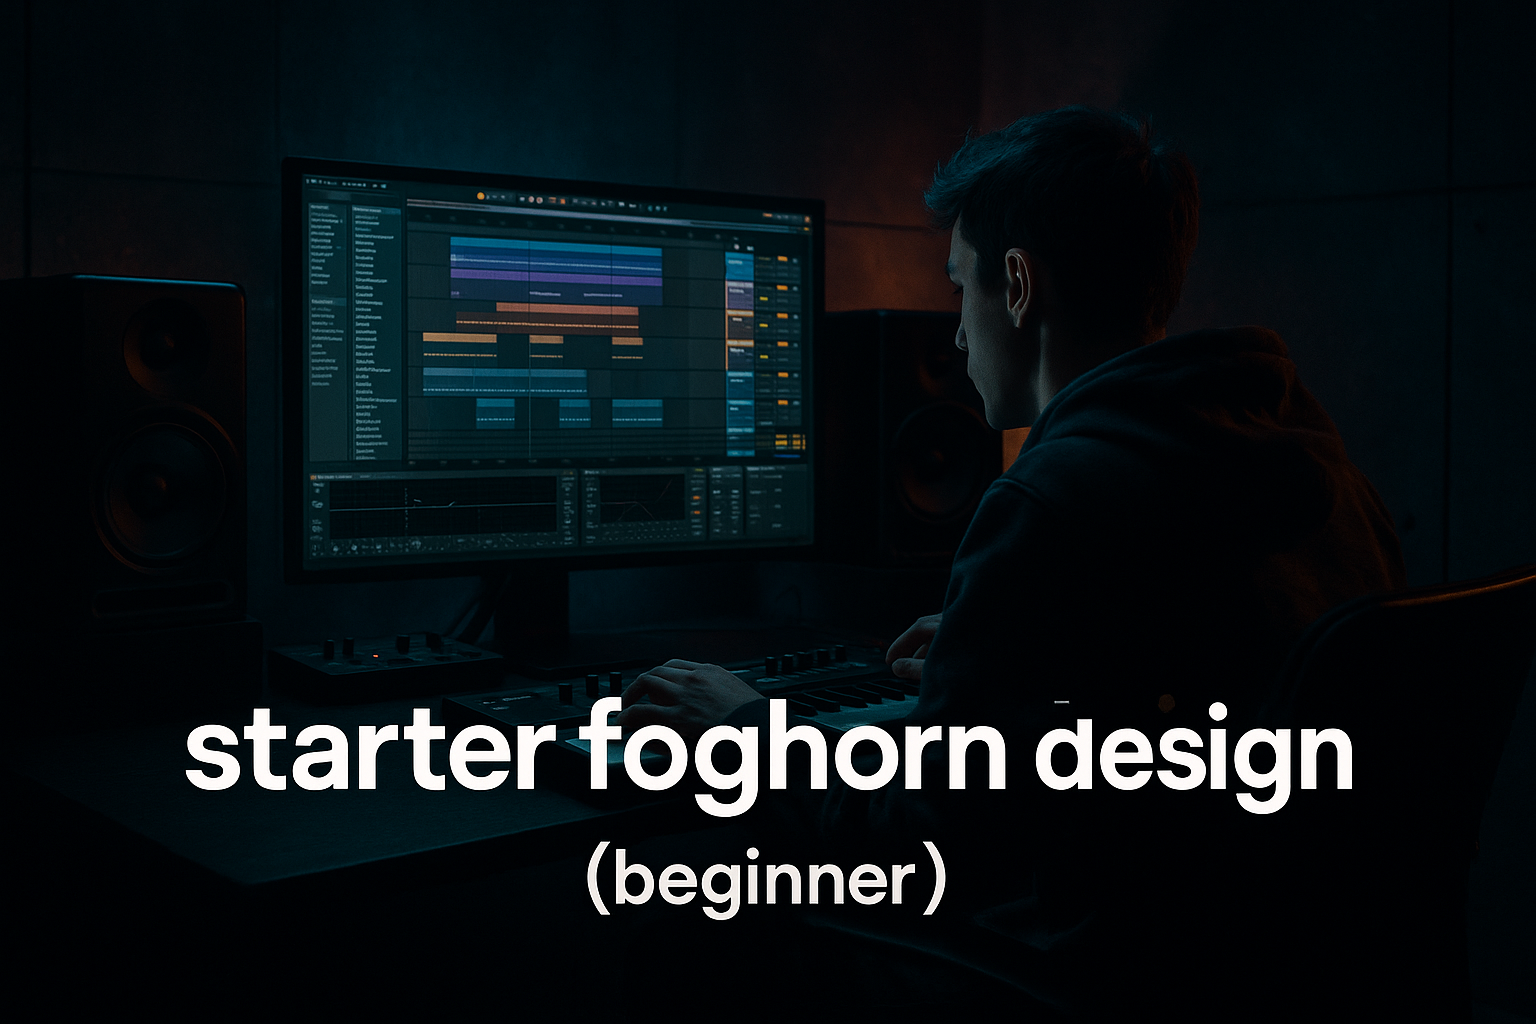
DNB COLLEGE

Drum & Bass Ableton Live 12 Tutorials

LESSON DETAIL

Tutorial for DJ intro from scratch in Ableton Live 12 for jungle oldskool DnB vibes (Beginner)

An AI-generated beginner Ableton lesson focused on Tutorial for DJ intro from scratch in Ableton Live 12 for jungle oldskool DnB vibes in the Edits area of drum and bass production.

Back to lessons
Tutorial for DJ intro from scratch in Ableton Live 12 for jungle oldskool DnB vibes (Beginner) cover image

Narrated lesson audio

The voice track includes the tutorial plus extra teacher commentary.

Open audio file

Main tutorial

```markdown

Tutorial: Build a DJ Intro From Scratch in Ableton Live 12 (Oldskool Jungle / DnB Vibes) 🥁⚡

1. Lesson overview

In this lesson you’ll create a DJ-friendly intro for a jungle/oldskool DnB track from scratch in Ableton Live 12. We’ll focus on:

  • A clean, mixable 16–32 bar intro
  • Classic jungle elements: break teases, sub/bass hints, pads/atmos, risers, FX, and drop prep
  • DJ practicality: predictable phrasing, solid downbeats, and no awkward “surprises” before the drop 🎚️
  • This is in the Edits category: you’re not writing the whole tune—just building a strong intro framework you can reuse.

    ---

    2. What you will build

    A 32-bar DJ intro at 170–175 BPM with:

  • Bars 1–8: Atmos + percussion tick + filtered break tease
  • Bars 9–16: Hats + snare/ghosts + bass hint (filtered)
  • Bars 17–24: Full break energy (still controlled), FX, tension
  • Bars 25–32: Drum fill + riser + clean impact into the drop
  • You’ll end with a structure that DJs love: clear 8-bar phrases, a stable groove bed, and a big signpost into the drop 🚦

    ---

    3. Step-by-step walkthrough

    Step 0 — Set up the project (tempo, markers, workflow)

    1. Open Ableton Live 12 → New Live Set.

    2. Set tempo to 174 BPM (classic jungle/DnB sweet spot).

    3. Turn on Arrangement View (press `Tab` if needed).

    4. Right-click the top timeline → Add Locator:

    - `Intro Start (Bar 1)`

    - `Intro Phase 2 (Bar 9)`

    - `Intro Phase 3 (Bar 17)`

    - `Drop (Bar 33)`

    5. Set loop brace to 1–33 while building.

    Workflow suggestion: Work in 8-bar blocks. Jungle feels “right” when phrases are obvious.

    ---

    Step 1 — Create a “DJ Intro Bus” group (clean routing)

    We’ll build intro elements and keep them controllable.

    1. Create these tracks:

    - Audio Track: `BREAK TEASE`

    - MIDI Track: `PERC (TICK/HAT)`

    - MIDI Track: `ATMOS/PAD`

    - Audio Track: `FX (RISERS/NOISE)`

    - (Optional) MIDI Track: `SUB HINT`

    2. Select them → `Cmd/Ctrl + G` to Group → name it DJ INTRO.

    3. On the DJ INTRO group, add:

    - EQ Eight: low-cut at 30 Hz (gentle cleanup)

    - Glue Compressor (subtle):

    - Attack 10 ms, Release Auto, Ratio 2:1, Threshold so you get 1–2 dB of gain reduction max.

    This keeps the intro “together” without squashing.

    ---

    Step 2 — Add atmosphere (instant jungle mood) 🌫️

    Oldskool intros often start with air, vinyl, distant pads, or rave stabs washed out.

    ATMOS/PAD (MIDI track)

    1. Load an instrument:

    - Wavetable (simple) or Simpler with a pad sample.

    2. If using Wavetable:

    - Osc 1: Sine or Triangle

    - Add unison: 2–4 voices, Amount low

    3. Add these effects (in this order):

    - Auto Filter

    - Mode: Low-pass, 24 dB

    - Cutoff: start around 400–800 Hz

    - Add a little Drive (2–5)

    - Hybrid Reverb

    - Algorithm: Hall/Plate style

    - Decay: 4–8 s

    - Dry/Wet: 20–35%

    - Echo

    - Time: 1/8 or 1/4 dotted

    - Feedback: 20–35%

    - Dry/Wet: 10–20%

    - Utility

    - Width: 120–140% (keep it wide)

    - Bass Mono: enable if you want safety

    Arrangement:

  • Hold a single chord or note from bar 1 to 33.
  • Automate Auto Filter cutoff slowly opening from bar 1 → 32.
  • ---

    Step 3 — Add a tight “tick” percussion (DJ mix glue) 🕺

    DJs like a steady transient to beatmatch. Even a tiny hat/tick helps.

    PERC (TICK/HAT) (MIDI track)

    1. Load Drum Rack.

    2. Pick a closed hat or ride tick from a stock pack (or any hat sample you have).

    3. Program:

    - For bars 1–8: 1/8 notes very quiet.

    - Bars 9–32: add 1/16 hats (still controlled).

    Processing chain (on the track):

  • EQ Eight
  • - High-pass around 200–400 Hz

    - If harsh, dip 8–10 kHz slightly

  • Drum Buss
  • - Drive: 5–15

    - Crunch: 0–10 (optional)

    - Boom: OFF (we don’t want low end here)

  • Utility
  • - Gain: trim so it sits behind everything (intro should not be hat-dominant)

    Pro phrasing move: Add a tiny 1-bar hat mute at bar 32 (or half-bar) before the drop—instant tension.

    ---

    Step 4 — Break tease (the jungle signature) 🔥

    We’ll use a break loop but keep it filtered and distant early on.

    BREAK TEASE (Audio track)

    1. Drop in a break sample/loop (Amen-style, think oldskool).

    2. Warp it:

    - Warp Mode: Beats

    - Preserve: 1/16 (or 1/8 for chunkier)

    - Turn on Loop for the region if needed.

    3. Start with it very subtle in bars 1–8: maybe only the first 1–2 hits or a low-volume loop.

    Processing chain (classic intro control):

    1. Auto Filter

    - Low-pass, 24 dB

    - Cutoff: start 250–500 Hz (muffled)

    - Resonance: 10–20%

    2. EQ Eight

    - High-pass at 40–60 Hz

    - Dip any boxy range around 250–400 Hz if muddy

    3. Reverb (or Hybrid Reverb)

    - Shorter than the pad (Decay 1–2.5 s)

    - Dry/Wet 10–20%

    4. Utility

    - Width: 80–120% (keep some stereo but don’t go extreme)

    Arrangement plan:

  • Bars 1–8: Break is filtered + quiet (tease).
  • Bars 9–16: Increase volume slightly, open filter a bit.
  • Bars 17–24: Open filter more and/or reduce reverb so it feels closer.
  • Bars 25–32: Add a small “fill” by duplicating a 1-bar slice and editing it.
  • Quick break edit idea (beginner-friendly):

  • Slice 1 bar into 16ths:
  • - Right-click clip → Slice to New MIDI Track

    - Slicing preset: Built-in → Slice to Drum Rack

    - Now you can rearrange hits in MIDI for a classic jungle “chop” moment in bars 29–32.

    ---

    Step 5 — Bass hint (keep it DJ-safe) 🧱

    In oldskool intros, bass often teases but avoids full sub weight until the drop (so DJs can mix without low-end fighting).

    SUB HINT (MIDI track) — optional but powerful

    1. Load Operator (simple and clean):

    - Algorithm: 1 oscillator

    - Osc A: Sine

    2. MIDI: long notes on root (e.g., F or G) in bars 9–16 and 17–24.

    3. Processing chain:

    - Auto Filter (low-pass) cutoff around 80–120 Hz (yes, low!)

    - We’re making a suggestion of sub, not full sub.

    - Saturator

    - Drive: 2–6 dB

    - Soft Clip: ON

    - Utility

    - Width: 0% (mono!)

    - EQ Eight

    - Roll off below 25–30 Hz

    Arrangement tip: Mute the bass hint for bar 32 to create a vacuum before the drop.

    ---

    Step 6 — FX riser + impact (the “drop signpost”) 🚨

    This is what tells the dancefloor and the DJ: “drop incoming”.

    FX (RISERS/NOISE) (Audio track)

    You can do this with stock devices even without samples.

    Option A: Noise riser using Operator

    1. Create a MIDI clip bars 25–33.

    2. Load Operator:

    - Use Noise oscillator (or a noisy wave)

    3. Add effects:

    - Auto Filter

    - High-pass

    - Cutoff automated rising from 200 Hz → 8–12 kHz

    - Reverb (or Hybrid Reverb)

    - Decay 3–6 s, Dry/Wet 20–35%

    - Redux (subtle) optional for grit

    - Downsample a little for oldskool texture

    - Limiter (gentle safety)

    Option B: White noise with Ableton stock sample

  • Use Simpler with a noise sample and do the same filter automation.
  • Add an impact at bar 33:

  • Place a crash, sub drop, or 808 hit right on the downbeat.
  • Use Reverb tail, but keep it controlled (too much reverb smears the drop).
  • ---

    Step 7 — Make it DJ-friendly: phrasing + clean transitions 🎛️

    Here’s the checklist that makes the intro usable in a club mix:

    1. Clear 8-bar blocks

    - Changes happen on bar 9, 17, 25, 33 (not randomly).

    2. Low end discipline

    - Intro: minimal sub (or none) until the drop.

    3. Consistent transient

    - Keep a hat/tick or percussion anchor so beatmatching is easy.

    4. Tension move before drop

    - A 1-beat stop or 1/2-bar mute right before bar 33 is classic.

    5. Automation lanes

    - Automate filter cutoff on the break + atmos.

    - Automate reverb send increasing into bar 32 then snapping back at 33.

    Quick send setup (recommended):

  • Create 2 return tracks:
  • - A: Short Verb (Hybrid Reverb, 1–2 s)

    - B: Long Verb (Hybrid Reverb, 5–10 s)

  • Send break/FX into long verb only in bars 25–32 for lift.
  • ---

    Step 8 — Final polish: gain staging + safety

    On the Master:

  • Add Limiter (transparent safety):
  • - Ceiling: -1.0 dB

    - Don’t slam it—this is an edit/intro build, not final mastering.

    Check levels:

  • Intro should be noticeably quieter than the drop (energy curve matters).
  • Make sure the intro doesn’t peak harder than the drop.
  • ---

    4. Common mistakes (and how to avoid them) ❌

    1. Too much sub in the intro

    - DJs can’t mix cleanly if your intro sub fights their outgoing track.

    2. Random arrangement changes

    - Keep changes on 8-bar boundaries. Jungle is fast; DJs need predictability.

    3. Break too loud too early

    - Tease first, reveal later. Your drop should feel like the payoff.

    4. Over-wet reverb everywhere

    - Use long reverb strategically (build sections), then pull it back at the drop.

    5. Stereo low end

    - Always mono your bass/sub (Utility width 0% below ~120 Hz conceptually).

    ---

    5. Pro tips for darker/heavier DnB 🖤

    1. Make the break nastier without getting louder

    - Add Drum Buss on BREAK TEASE:

    - Drive 10–25, Crunch 5–15

    - Trim output so perceived loudness stays controlled.

    2. Add “room tone” grit

    - Subtle vinyl noise, tape hiss, or Redux on atmos adds darkness fast.

    3. Tension with pitch automation

    - Pitch riser up +7 semitones over bars 25–32, then hard cut at drop.

    4. Use a “fake drop”

    - At bar 25, do a mini impact + 1 bar of silence, then continue the build. Very oldskool if done tastefully.

    5. Ghost snare build

    - Add quiet snare ghosts leading into bar 33. Keep them filtered/quiet, then unleash the real snare at the drop.

    ---

    6. Mini practice exercise (15 minutes) ⏱️

    Create two versions of your intro:

    Version A: Clean DJ Intro (minimal)

  • Bars 1–16: atmos + tick + filtered break
  • Bars 17–32: slightly more break + simple riser
  • Goal: maximum mix compatibility

    Version B: Rugged Jungle Intro (more character)

  • Add a 1-bar break chop fill at bar 31–32
  • Add subtle Drum Buss grit on break
  • Add a short tape-stop style moment:
  • - Use Frequency Shifter (very subtle) + quick volume dip, or simply cut audio for 1 beat

    Goal: more attitude, still DJ-friendly

    Bounce both and A/B them in a DJ-style listen: does bar 33 feel like a proper arrival?

    ---

    7. Recap ✅

    You built a 32-bar oldskool jungle/DnB DJ intro in Ableton Live 12 by:

  • Structuring in 8-bar phrases with locators
  • Layering atmos + percussion anchor + filtered break tease
  • Adding controlled bass hints (mono, minimal sub)
  • Building tension with filter automation, reverb sends, and an FX riser
  • Finishing with a clear signpost into the drop at bar 33

If you want, tell me your target vibe (e.g., 95 jungle, techstep darkness, liquid rollers, modern jump-up with oldskool breaks) and I’ll suggest a matching intro palette (break choice, bass hint notes, FX moves, and a 32-bar template).

```

Ask GPT about this lesson

Chat with the lesson tutor, get follow-up help, or use quick actions.

Bigup 👽 Ask me anything about this lesson and I’ll answer in context.

Narration script

Show spoken script
Welcome in. In this lesson we’re building a DJ-friendly intro from scratch in Ableton Live 12, with that oldskool jungle, early DnB energy. Think break teases, atmosphere, a little sub suggestion, and a clear signpost into the drop, without doing anything that makes a DJ hate you in the mix.

The goal is simple: a clean 32-bar intro at around 174 BPM, broken into obvious 8-bar phrases. Bars 1 to 8 is mood and a tiny rhythm anchor. Bars 9 to 16 adds a bit more drum information and maybe a bass hint. Bars 17 to 24 brings the break forward for energy. Bars 25 to 32 is the build and the “incoming” moment, and then bar 33 is your drop.

We’re in the edits mindset here. You’re not writing the whole tune today. You’re building a reusable intro framework you can drop onto multiple tracks.

Alright, let’s set the project up.

Open Ableton Live 12 and start a new Live Set. Set your tempo to 174 BPM. That’s the sweet spot for a lot of jungle and DnB, and it makes your phrasing feel instantly correct.

Go to Arrangement View if you’re not already there. Now, the first thing we’re going to do is place locators, because this is where “DJ math” starts paying off. Right-click on the top timeline and add locators at Bar 1, Bar 9, Bar 17, and Bar 33. Name them Intro Start, Intro Phase 2, Intro Phase 3, and Drop.

Teacher note: this is more important than it seems. When you force your changes to happen at 9, 17, 25, 33, your intro becomes predictable in the best way. Predictable means mixable. Mixable means DJs actually play it.

Set your loop brace from Bar 1 to Bar 33 while you build, so you’re always working inside the intro.

Now let’s create the tracks and routing.

Create an audio track called BREAK TEASE. Create a MIDI track called PERC, like tick or hat. Create another MIDI track called ATMOS or PAD. Create an audio track called FX, for risers and noise. And optionally create a MIDI track called SUB HINT.

Select all those tracks and group them. Name the group DJ INTRO.

On the DJ INTRO group, add EQ Eight and do a gentle low cut around 30 Hz. We’re not carving the life out of it, we’re just cleaning out sub-rumble that can build up from reverbs and noise.

Then add Glue Compressor, super subtle. Attack around 10 milliseconds, release on Auto, ratio 2 to 1. Bring the threshold down until you’re only getting about 1 to 2 dB of gain reduction at most.

Quick coaching: if you hear the compressor pumping in the intro, you went too far. This glue is just to make the intro feel like one “thing,” not five unrelated tracks.

Next: atmosphere. This is where the jungle mood shows up instantly.

Go to your ATMOS or PAD MIDI track. Load Wavetable if you have it handy, or Simpler with a pad sample. If you’re using Wavetable, keep it simple: a sine or triangle style base works great. Add a little unison, like 2 to 4 voices, not huge, just enough width.

Now add effects in this order. First Auto Filter, set it to low-pass, 24 dB slope. Start the cutoff around 400 to 800 Hz, and add a little drive, maybe 2 to 5, just to give it some edge.

Then Hybrid Reverb, hall or plate vibe. Decay around 4 to 8 seconds, and keep dry/wet around 20 to 35 percent. Then Echo, set to 1/8 or 1/4 dotted, with feedback around 20 to 35, and keep the dry/wet fairly light, like 10 to 20 percent.

Finally, Utility. Widen it to maybe 120 to 140 percent, and if you want extra safety, use Bass Mono.

Now for the arrangement: hold one chord or even a single note from Bar 1 all the way to Bar 33. This is background mood, not the hook. Then automate the Auto Filter cutoff so it slowly opens from Bar 1 to Bar 32.

This is a classic trick: even if nothing else changes, that slow opening makes the intro feel like it’s moving forward.

Now we need a transient anchor. This is one of the biggest DJ-friendly secrets: even a tiny tick makes beatmatching easier. And DJs often mix by eye too, so having consistent little hits helps the waveform look readable.

On your PERC track, load a Drum Rack and pick a closed hat or a little ride tick. Program 1/8 notes for Bars 1 to 8, very quiet. Then from Bars 9 through 32, you can switch to 1/16 hats, still controlled.

Process it like this. EQ Eight first: high-pass around 200 to 400 Hz. If it’s harsh, do a small dip around 8 to 10 kHz. Then Drum Buss: drive somewhere around 5 to 15. Crunch is optional, keep it light. Make sure Boom is off. Then Utility to trim gain so it sits behind everything. You should feel it more than you “hear” it.

And here’s a pro tension move that always works: do a tiny mute right before the drop. For example, mute the hats for the last half bar of Bar 32. That small subtraction creates instant pressure.

Now the jungle signature: the break tease.

On BREAK TEASE, drag in a break loop. Amen-style is the obvious choice, but any break with character works.

Warp it. Set Warp Mode to Beats. Preserve at 1/16 for tighter chopping, or 1/8 if you want it chunkier and more old-school heavy. Loop the region if needed.

For Bars 1 to 8, keep the break super subtle. You can even use just the first hit or two, or a very low-volume loop. The idea is: tease, don’t reveal.

Now processing. Put an Auto Filter first, low-pass, 24 dB. Start cutoff around 250 to 500 Hz so it’s muffled and distant. Add a little resonance, like 10 to 20 percent.

Then EQ Eight. High-pass at around 40 to 60 Hz. If it’s muddy, dip gently around 250 to 400.

Then add reverb, or Hybrid Reverb, but shorter than your pad. Decay around 1 to 2.5 seconds, dry/wet around 10 to 20 percent.

Then Utility for width. Something like 80 to 120 percent is fine. Don’t go insanely wide on breaks if you want them to hit clean later.

Now arrange it in phases.
Bars 1 to 8: filtered and quiet.
Bars 9 to 16: slightly louder, slightly more open filter.
Bars 17 to 24: open it further and maybe reduce reverb a bit so it feels closer and more present.
Bars 25 to 32: add a little fill moment.

Beginner-friendly fill idea: take one bar of the break and slice it. Right-click the clip and choose Slice to New MIDI Track, using the built-in slice to Drum Rack preset. Now you can rearrange a couple hits in MIDI to make a classic jungle chop for Bars 29 to 32. Keep it simple. One or two swaps is enough to sound intentional.

Teacher note: if you do too much chopping in the intro, you steal thunder from the drop. The intro is the trailer, not the movie.

Now let’s talk bass, because this is where beginners accidentally destroy DJ mixability.

We’re going to do a sub hint, not a full sub line.

On the optional SUB HINT track, load Operator. Use a single oscillator, sine wave. Program long notes on the root from Bars 9 to 16 and again from 17 to 24. Keep it simple: this is a pressure layer, not the bassline.

Process it like this. Auto Filter low-pass, cutoff around 80 to 120 Hz. Yes, that low. We’re making a suggestion of sub energy, not giving the full drop bass early.

Then Saturator, drive around 2 to 6 dB, soft clip on. Then Utility, width to 0 percent. Mono it. Then EQ Eight, roll off below 25 to 30 Hz.

And a great move: mute that bass hint for Bar 32. That creates a vacuum so the drop feels huge.

Now we need the drop signpost: FX riser plus impact.

On the FX track, you can do it without fancy samples. Make a noise riser using Operator. Create a MIDI clip from Bars 25 to 33. In Operator, use the Noise oscillator, or any noisy source.

Add Auto Filter set to high-pass, and automate the cutoff rising from about 200 Hz up to 8 or even 12 kHz over those 8 bars. Add Reverb or Hybrid Reverb, decay 3 to 6 seconds, dry/wet around 20 to 35 percent. If you want oldskool grit, add a touch of Redux. And put a Limiter at the end just to keep it from spiking.

Now the impact: at Bar 33, place a crash, a sub drop, or a tight 808 hit right on the downbeat. Use some reverb tail if you want, but keep it controlled. If the reverb smears over the downbeat, the drop loses punch.

Now we make it DJ-friendly on purpose.

Here’s your quick checklist.

First, changes happen on the phrase points: Bar 9, 17, 25, 33. Not randomly.
Second, low-end discipline: minimal sub before the drop.
Third, consistent transient anchor: that hat tick makes beatmatching easy.
Fourth, tension right before the drop: half-bar mute, one-beat stop, or a suck-in effect.

If you want a DJ-safe fake-out, instead of full silence, do a one-beat high-pass and mono collapse on the whole DJ INTRO group right before 33, then release it on the drop. It keeps the grid obvious while still giving that “whoosh-in” moment.

Now, for extra polish, set up reverb sends like a pro.

Create two return tracks. One is a short verb, around 1 to 2 seconds. The other is a long verb, like 5 to 10 seconds.

Then, only in Bars 25 to 32, send the break and FX more into the long verb to lift the build. And then, right at 33, pull that long verb send back down so the drop is tight and forward.

Another fast coaching habit: clip gain first, plugins second. Before you go chasing compression settings, do a two-minute cleanup pass. Make sure no clip is unexpectedly hot. Aim for a calm master level with peaks comfortably below zero. Everything you do after that will sound smoother.

Now final polish on the master.

Put a Limiter on the master with the ceiling at minus 1 dB. Don’t slam it. This isn’t mastering, it’s just safety.

Then do an energy curve check: the intro should be noticeably quieter than the drop. And make sure the intro isn’t peaking harder than the drop. That’s a common mistake and it kills the moment of arrival.

Here are a few common mistakes to avoid, quickly.

Too much sub in the intro. DJs can’t mix that cleanly.
Random arrangement changes. Keep it phrase-based.
Break too loud too early. Tease first, reveal later.
Reverb everywhere. Use long reverb strategically, then pull it back for the drop.
Stereo low end. Keep bass and sub mono.

Now a couple fun variation ideas you can try once your basic intro works.

Try a “dubplate intro”: Bars 1 to 8 is just tick and room tone, Bars 9 to 16 is a single break hit every couple bars, and only by 17 to 32 does the loop come in, still band-limited. It’s minimal but threatening.

Or a “rave tape” vibe: one stab chord or vocal one-shot that only appears at Bar 8, 16, 24, and 32. Process it like it’s from hardware: band-pass it, add a short gated reverb, maybe a little wow and flutter. Keep it rare so it feels special.

Or a “two-break tease”: use one darker break early, and a cleaner break later. That alone creates escalation without needing a huge volume jump.

One more upgrade that makes 32 bars feel less copy-paste: do one tiny change every 4 bars, and a bigger change every 8. Tiny change could be removing the hat for the last half-beat, or opening the break filter slightly on the last bar of each phrase.

And make Bar 32 intentionally different. Shorten reverb tails, narrow the stereo a touch, maybe remove one layer. That contrast is what makes Bar 33 hit hard without you having to over-master it.

Before we wrap, here’s a quick DJ compatibility test you can do in literally ten seconds.

Mute your pad and FX. If the intro still feels mixable with just the drums, the tick anchor, and the filtered break, you’re in the safe zone. Then bring the mood back in on top.

Finally, your mini practice exercise.

Make two versions of this intro. Version A is clean: Bars 1 to 16 is atmos, tick, filtered break. Bars 17 to 32 adds a simple riser, nothing fancy. Maximum mix compatibility.

Version B is rugged: add a one-bar break chop fill at Bars 31 to 32, add a touch of grit like Drum Buss on the break, and maybe do a tiny one-beat cut right before 33. More attitude, still DJ-friendly.

Bounce both and A/B them. Ask yourself: does Bar 33 feel like a proper arrival, even at low volume?

Recap. You built a 32-bar oldskool jungle DnB DJ intro by locking your structure to 8-bar phrases, layering atmos, a steady percussion anchor, and a filtered break tease, adding a controlled mono bass hint, building tension with automation and reverb sends, and finishing with a clear signpost impact into the drop at Bar 33.

If you tell me your exact target vibe, like 95 jungle, techstep darkness, atmospheric, or a modern roller with oldskool breaks, I can suggest a matching intro palette: which break to tease, what root notes to hint, and what kind of riser and impact best fits that era.

mickeybeam

Go to drumbasscd.com for +100 drum and bass YouTube channels all in one place - tune in!

Generating PDF preview…