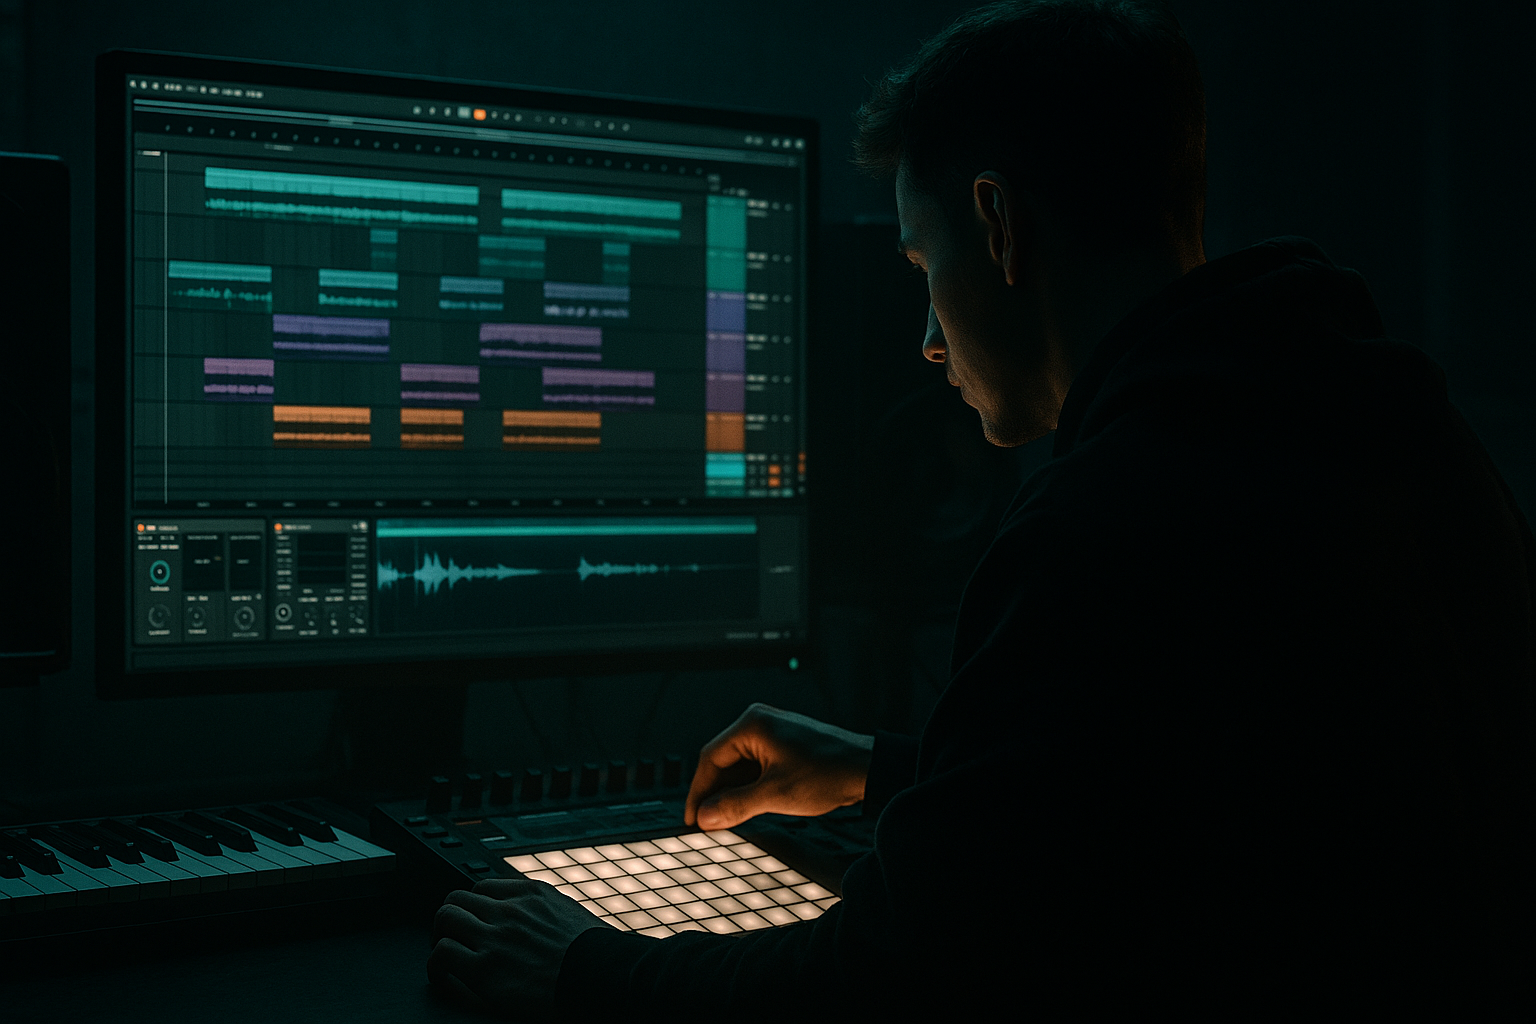
DNB COLLEGE

Drum & Bass Ableton Live 12 Tutorials

LESSON DETAIL

Warehouse session: top loop swing in Ableton Live 12 for jungle oldskool DnB vibes (Advanced)

An AI-generated advanced Ableton lesson focused on Warehouse session: top loop swing in Ableton Live 12 for jungle oldskool DnB vibes in the FX area of drum and bass production.

Back to lessons
Warehouse session: top loop swing in Ableton Live 12 for jungle oldskool DnB vibes (Advanced) cover image

Narrated lesson audio

The voice track includes the tutorial plus extra teacher commentary.

Open audio file

Main tutorial

Warehouse session: Top loop swing in Ableton Live 12 (Jungle / Oldskool DnB vibes) 🏭🥁

1) Lesson overview

In jungle and oldskool DnB, that top loop (hats/shakers/ride noise) is where the movement lives. The groove is rarely “perfectly quantized”—it’s push/pull, micro-timing, and a bit of gritty modulation that makes your drums feel like they’re coming off an old sampler in a sweaty warehouse.

This lesson is about crafting swingy, rolling top loops in Ableton Live 12 using stock devices and advanced workflow: Groove Pool + micro-timing + velocity shaping + resampling + parallel grit.

---

2) What you will build

You’ll build a top-loop bus that:

  • Swings like classic jungle breaks, but works on modern tight DnB drums
  • Has controlled timing looseness (not messy)
  • Includes dynamic velocity feel (ghosts + accents)
  • Gets character via subtle saturation, transient control, and “air” EQ
  • Can be resampled into a single loop for that authentic “lifted from vinyl” vibe
  • End result: a top loop that sits above your kick/snare, rolls forward, and locks with your bass without sounding robotic. 🔥

    ---

    3) Step-by-step walkthrough

    Step A — Set the session up like a DnB engineer

    1. Tempo: 165–174 BPM (try 170 BPM).

    2. Core drum groups (recommended):

    - `DRUMS (Group)`

    - `KICK`

    - `SNARE/CLAP`

    - `TOPS` (what we build)

    - `BREAK` (optional, for layering)

    3. Create a Return track called:

    - `R: TOP CRUSH` (for parallel grit)

    - `R: TOP ROOM` (short ambience)

    Keep kick + snare mostly straight. The tops get the swagger.

    ---

    Step B — Build the top loop sources (multiple layers = authentic movement)

    Inside `TOPS`, create 3–5 lanes (Audio or MIDI), each doing one job:

    Option 1: Audio loop tops (classic approach)

  • Grab a clean top loop (hat loop, shaker loop, ride loop). Even a break top extracted works.
  • Warp mode:
  • - Try Complex Pro for full loops

    - Try Beats for crisp hats

  • Warp markers: avoid over-warping; keep it natural.
  • Option 2: MIDI tops (modern control)

  • Load a Drum Rack with:
  • - Closed hat (tight)

    - Open hat (short)

    - Shaker

    - Ride or noise hat

  • Pattern idea (1 bar, 16th grid as base):
  • - Closed hat: steady 16ths

    - Shaker: off-beat 8ths + a couple 16ths

    - Open hat: on “and” of 2 or 4 (sparingly)

    Goal: You want density, but not constant maximum brightness. Jungle grooves “breathe.”

    ---

    Step C — Swing the tops only using Groove Pool (advanced but clean)

    This is the cleanest way to keep your kick/snare firm while tops dance.

    1. Select your top clips only (Audio or MIDI).

    2. In Live, open Groove Pool.

    3. Load grooves:

    - If you have a classic break loop (Amen, Think, etc.), right-click → Extract Groove.

    - Or use Ableton’s built-in grooves: look for MPC-style swing and 16th swing.

    4. Apply the groove to the selected top clips.

    5. Dial in Groove Pool parameters (starting points):

    - Timing: 35–60%

    - (Try 45% for subtle jungle roll; 55% for noticeable swagger)

    - Velocity: 15–35%

    - Gives accents/ghosts without rewriting your MIDI

    - Random: 3–10%

    - Adds human variation; don’t overdo it

    - Base: typically 1/16 for DnB tops

    6. Click Commit only when you’re sure.

    - I often don’t commit until late—keeps it flexible for arrangement changes.

    Why this works: swing from Groove Pool isn’t just “delay every other 16th”—it’s a feel map.

    ---

    Step D — Micro-time the “push/pull” like oldskool programming

    Groove gets you 70%. The rest is micro-placement.

    For MIDI clips:

    1. Open MIDI editor.

    2. Turn off strict quantize (don’t hit 100% quantize after this).

    3. Nudge specific hits:

    - Push a few closed hats slightly early: -3 to -8 ms

    - Pull a few shakers slightly late: +5 to +12 ms

    4. Keep snare and main backbeat stable; tops move around it.

    For audio clips:

  • Use Warp markers sparingly:
  • - Nudge certain transients a few ms ahead/behind.

  • Or slice:
  • - Right-click loop → Slice to New MIDI Track (choose transient slicing)

    - Then apply Groove Pool + micro-nudging in MIDI.

    Rule of thumb: If it starts sounding “flammy” against your snare, you went too far.

    ---

    Step E — Velocity sculpting for jungle energy (this is where life appears)

    Swing without velocity often still feels stiff.

    For MIDI hats/shakers:

  • Make a 2–4 hit accent cycle:
  • - Hit 1: 95–110

    - Hit 2: 65–80

    - Hit 3: 80–95

    - Hit 4: 55–70

  • Add occasional ghost hat at very low velocity (20–40), especially before snare hits.
  • For audio loops:

  • Use Drum Buss or Glue Compressor (subtle) to shape perceived accents.
  • Or use Auto Filter with Envelope (explained next) to “open” certain hits.
  • ---

    Step F — Build the TOPS FX chain (stock devices) 🎛️

    Put this chain on the `TOPS` group (or an Audio Effect Rack inside it).

    #### Recommended chain (in order)

    1. EQ Eight

    - HP filter: 200–400 Hz (depends on loop)

    - Gentle dip: 3–5 kHz if harsh

    - Small shelf: +1 to +3 dB at 10–14 kHz for air (be careful)

    2. Auto Filter (for movement)

    - Mode: High-Pass (12 dB or 24 dB)

    - Frequency: ~250–600 Hz

    - Envelope: 5–15%

    - Attack: 1–5 ms

    - Release: 50–120 ms

    - Adds “flick” to hits depending on transient energy

    3. Drum Buss (character + glue)

    - Drive: 5–15%

    - Crunch: 0–10% (tiny amounts!)

    - Boom: 0% (usually off for tops)

    - Damp: tune to avoid fizz

    - Transients: +5 to +20 if you want more tick

    4. Saturator (post-drum buss for tone)

    - Mode: Soft Sine or Analog Clip

    - Drive: 1–4 dB

    - Soft Clip: ON

    - This gives “old sampler edge” without turning into white noise

    5. Glue Compressor (optional, subtle)

    - Attack: 3 ms

    - Release: Auto

    - Ratio: 2:1

    - Threshold: aim for 1–2 dB GR

    - Purpose: unify layers, not smash them

    6. Utility

    - Width: 110–140% (if your mix can handle it)

    - Or keep it mono-friendly: use width automation in drops only

    ---

    Step G — Parallel warehouse grit (Return tracks = fast pro workflow) 😈

    #### Return `R: TOP CRUSH`

  • Overdrive
  • - Freq: 2–4 kHz

    - Drive: 20–40%

    - Tone: adjust until aggressive but not piercing

  • Redux
  • - Downsample: 4–10 (start at 6)

    - Bit Reduction: 0–2 (don’t kill it)

  • EQ Eight
  • - HP: 500–1k (so the crush is mostly texture)

    - Optional: notch harshness at ~7–9 kHz

  • Send from TOPS: start at -18 to -12 dB, blend to taste
  • #### Return `R: TOP ROOM`

  • Hybrid Reverb
  • - Choose a small room / ambience

    - Decay: 0.3–0.8s

    - Pre-delay: 0–10 ms

    - HP: 400–800 Hz

    - Wet on return: 100%

  • Send just enough to give “space” without washing transients.
  • ---

    Step H — Arrangement moves: make swing evolve across 16–32 bars

    Oldskool vibes often come from variation, not one static 1-bar loop.

    Try these:

  • Bar 1–8: subtle swing (Timing 35–45%)
  • Bar 9–16: increase swing a touch (Timing +5–10%), add extra shaker ghost
  • Drop: reduce Random slightly (tighter), increase parallel crush send for hype
  • Breakdown: filter tops with Auto Filter down to 6–8 kHz LP then open back up
  • Automation ideas:

  • `Groove Timing` isn’t directly automatable, but you can:
  • - Duplicate clips with different groove settings

    - Swap clip versions at key points (classic pro move)

    ---

    Step I — Resample the tops into a single “oldskool” loop (glue + authenticity)

    This is a big jungle trick.

    1. Create a new audio track: `TOPS RESAMPLED`.

    2. Set its input to `Resampling` (or “TOPS” group output).

    3. Record 8 bars of your tops with FX + returns (print the vibe).

    4. Now treat that audio like a break:

    - Warp: Beats mode

    - Preserve: 1/16

    - Transient loop feels tighter, and it becomes one cohesive texture.

    Optional: Slice to New MIDI Track afterwards for even more control.

    ---

    4) Common mistakes

  • Swinging the entire drum bus: your kick/snare loses authority. Swing tops, not the foundation.
  • Too much Random: it starts sounding drunk instead of rolling.
  • Over-warping audio loops: you destroy the natural groove. Use fewer warp markers.
  • Too much high-end saturation: hats turn into brittle fizz. Filter before heavy distortion.
  • No velocity/accents: even with swing, constant velocity = machine gun.
  • ---

    5) Pro tips for darker/heavier DnB 🖤

  • Keep tops slightly “under” the snare transient:
  • Use Utility gain or clip gain so snare owns the 2 & 4.

  • Darken the top loop but keep presence:
  • EQ Eight: small dip at 10–12 kHz, boost 6–8 kHz slightly for bite without air-hiss.

  • Add controlled noise layer (very quiet):
  • White noise → Auto Filter band-pass around 6–10 kHz → sidechain gate feel via volume shaping. Makes the loop feel “alive.”

  • Sidechain the TOPS to the snare very subtly:
  • - Compressor with sidechain from snare

    - Fast attack, short release

    - Only 1–2 dB duck

    This creates that “snare punches through the haze” warehouse impact.

  • Print + re-sample + re-process:
  • One generation of resampling with light saturation often gives the “tape/sampler” cohesiveness modern clean layers lack.

    ---

    6) Mini practice exercise (15–25 minutes) 🎯

    1. Create a 1-bar MIDI hat pattern (16ths) + shaker offbeats.

    2. Extract groove from a break you like (or pick an MPC groove).

    3. Apply to tops only:

    - Timing 50%, Velocity 25%, Random 6%

    4. Micro-nudge:

    - Push 2 hats early (-5 ms)

    - Pull 2 shakers late (+8 ms)

    5. Add the TOPS chain:

    - EQ Eight HP 300 Hz

    - Drum Buss Drive 10%, Transients +10

    - Saturator Soft Sine, Drive 2 dB

    6. Set up `R: TOP CRUSH`, send until it just starts to “hair up” the loop.

    7. Resample 8 bars and compare:

    - Original layered tops vs. resampled loop

    Decide which feels more “warehouse.”

    ---

    7) Recap

  • Use Groove Pool to impose a real swing feel on tops without wrecking your kick/snare.
  • Add micro-timing (ms-level nudges) for authentic jungle push/pull.
  • Shape velocity/accents so the groove breathes.
  • Build a TOPS FX chain with EQ → movement (Auto Filter) → character (Drum Buss/Saturator) → glue.
  • Use parallel crush + short room for warehouse grit and space.
  • Resample to turn multiple clean layers into one cohesive oldskool top loop.

If you want, tell me your target sub-genre (early 90s hardcore jungle, techstep, modern rollers) and I’ll give you a swing “recipe” with groove choice, timing %, and a matching top-loop pattern.

Ask GPT about this lesson

Chat with the lesson tutor, get follow-up help, or use quick actions.

Bigup 👽 Ask me anything about this lesson and I’ll answer in context.

Narration script

Show spoken script
Title: Warehouse session: top loop swing in Ableton Live 12 for jungle oldskool DnB vibes (Advanced)

Alright, welcome back. Today we’re going deep into one of the most underrated, most “warehouse” parts of jungle and oldskool DnB production: the top loop. Not your kick and snare. Not the big obvious stuff. I’m talking hats, shakers, rides, little bits of noisy brightness that live above the drums and create that rolling, sweaty-forward momentum.

Because in real classic jungle, that groove is almost never perfectly quantized. It’s push and pull. It’s micro-timing. It’s velocity shape. It’s a little grit that makes it feel like it got bounced through a sampler, recorded in a hot room, and played too loud on a proper system.

And we’re doing it in Ableton Live 12, stock devices only, advanced workflow. Groove Pool, micro-nudging, velocity sculpting, resampling, and some parallel “top crush” to bring the attitude.

Let’s set the session up like a DnB engineer.

Set your tempo between 165 and 174. I’ll sit at 170 BPM so the groove is fast enough to feel like jungle, but we can still hear the swing clearly.

Now, create a drum group. Inside it, keep it organized: kick, snare or clap, tops, and optionally a break layer if you’re stacking one. The key mindset today is this: keep kick and snare mostly straight. The tops get the swagger.

Also create two return tracks right now, because this is the “pro workflow” part where you move fast and you don’t bake everything into one channel too early. Name the first return R: TOP CRUSH. Name the second one R: TOP ROOM. Crush is your parallel grit. Room is your short ambience.

Cool. Now let’s build the sources for the tops, because a great top loop is rarely one sound. It’s a little ecosystem.

Inside your TOPS group, aim for three to five lanes. Each lane does one job.

You’ve got two main approaches: audio loops or MIDI programming. Audio is the classic approach. MIDI is modern control. You can also blend them, which is honestly where things start to feel “expensive.”

If you’re using an audio top loop, grab something clean: a hat loop, shaker loop, ride loop, or even the top end extracted from a break. Warp mode matters here. For crisp hats, try Beats mode. For a fuller loop with more texture, Complex Pro can work, but don’t over-warp it. This is important: over-warping destroys natural movement. Use as few warp markers as you can get away with. You want control, not surgery.

If you’re using MIDI, load up a Drum Rack. Put in a tight closed hat, a short open hat, a shaker, and maybe a ride or noise hat. Start with a one-bar pattern and think in a 16th-note grid as your base.

Do a steady 16th closed hat as the spine. Add shaker on off-beat eighths, and sprinkle in a couple of extra 16ths so it doesn’t feel like a metronome. Then open hat, sparingly, maybe on the “and” of 2 or 4. Just enough to lift.

Here’s the goal: density, but not constant brightness. Jungle grooves breathe. The air comes and goes.

Now we swing the tops only. This is where people mess up and swing the whole drum bus, and suddenly the kick and snare lose authority. Don’t do that. Tops only.

Select your top clips, either audio or MIDI. Open the Groove Pool. Now pick a groove source. Best-case scenario: you have a break loop you love. Amen, Think, whatever you’re referencing. Right-click it and extract groove. That’s the cheat code because it gives you a real feel map, not just generic swing.

If you don’t have a break handy, Ableton’s built-in grooves are still great. Look for MPC-style swings or 16th swing templates.

Apply the groove to your top clips and now dial it in.

Timing: start around 45%. That’s a sweet spot where you feel it, but it’s not falling over. If you want subtle jungle roll, 35 to 45. If you want noticeable swagger, 55-ish.

Velocity: 15 to 35%. This matters even if you think you already did velocity work. Groove velocity adds a kind of “performance contour” that’s hard to fake quickly.

Random: three to ten percent. Go easy. Random is like hot sauce. A little makes it exciting, too much and it tastes like chaos. When random is too high, it stops rolling and starts sounding drunk.

Base: usually one-sixteenth for DnB tops.

And one more pro habit: don’t commit right away. Groove is flexible as long as you keep it uncommitted. I personally only commit when the arrangement is solid and I’m sure I’m not about to change the clip structure.

Now, groove gets you most of the way, but the remaining magic is micro-timing. This is where you start sounding oldskool.

Let’s do micro push and pull.

If you’re in MIDI, open the MIDI editor and resist the urge to hit 100% quantize after this. That will erase the vibe you’re creating.

Pick a couple closed hats and nudge them slightly early, like minus three to minus eight milliseconds. Not 30. Not a full 16th. Milliseconds. You’re creating urgency.

Then take a couple shaker hits and nudge them slightly late, like plus five to plus twelve milliseconds. That creates that lazy tail behind the grid that makes the loop roll forward.

Important rule: keep your snare and your main backbeat stable. The tops orbit around the snare. They don’t replace it.

If you’re using audio, do the same thing but with warp markers, sparingly. Or slice the loop to a new MIDI track based on transients, then groove it and nudge it like MIDI. That’s a killer hybrid trick: you keep the loop’s texture, but you gain placement control.

Now, quick coaching note: when you’re judging swing, don’t solo the whole drums. Solo snare plus tops. Think “anchor and haze.” The snare is the anchor. The tops are controlled haze around it. If the snare starts feeling like it disappears, your hats are either too loud in that 3 to 8k range, or they’re landing too close to the snare transient and masking it.

Next: velocity sculpting. This is where life appears. Swing without velocity can still feel stiff.

For MIDI hats and shakers, build a simple accent cycle. Think four hits repeating. First hit strong, maybe 95 to 110. Second hit lighter, 65 to 80. Third medium, 80 to 95. Fourth lighter again, 55 to 70. Now you’ve got breath.

Then add occasional ghost hats at super low velocities, like 20 to 40, especially leading into the snare. This is a classic jungle feeling: little whispers that make the snare hit feel bigger because the space is framed.

And here’s an advanced move: intentional missing hits. Instead of constantly adding notes, delete a couple 16ths every bar, often right before the snare. The gap makes the next hit feel like it pulls harder. And delete them for real, don’t just set velocity to one, because the envelope and the way effects respond can be different.

Alright, now we build the TOPS FX chain on the TOPS group. Stock devices, but we’re being deliberate.

First device: EQ Eight. High-pass the tops somewhere around 200 to 400 Hz. The exact spot depends on the source, but the goal is simple: tops should not be dragging low-mid junk into your drum bus. If it’s harsh, do a gentle dip around 3 to 5k. Then, if you need air, a very small shelf, like plus one to plus three dB around 10 to 14k. Be careful. Air is addictive, and it turns to fizz fast.

Next: Auto Filter for movement. Set it to high-pass, 12 or 24 dB slope. Frequency around 250 to 600 Hz. Then add a bit of envelope, like five to fifteen percent, with a fast attack, one to five milliseconds, and release around 50 to 120 milliseconds. What this does is it “flicks” the filter based on transient energy, so louder hits feel like they open up a touch. It’s subtle movement, but it reads as life.

Next: Drum Buss. This is character and glue. Drive around five to fifteen percent. Crunch very small, like zero to ten percent. Boom usually off for tops. Damp to control fizz. And transients plus five to plus twenty if you want more tick and definition.

Then: Saturator. Put it after Drum Buss for tone. Soft Sine or Analog Clip. Drive one to four dB. Soft Clip on. This is where you get that old sampler edge, but you’re trying to stop before it becomes constant white noise.

Optional: Glue Compressor, very subtle. Attack three milliseconds, release auto, ratio two to one. Aim for one to two dB of gain reduction. The goal is to unify layers, not smash them.

Then Utility. If you want width, try 110 to 140 percent, but be smart. A lot of classic jungle is wide up top, but mono compatibility matters. So here’s your phase-safe stereo rule: put a Utility at the very end with a mono toggle, and map it so you can check quickly. If the hats vanish in mono, reduce width or only widen the highest, sparkliest layer and keep the rest centered.

Now let’s get the warehouse grit with returns.

On R: TOP CRUSH, load Overdrive first. Set the frequency somewhere around 2 to 4k so you’re biting the presence range. Drive 20 to 40 percent. Tone to taste, aggressive but not piercing.

Then add Redux. Downsample around four to ten, start at six. Bit reduction zero to two. You’re adding texture, not destroying the audio.

Then EQ Eight. High-pass it hard, 500 Hz to even 1k. This is a big one: you want the crush return to be mostly texture and hair, not body. Optionally notch any harshness around seven to nine k.

Now send to it from TOPS. Start low, like minus 18 to minus 12 dB send level, and blend until the loop just starts to “hair up.” If you notice the hats turning brittle, back off and consider filtering before the distortion, or using a little transient control pre-crush so the distortion doesn’t grab nasty spikes.

On R: TOP ROOM, load Hybrid Reverb. Pick a small room or ambience. Decay 0.3 to 0.8 seconds. Pre-delay zero to ten milliseconds. High-pass the reverb around 400 to 800 Hz. Wet on the return at 100%. Then send just enough so the tops sit in a space without washing the transients.

Now one more macro groove tool that advanced producers use constantly: Track Delay.

After you’ve got Groove Pool and micro nudges, go to the track delay field for the entire TOPS group. This is not swing. This is global placement relative to kick and snare.

Try making the TOPS late by plus three to plus twelve milliseconds. Late tops feel heavier, more head-nod, more warehouse. Or make them early by minus two to minus six milliseconds for urgency, more rave, more on-the-edge.

Pick one direction and commit to mixing into it. It changes the attitude of the whole tune.

Next, let’s talk arrangement, because oldskool vibes come from variation, not a static one-bar loop.

Over 16 or 32 bars, evolve the swing and density. Maybe bars one to eight are subtle swing, timing 35 to 45. Bars nine to sixteen, push timing up five to ten percent and add a ghost shaker. At the drop, tighten the random slightly so it feels more locked, and increase the crush send for hype.

And if you want a really effective pre-drop trick: one bar before the drop, do an “air choke.” Automate a gentle high shelf cut on the tops, or low-pass down to about eight to ten k, and kill the crush send briefly. Then on the downbeat, restore both. The groove hits harder even though the timing didn’t change.

Since Groove Timing isn’t directly automatable, here’s the workaround that feels like proper hardware sequencing: make clip variants. Light swing, medium swing, heavy swing. Swap clips at key points. That’s the swing ramp without automation.

Now the big jungle trick: resampling.

Create a new audio track called TOPS RESAMPLED. Set its input to resampling, or directly from the TOPS group output. Record eight bars of your tops including your FX and returns. Print the vibe.

Then treat that resampled audio like a break. Warp it in Beats mode, preserve one-sixteenth. Now it’s one cohesive texture. This is where modern clean layers start feeling like “a record,” because they’re glued together in time and tone as a single performance.

And here’s a pro workflow detail: commit in stages. Print a dry-ish tops version with returns off. Then print a wet version with returns on. You’ll often want the same groove performance, but different ambience choices across the arrangement.

Let’s quickly cover common mistakes so you can avoid the pain.

First, swinging the entire drum bus. Don’t. Kick and snare lose authority.

Second, too much random. It stops rolling and starts wobbling.

Third, over-warping audio loops. You kill the natural groove. Fewer warp markers, better feel.

Fourth, too much high-end saturation. Hats become brittle fizz. Filter before heavy distortion and keep that crush return high-passed.

Fifth, no velocity shaping. Constant velocity equals machine gun, even with swing.

Now, if you’re going for darker or heavier DnB, here are a couple fast tweaks.

Keep the tops slightly under the snare transient. The snare owns two and four. Use Utility gain or clip gain on tops so they don’t steal the backbeat.

If you want it dark but still present, try dipping a little at 10 to 12k and boosting a touch at 6 to 8k instead. That gives bite without hiss.

And try subtle sidechain from the snare to the tops. Just one to two dB of ducking, fast attack, short release. It creates that feeling like the snare punches through the haze.

Alright, mini practice run. If you want a 20-minute drill after this lesson, do this:

Make a one-bar MIDI pattern: 16th hats plus offbeat shaker. Extract groove from a break or choose an MPC groove. Apply it to tops only. Timing 50, velocity 25, random 6. Micro-nudge two hats early, about minus five ms. Pull two shakers late, about plus eight ms. Add EQ Eight high-pass around 300 Hz, Drum Buss drive 10 percent with transients plus 10, Saturator Soft Sine drive 2 dB. Set up the TOP CRUSH return and send until it just starts to hair up. Then resample eight bars and compare the layered version to the resampled loop. Decide which feels more warehouse.

Let’s recap the whole concept.

Groove Pool gives you a real swing map on tops only, so the foundation stays solid. Micro-timing gives you the push and pull that feels oldskool. Velocity shaping gives you breath and accents. Your tops chain is EQ for cleanup, Auto Filter for movement, Drum Buss and Saturator for character, Glue for subtle glue if needed, Utility for width management. Then parallel crush and a short room for warehouse grit and space. And finally, resample to turn a stack of clean layers into one cohesive, authentic top loop texture.

If you want to take this even further, tell me your target lane, like early 90s hardcore jungle, techstep, or modern rollers, and the break you’re referencing. I’ll give you a specific groove template pairing, timing percentage targets, and a matching top pattern that nails that lineage.

mickeybeam

Go to drumbasscd.com for +100 drum and bass YouTube channels all in one place - tune in!

Generating PDF preview…